
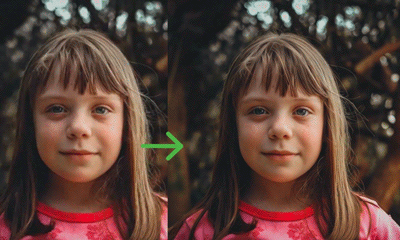
Are you new to creating videos with AI? If so, you're in the right place! In this guide, we'll introduce you to CogVideoX. It is perfect for beginners who want to start making amazing videos from ANY still image. This Image2Video and Text2Video model can be used inside ComfyUI, a powerful interface that makes working with image-to-video model CogVideoX easy and fun. Let's get started!
What is CogVideoX AI?
CogVideoX AI is a custom model and node that has the ability to generate videos based on input using text or images. This makes it perfect for beginners who want to make videos without learning complex video editing software. There are several models for CogVideoX that can be used. But in this guide, we're going to use CogVideoX1.5-5B-I2V , an open-source model created by THUDM which is the recommended model for image to video generation. The I2V stands for Image2Video.
ComfyUI simplifies the process by providing ready made workflows that you can drag & drop. You can focus on being creative without worrying about building complicated workflows, making the whole experience of using ComfyUI and CogVideoX much more accessible and fun.
How to Use CogVideoX in ComfyUI
Installation Guide
Custom Nodes
If there are red nodes in the workflow, it means that the workflow lacks the certain required nodes. Install the custom nodes in order for the workflow to work.
- Go to ComfyUI Manager > Click Install Missing Custom Nodes
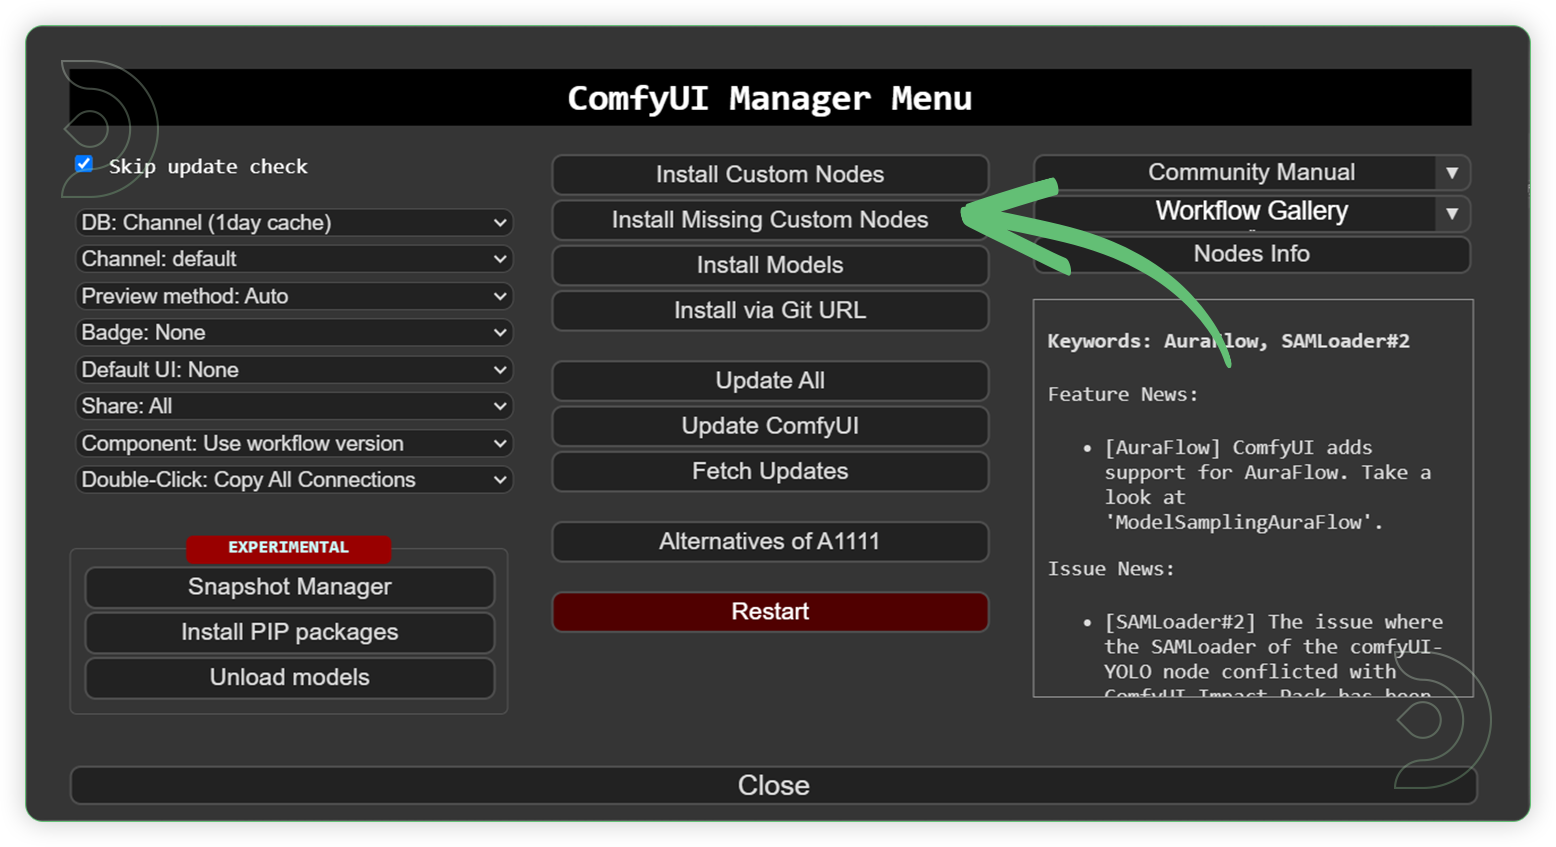
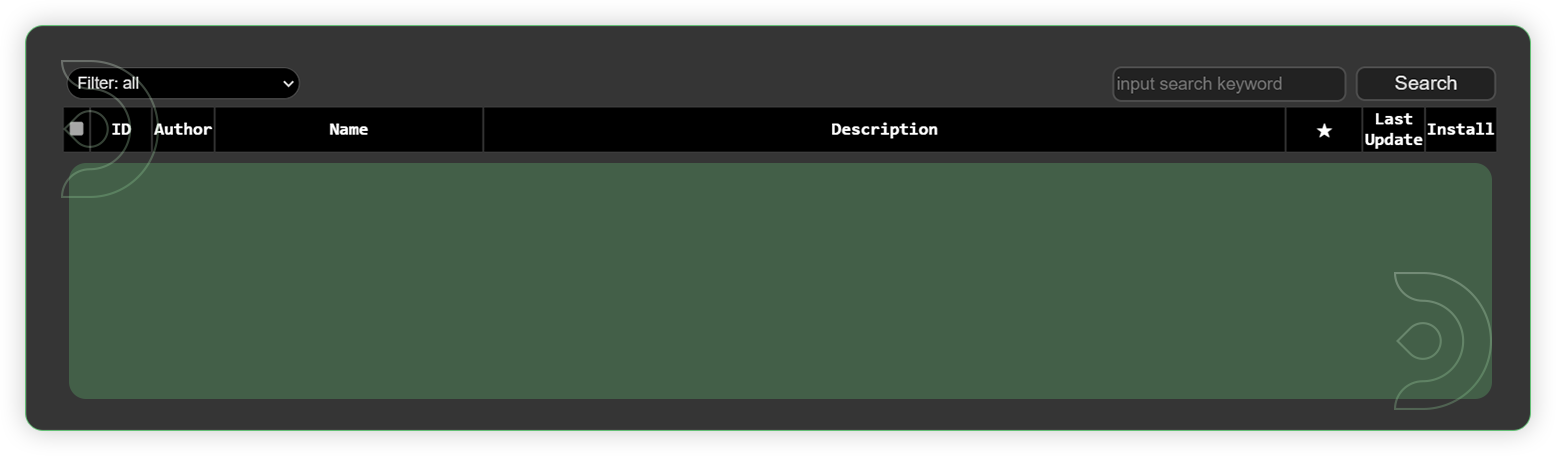
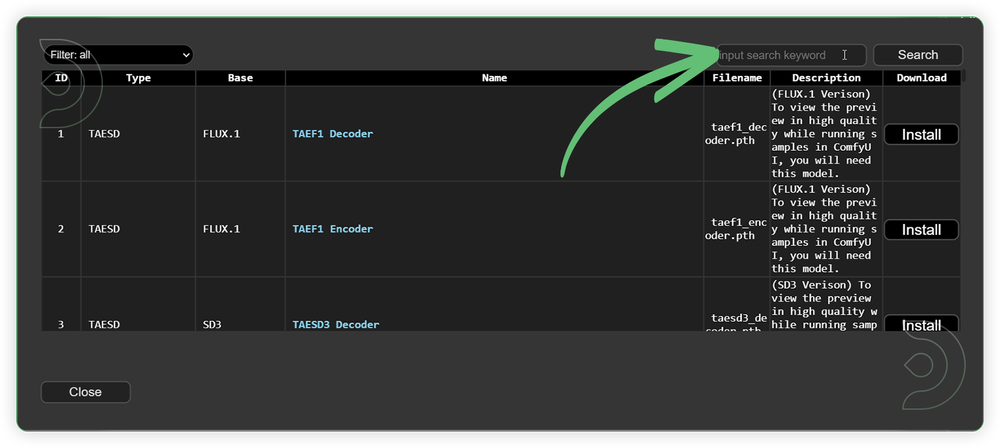
- Check the list below if there's a list of custom nodes that needs to be installed and click the install.
Models
Download the recommended models (see list below) using the ComfyUI manager and go to Install models. Refresh or restart the machine after the files have downloaded.
- Go to ComfyUI Manager > Click Install Models
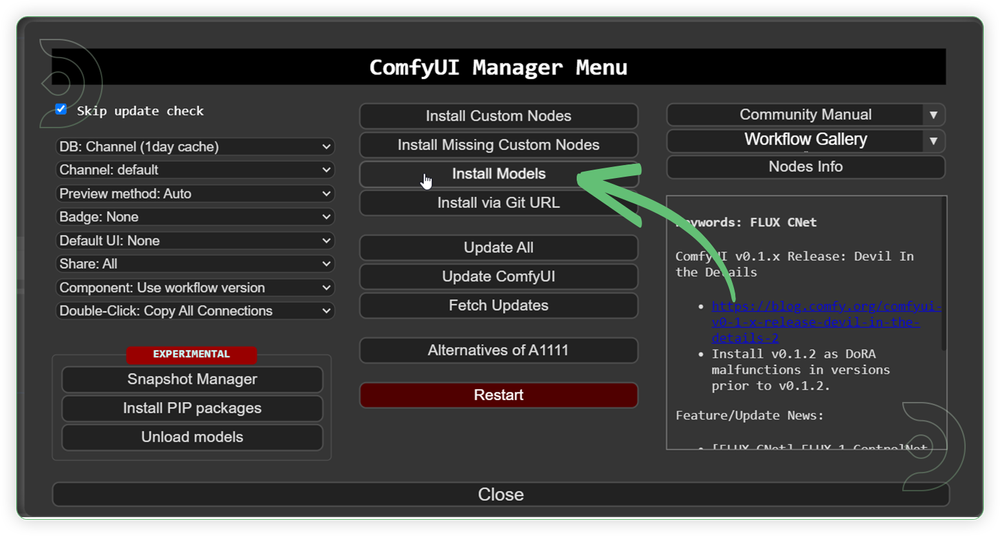
- When you find the exact model that you're looking for, click install and make sure to press refresh when you are finished.
Recommended Models
Use the models a shown below. Some of the models are already available (pre-loaded) in the CogVideoX custom node and with the model manager. If not available selection, installed it using the information below.
| Model Name | Where to Get? |
|---|---|
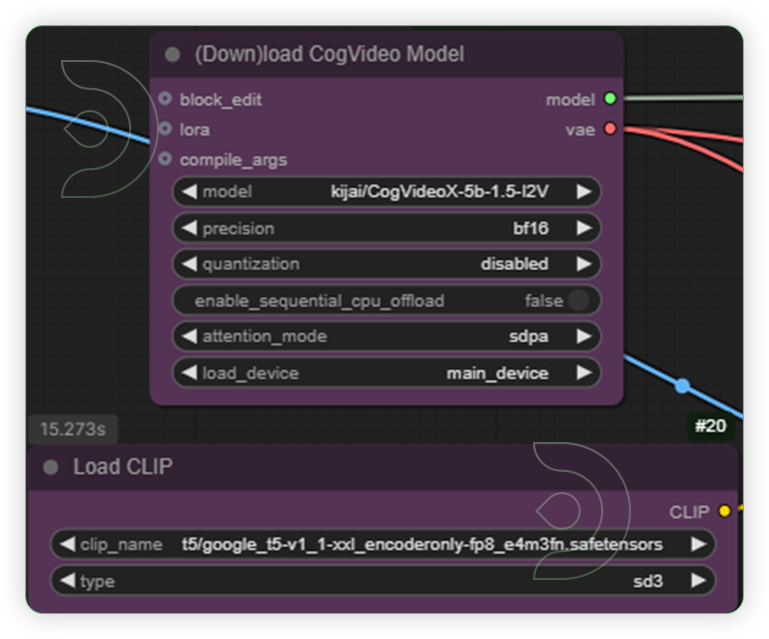
| CogVideoX-5b-1.5-I2V | Pre-loaded in Download CogVideo Model node |
| google_t5-v1_1-xxl_encoderonly-fp8_e4m3fn.safetensros | available in Model Manager of Comfy Manager |
| t5xxl_fp8_e4m3fn.safetensors | available in Model Manager of Comfy Manager |
Reminder
- up to 81 frames of video
- 5-10 secs of video length
- 1360 x 1360 of resolution
- up to 200 words of prompt
Procedures
Now that the hard work is out of the way, let's get creative. You need to follow the steps from top to bottom. The workflow is a one-click process after everything has been set up.
| Steps | Default Nodes |
|---|---|
| 1. Load an Image | 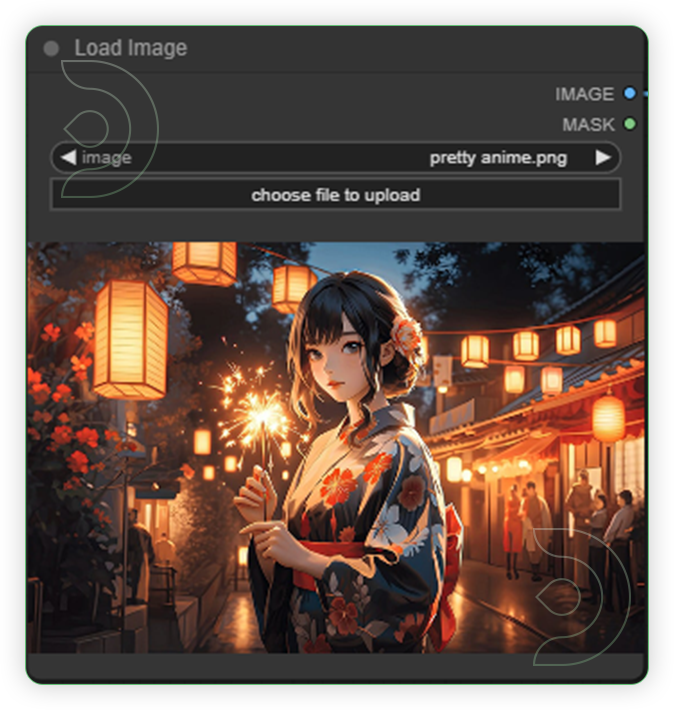 |
| 2. Set the Image Size | 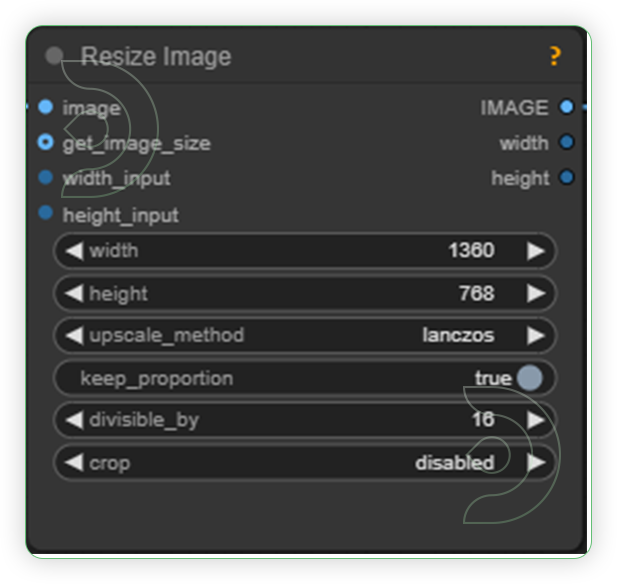 |
| 3. Set the Models Use the t5xxl_fp8_e4m3fn clip model instead with encoderonly if you want a accurante implementation of text prompt. |
 |
| 4. Write a Prompt | 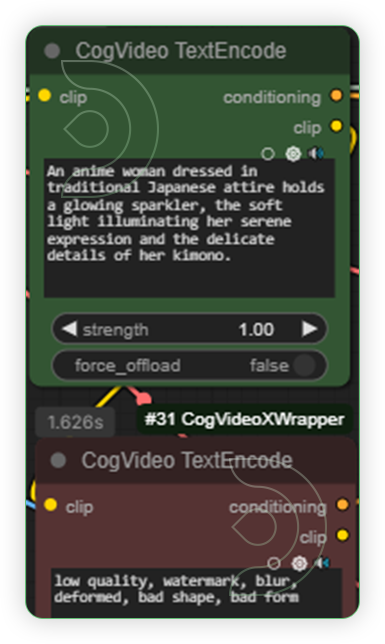 |
| 5. Set the Settings as seen on the Image. Run the Prompt You can gradually test the frames count while running the prompt. Higher frames sometimes can display a weird video frames |
 |
| 6. Check the Video | 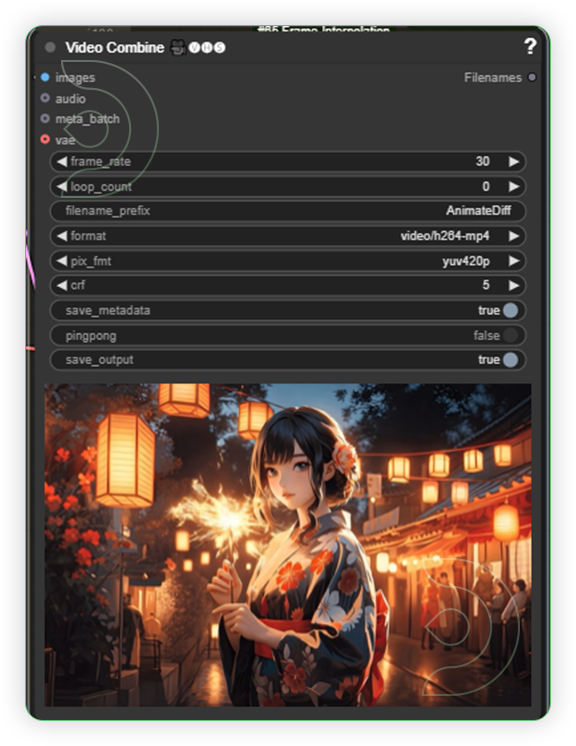 |
Reminders
CogVideoX Examples
Shoes Display
Prompt: A quick 360-degree rotate view of shoes on a white background, capturing its unique design.
- base model - CogVideoX1.5-5B-I2V
- resolution - 1360 x 768
- precision - bf16
- seed - 92162988405408
- frame - 30
- steps - 25, cfg - 6, denoise - 1
- scheduler - CogVideoXDDIM
- clip - google_t5-v1_1-xxl_encoderonly-fp8_e4m3fn.safetensors
Animate the Anime
Prompt: An anime woman dressed in traditional Japanese attire holds a glowing sparkler, the soft light illuminating her serene expression and the delicate details of her kimono.
- base model - CogVideoX1.5-5B-I2V
- resolution - 1360 x 768
- precision - bf16
- seed - 184363993861098
- frame - 50
- steps - 25, cfg - 6, denoise - 1
- scheduler - CogVideoXDDIM
- clip - google_t5-v1_1-xxl_encoderonly-fp8_e4m3fn.safetensors
Food Presentation
Prompt: A zoom out view of a newly cooked ramen, featuring rich, savory broth, perfectly tender noodles, slices of succulent pork, a soft-boiled egg, fresh green onions, and a sprinkle of sesame seeds.
- base model - CogVideoX1.5-5B-I2V
- resolution - 1360 x 768
- precision - bf16
- seed - 474954467584424
- frame - 25
- steps - 25, cfg - 6, denoise - 1
- scheduler - CogVideoXDDIM
- clip - t5xxl_fp8_e4m3fn.safetensors
Coffee Demo
Prompt: A barista carefully pour a coffee into a blue cup.
- base model - CogVideoX1.5-5B-I2V
- resolution - 1360 x 768
- precision - bf16
- seed - 323367415049274
- frame - 25
- steps - 25, cfg - 6, denoise - 1
- scheduler - CogVideoXDDIM
- clip - t5xxl_fp8_e4m3fn.safetensors
If you’re having issues with installation or slow hardware, you can try any of these workflows on a more powerful GPU in your browser with ThinkDiffusion.
If you enjoy ComfyUI and you want to test out creating awesome animations, then feel free to check out this AnimateDiff tutorial here. Happy creating!
Member discussion