
Photographers, digital artists, and content creators seeking a state-of-the-art tool to effortlessly extend their images beyond the initial frame will find Outpainting to be an indispensable workflow.
With this cutting-edge generative AI, users may easily add any number of pixels to the height or width of an image while keeping the quality the same regardless of the aspect ratio. Let the AI do its thing when you submit your image and select the direction you want it to expand. Get the workflow now to broaden your artistic horizons and discover new mediums.
What is Outpainting?
Outpainting allows for the creation of any desired image beyond the original boundaries of a given picture. That is, you can enlarge photographs beyond their original boundaries using the capabilities of artificial intelligence.
Whether you begin with photographs, paintings, or art generated by artificial intelligence, you may utilize the workflow to enlarge images that closely resemble the original in terms of style and colors. When it comes to fascinating ones to utilize, outpainting is up there. It aids in the expansion of an existing image in one or more directions depending on the resolution settings and sampling methods.

The outpainting function allows artists and casual users of generative AI to have greater control over the final product, in contrast to images that are exclusively generated by AI. If you want your images to go beyond their confines, outpainting is a strong technique to apply. You may use this to make a panorama, add more details to an existing image, or even extend the background.
Applications of Outpainting
- Customized Digital Artwork: Artists may create one-of-a-kind digital artworks with the outpainting tool by expanding the canvas to add more features and elements. This comes in handy particularly when working on complicated subjects or expansive vistas that call for a bigger canvas.
- Film and Animation: As an economical substitute for hand-drawn or computer-generated imagery, the outpainting function is utilized in the film and animation business. Useful for generating panoramic views or wide-angle pictures, it extends subjects or backdrops.
- Advertising and Marketing: Marketers can also benefit from outpainting, a method that allows them to change the aspect ratio of images to fit different ad platforms. For billboard ads, for instance, a square image can be outpainted to a landscape format; for mobile ads, it can be outpainted to a portrait format.
- Game Design: Outpainting is a technique commonly used in the gaming industry to create diverse game worlds. This can greatly aid game creators in rapidly creating new levels or sceneries, thus saving precious time and resources.
- Interior Design and Architecture: A great way to see how different architecture plans or design ideas would look is with outpainting. To illustrate the impact of alterations or additions to a room's design, interior designers might use it to expand the room's picture.
- Fashion and Apparel Design: Outpainting allows designers to amplify the design of an accessory or garment. They can see how everything will turn out and make any necessary adjustments using this method.
- Reimagining Historical or Classic Art: Traditional or vintage artworks can be given a modern twist by artists employing outpainting techniques. This is the process of giving an existing work a new lease on life by giving it new features or styles.
Outpainting in ComfyUI
Eventually, you'll have to edit a picture to fix a detail or add some more space to one side. Although the process is straightforward, ComfyUI's outpainting is really effective. Be aware that outpainting is best accomplished with checkpoints that have been specifically trained for the task. Inpainting is added to the name of the base model to make a common name for them.
A unique model usually yields better results, while regular checkpoints can be utilized for outpainting. Typically, DreamShaper is utilized for these types of workflows. Similar to inpainting, outpainting still makes use of an inpainting model for best results and follows the same workflow as inpainting, except that the Pad Image for Outpainting node is added. In order to make the outpainting magic happen, there is a node that allows us to add empty space to the sides of a picture. The feathering option is available, but it's usually unnecessary. Increasing the grow_mask_by in the VAE Encode (for Inpainting) node actually yields better results.
One-Time Setup
Let's get the hard work out of the way, this is a one time set up and once you have done it, your custom nodes will persist the next time you launch a machine.
- Download the workflow here OUTPAINTING
- Launch a ThinkDiffusion machine. You can use the Turbo machine when running this machine as it is quite intensive on the graphics card.
- Drag and drop the workflow .json files into your ComfyUI machine workspace to test the missing custom nodes.
- If there are red coloured nodes, download the missing custom nodes using ComfyUI manager or by using the Git URL.
- If there are red coloured nodes, download the missing models using ComfyUI manager or by using the Git URL.
Custom Nodes
UE Nodes
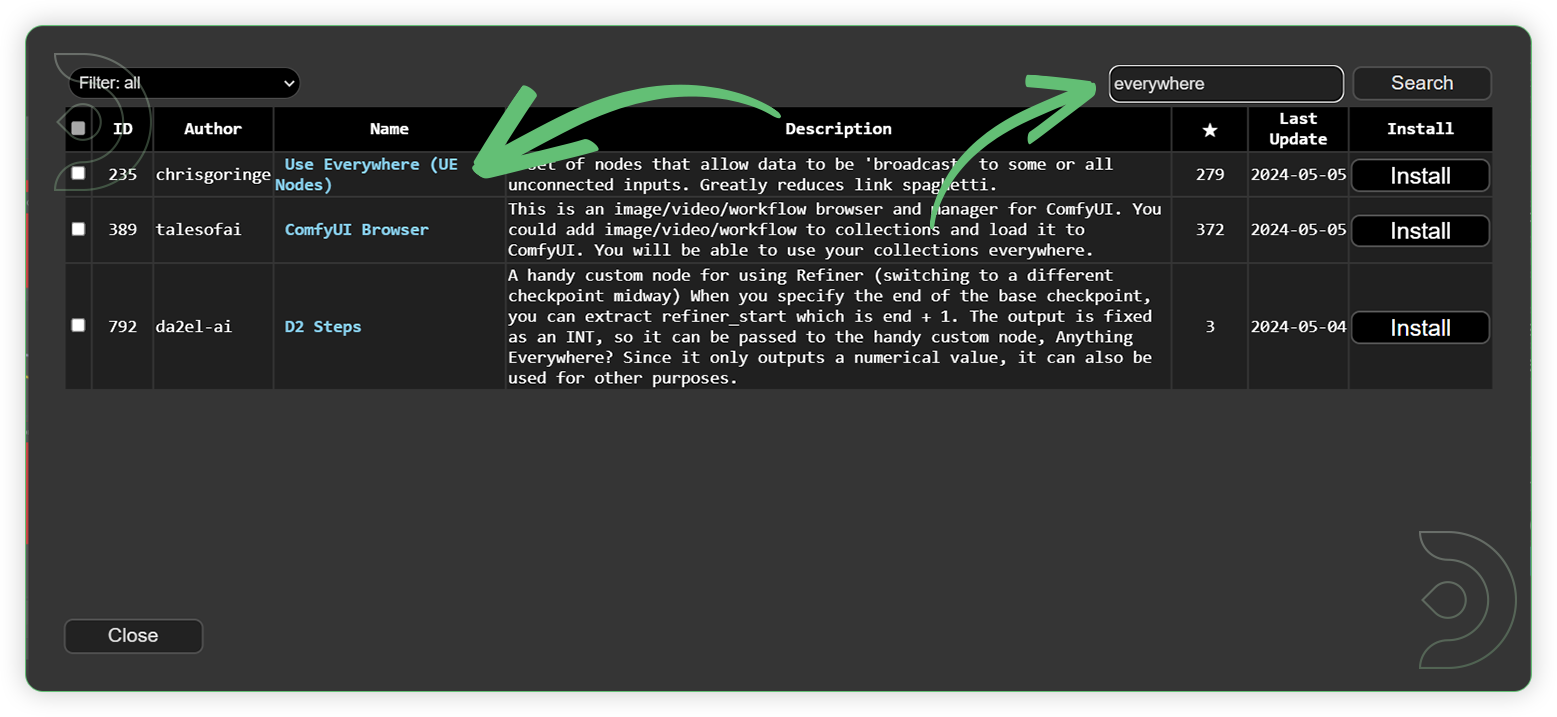
Install this custom node using the ComfyUI Manager. Search “everywhere” in the search box, select the Use Everywhere (UE Nodes) in the list and click Install. Restart the ComfyUI machine in order for the newly installed model to show up.
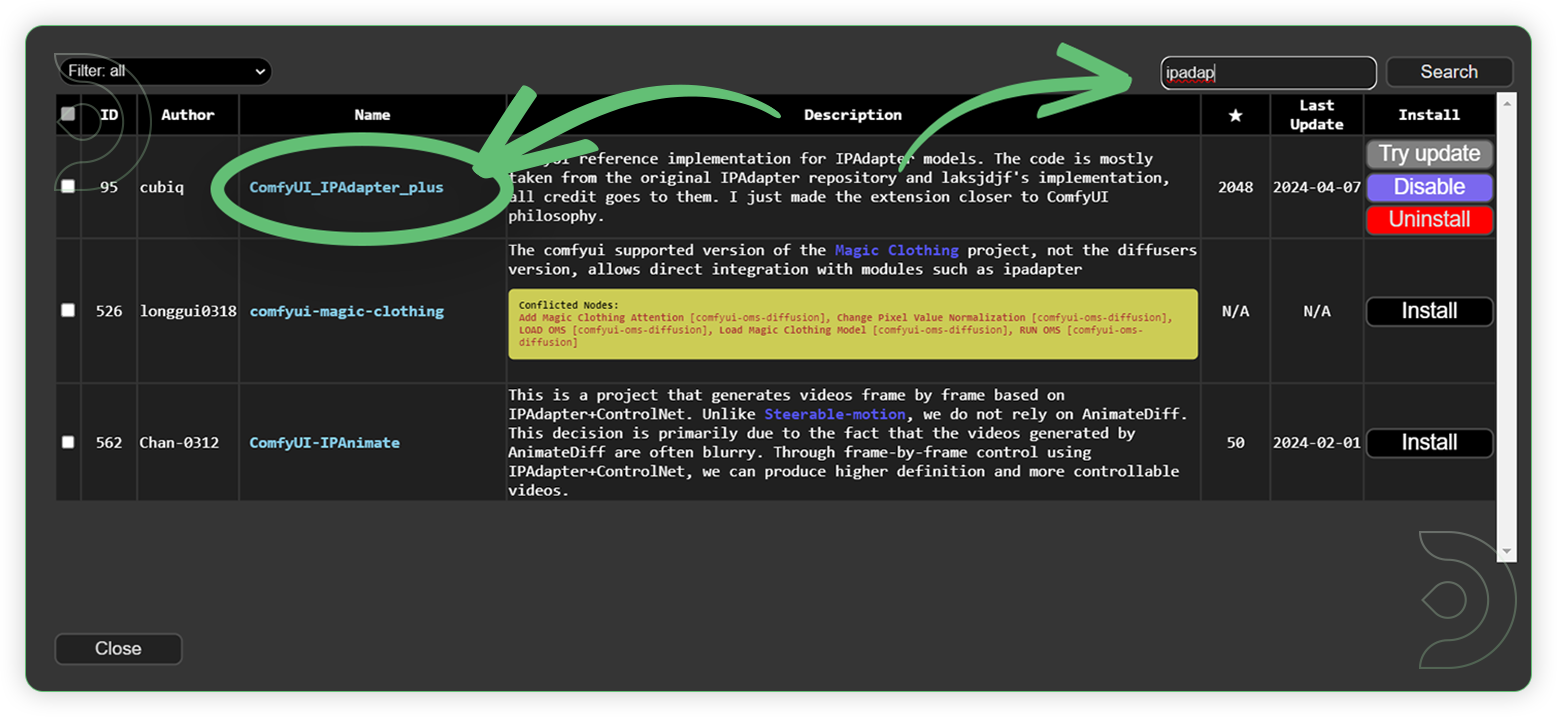
IPAdapter Plus
Install this custom node using the ComfyUI Manager. Search “ipadapter” in the search box, select the ComfyUI_IPAdapter_plus in the list and click Install. Restart the ComfyUI machine in order for the newly installed model to show up.
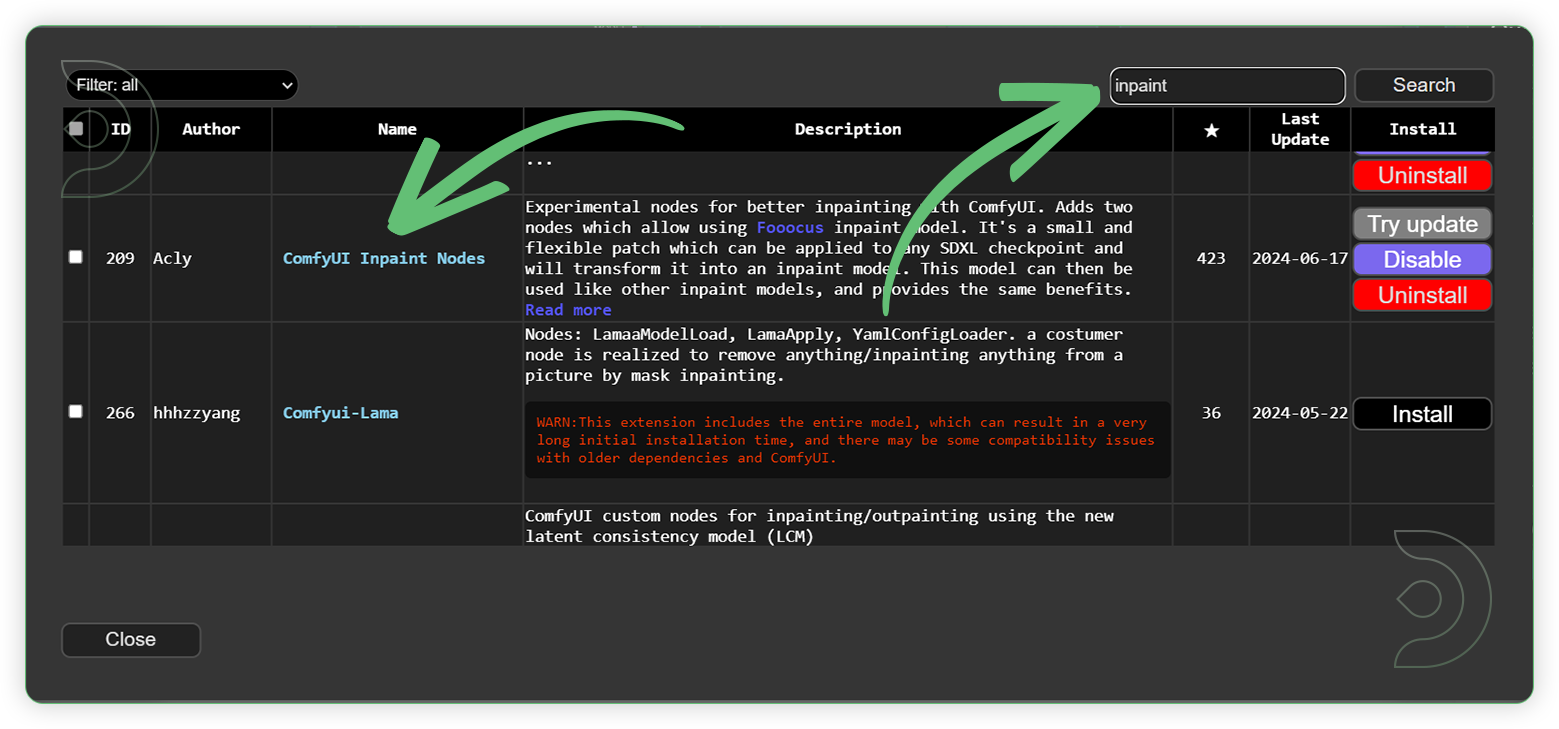
ComfyUI Inpaint Nodes
Install this custom node using the ComfyUI Manager. Search “inpaint” in the search box, select the ComfyUI Inpaint Nodes in the list and click Install. Restart the ComfyUI machine in order for the newly installed model to show up.
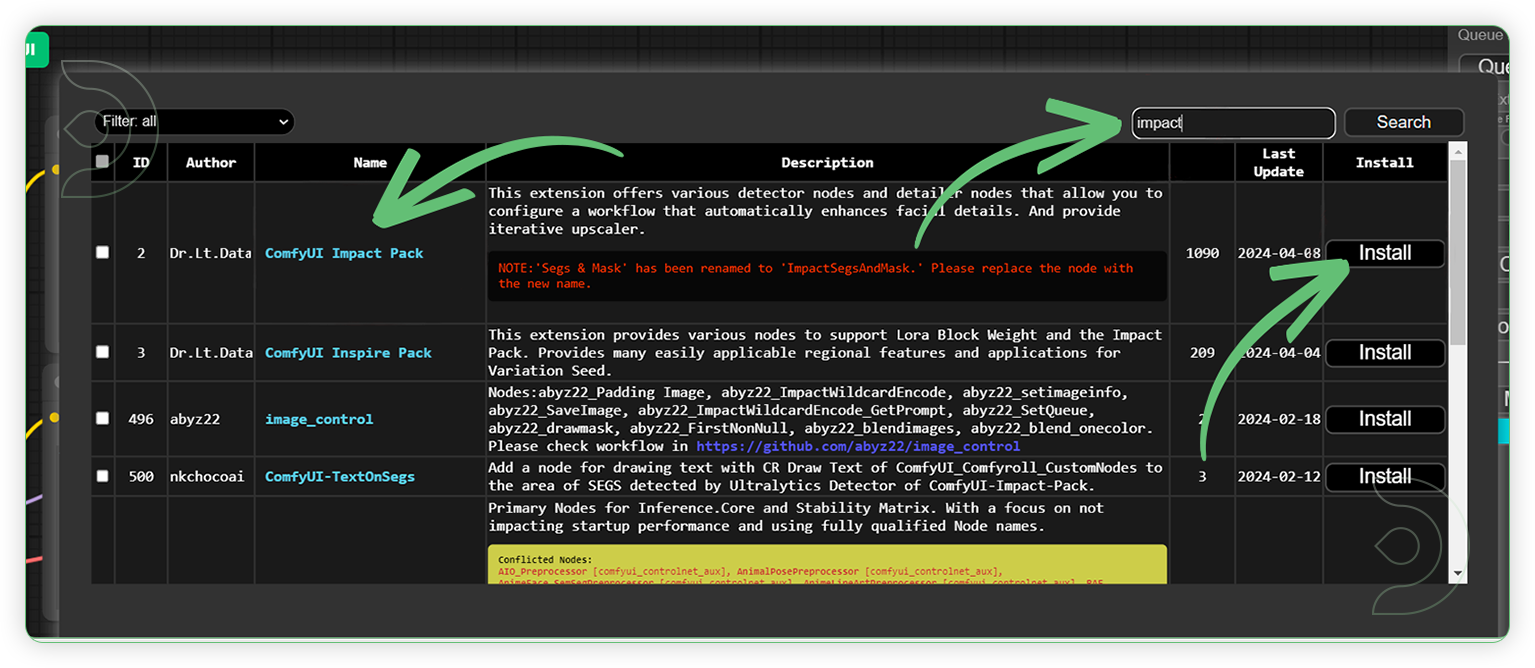
Impact Pack
Install this custom node using the ComfyUI Manager. Search “impact” in the search box, select the ComfyUI Impact Pack in the list and click Install. Restart the ComfyUI machine in order for the newly installed model to show up.
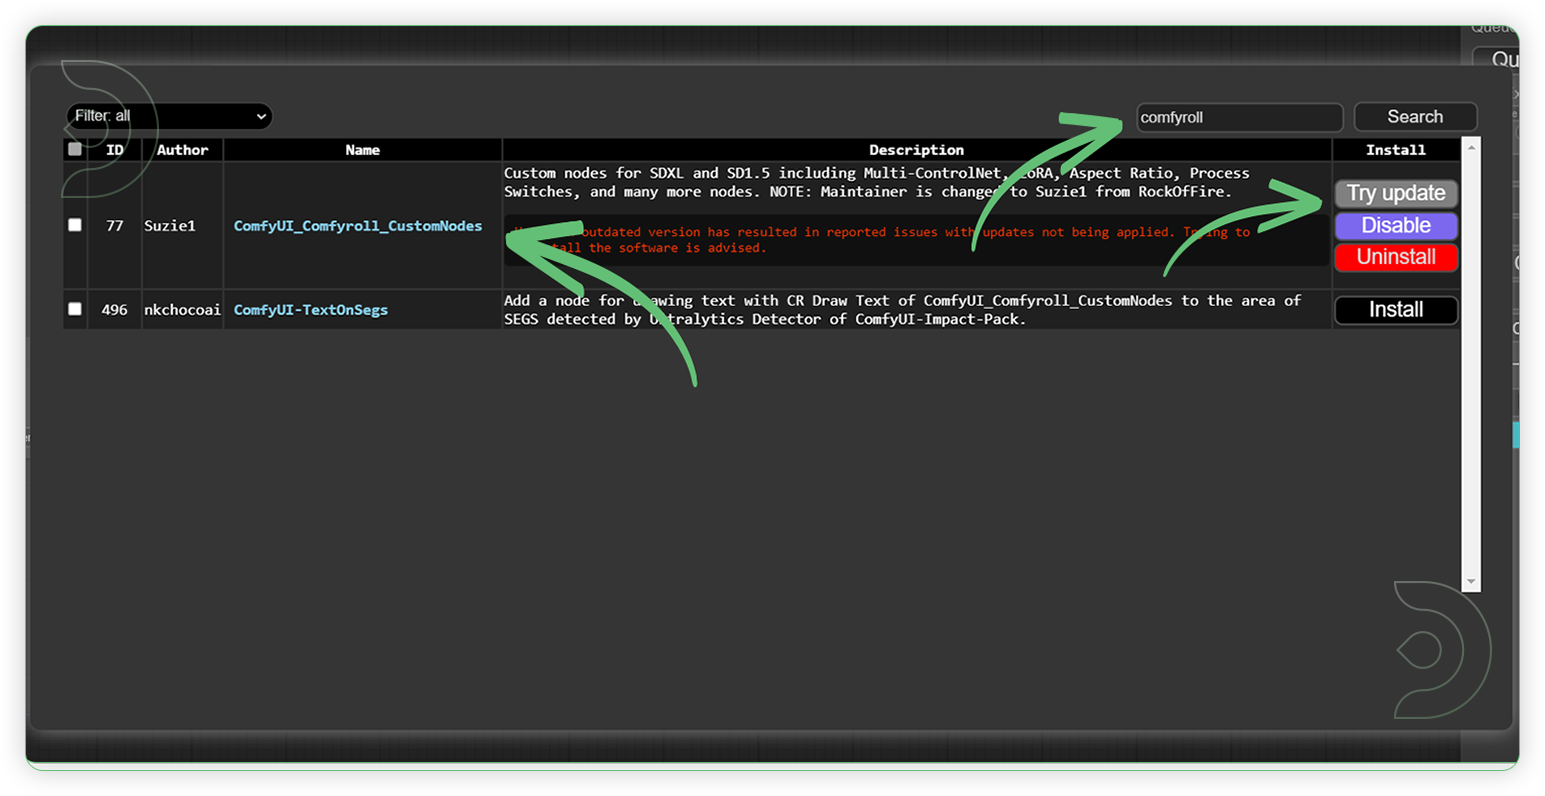
Comfyroll Studio
Install this custom node using the ComfyUI Manager. Search “comfyroll” in the search box, select the ComfyUI_Comfyroll_CustomeNodes in the list and click Install. Restart the ComfyUI machine in order for the newly installed model to show up.
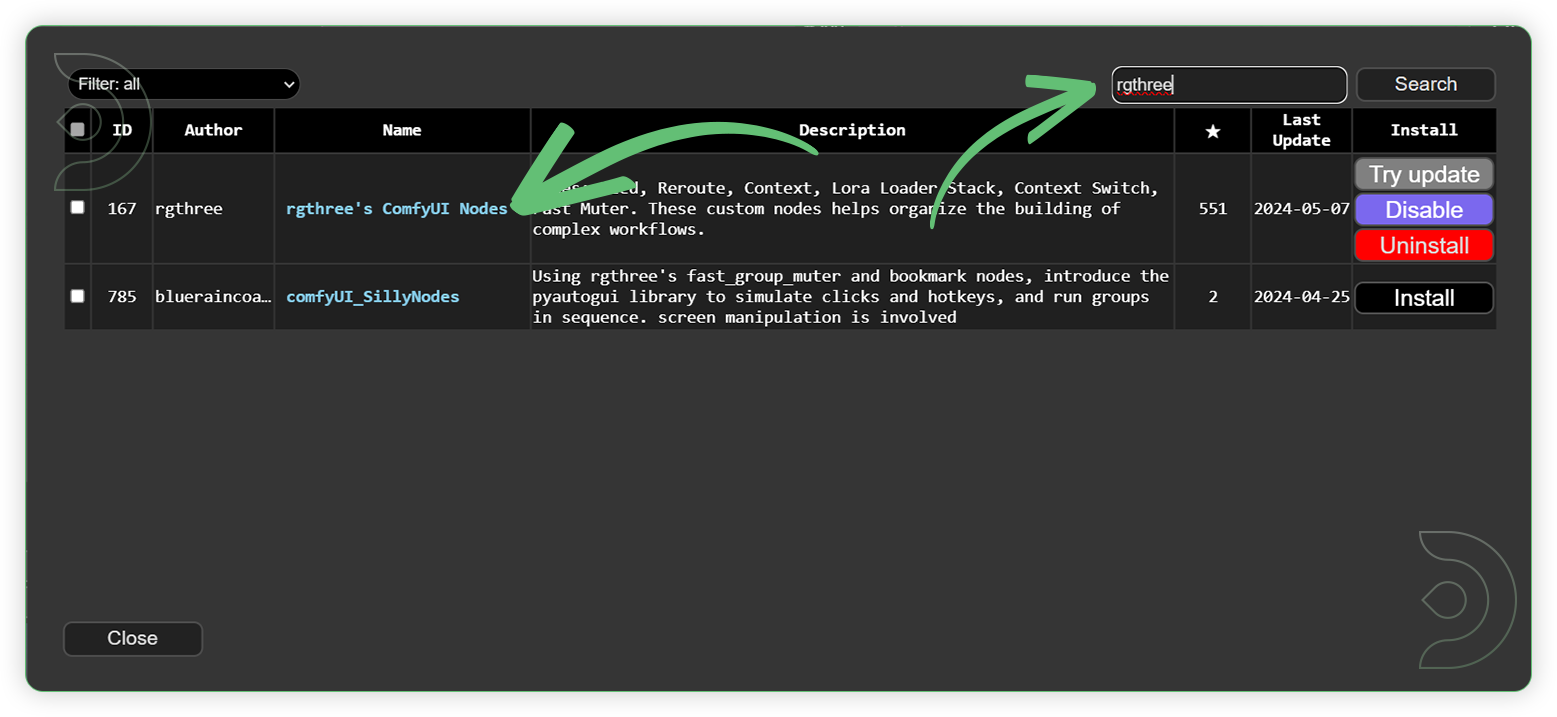
rgthree
Install this custom node using the ComfyUI Manager. Search “rgthree” in the search box, select the rgthree’s ComfyUI Nodes in the list and click Install. Restart the ComfyUI machine in order for the newly installed model to show up.
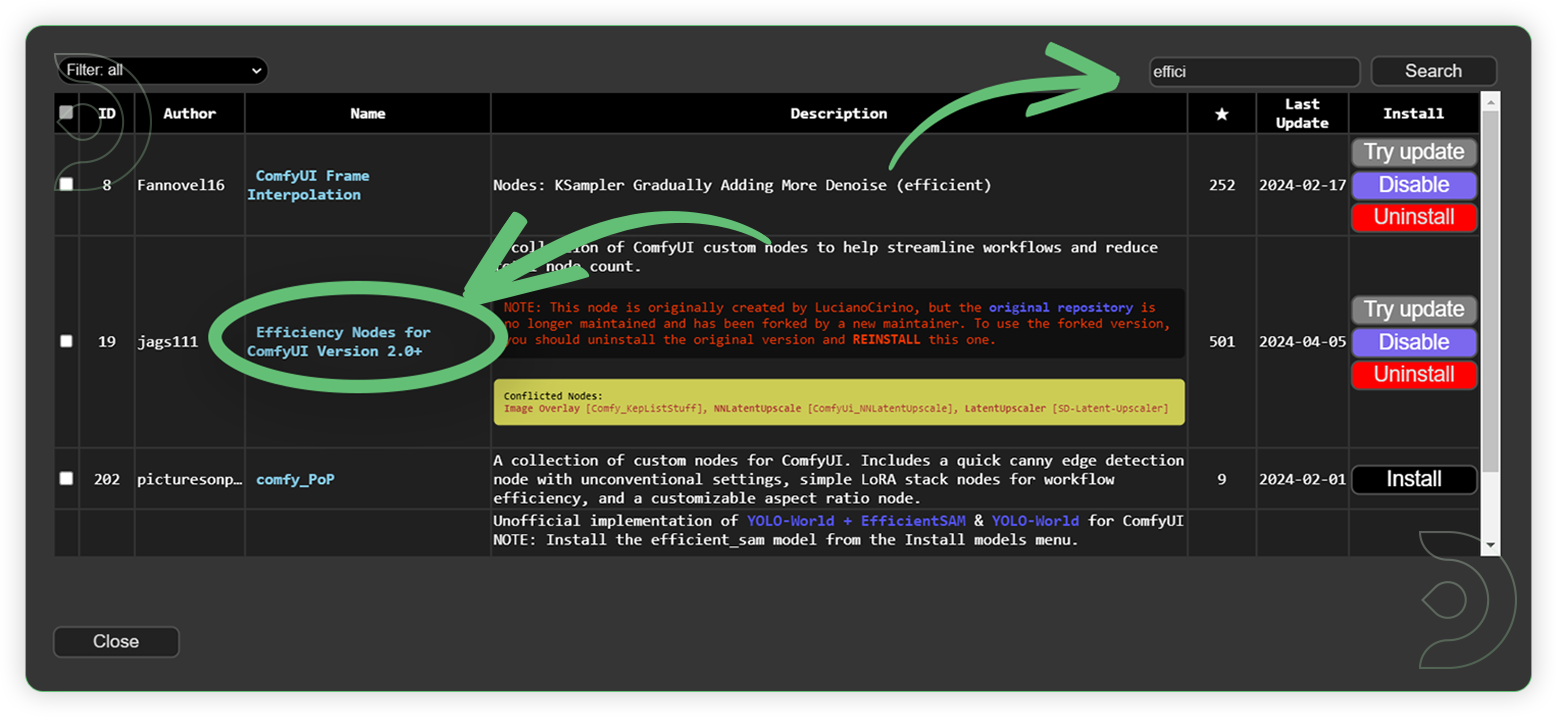
Efficiency Nodes
Install this custom node using the ComfyUI Manager. Search “efficiency” in the search box, select the Efficiency Nodes for ComfyUI Version 2.0+ in the list and click Install. Restart the ComfyUI machine in order for the newly installed model to show up.
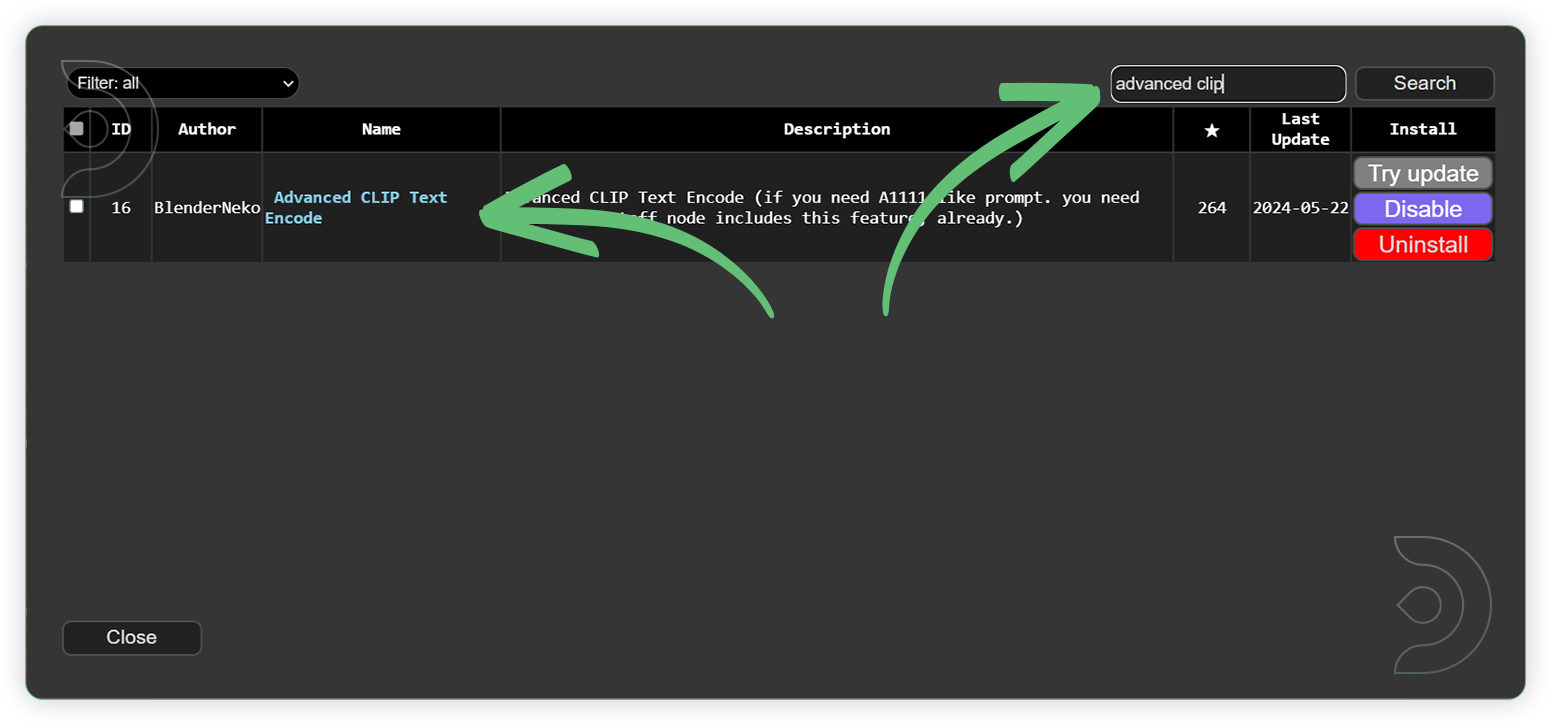
Advanced Clip
Install this custom node using the ComfyUI Manager. Search “advanced clip” in the search box, select the Advanced CLIP Text Encode in the list and click Install. Restart the ComfyUI machine in order for the newly installed model to show up.
Models
Download these recommended models using the ComfyUI manager and restart the machine after uploading the files in your ThinkDiffusion My Files.
Some of the files are larger and above 2GB size, follow the instructions here UPLOAD HELP by using Google Drive method, then upload it to the ComfyUI machine using a Google Drive link. Restart the ComfyUI machine in order for the newly installed model to show up. Another method is copy link address of download button/icon from civitai or huggingface and paste into the Upload section of ThinkDiffusion My Files using the copied URL.
For ease of use, here is a google drive link to the MODELS.
Guide Table
Reminder
- You can use the MAT and Fill inpaint model if you have those models. But I have still recommend the LAMA.
- You can test the other DreamShaper xl base models especially the v2.1. I chose the turbo version as the stable version for me.
How to Use
Download the workflow here OUTPAINTING.
Now that the hard work is out of the way, let's get creative!. For most use cases, you only need to do the steps that are marked required change. You need to follow the steps from top to bottom. The workflow is a one-click process and you don’t need to worry if there’s a default model that was already installed them in your ThinkDiffusion My Files. You can re-run the queue prompt when necessary in order to achieve your desired results.
| Steps | Description / Impact | Default / Recommended Values | Required Change |
|---|---|---|---|
| Load an Image | This is the first step which can upload an image that can be used for outpainting. | 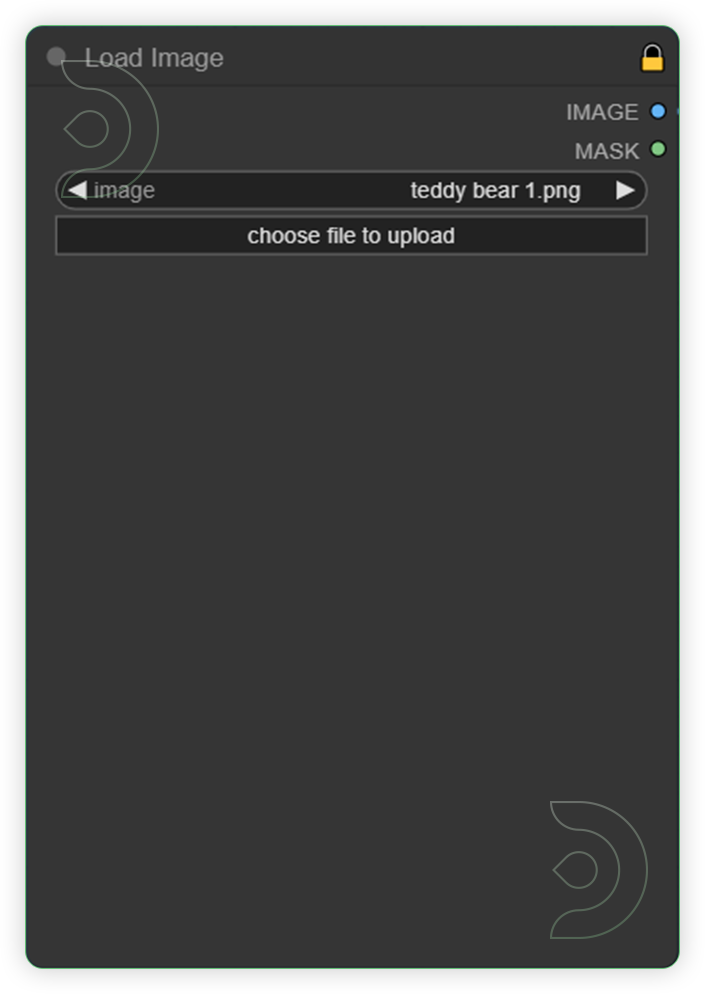 |
YES |
| Set the Models | Check this grouped node. These the models that are responsible for the outpainting. Based from the image set the default of base model, ipadapter model, clip vision and inpaint model. | 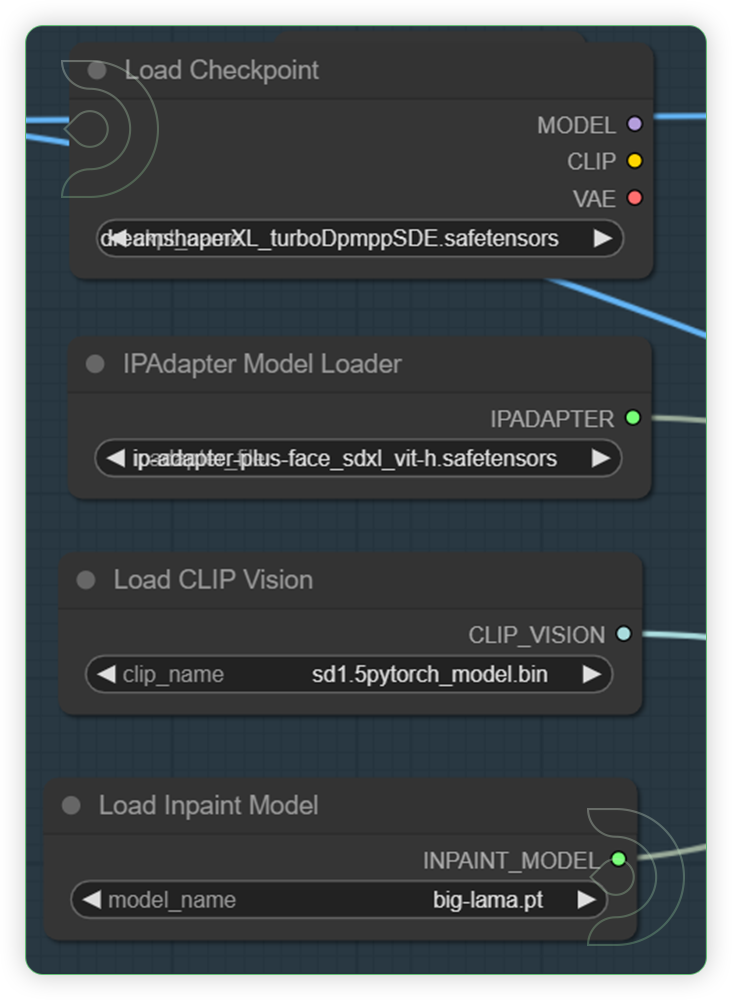 |
|
| Choose which side you want to be Outpainted | The Pad Image for Outpainting node can be used to to add padding to an image for outpainting. This image can then be given to an inpaint diffusion model via the VAE Encode for Inpainting. | 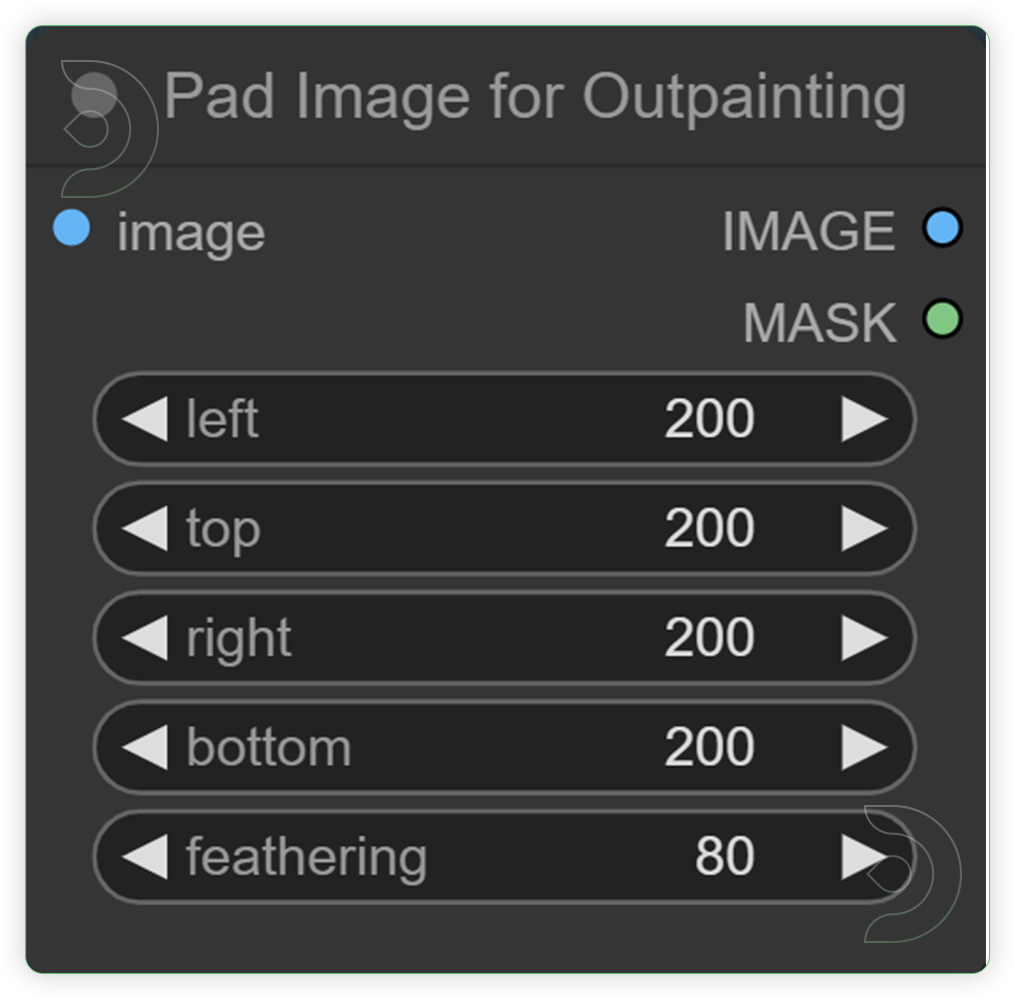 |
YES |
| Set the grow mask by for Inpaint | The VAE Encode For Inpainting node can be used to encode pixel space images into latent space images, using the provided VAE. It also takes a mask for inpainting, indicating to a sampler node which parts of the image should be denoised. The area of the mask can be increased using grow_mask_by to provide the inpainting process with some additional padding to work with. |  |
|
| Check the fill and set your desired option. | Set the fill either the telea, neutral and navier. Telea is good for filling the inpaint with colors while the neutral isi not. Navier is a combination of the two. | 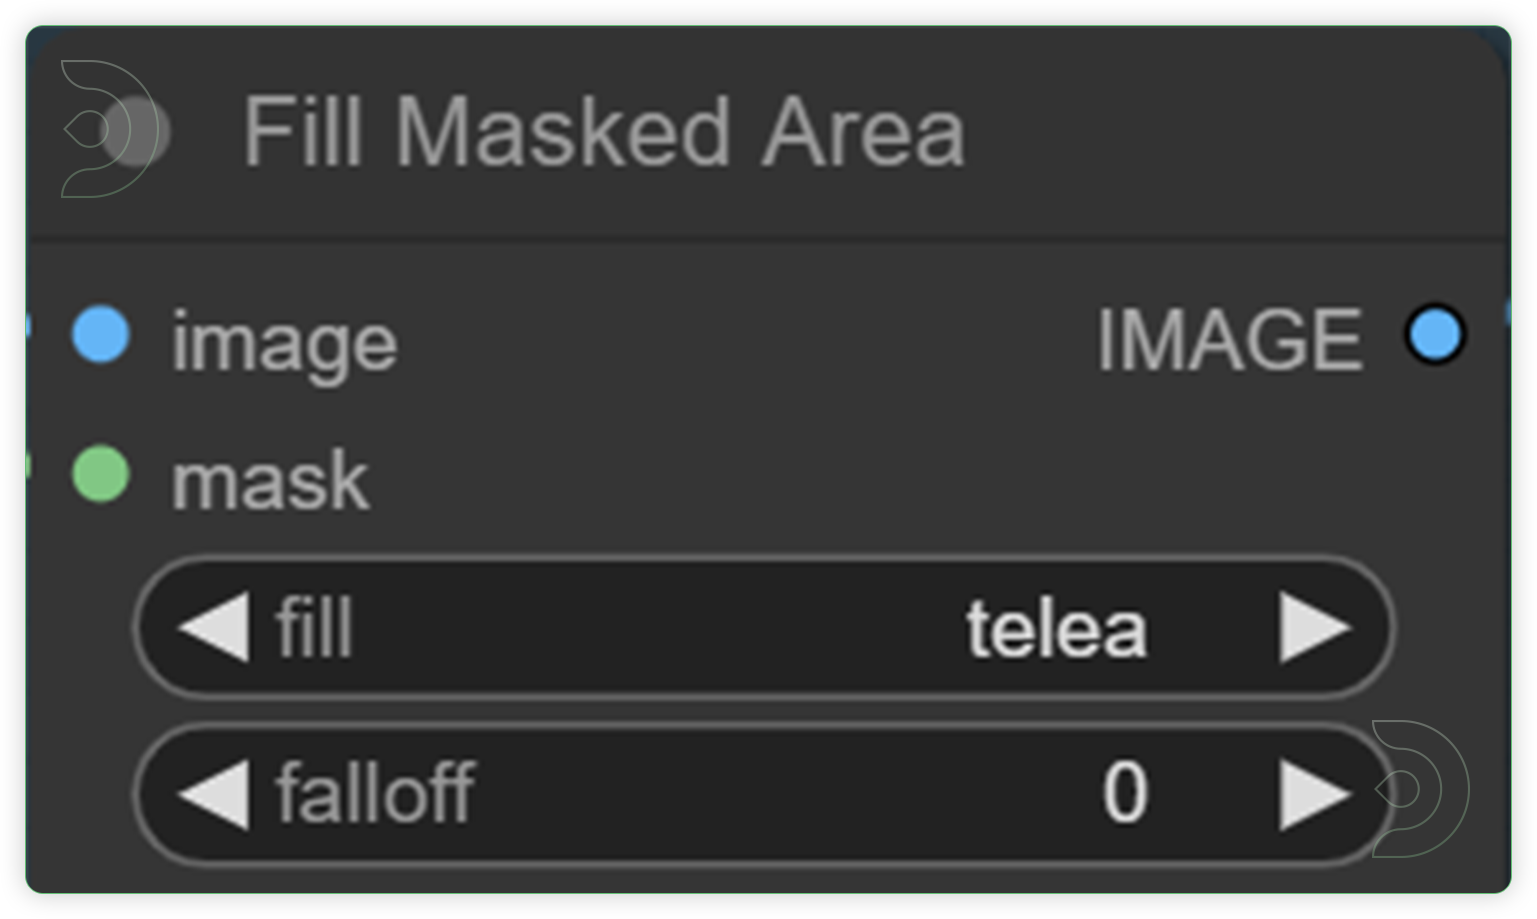 |
|
| Check the default inpaint head and patch | Check the head and patch. Otherwise, set it to the default settings. | 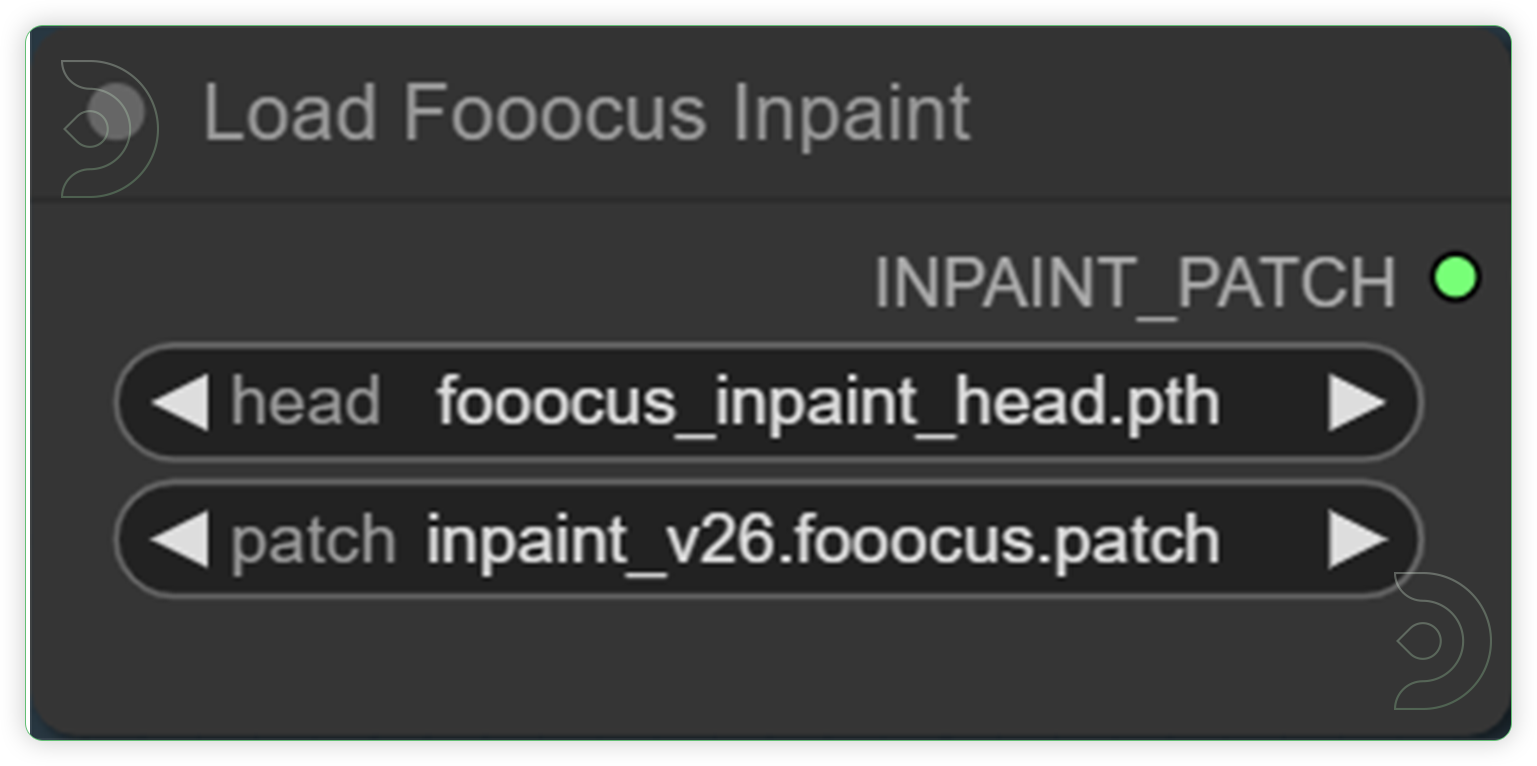 |
|
| Set the text prompt or let as empty | A node that determines how token weights are normalized. It determines how up/down weighting should be handled. Choose the comfy in weight interpolation. You can let this node empty or you can set a simple noun of what you want to appear in the outpainted area. | 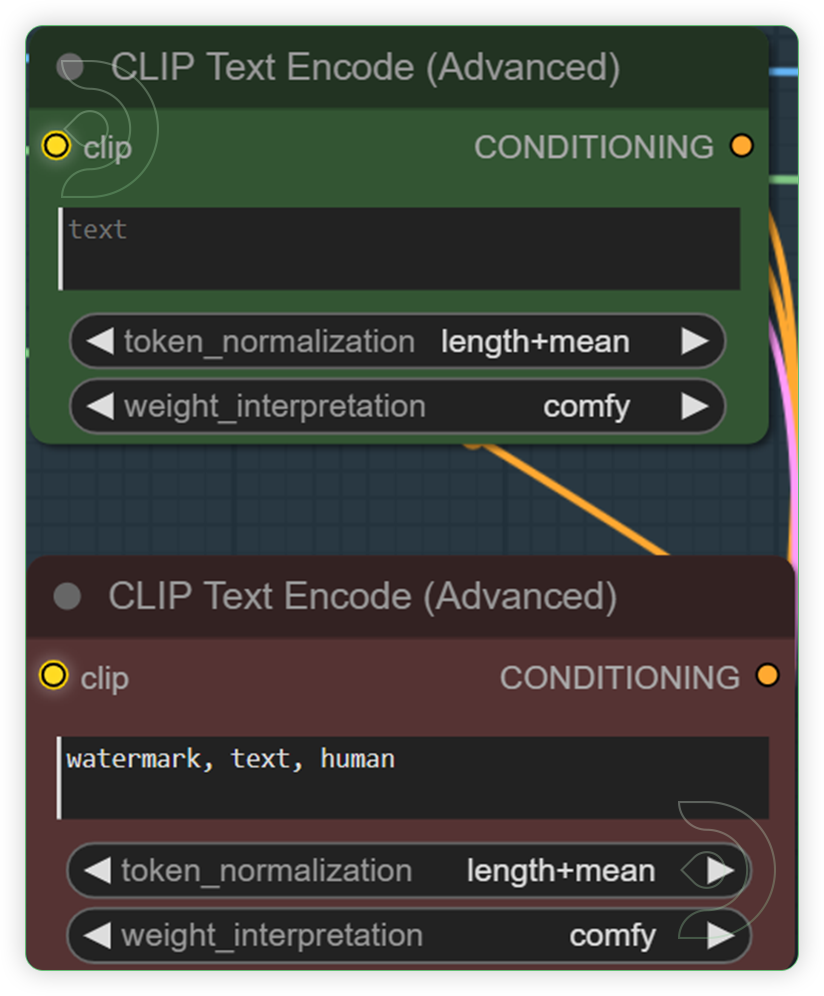 |
YES |
| Check and set your desired weight for IPAdapter | This node contains all the options to fine tune the IPAdapter models. This is the area where we can adjust the weight of the IPAdapter model. | 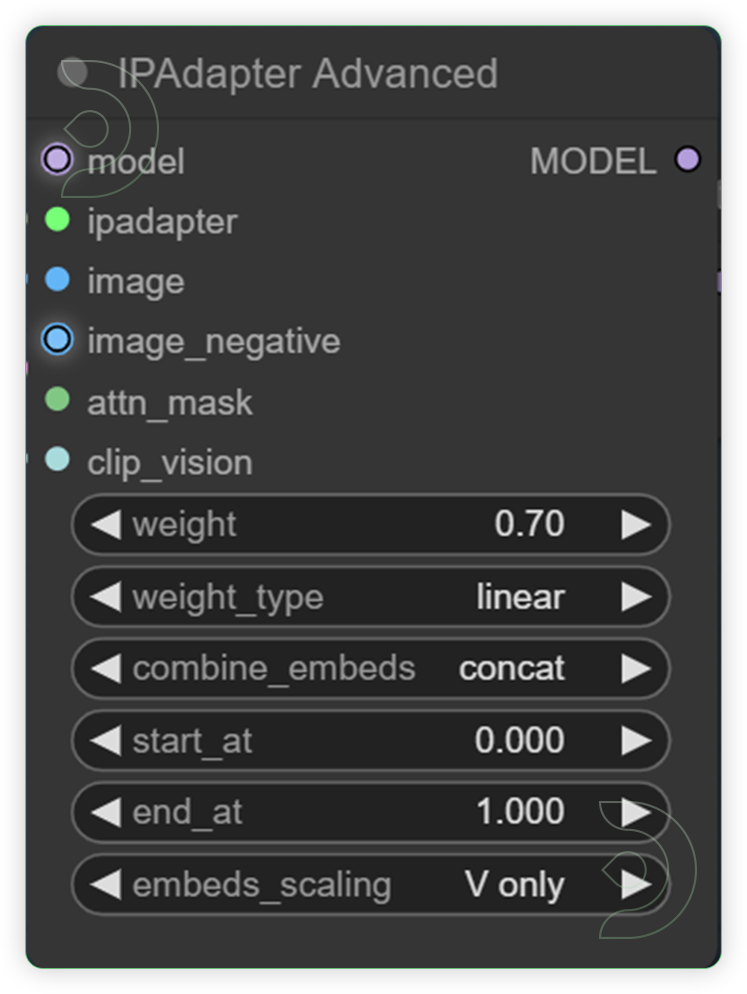 |
|
| Check the Seed. You can set a fixed seed or choose the random. | An intuitive seed control node for ComfyUI that work like the other platform. Set the seed value to "-1" to use a random seed every time. Set any other number in there to use as a static/fixed seed. | 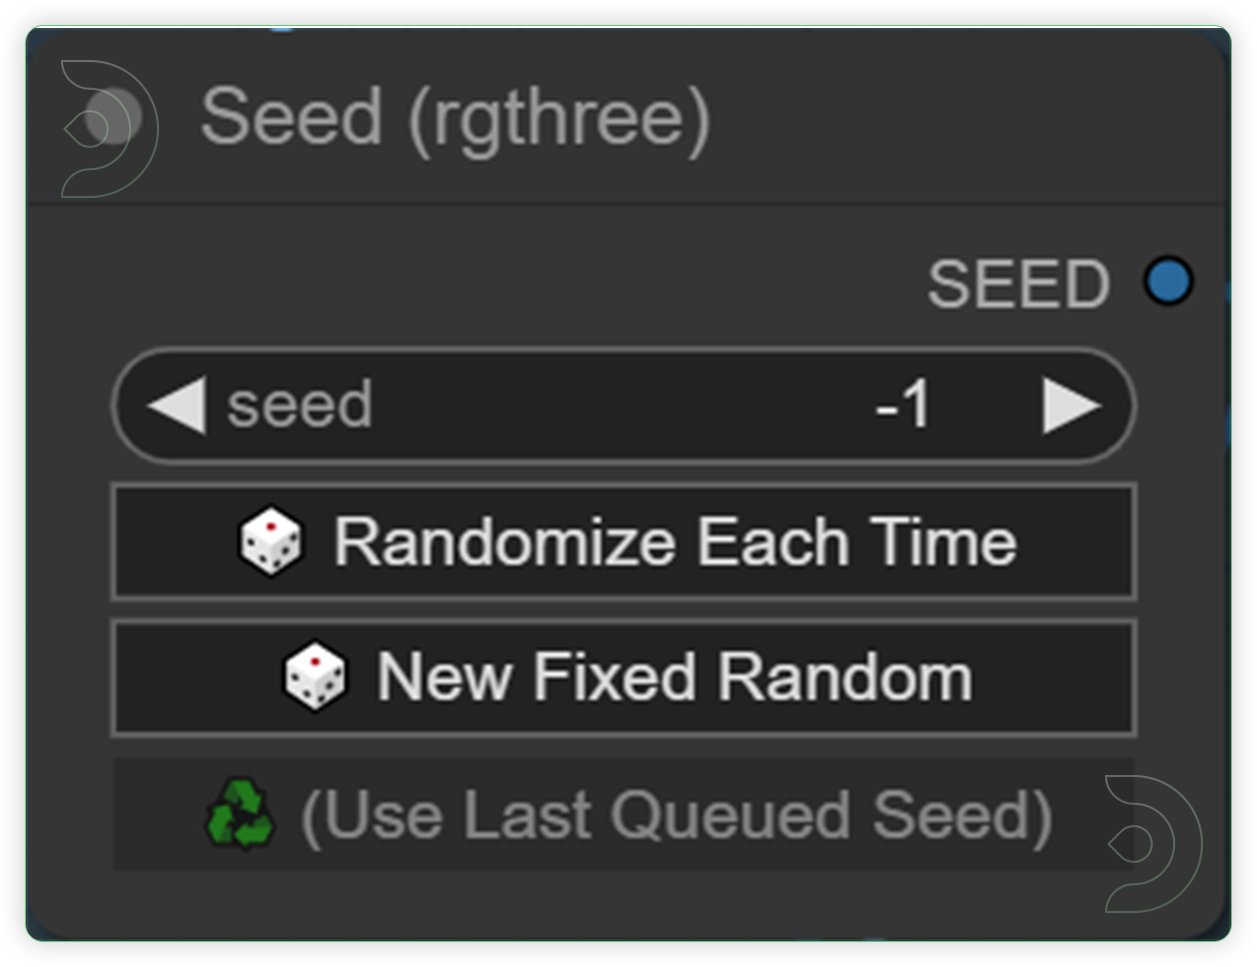 |
|
| Set your desired steps and cfg. | A modded KSampler with the ability to preview/output images and run scripts. Just only adjust the steps and cfg. | 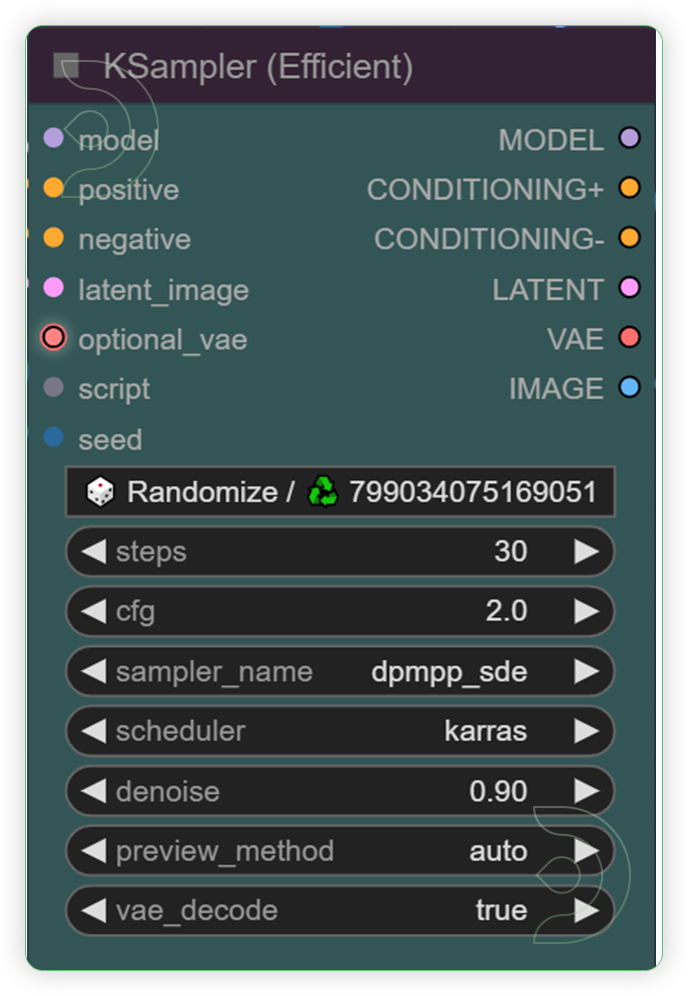 |
|
| RUN the QUEUE PROMPT | |||
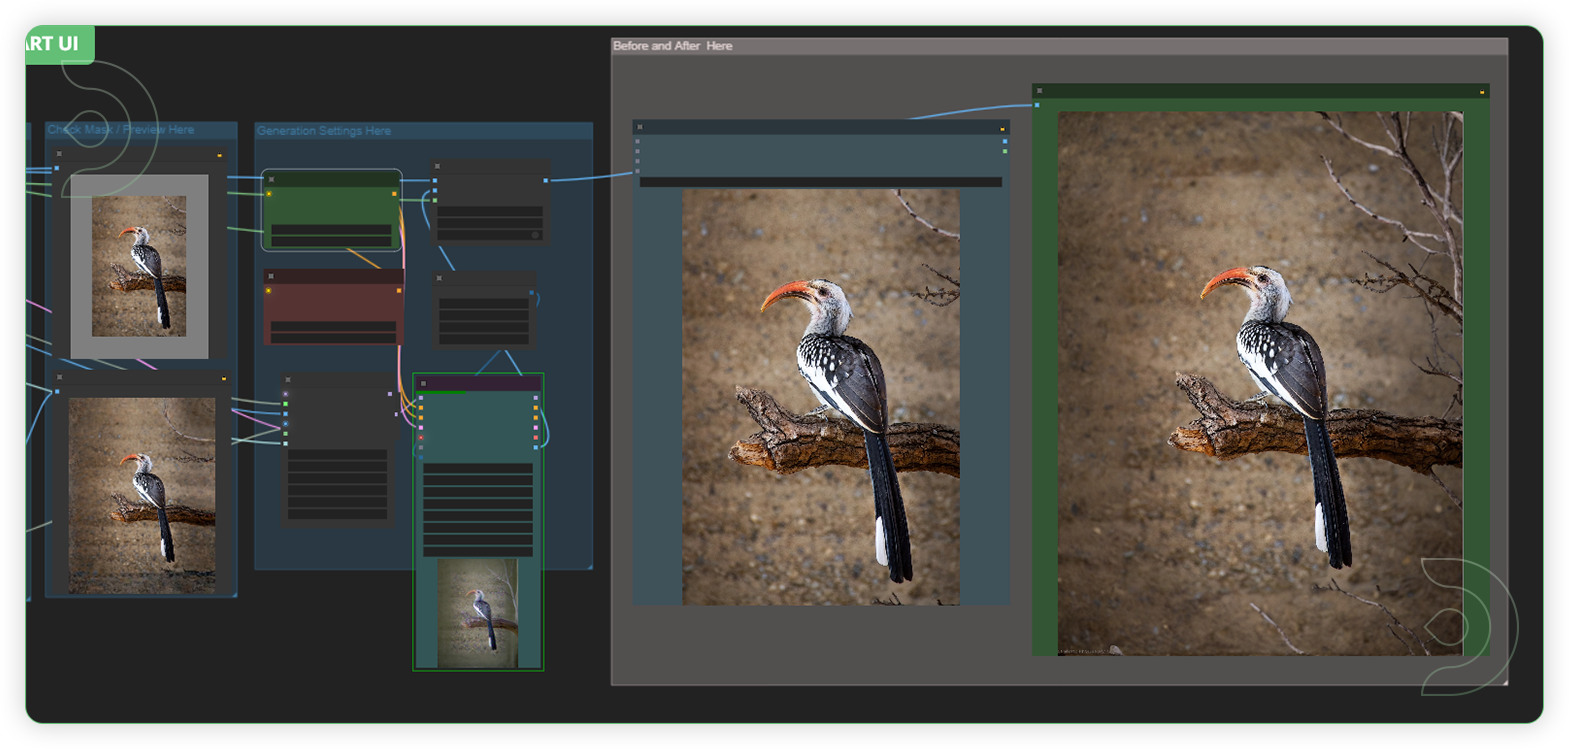
| Check the Before and After in this last group node. | This last step is important because you will see here the outcome for outpainting. Once the queue prompt are not right you check the previous settings from the group node and re-run the the workflow. |  |
Reminder
- In the last group node, after the queue prompt is completed, wait for 1 minute in the outpainted image node to appear. Highly recommended to use the Turbo machine since the base model uses an SDXL checkpoint.
The Examples
Download the examples HERE
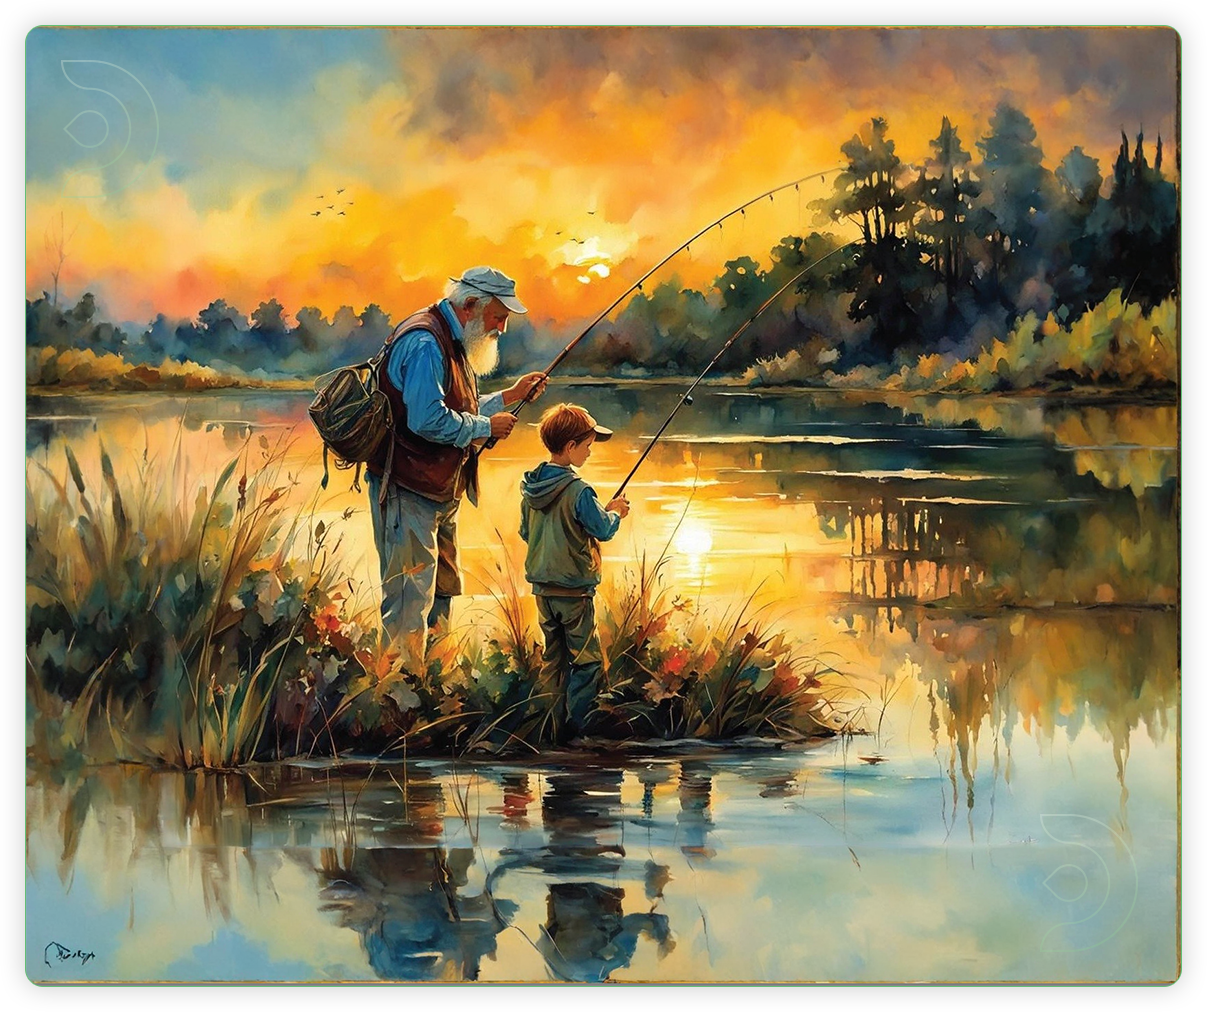
| Settings | Original Image | Outpainted Image |
|---|---|---|
| Left 200, Right 200, steps 30, cfg 2, dmpp_sde, karras | 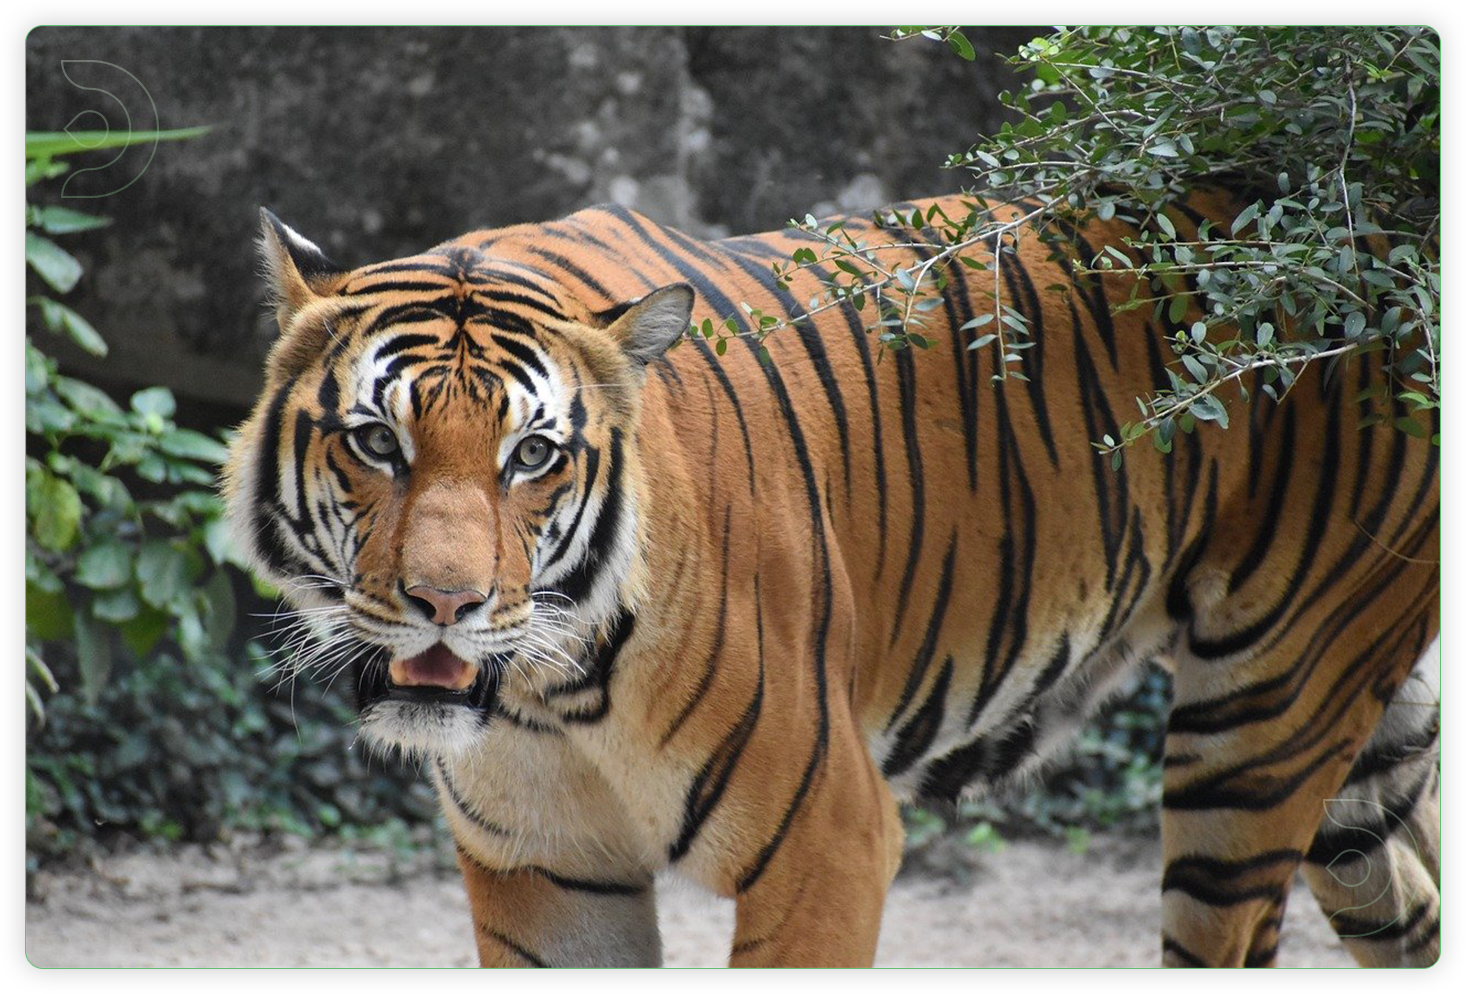 |
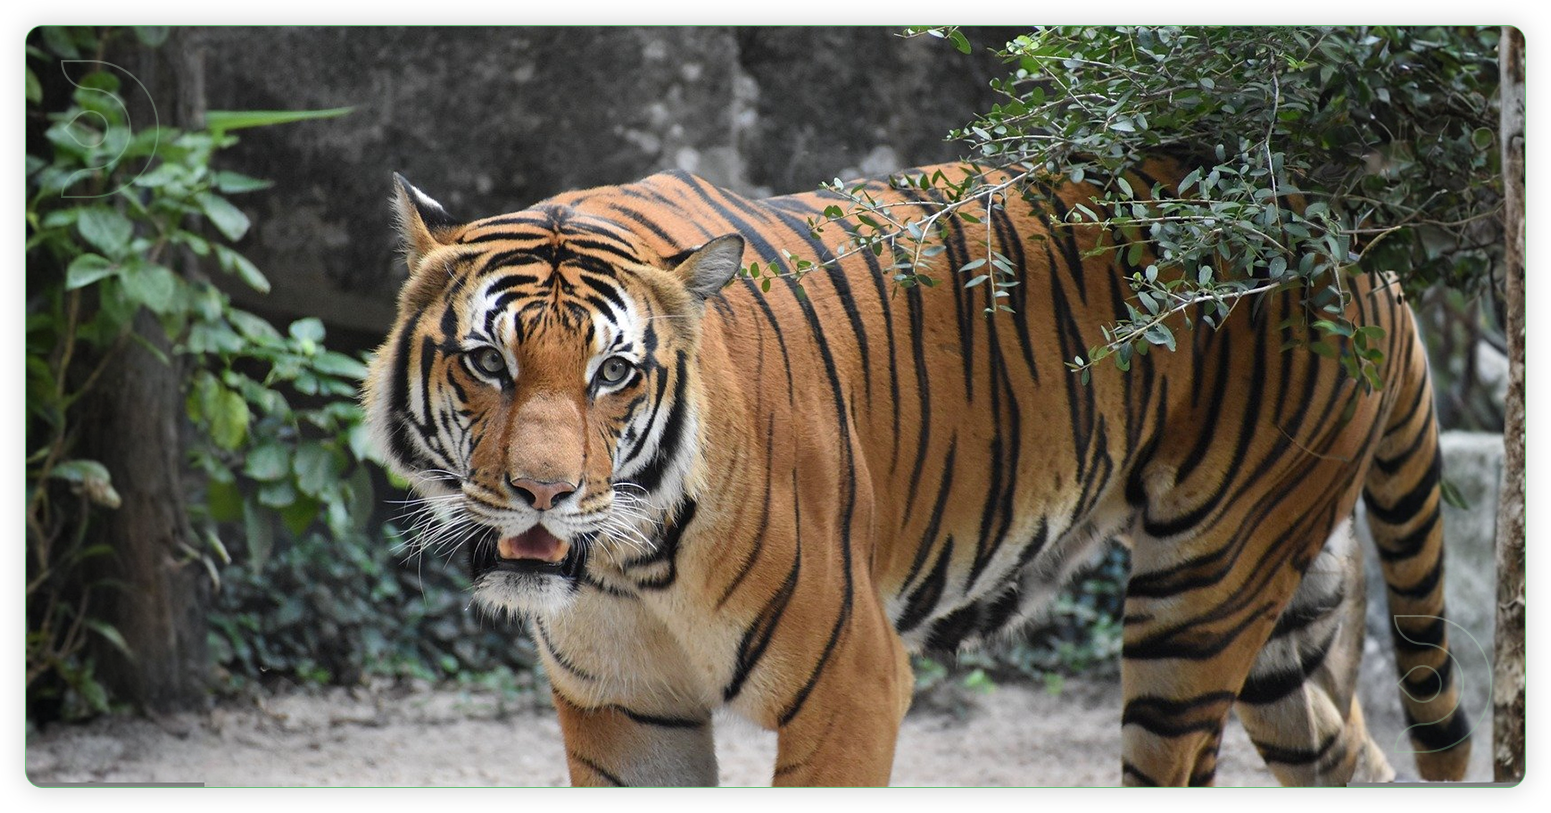 |
| Top 200, Bottom 200, steps 30, cfg 2, dmpp_sde, karras |  |
 |
| Top 200, Bottom 200, Left 200, Right 200 steps 50, cfg 2, dmpp_sde, karras | 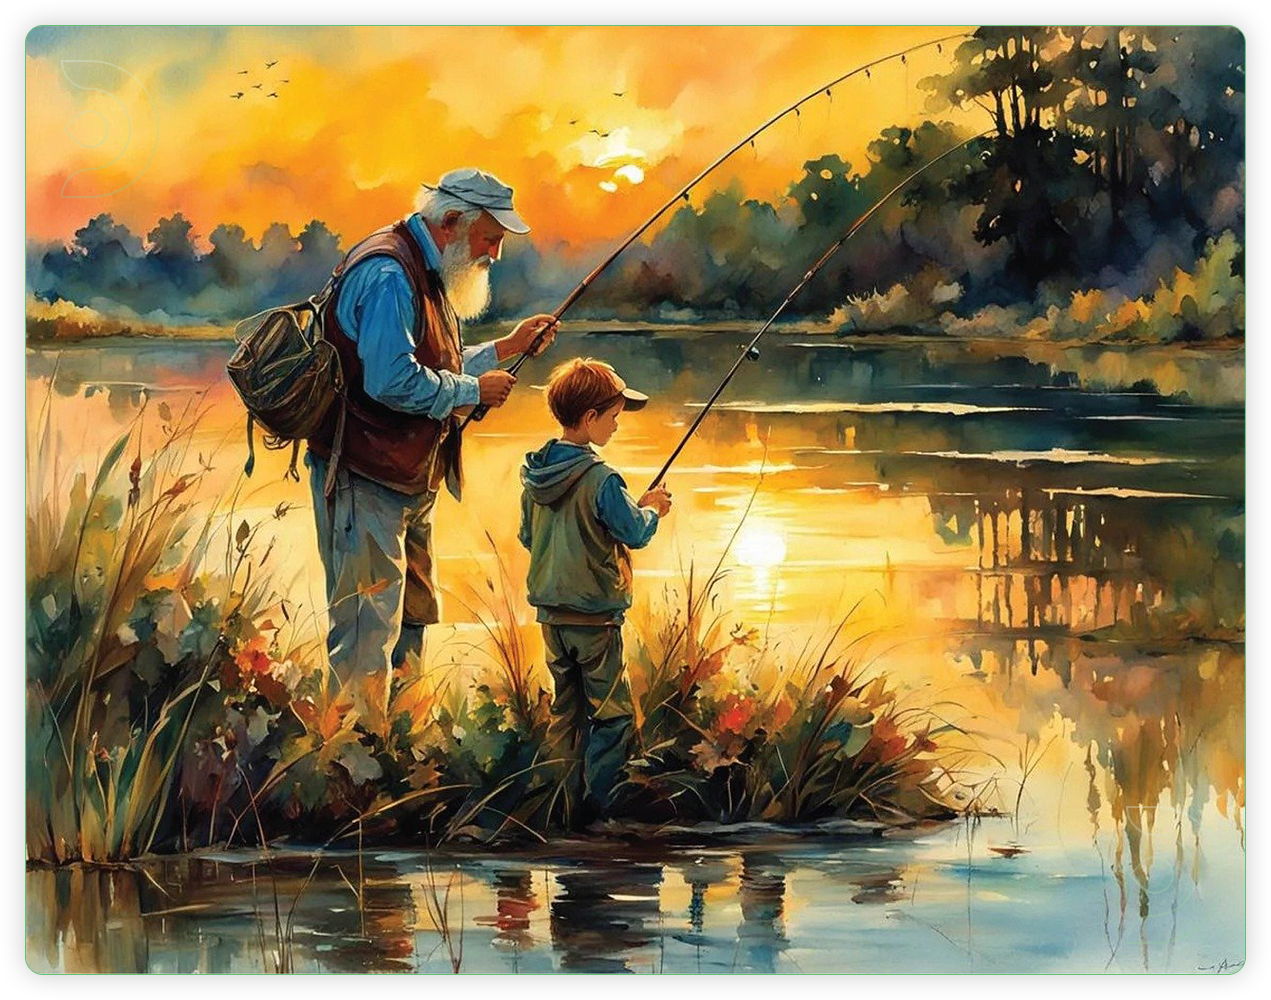 |
 |
Frequently Ask Questions
- What is Outpainting?
Contrarily, outpainting is an extrapolation technique that makes use of newly generated pixels to enlarge the image's visual narrative while maintaining contextual consistency with the original. Your image can now be stretched beyond its original dimensions.
- What is ComfyUI?
An easy-to-use, robust Stable Diffusion UI, ComfyUI makes use of a graph and nodes interface. Integrating models, prompts, and other nodes allows you to build a personalized process. Rapid expansion has allowed it to include phenomena beyond Stable Diffusion.
If you’re having issues with installation or slow hardware, you can try any of these workflows on a more powerful GPU in your browser with ThinkDiffusion.
If you enjoy ComfyUI and you want to test out creating awesome animations, then feel free to check out this AnimateDiff tutorial here.
Member discussion