
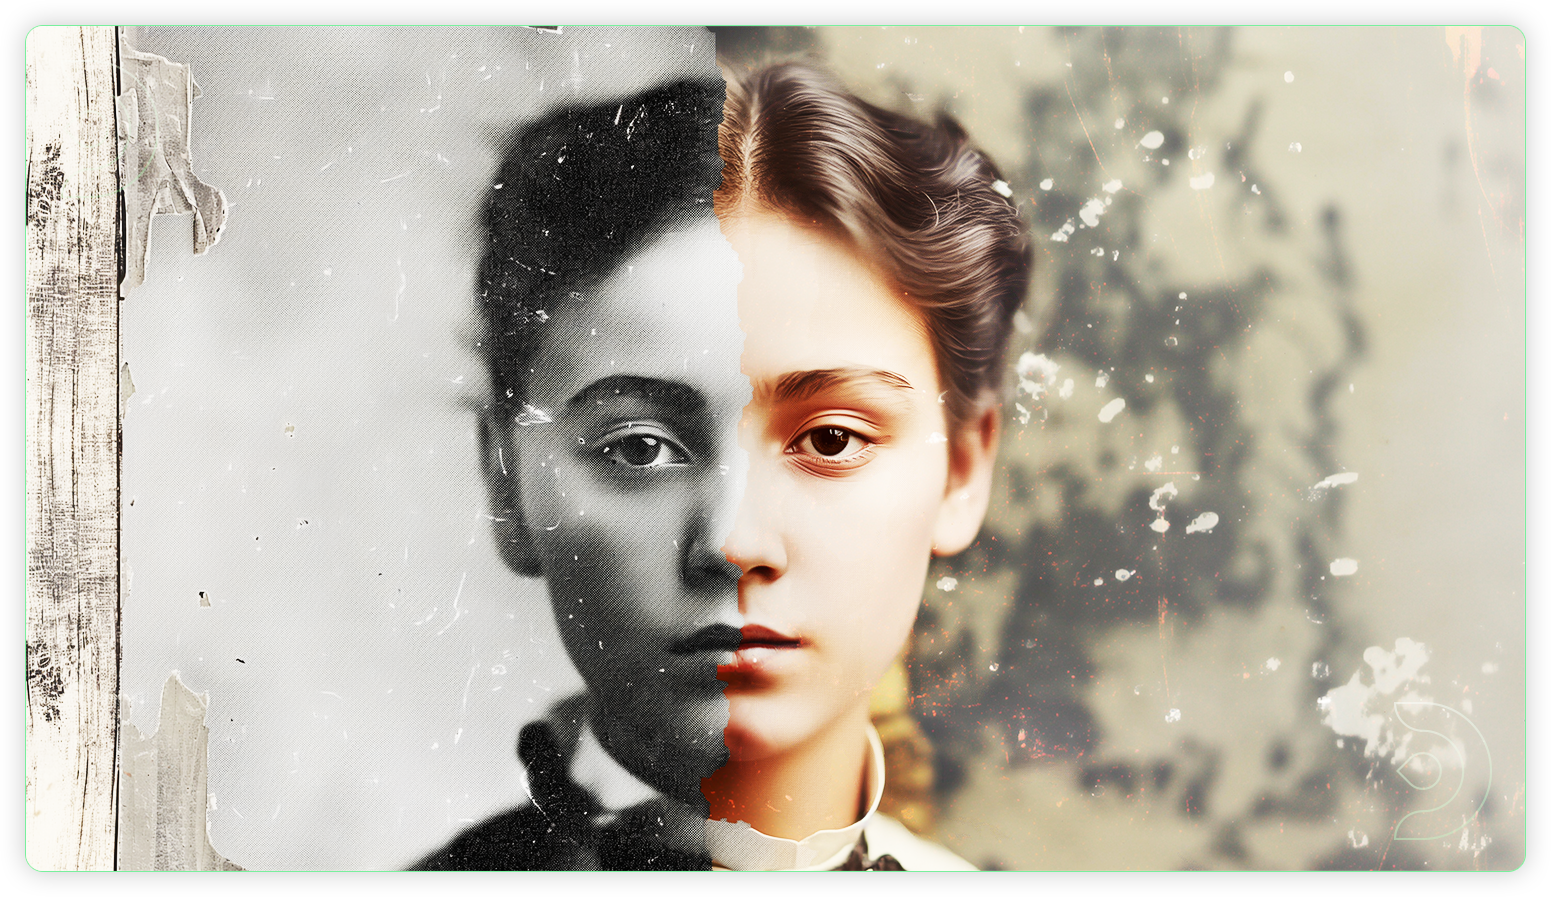
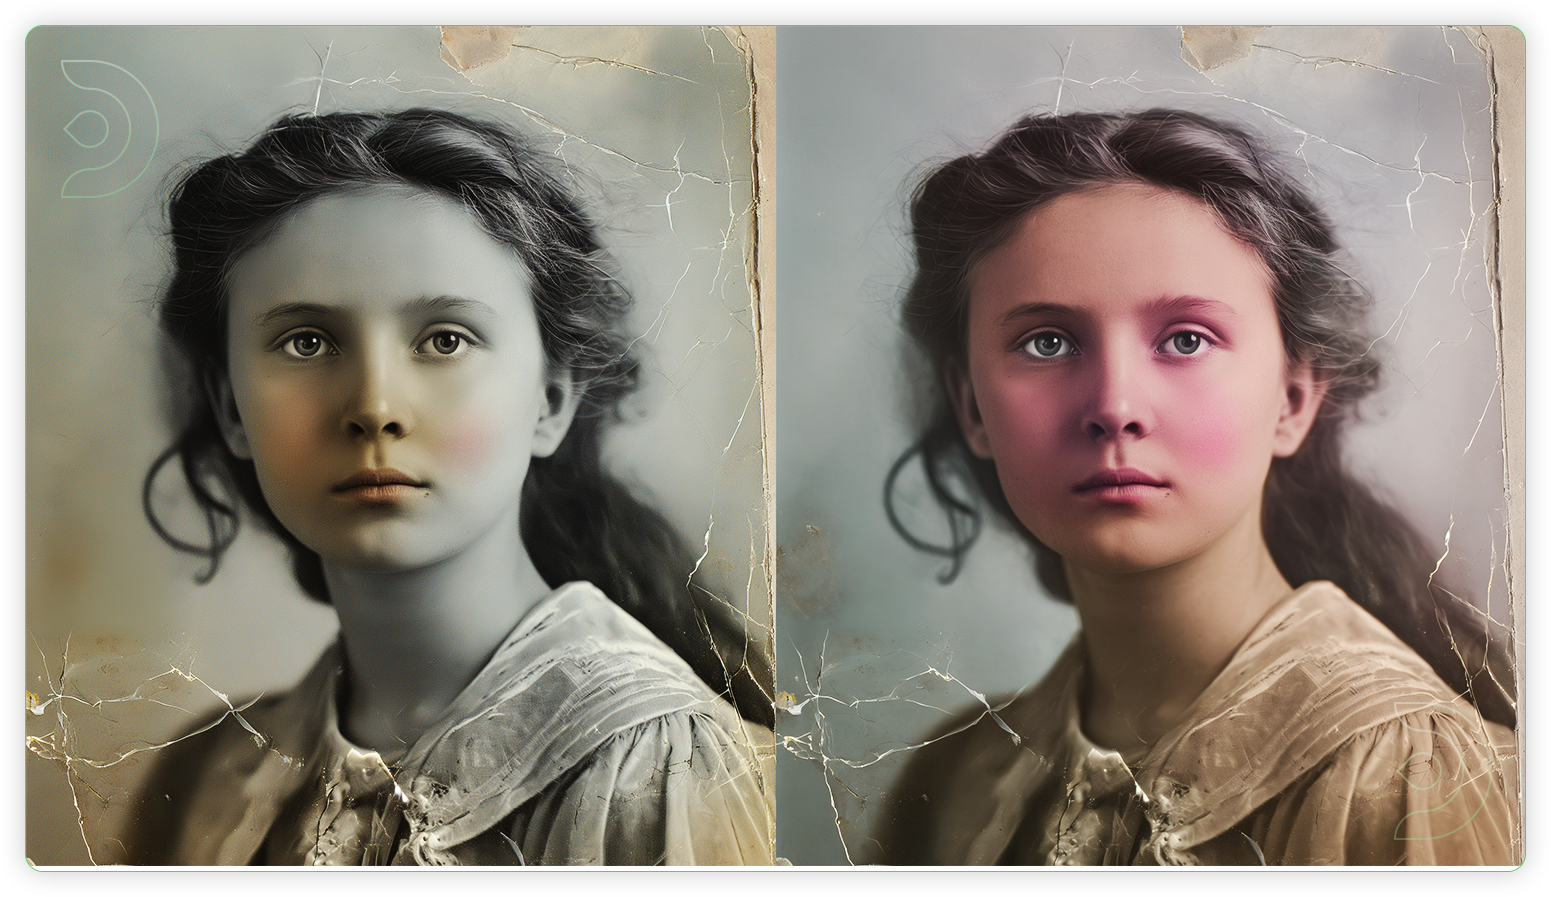
Old photo restoration brings faded memories back to life. Over time, photographs can lose their sharpness due to damage from elements like water, fire, or simply age. Restoring these images digitally can revive them, preserving precious memories and family history for future generations.
This process, once requiring expert skills and a ton of manual time, is now more accessible thanks to advanced AI tools. By restoring old photos, we can reconnect with our past, safeguard our legacy, and honor our heritage.
This guide will walk you through the essential techniques to restore and preserve your old photos and cherished memories using modern AI tool ComfyUI.

Photo Restoration with ComfyUI
ControlNet and ReActor are the main components that make up this procedure, which is designed to turn old photographs into vivid recollections.
ControlNet, which incorporates OpenPose, Depth, and Lineart, provides exact control over the entire picture production process, allowing for detailed scene reconstruction. The OpenPose filter controls poses, the Depth filter creates a sense of three-dimensionality, and the LineArt filter improves outlines.
The final step in the restoration process is the ReActor node, which specializes in face swaps through the enhancement of face detail and accuracy in restored photographs. This brings the restoration process to a successful conclusion with greater realism and faithfulness to the original scene.
One-Time Setup
Let's get the hard work out of the way, this is a one time set up and once you have done it, your custom nodes will persist the next time you launch a machine.
- Download the workflow above.
- Launch a ThinkDiffusion machine. We recommend the Turbo machine for faster speeds.
- Drag and drop the workflow .json files into your ComfyUI machine workspace.
- If there are red coloured nodes, download the missing custom nodes using ComfyUI manager or by using the Git URL.
- If there are red or purple borders around model loader nodes, download the missing models using ComfyUI manager.
Custom Nodes
If there are red nodes in the workflow, it means that the workflow lacks the certain required nodes. Install the custom nodes in order for the workflow to work.
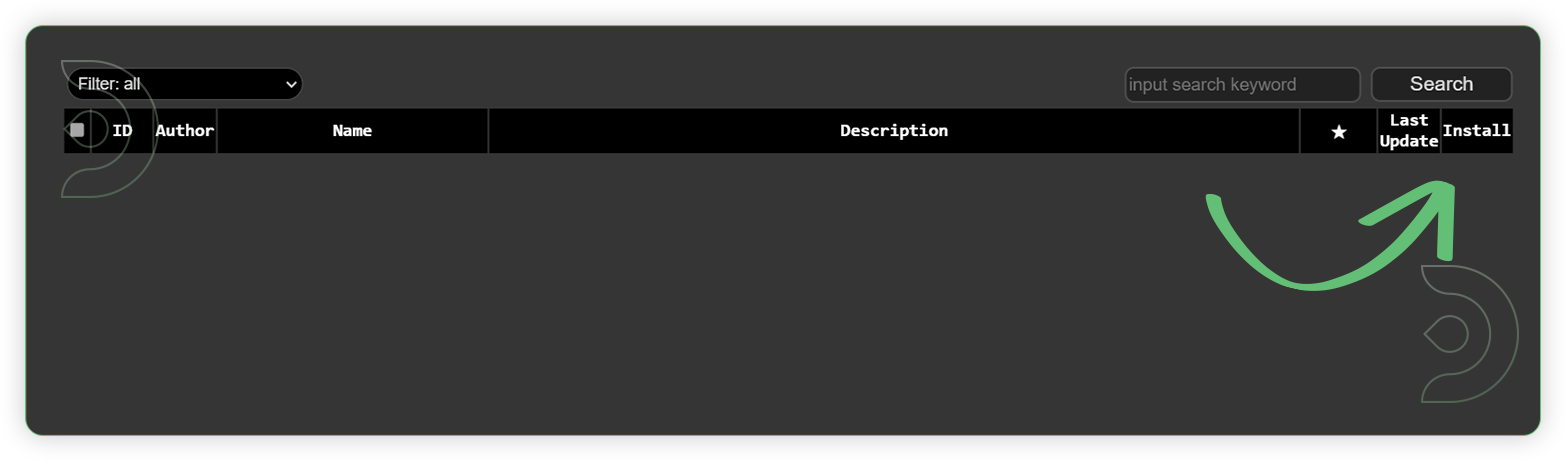
- Go to ComfyUI Manager > Click Install Missing Custom Nodes
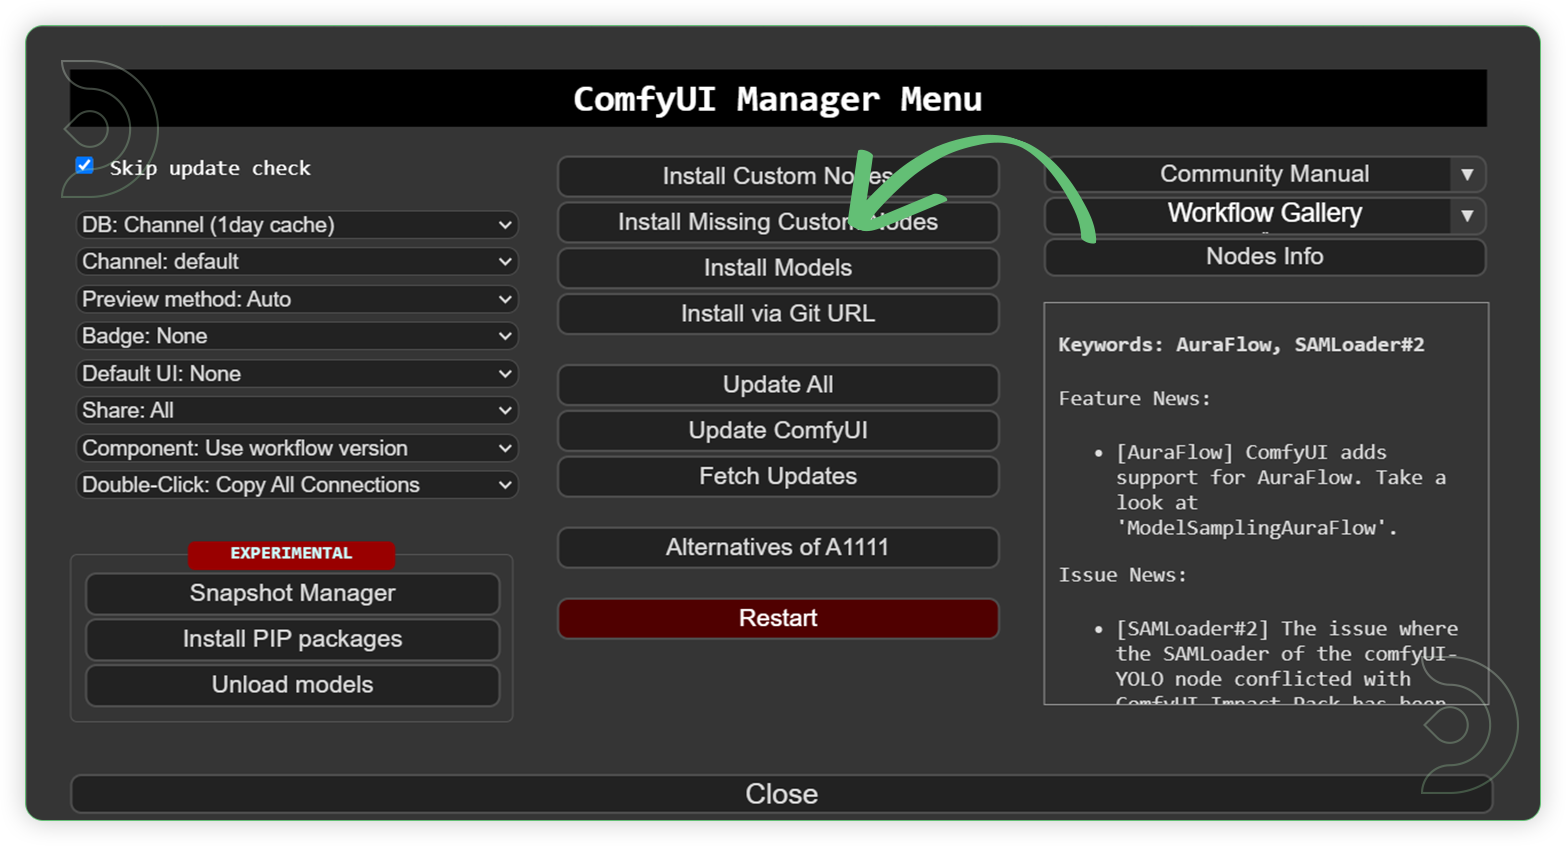
- Check the list below if there's a list of custom nodes that needs to be installed and click the install.
If you prefer the installation using the Git URL, these are the lists that are required for the workflow to work.
Models
Download these recommended models using the ComfyUI manager and refresh or restart the machine after uploading the files in your ThinkDiffusion My Files.
Some of the files are larger and above 2GB size, follow the instructions here UPLOAD HELP by using Google Drive method, then upload it to the ComfyUI machine using a Google Drive link. Restart the ComfyUI machine in order for the newly installed model to show up. Another method is copy link address of download button/icon from civitai or huggingface and paste into the Upload section of ThinkDiffusion My Files using the copied URL.
For ease of use, here is a google drive link to the HERE
Guide Table
Reminder
- Install models using the ComfyUI Manager > Install Models > Search your desired models. If not available in the ComfyUI Manager, you can search in HuggingFace or in Github and install using the steps above.
- You can use any realistic SD 1.5 base model if you don’t have the epictogasm_x.safetensors.
How to Use
Download the workflow below
Now that the hard work is out of the way, let's get creative and let's restore old photos. Follow the steps below:
| Steps | Description / Impact | Default / Recommended Values | Required Change |
|---|---|---|---|
| 1 - Load an Old Photo | The Load Image node is utilized for the purpose of loading an image. Images can be uploaded either by initiating the file dialog or by dragging and dropping an image onto the node. After the image has been uploaded, it can be chosen within the node. | 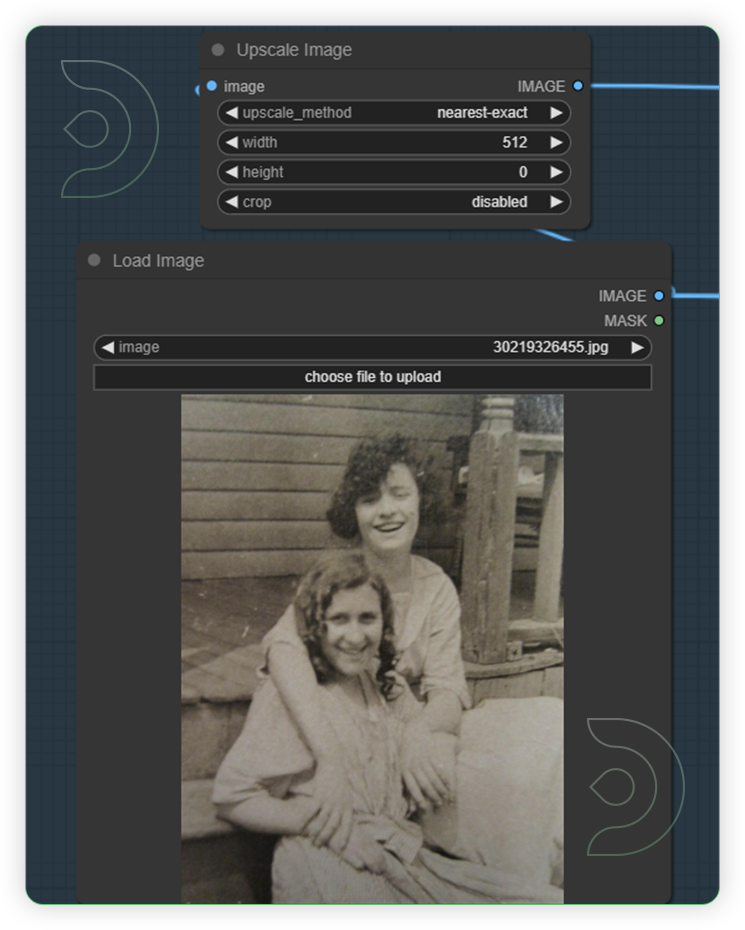 |
YES |
| 2 - Make sure your models are available. | If they are not installed, you will get an error during generation. | 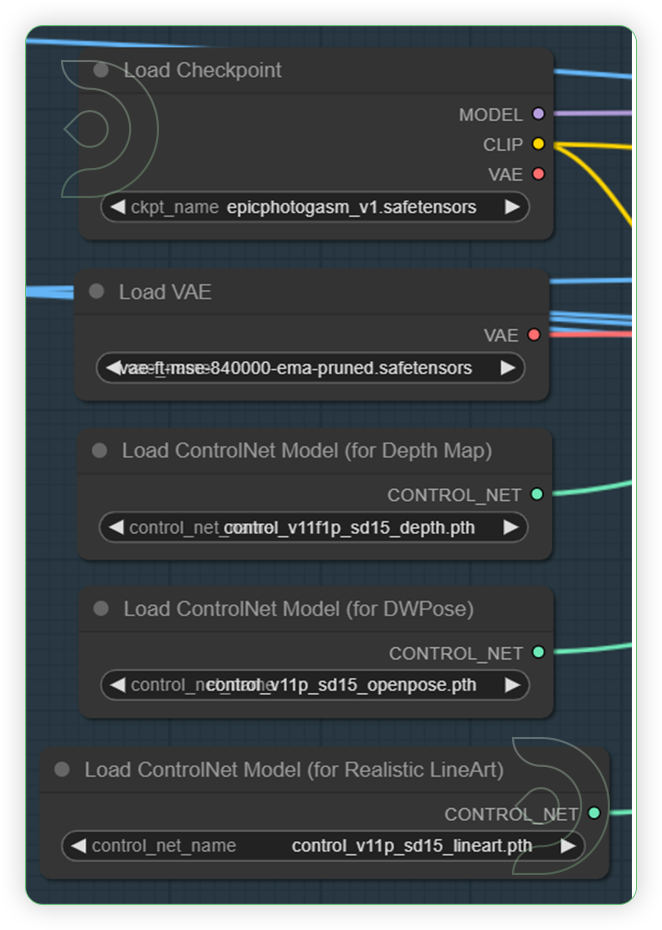 |
|
| 3 - Write a simple text prompt that describe the subject. | Describe your subjects in simple words, avoid long text descriptions and stick with keywords. | 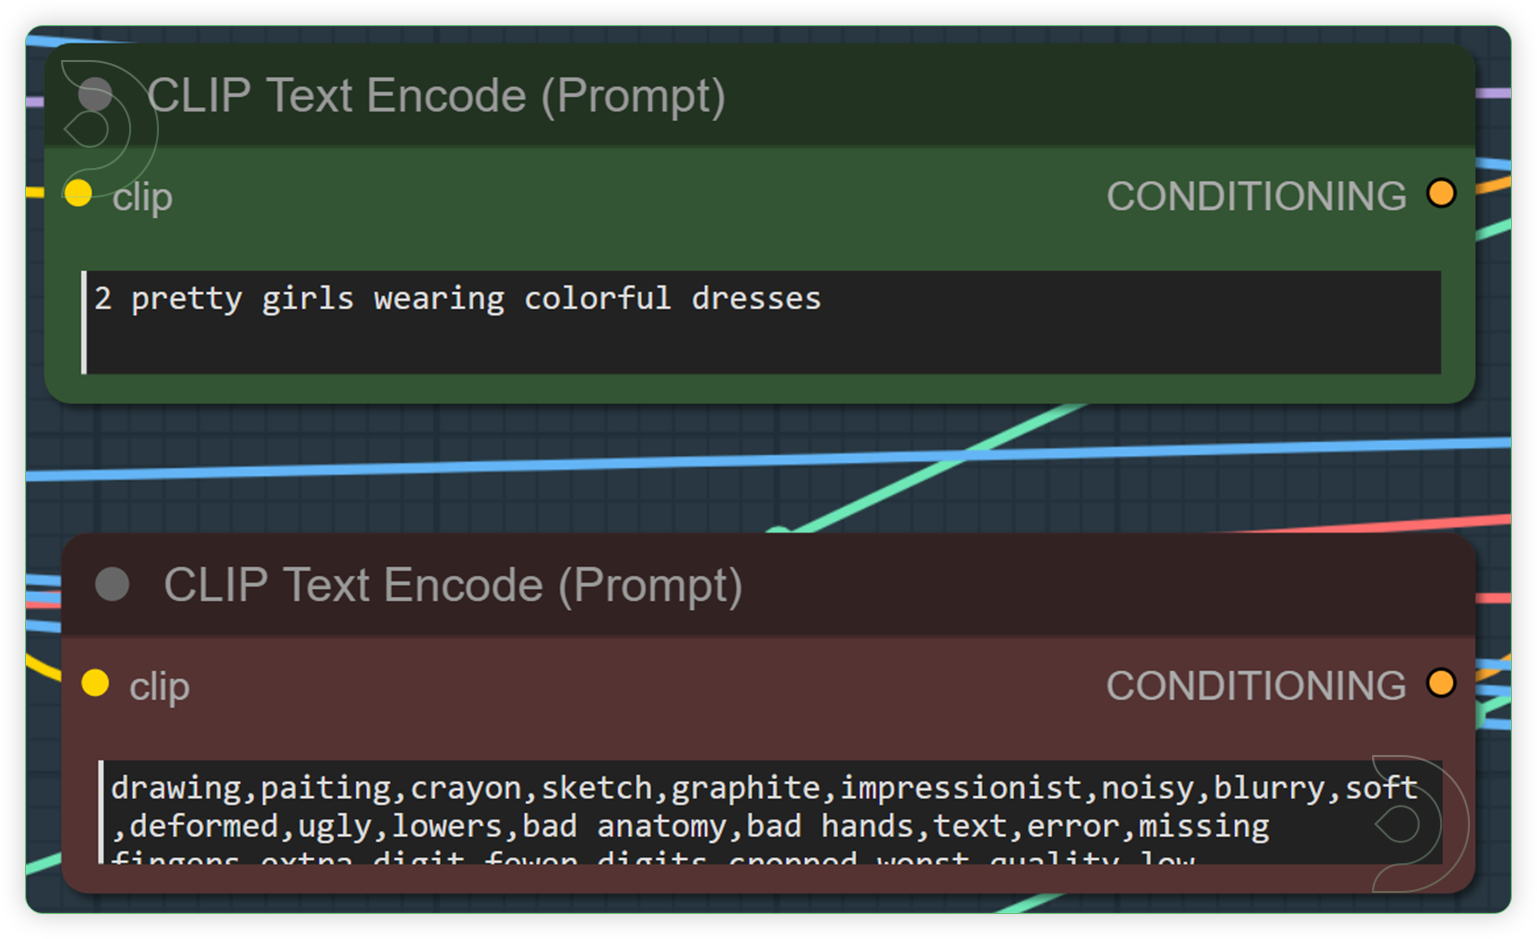 |
|
| 4 - Optional: Adjust ControlNet values if necessary. | ControlNet controls the output by looking at your input image. This controls your final result so that it looks similar to the input. You can adjust the values if the output is not your desired result. | 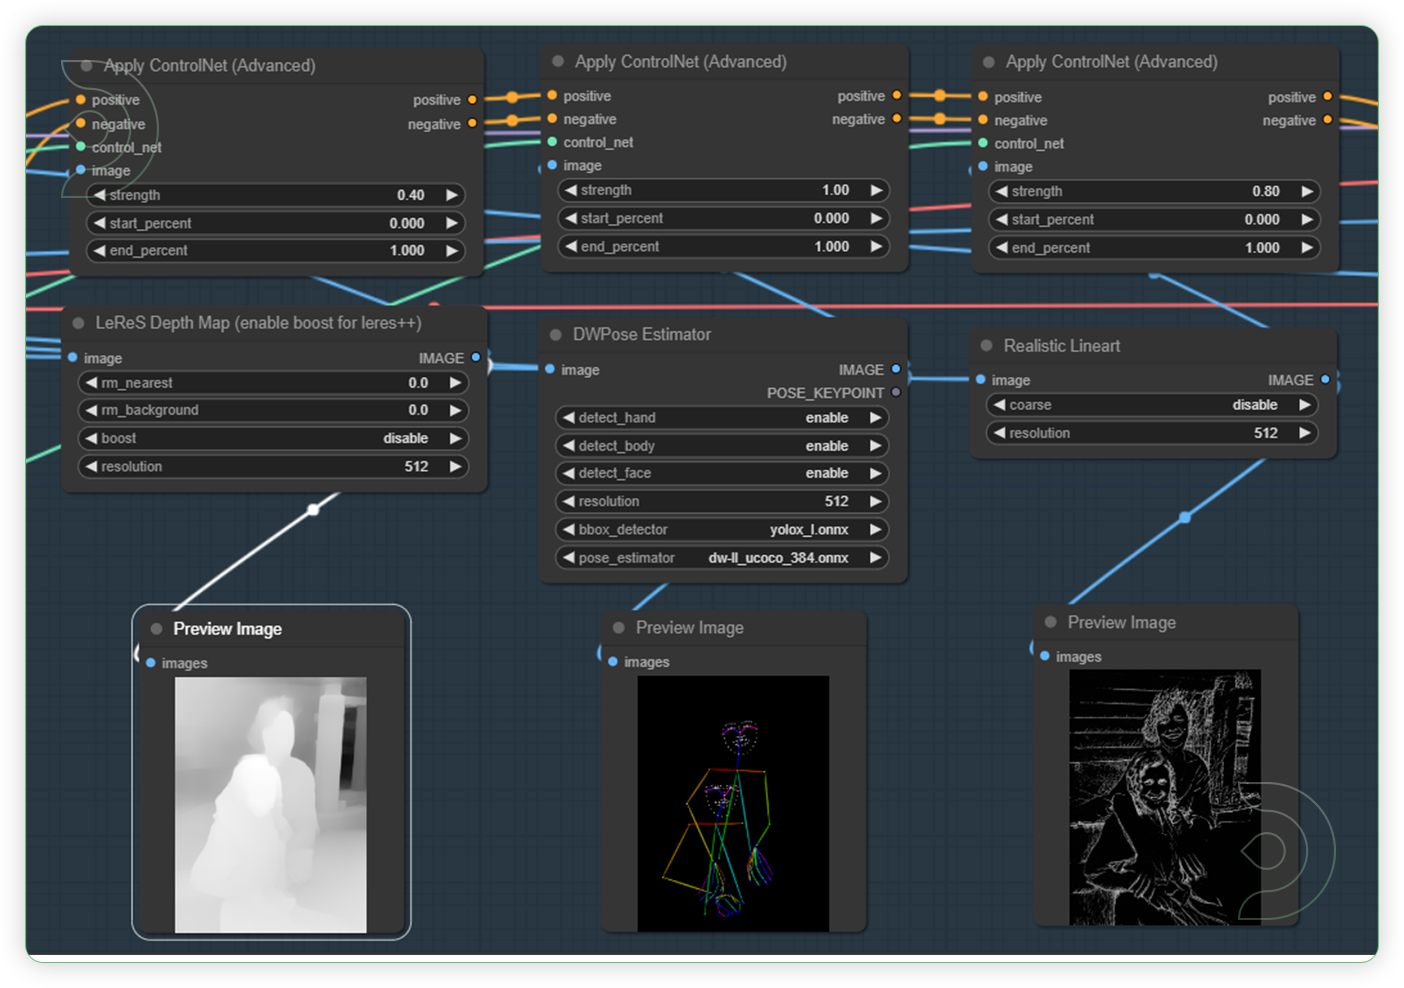 |
|
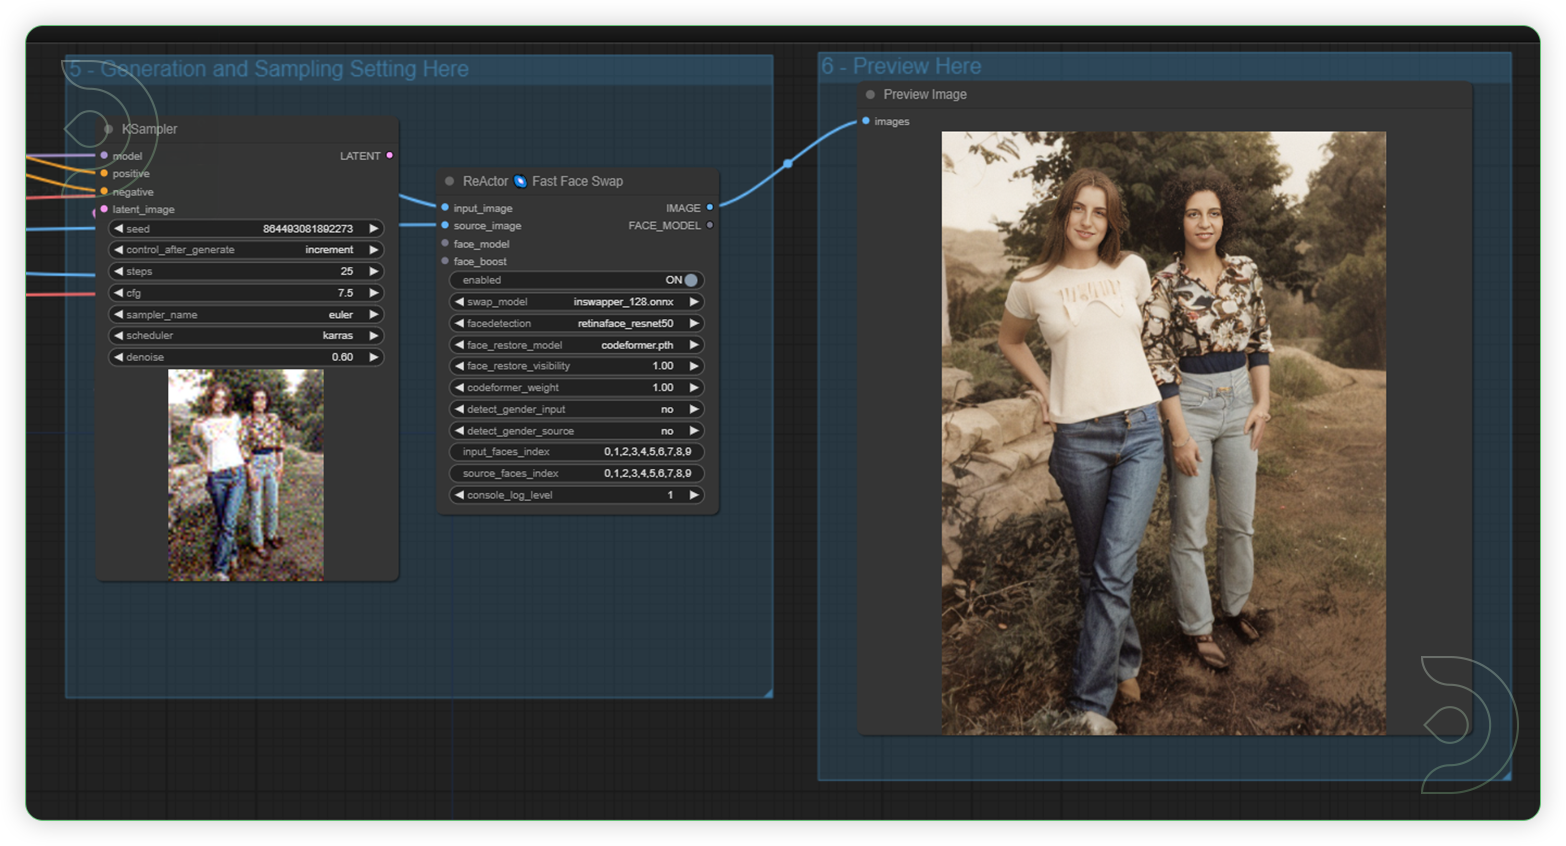
| 5 - Optional: Adjust Ksampler and ReActor values if necessary | The Ksampler generates your image. To increase the quality you can increase the number of steps. This also increases your generation time. Reactor is responsible for face swap or restoring face images. | 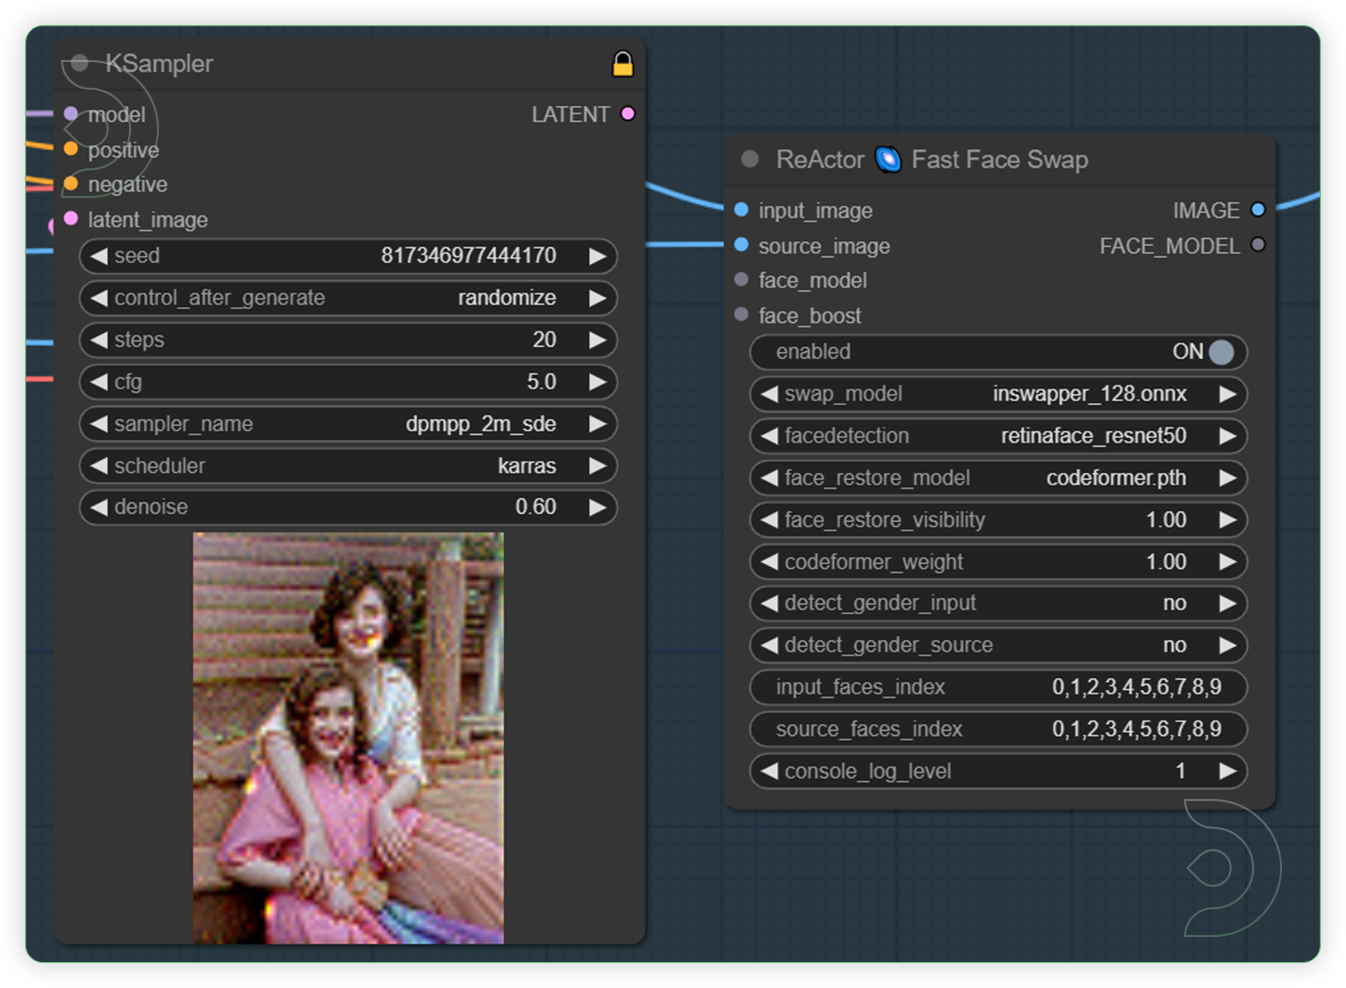 |
|
| 6 - Check the preview image. | To preview images within the node graph, you can use the Preview Image node. If you're not happy with your results, go back and adjust the values in the previous steps. | 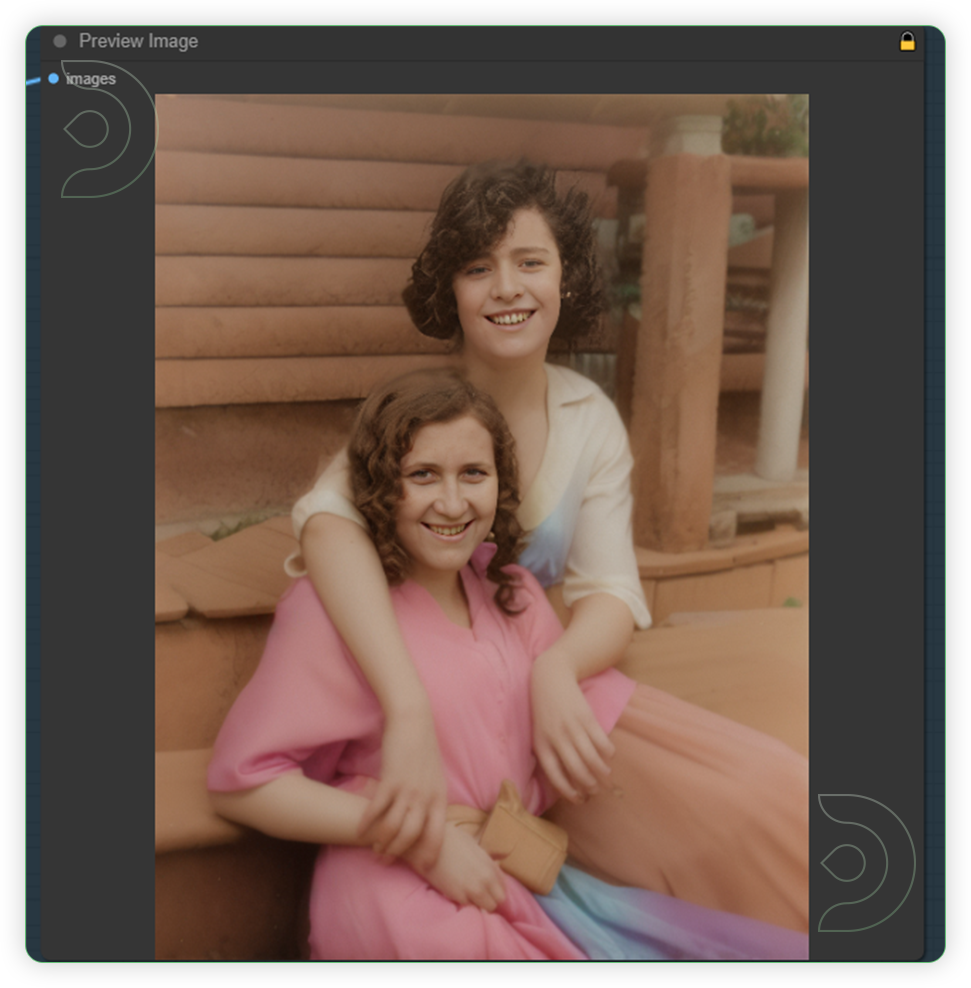 |
Tips
- Use input image with few people and facing front
- Doesn’t work with input images that have no people, landscape, nature, etc because the controlnet is designed for human photos.
- Preview images in controlnet if detects the right person. Otherwise, re-prompt or change in input image.
The Examples
Check the examples HERE
| Settings | Old Photo | Restored Photo |
|---|---|---|
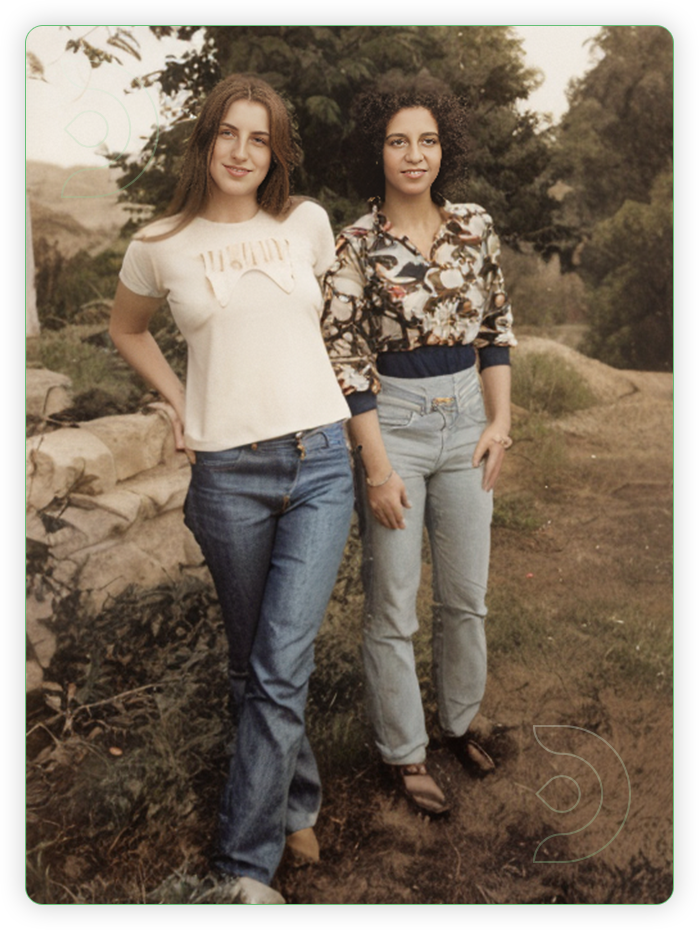
| Text prompt - 2 woman wearing jeans, seed randomized, epicphotogasm_v1.safetensors, steps 25, cfg 7.5, euler, karras | 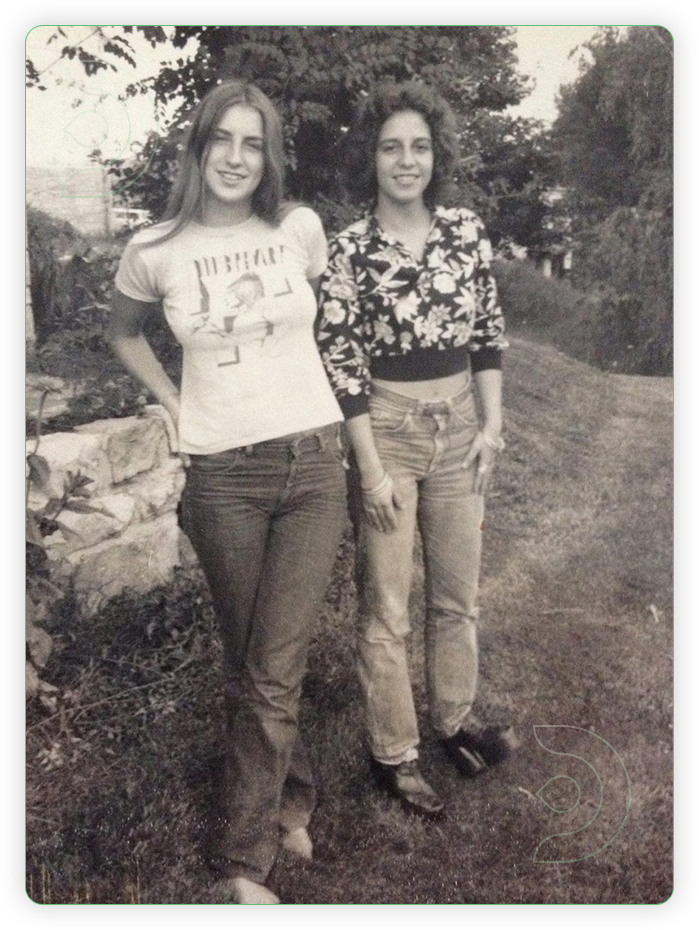 |
 |
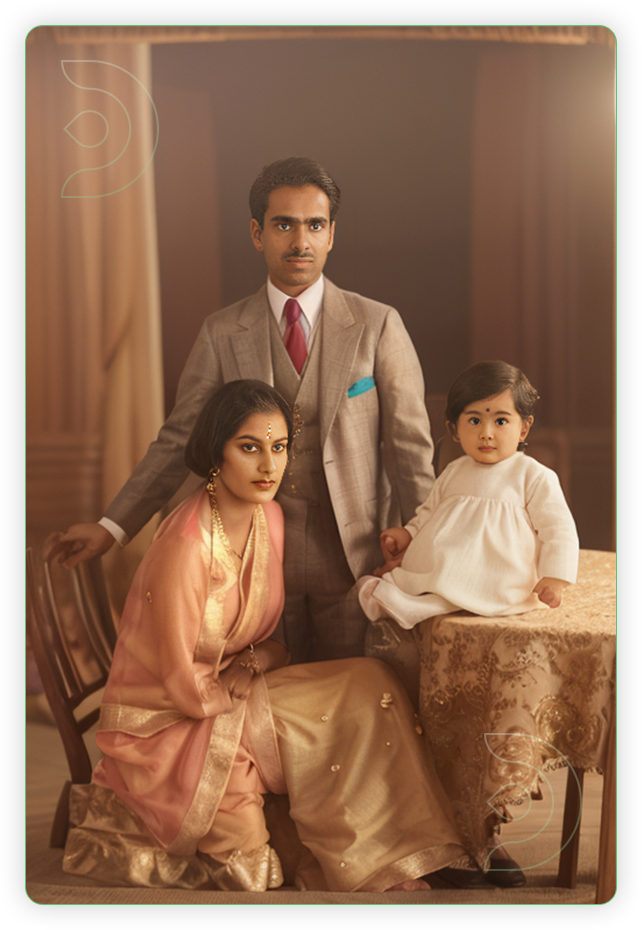
| Text prompt - indian family father wearing suit mother wearing dress baby wearing dress, seed randomized, epicphotogasm_x.safetensors, steps 20, cfg 5, dmpp_2d_sde, karras | 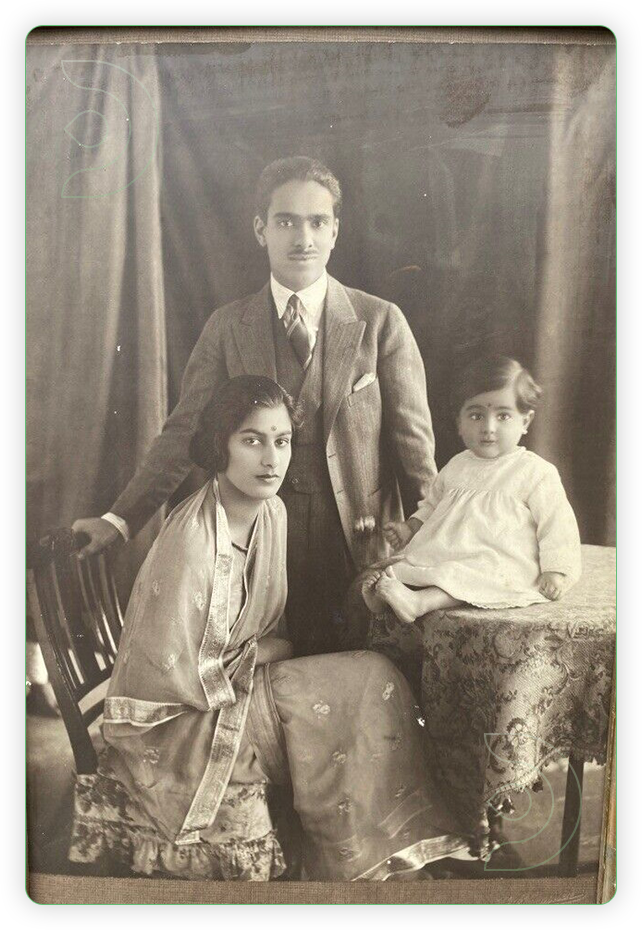 |
 |
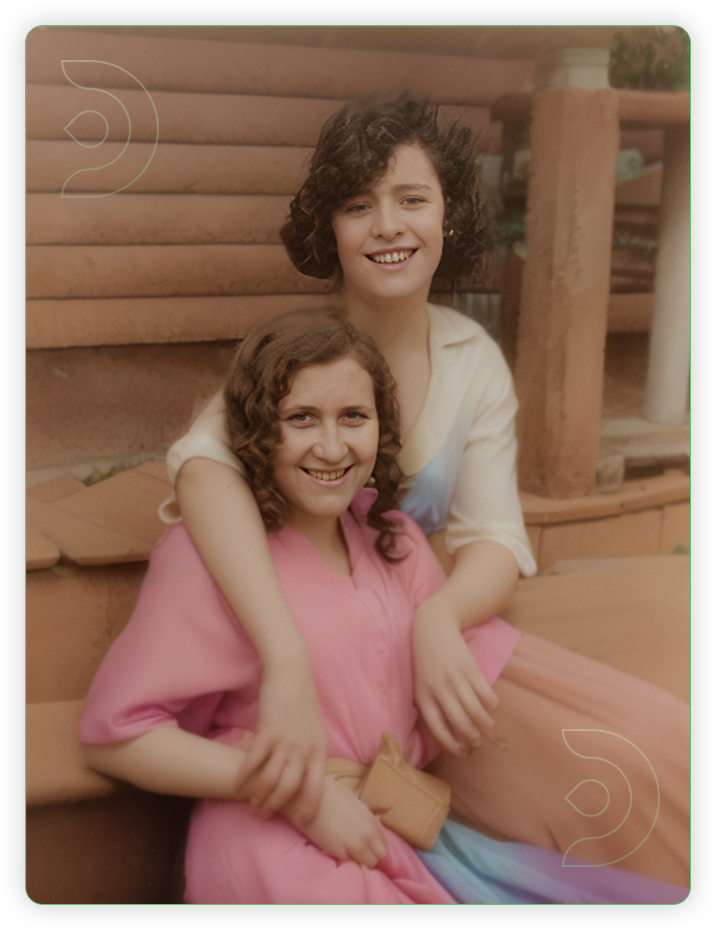
| Text prompt - 2 girls wearing colorful dresses, seed randomized, epicphotogasm_v1.safetensors, steps 20, cfg 5, dmpp_2d_sde, karras |  |
 |
Frequently Asked Questions
- What is old photo restoration?
This method involves altering the image's sharpness or contrast and removing undesirable color casts in order to restore the contrast range and detail that were believed to be there in the original physical image. Digital or AI-powered editing returns them to their original appearance.
- What is ComfyUI?
When it comes to web-based Stable Diffusion interfaces, ComfyUI is first and foremost about workflow customization. This framework is built to improve the user experience and productivity when dealing with Stable Diffusion, a strong AI text-to-image generation model. It is easier to create and change picture generation tasks with the platform's graph/nodes interface.
If you’re having issues with installation or slow hardware, you can try any of these workflows on a more powerful GPU in your browser with ThinkDiffusion.
If you enjoy ComfyUI and you want to test out creating awesome animations, then feel free to check out this AnimateDiff tutorial here. Happy memory creating!
Member discussion