
The user interface in Kohya has recently undergone some big changes and previous guides are now now deprecated. Therefore, we will be running through a new user guide on how to create LoRA's with the new user interface.
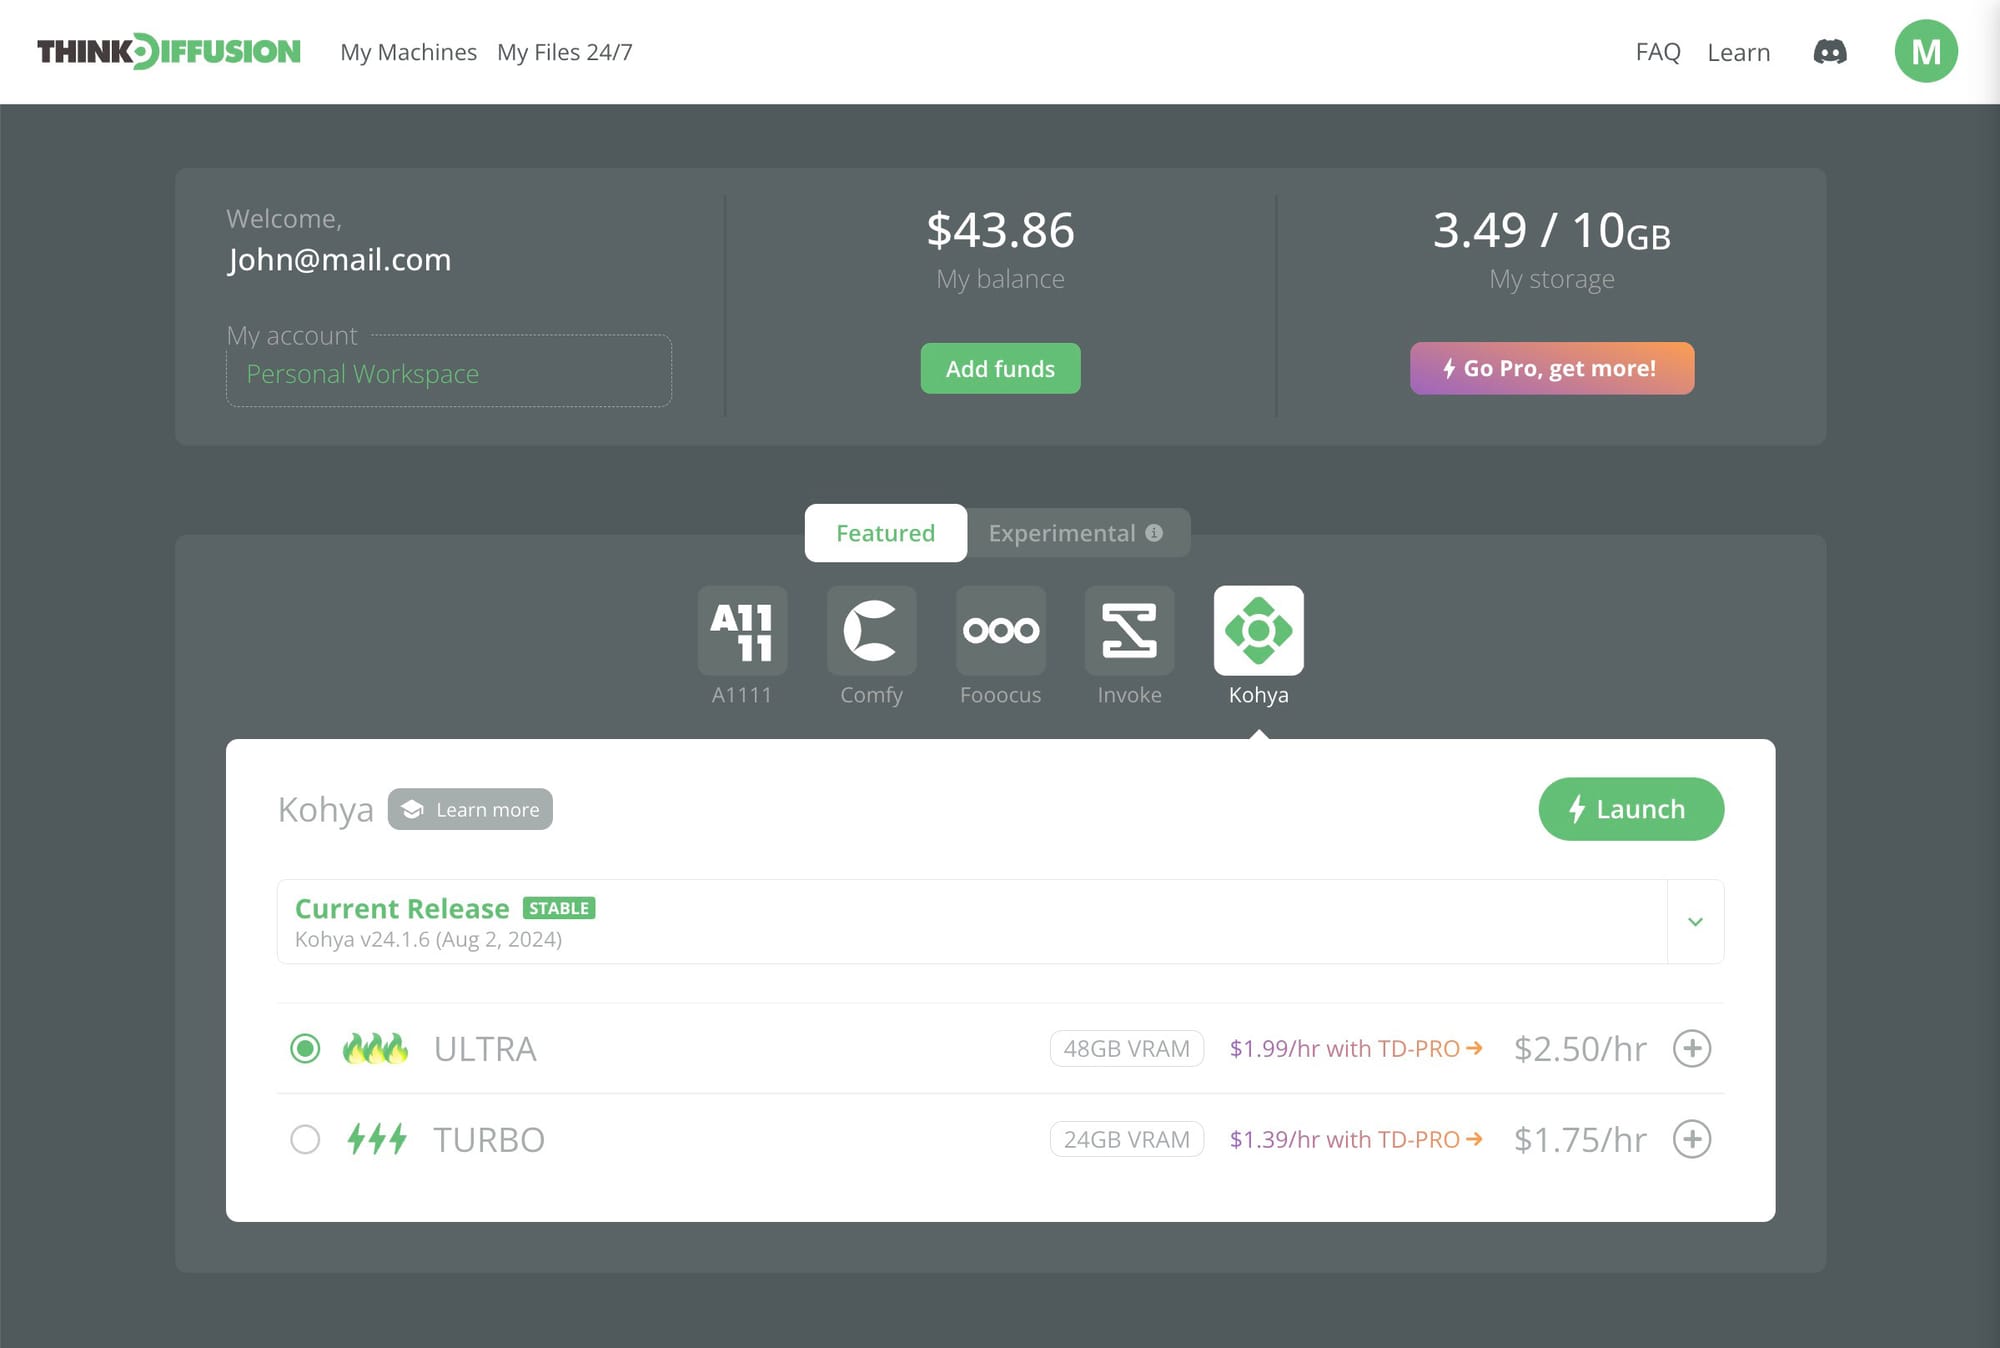
This workflow works on Think Diffusion Turbo and Ultra machines so to start, you will need to launch one of those machines.
This guide can also be applied to your local install as well!
Kohya workflow setup
- (1) Create a folder in the root Kohya directory called 'LORA_TRAIN'
Within, the newly created LORA_TRAIN folder we need to create the following three sub folders:-
- LORA_TRAIN/img
- LORA_TRAIN/log
- LORA_TRAIN/model
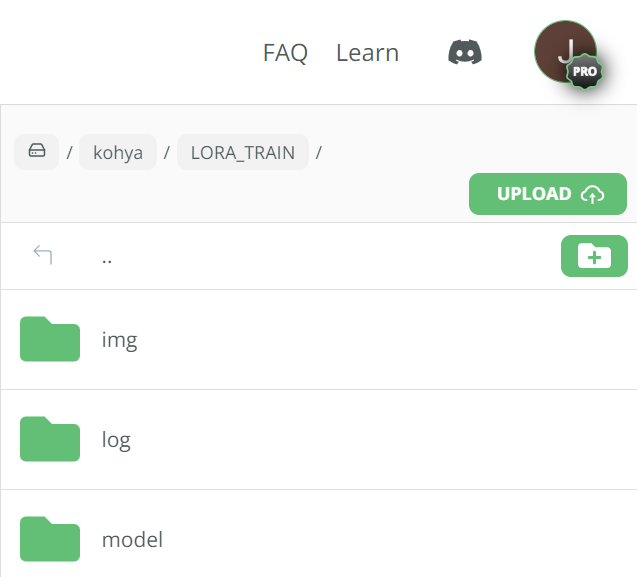
Image preparation
This is probably the most important part of LoRA training on Kohya. It can not be emphasised enough that the quality of your images and your captioning will dramatically affect the quality of your LoRA.
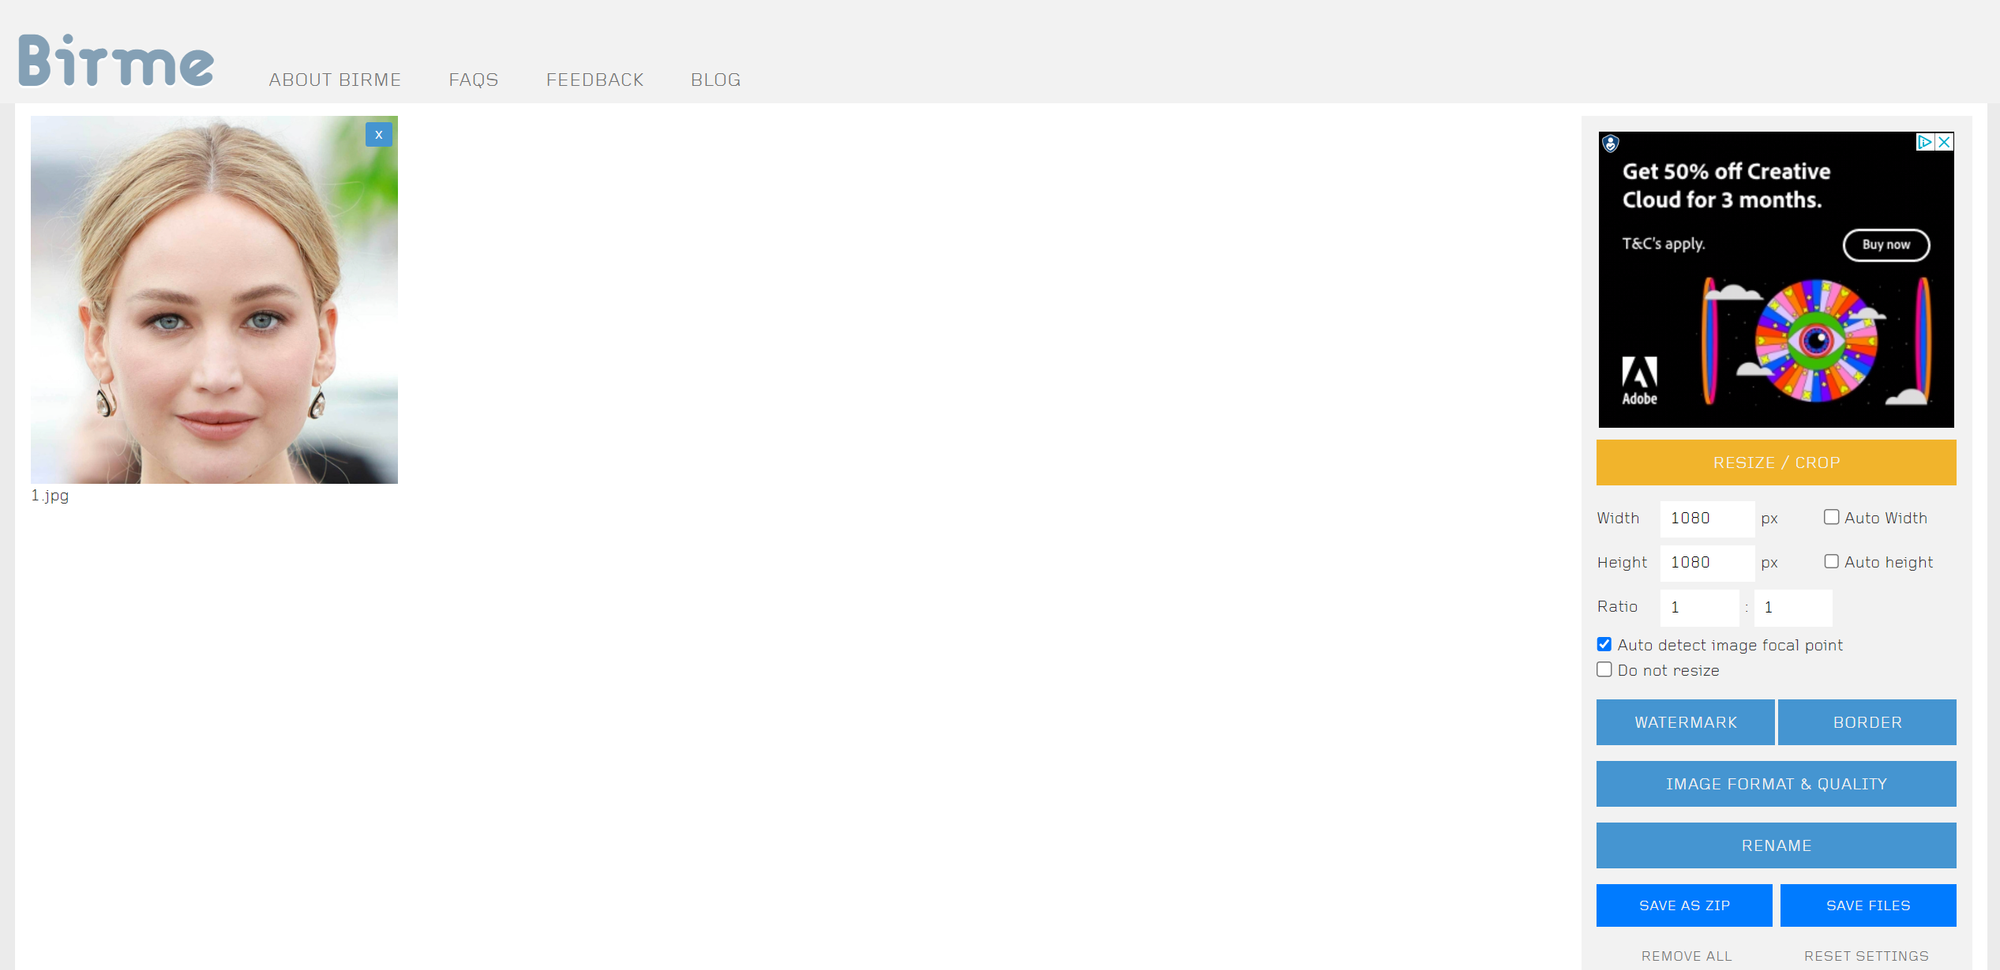
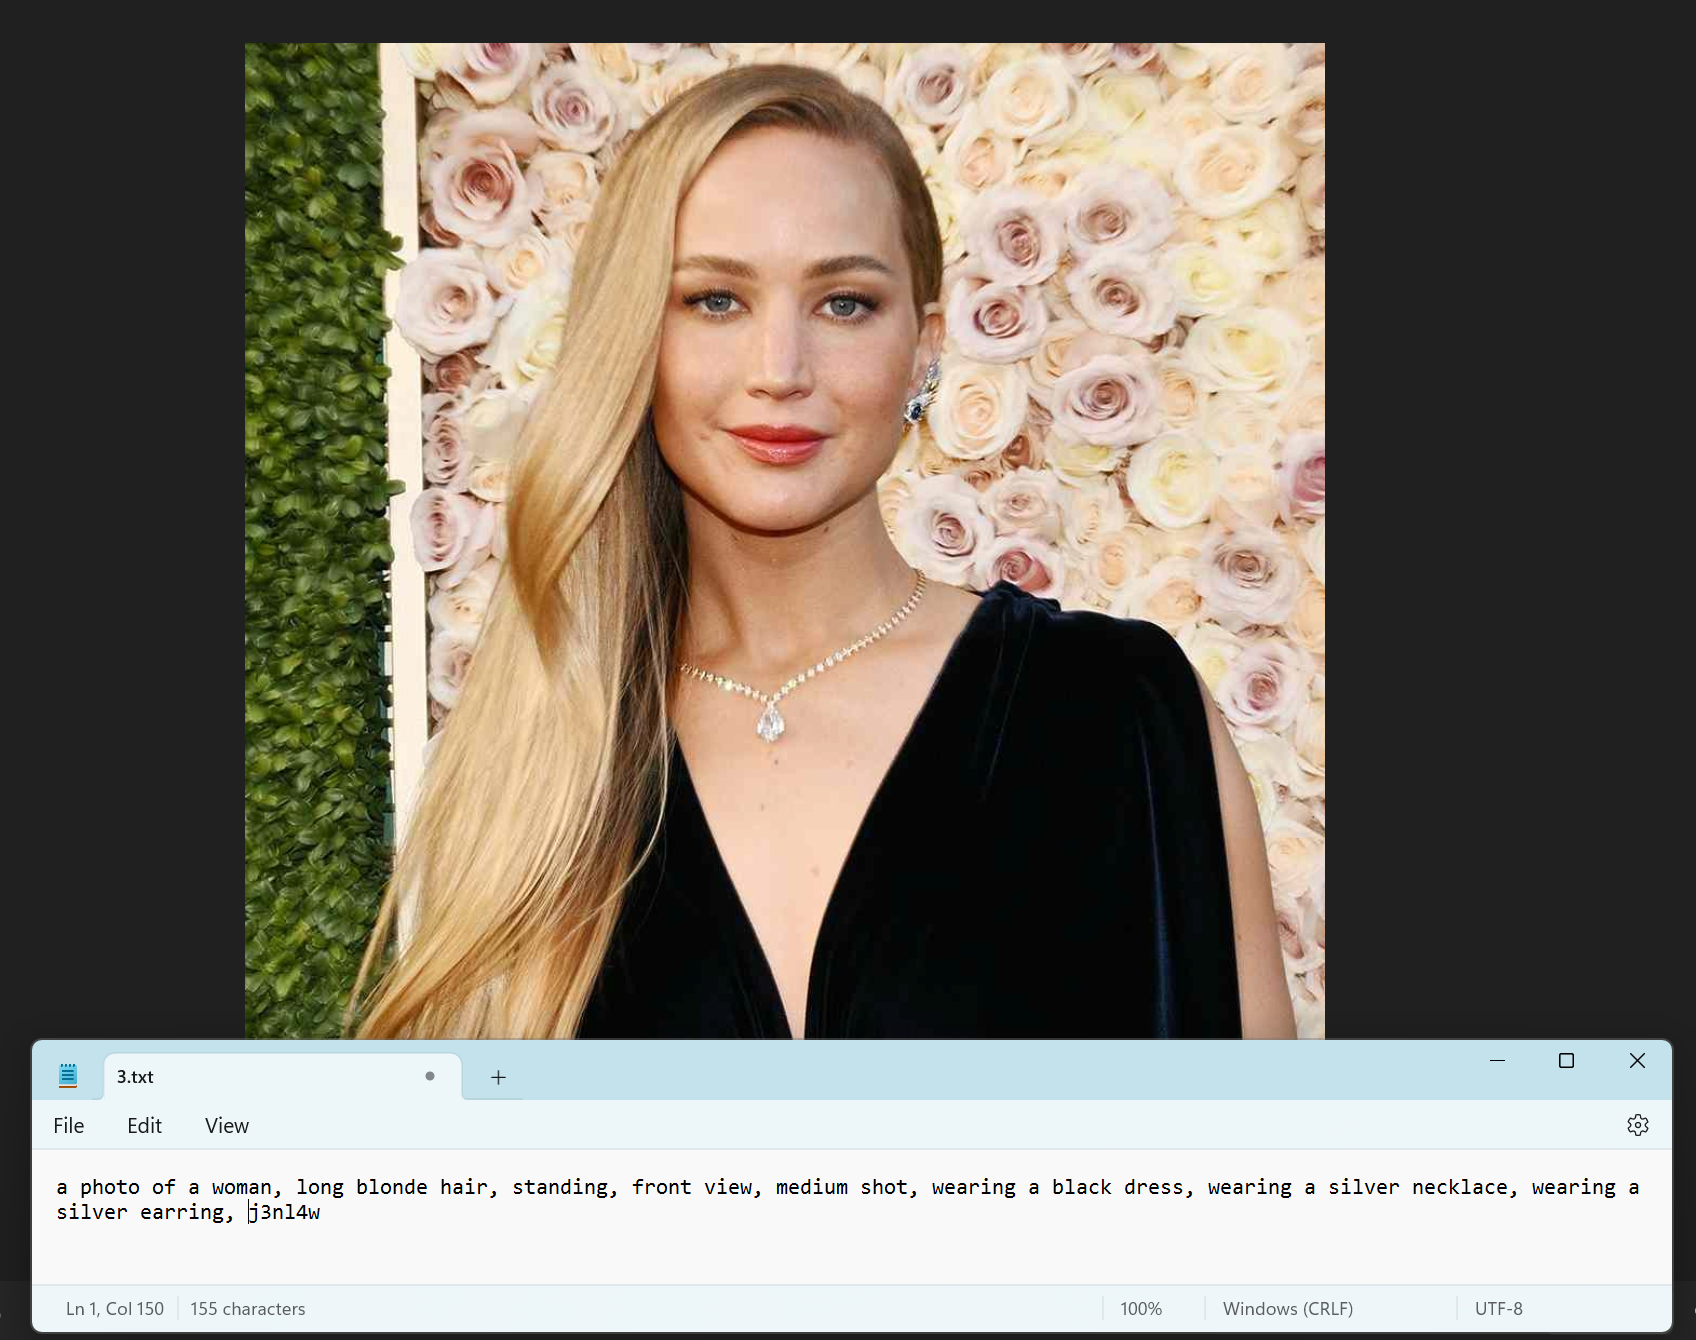
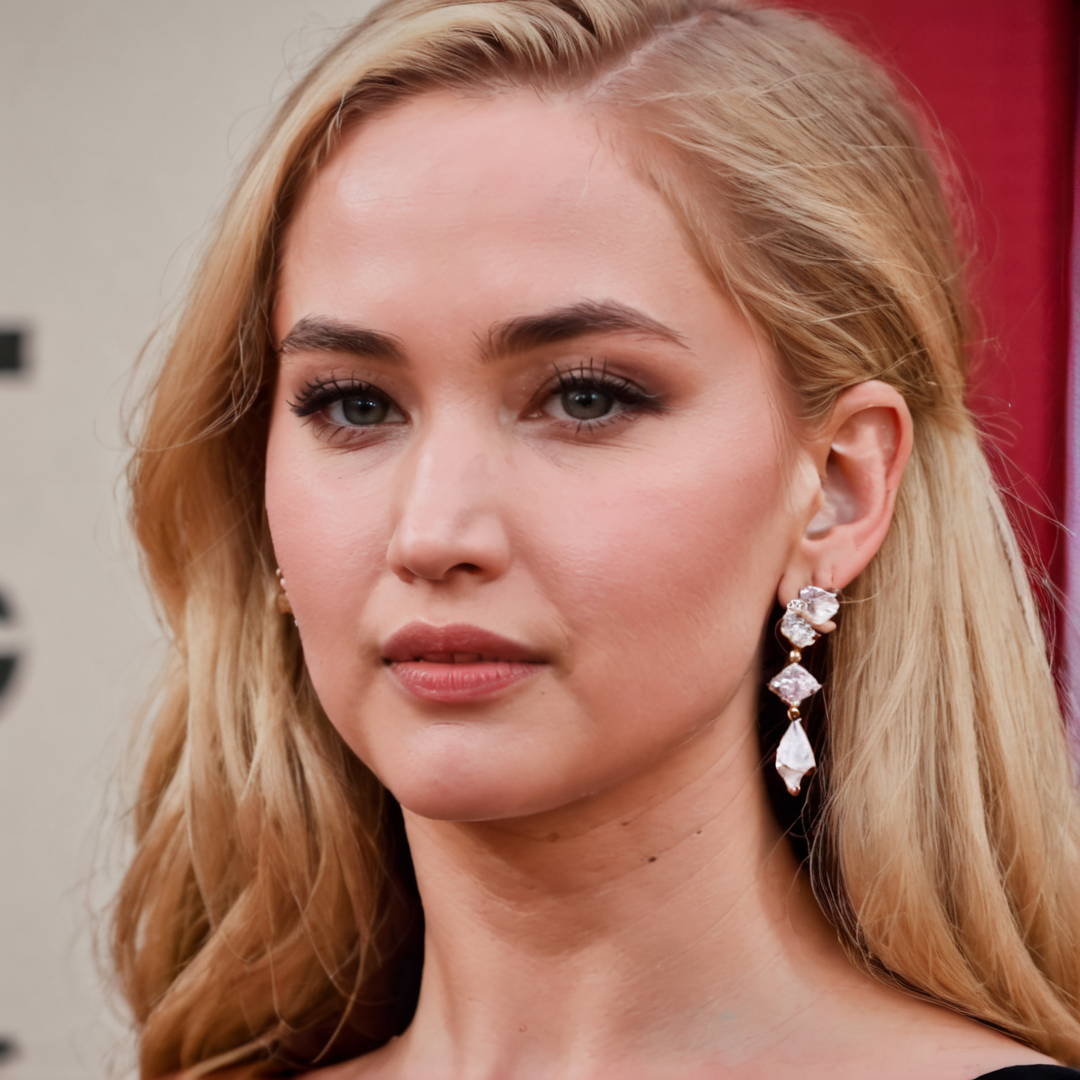
In this example I am going to train a LoRA on Jennifer Lawrence, the American actress. I will be training an SDXL LoRA so the first thing I did was gather 23 images of Jennifer Lawrence and manually cropped the images to 1080 x 1080. I use the following free software to crop the images https://www.birme.net/?target_width=1080&target_height=1080
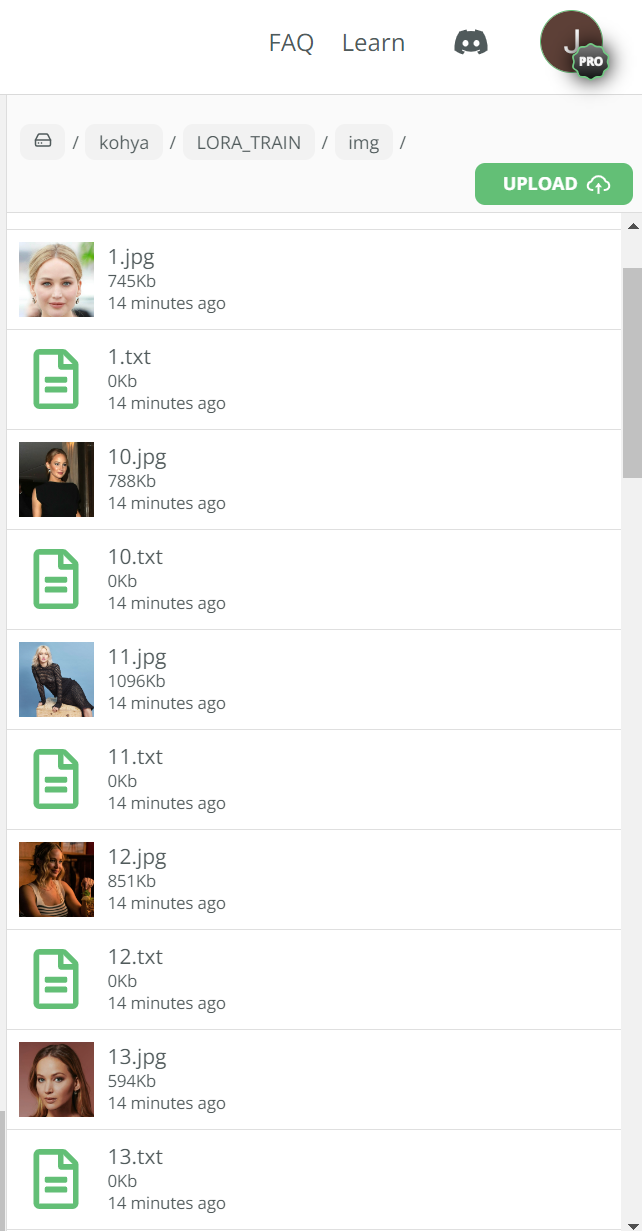
We now need to caption each image so we can tell Stable Diffusion what is represented in the image so that it can easily re-create it. There are tools available for this, to help automate the process but I find it lacks accuracy and hinders the quality of the final LoRA. Therefore, I tend to caption my images manually. To do this we simply need to open up our image (my images are simply numbered 1 through to 23) and create a corresponding .txt file with the same file name as can be shown below:-
Download the workflow
To follow along to this tutorial, download all the resources here:

Download Kohya workflow and safetensors

Download the starting images and text files for this LoRA training
Uploading your images and captioning files
We are now ready to upload our images and .txt files into Kohya. To do this we need to upload them into our newly created LORA_TRAIN/img folder.
Folder preparation
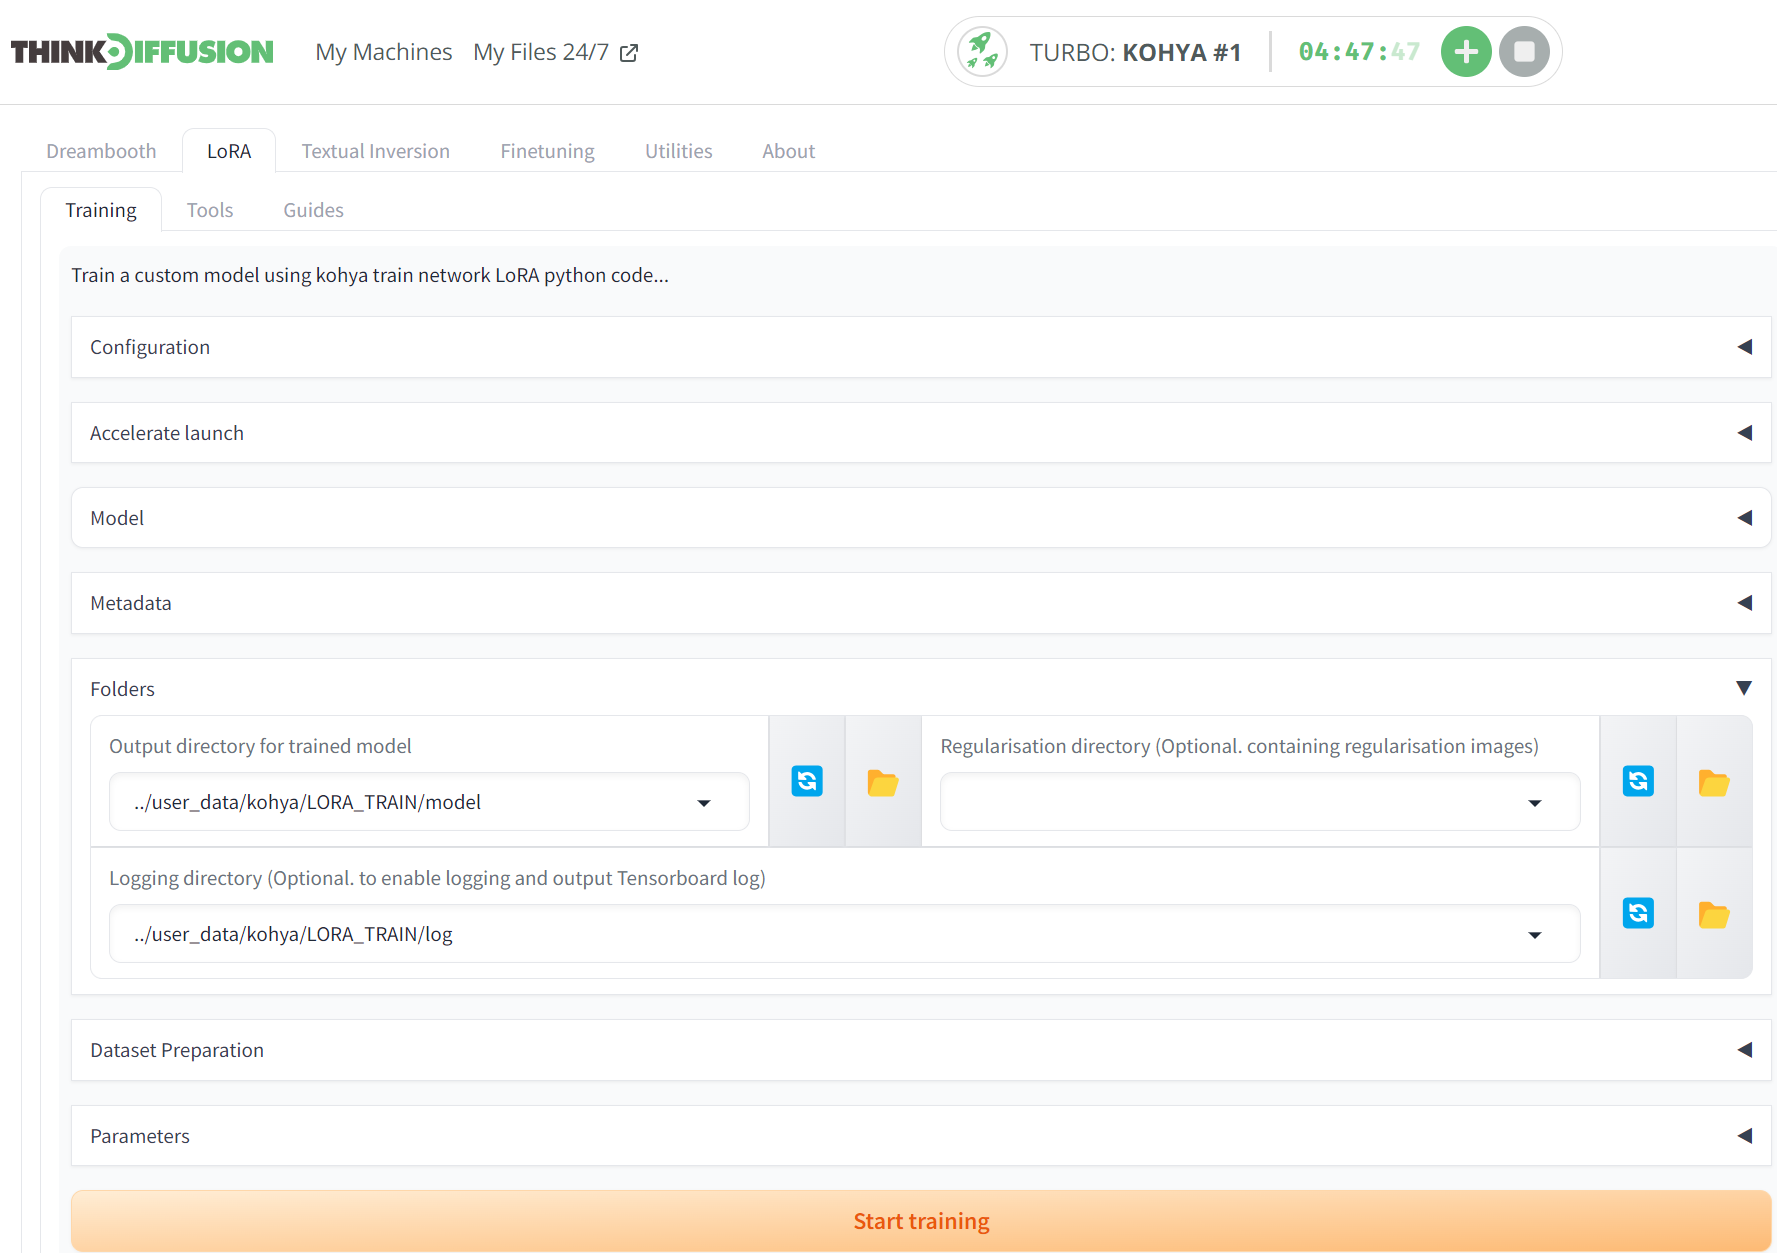
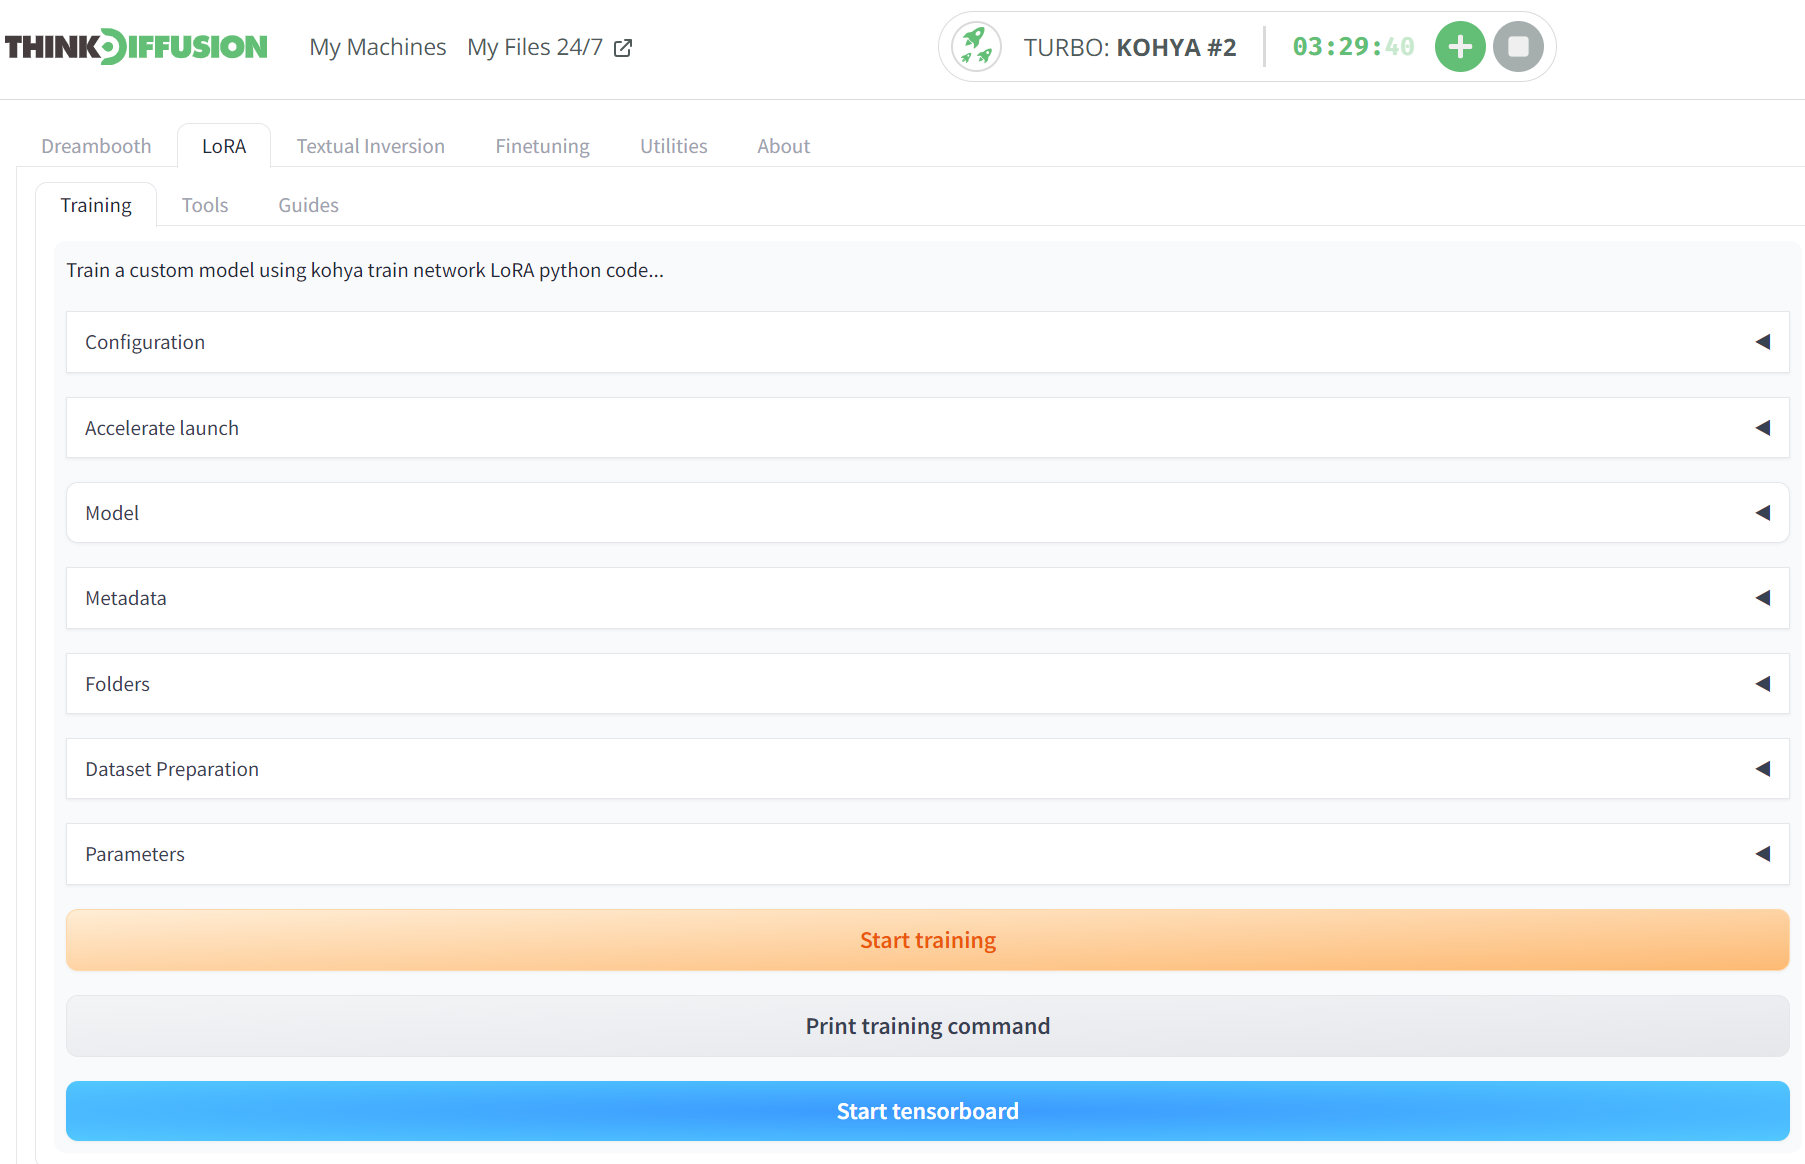
We can now start filling in the required fields in order for us to start our LoRA training. Firstly within the LoRA tab (Not the dreambooth tab!) and the Training sub tab, drop down the Folders option and for the Output directory for trained model field, enter ../user_data/kohya/LORA_TRAIN/model and for the Logging directory, enter ../user_data/kohya/LORA_TRAIN/log.
Dataset Preparation
Drop down the Dataset Preparation tab and we need to enter the following values:-
- (1) Instant prompt = 1woman
- (2) Class prompt = 1woman
- (3) Training images = ../user_data/kohya/LORA_TRAIN/img
- (4) Repeats = 5
- (5) Destination training = ../user_data/kohya/LORA_TRAIN/
- (6) Click prepare training data
- (7) Click Copy info to respective fields
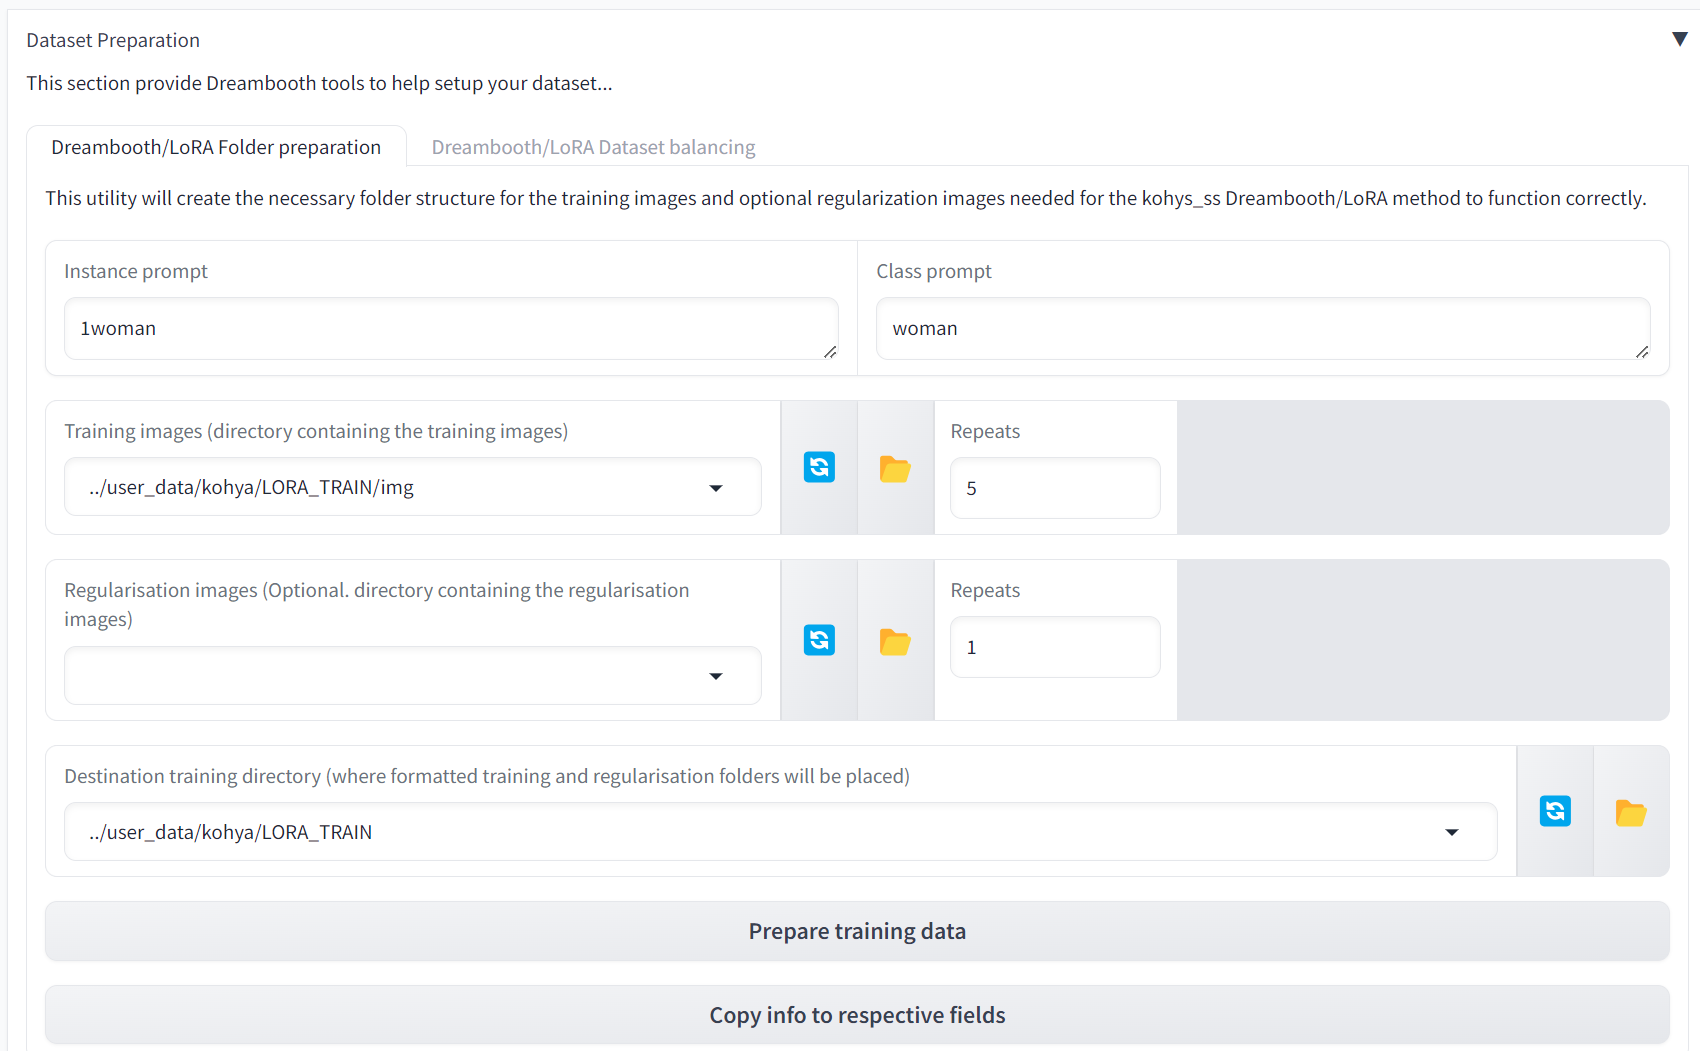
If you check in the LORA_TRAIN/img folder we should now see a new sub folder called 5_1woman woman. This essentially wraps the 5 repeats with your instance prompt of 1woman with the class prompt of woman

Accelerate launch
Drop down the Accelerate launch tab and we need to enter the following values:-
- (1) Mixed precision = fp16
- (2) Number of processes = 2
- (3) Number of CPU threads per core = 8

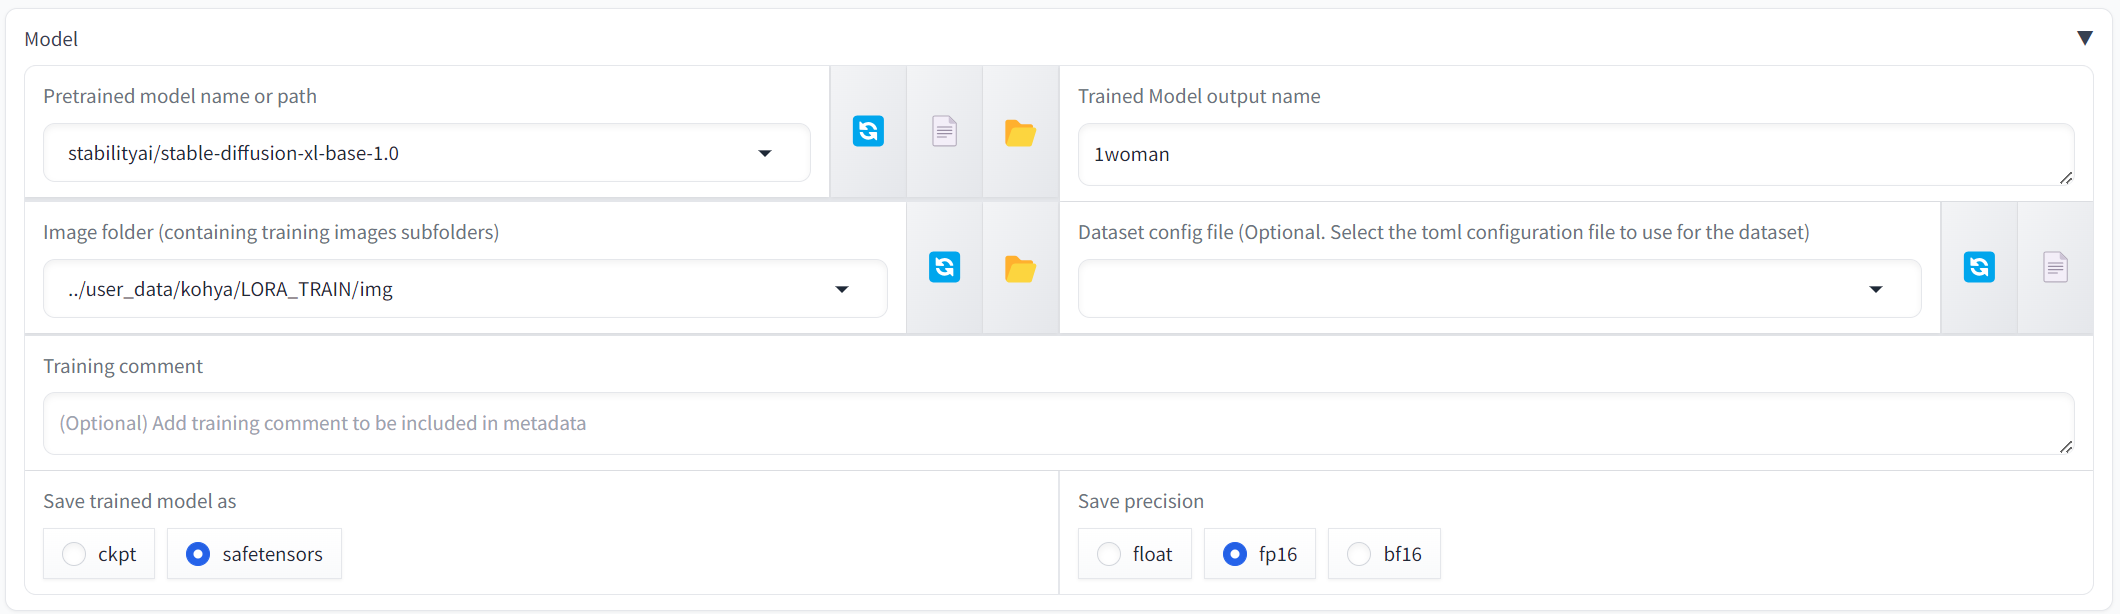
Model
Drop down the Model tab and we need to enter the following values
- (1) Pretrained model name = stabilityai/stable-diffusion-xl-base-1.0
- (2) Trained Model output name = 1woman
- (3) Image folder = ../user_data/kohya/LORA_TRAIN/img (Hopefully this will be pre-filled for you)
- (4) Save trained model as = safetensors
- (5) Save precision = fp16
- For the purposes of this tutorial I have used the SDXL base model but you are free to use any SDXL model that you want (You must upload your model if you want to use something different to the SDXL base model)
PROTIP💡: If you do decide to add your own model
Create a new folder called "models", upload it there, and copy the path just like you did above. There are several easy ways for uploading including:
- uploading from your computer,
- by link, or
- from a google drive.
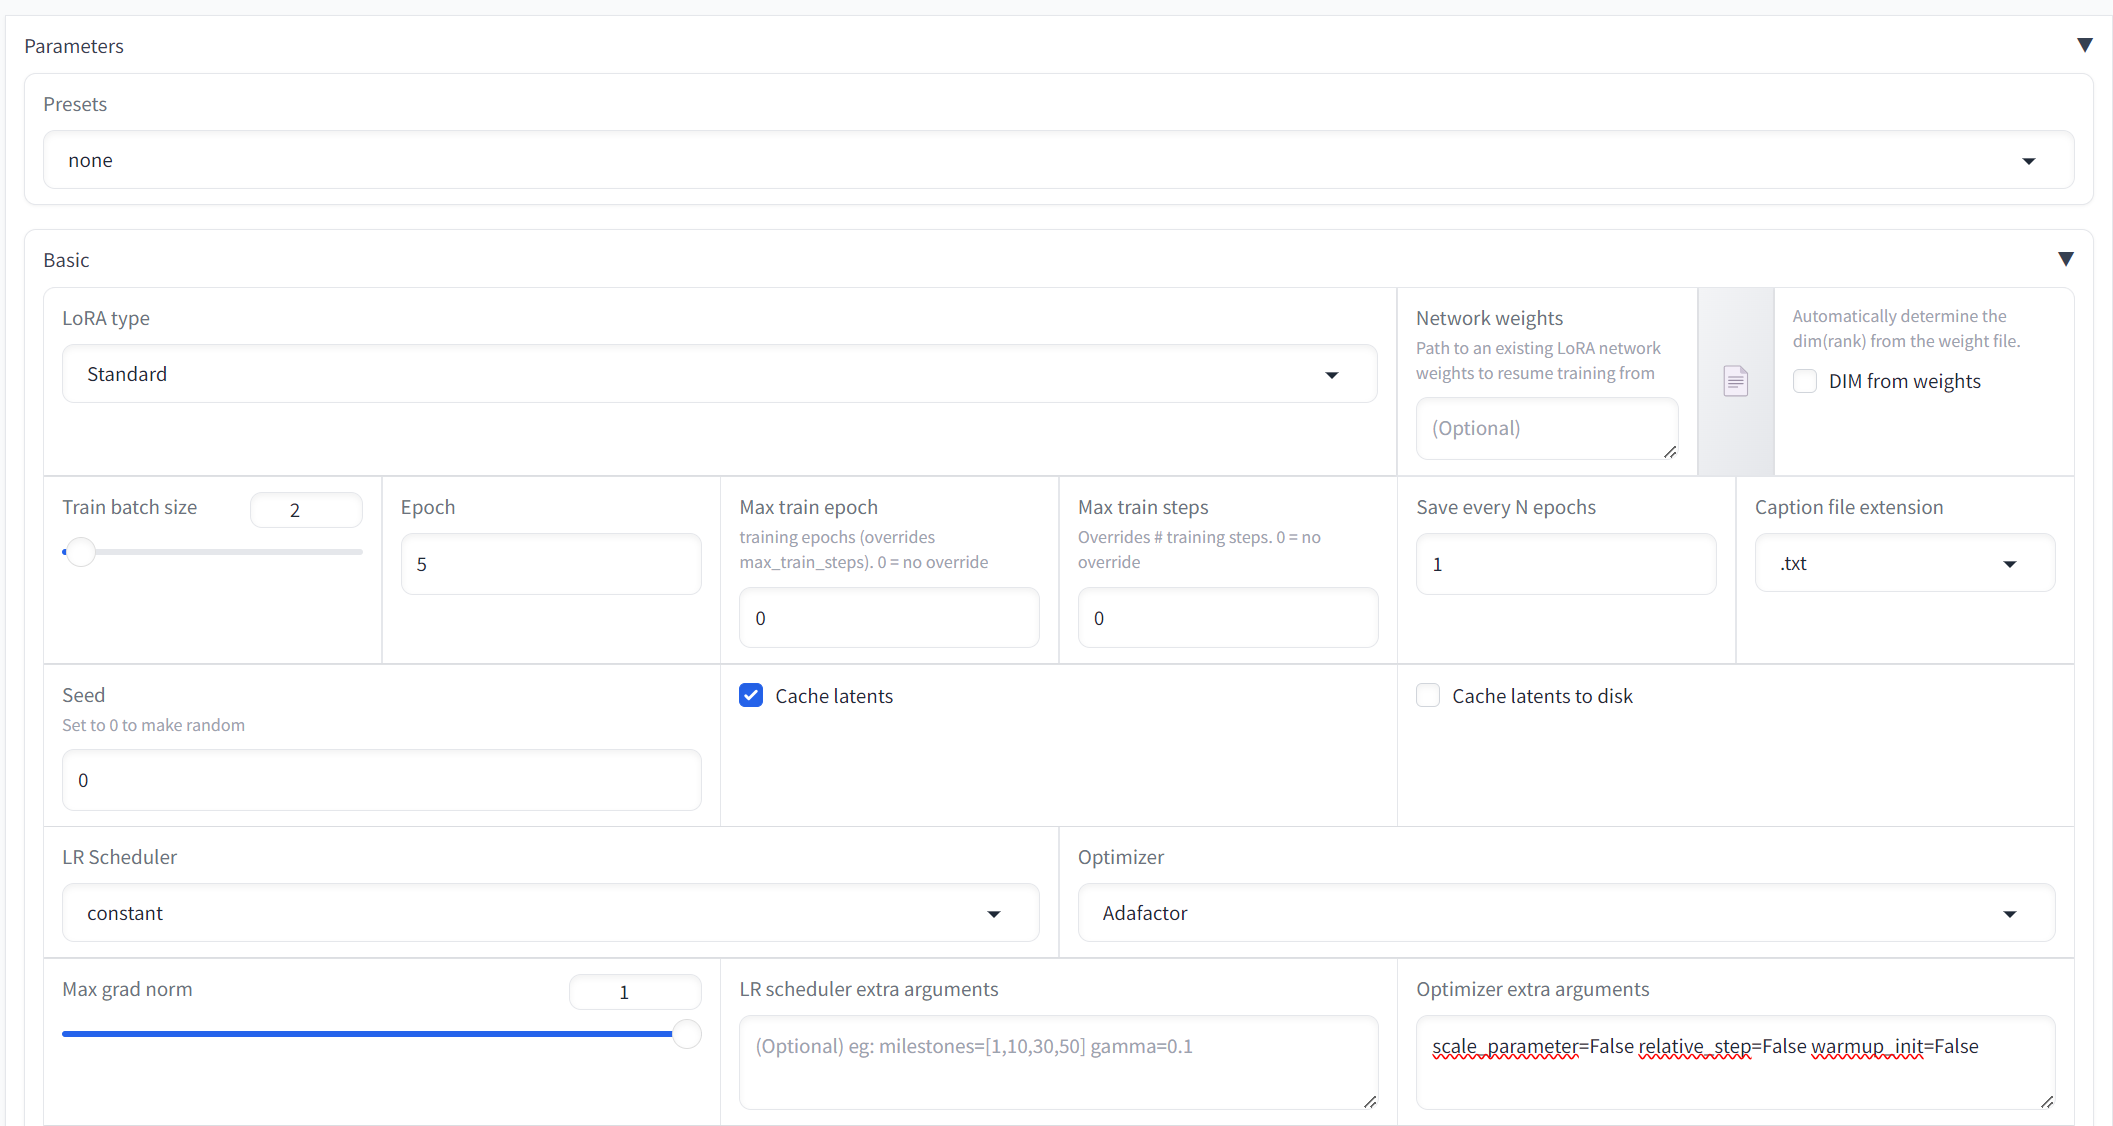
Parameters (Basic)
Drop down the Parameters tab and the Basic sub tab and we need to enter the following values:-
- (1) Presets = None
- (2) Lora Type = Standard
- (4) Train Batch Size = 2
- (5) Epoch = 5
- (6) Max train Epoch = 5
- (7) Max train steps = 0
- (8) Save every N epoch = 1
- (9) Caption file extension = .txt
- (10) Seed = 0
- (11) Cache latents = checked
- (12) Cache latents to disk = unchecked
- (13) LR Scheduler = constant
- (14) Optimizer = Adafactor
- (15) Optimizer extra arguments = scale_parameter=False relative_step=False warmup_init=False
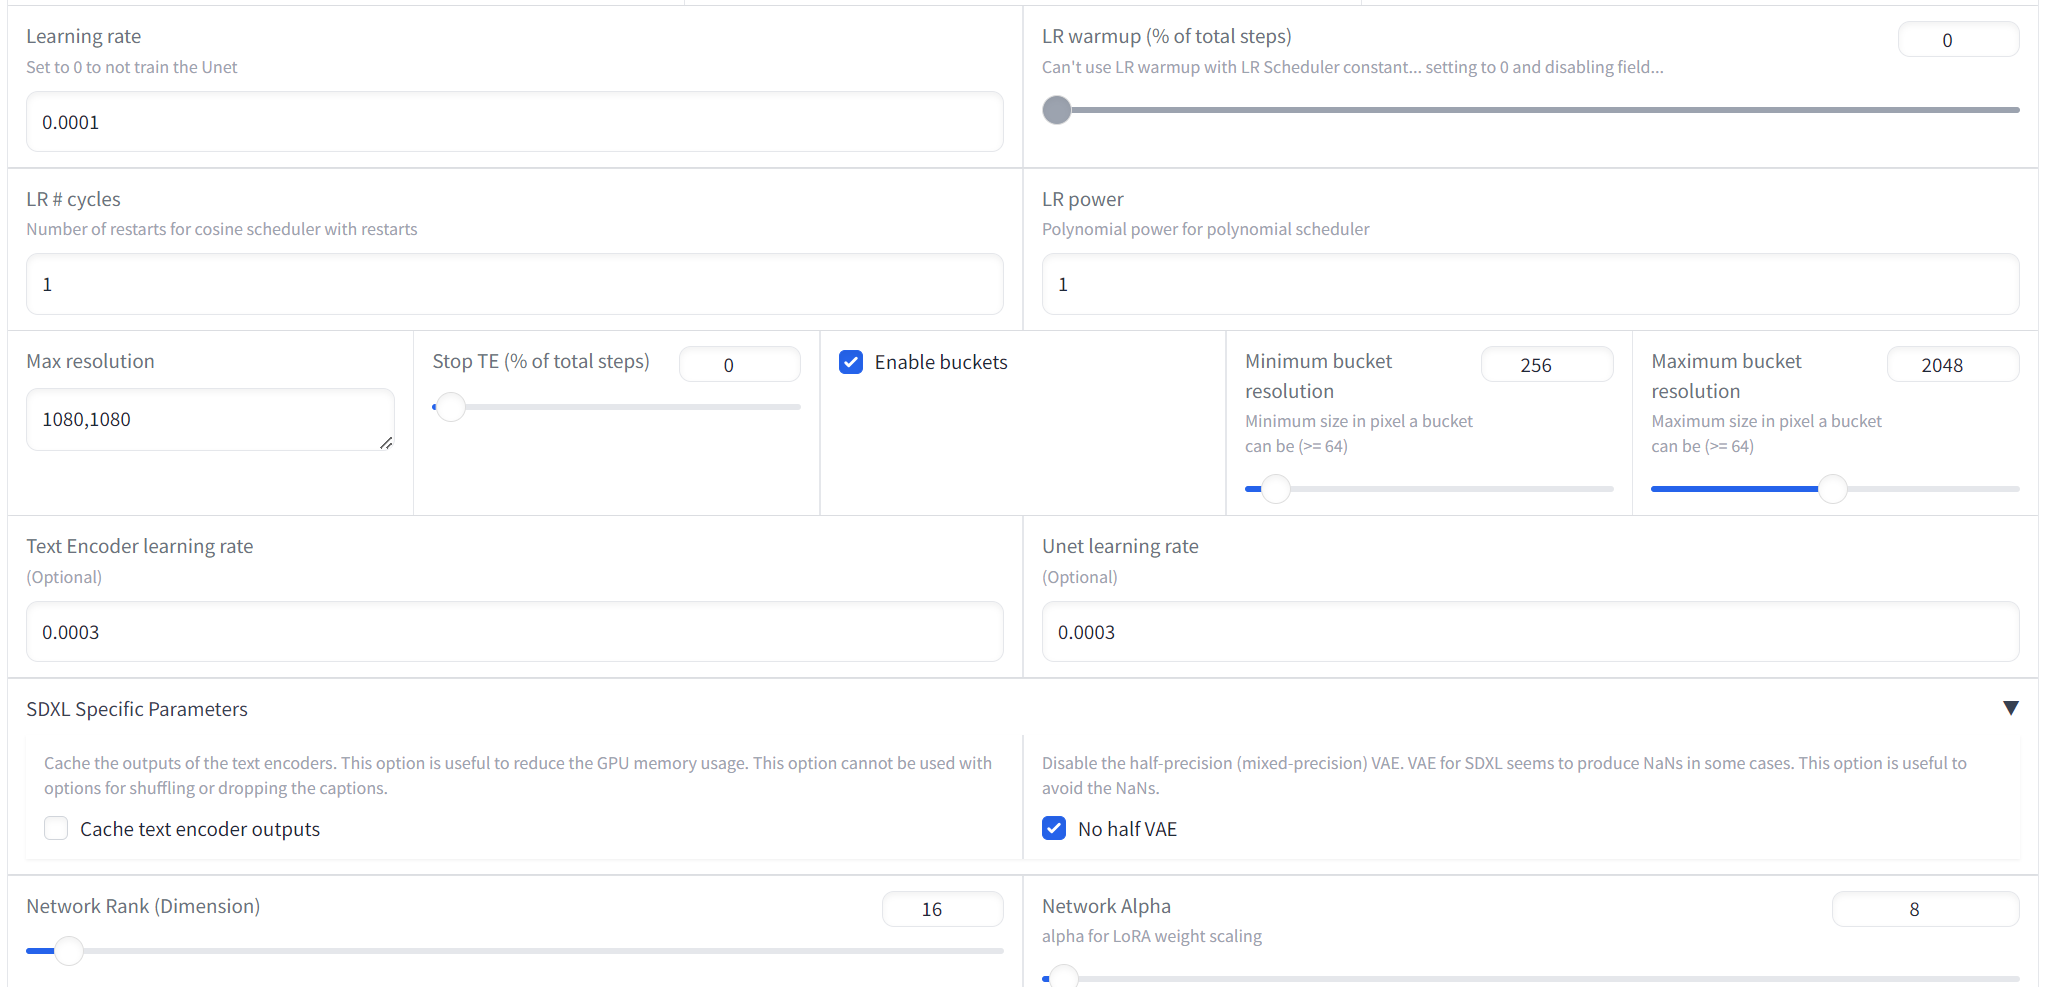
- (16) Learning rate = 0.0003
- (17) Max resolution = 1080,1080
- (18) Enable buckets = checked
- (19) Text Encoder learning rate = 0.0003
- (20) Unet learning rate = 0.0003
- (21) No Half VAE = checked
- (22) Network rank (Dimension) = 16
- (23) Network Alpha = 8 (This is typically set to 50% of the Network rank)
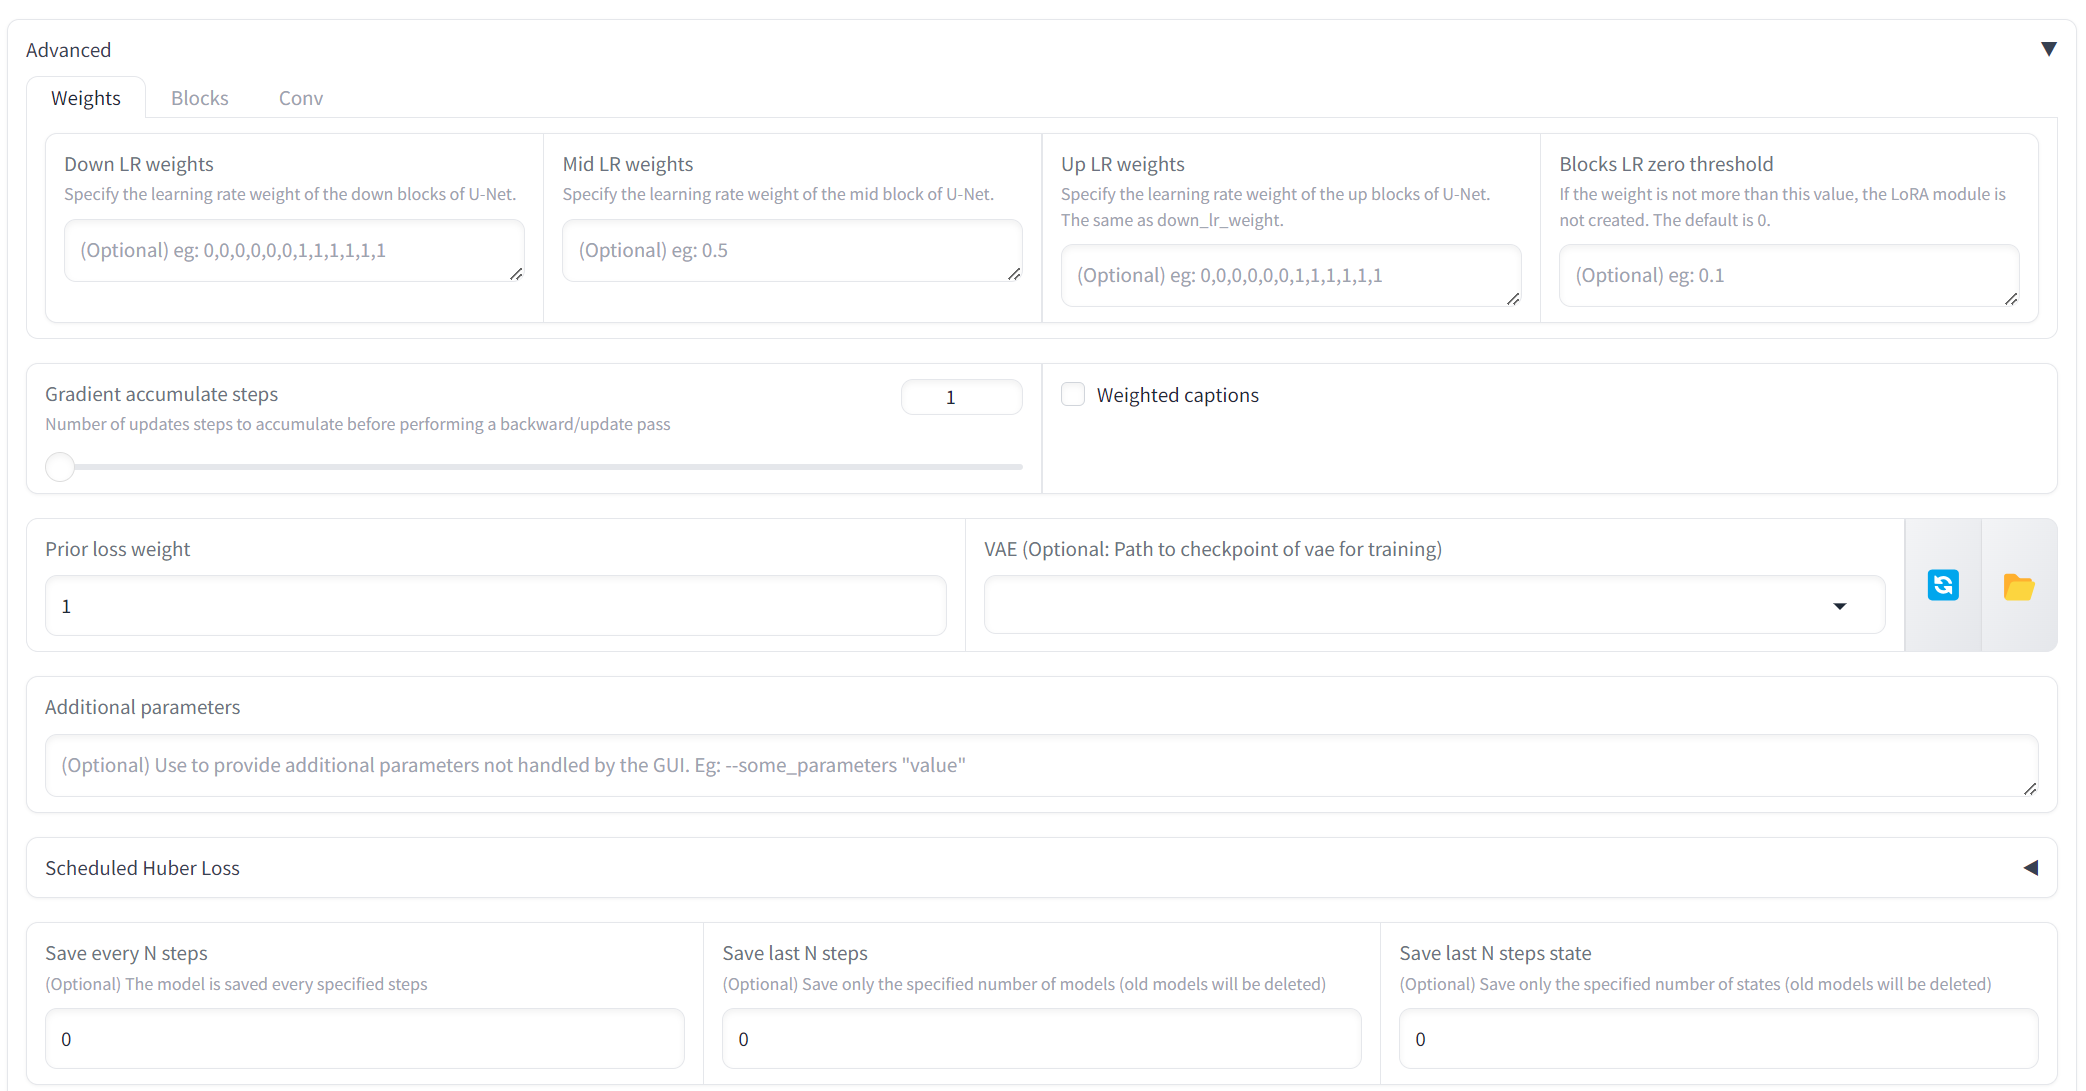
Parameters (Advanced)
Drop down the Parameters tab and the Advanced sub tab and we need to enter the following values:-
- (1) Clip Skip = 2
- (2) Max Token Length = 150
- (3) Full fp16 Training (experimental) = checked
- (4) Gradient checkpointing = checked
- (5) Persistent data loader = checked
- (6) Memory efficient attention = unchecked
- (7) CrossAttention = xformers
- (8) Don't upscale bucket resolution = checked (prepare beforehand your dataset images properly :))
- (9) Max num workers for DataLoader = 2

Start Training
You can now click Start Training to begin the process of training a LoRA
Checking your progress
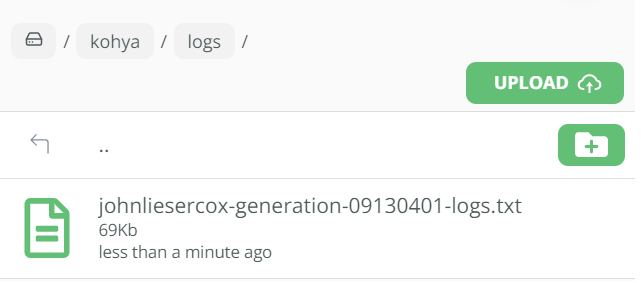
- Please note that there is no indicator bar on the front end of Kohya (yet), so you have to go to the logs folder to check the *.txt file.
- Click on that text file, which will open in a new browser, to see the progress. You can simply hit refresh on your browser (F5 on a PC) to keep refreshing this.
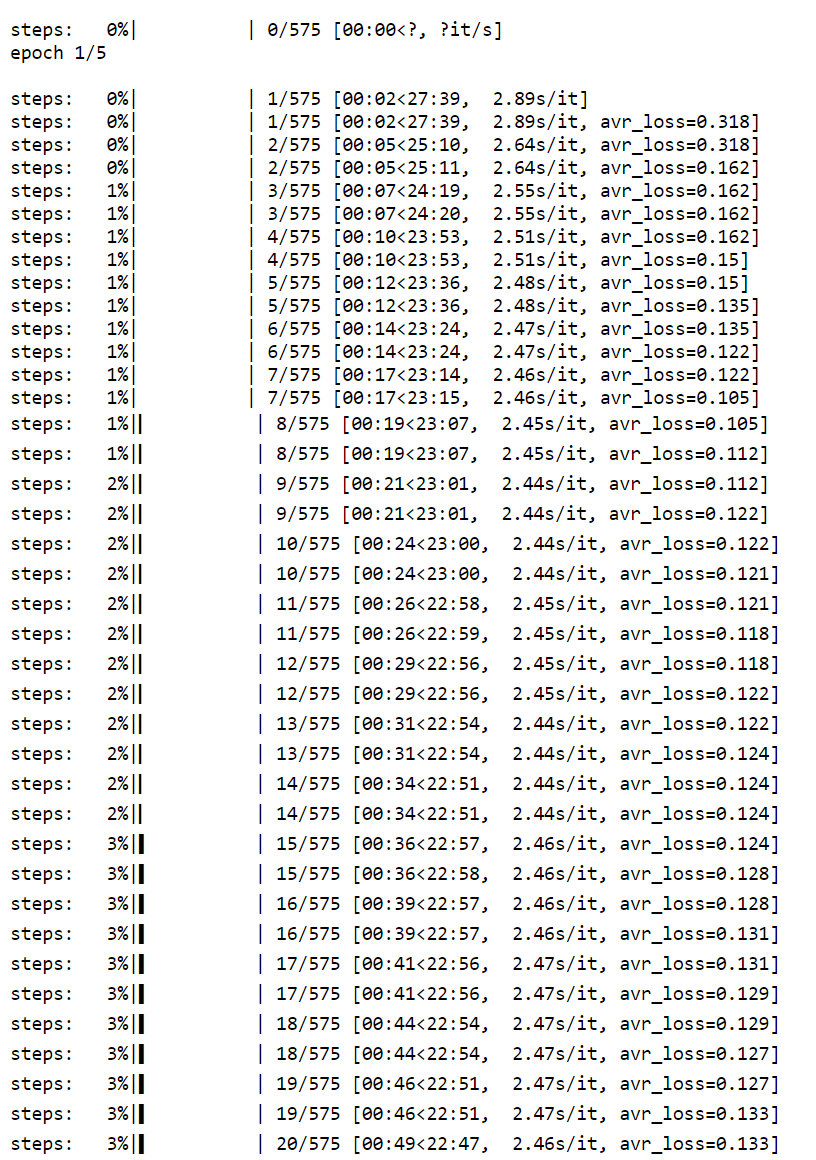
As you can see below, our training has started:-
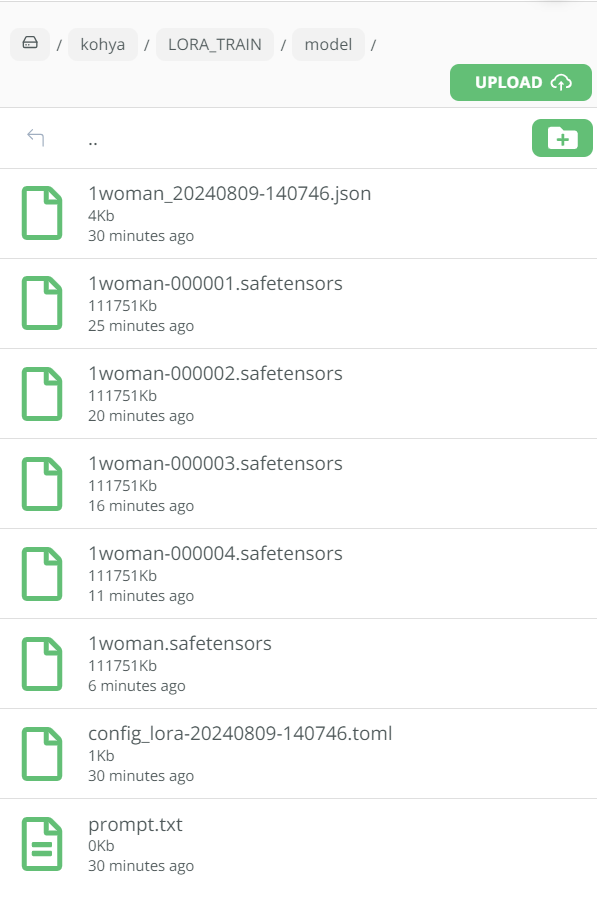
Once the training has completed you will be able to see your .safetensors files in the following folder:-
Trying out your new LoRA in Automatic1111
- Firstly, we need to download our newly created LoRA's (there should be 5 of them) The first is 20% of the training, the second is 40% of the training etc...
- We then need to launch an Auto1111 machine and upload our LoRA's into the ../user_data/a1111/models/Lora folder
To test things out, head over to the txt2img tab in auto1111, and we can enter the following values:-
- Positive prompt: a photo of a woman, shoulder length blonde hair, standing, wearing a pink dress, front view, medium bodyshot
- Checkpoint: DreamshaperXL10
- Sampling steps: 25
- Resolution: 1080 x 1080
- CFG Scale: 10

- To activate the LoRA you need to enter the trigger word in angled brackets as shown below by navigating to the LoRA subtab (If your LoRA does not show then refresh the page and make sure you have selected an SDXL checkpoint model)
- When you click on your LoRA (In this case we called it 1woman), the trigger word will be added to your positive prompt. In this case, you can see we have the angled brackets added at the end of the positive prompt <lora:1woman:1>, where the final :1 value is the weighting of the LoRA to be applied. You can adjust this to lower the weighting to see the effects, such as :0.9, :0.8 etc..
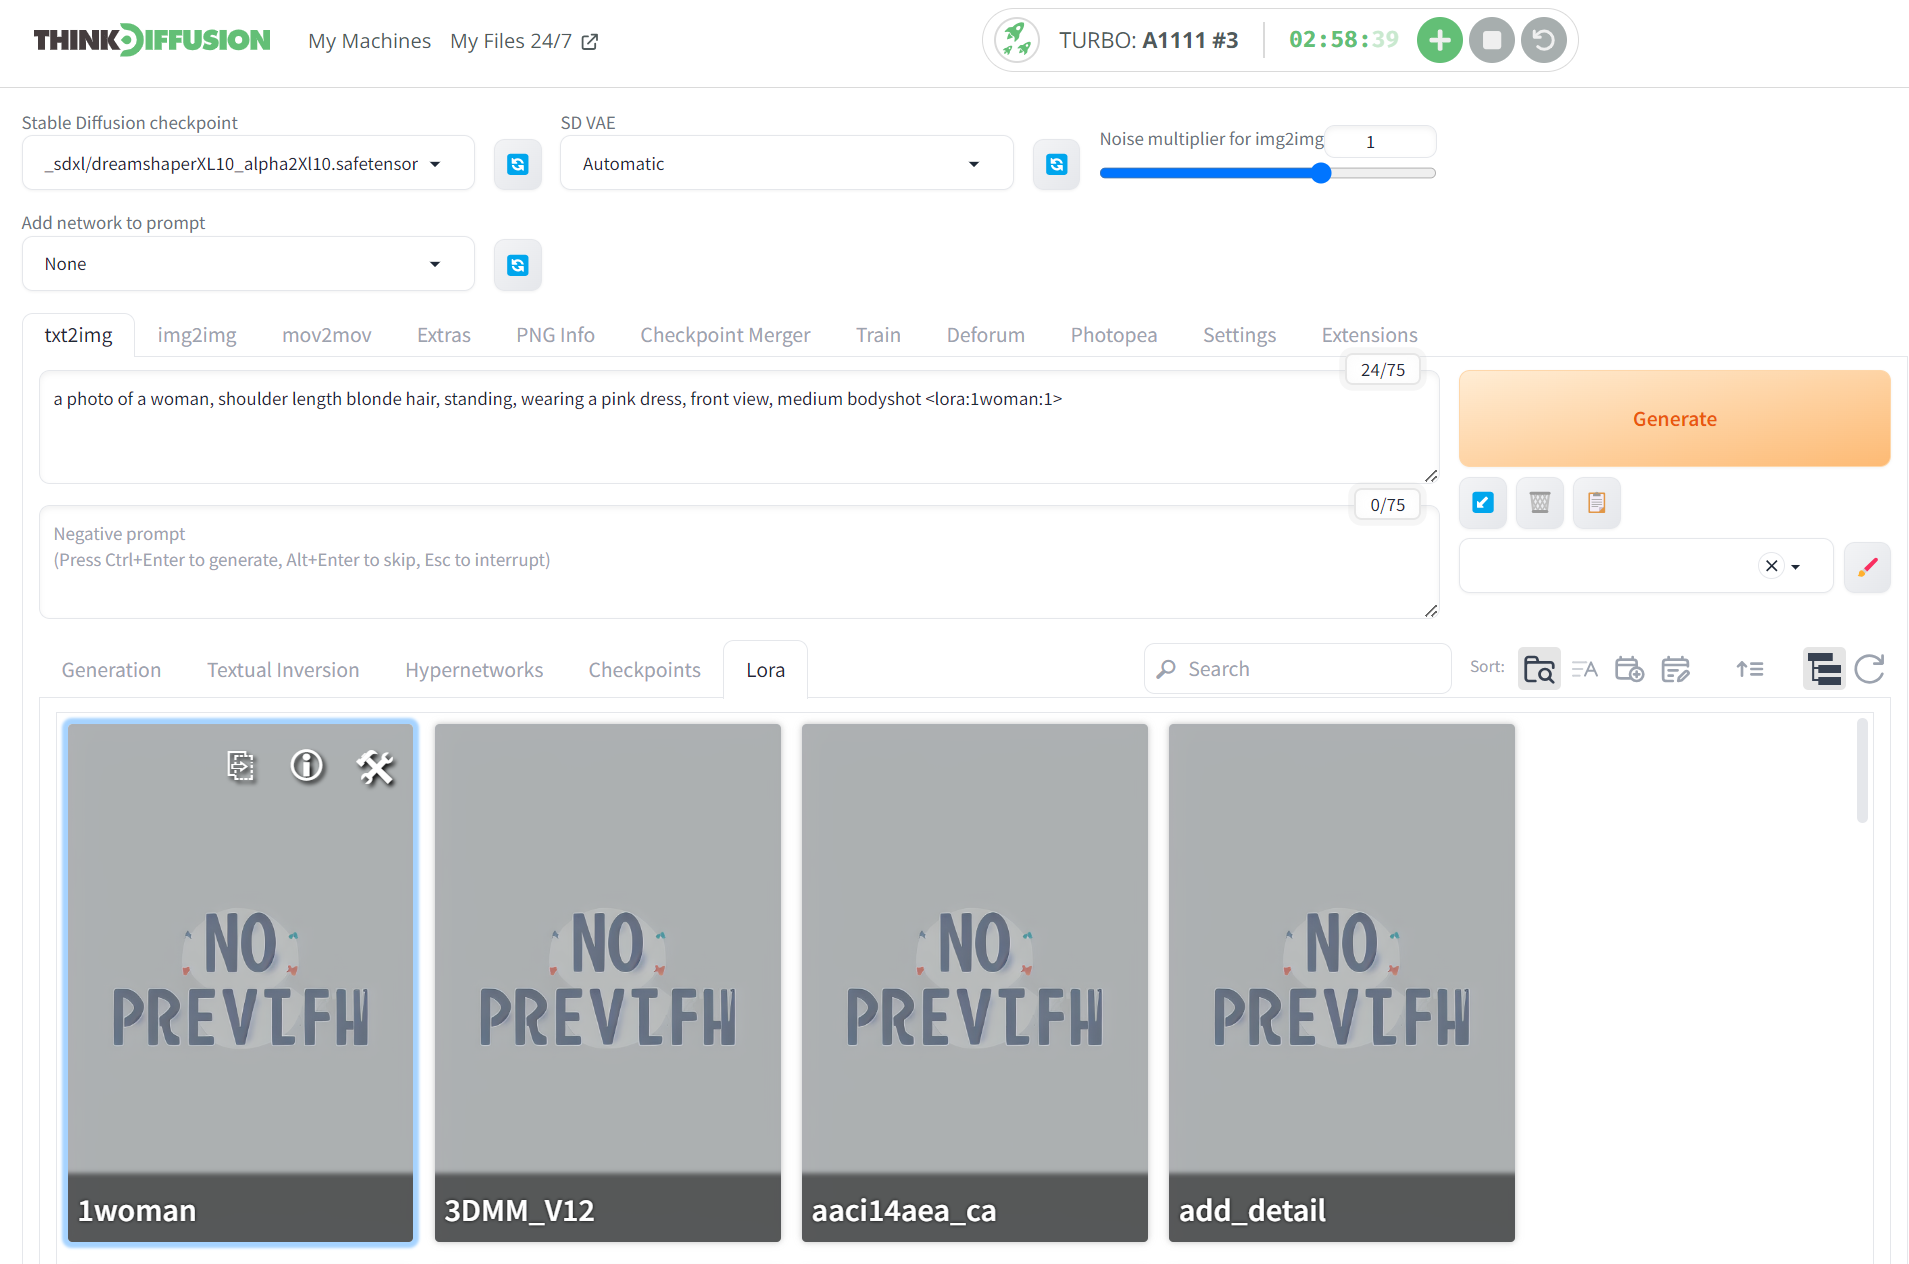
Hit generate, and we can see our LoRA being applied to the generated image, note that we did not mention Jennifer Lawrence in our prompt:-
Glossary
There are a lot of fields and settings that we have simply entered values for above without trying to explain what they do. You could really go into depth to try and explain each one, so for the purposes of this tutorial, I merely provided some initial values to get you up and running. To fully understand LoRA training with Kohya, would take much more extensive research and trial and error. However, let's try and get a little into the technicalities here for those who are brave enough to deep dive in!
- (1) Train Batch Size: As we are using ThinkDiffusion we can set the batch size to 2, but if you are on a lower end GPU, then you should leave this as 1. The batch size determines how many images the model processes simultaneously. The higher the batch size the faster the training will be but it will be more demanding on your GPU. Please note that you can sometimes have an out of memory error when setting the batch size to 2. If you encounter this, you should lower the batch size to 1
- (2) Epochs: You can experiment with this figure but as a rule the higher the number of Epochs, the more chance of overtraining the model. Epoch's represent a cycle of training. We selected 5 Epochs in our settings, so this will result in 5 safetensors files at the end of the training. The 1st will be 20% of the training, the 2nd will be 40% of the training, the 3rd will be 60% of the training, the 4th will be 80% of the training and the final one is 100% of the training. You can experiment which LoRA turned out the best.
- (3) Steps: This number is not selected directly but comes as a result of some of your settings. Steps are calculated by the number of images x the number of repeats x the number of Epoch's For example, in this tutorial we had 23 images, 5 repeats and 5 epochs, resulting in 575 steps. I usually try to end up at around 2k - 3k steps when training a LoRA.
- (4) Save every n Epoch's: This is useful to see if you are undertraining or overtraining your LoRA. If we are running 5 Epoch's and we save every 1 Epoch then a LoRA will be created at the end of each Epoch. In essence, we will have 5 LoRA's that are created at the end of each Epoch cycle
- (5) Caption Extension: Use the '.txt' extension for your captions. This is necessary as Kohya now requires captioned images to avoid warnings.
- (6) Mixed Precision: Set your training precision to 'fp16'. bf16 precision is more demanding on your Vram, and can sometimes result in out of memory errors
- (7) Save Precision: Use 'fp16' for saving model checkpoints, with the same considerations as for Mixed Precision mentioned above.
- (8) Learning Rate: Set to between 0.0001 and 0.0003 - Typically, the higher the learning rate, the sooner you will finish training the LoRA
- (9) Enable Buckets: Keep this option checked, especially if your images vary in size. This is a very useful feature in Kohya that means we can have different resolutions of images and there is no need to crop them. Essentially Kohya will drop your images into separate buckets of the same sizes. (However, you do not know how Kohya will crop the images, so I prefer to crop my images manually as mentioned in the guide)
- (10) Network Rank: This parameter influences the AI's expressiveness. A higher value allows for more creativity. This can typically be set between 16 to 256 as a rule of thumb. The higher the network rank, the bigger the file size of the LoRA will be. However, a larger network rank will also help the LoRA retain more details to improve the quality of the images
- (11) Network Alpha: Set Network Alpha to approximately half of the Network Rank value. This parameter acts as a creativity regulator.
- (12) Repeats: This is essentially the number of times each image in your dataset is cycled over. Increasing the number of repeats will increase the number of steps and therefore the overall training time
Let's get training!
Any of our workflows including the above can run on a local version of SD but if you’re having issues with installation or slow hardware, you can try any of these workflows on a more powerful GPU in your browser with ThinkDiffusion.
If you’d like a way turn some of your LoRA-trained work into animated masterpieces, check out my post creating killer animations with AnimateDiff.
Member discussion