
Ever feel like creating videos takes forever? You're not alone! That's where LTX and ComfyUI come in, making video creation smoother and faster. LTX speeds up the video-making process so you can focus on what really matters — telling your story and connecting with your audience. In this guide, we'll focus on Image2Video generation specifically, and we’ll explore all the features that make LTX a game-changer. Let’s jump in!
How to run LTX in ComfyUI for Image to Video Generation
Installation guide
Custom Nodes
If there are red nodes in the workflow, it means that the workflow lacks the certain required nodes. Install the custom nodes in order for the workflow to work.
- Go to ComfyUI Manager > Click Install Missing Custom Nodes
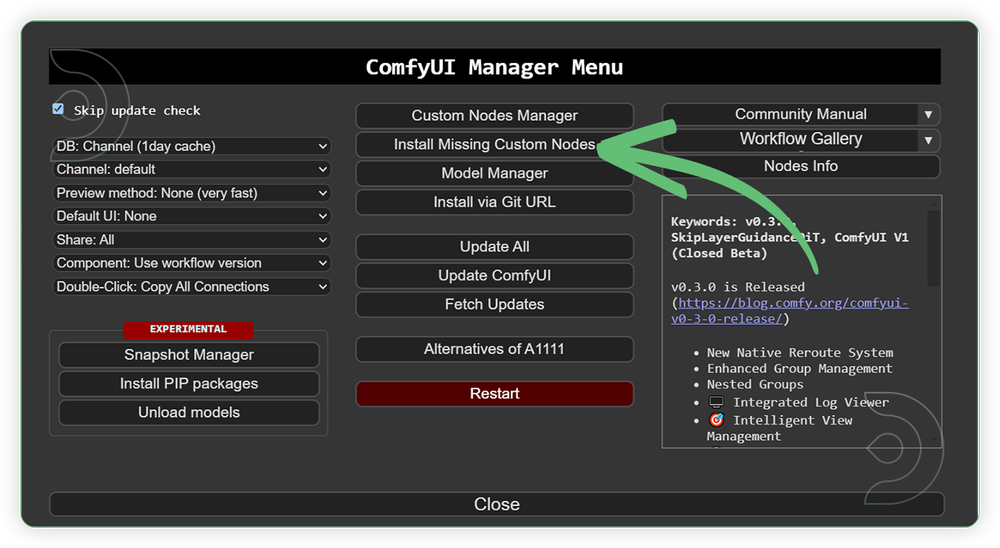
- Check the list below if there's a list of custom nodes that needs to be installed and click the install.
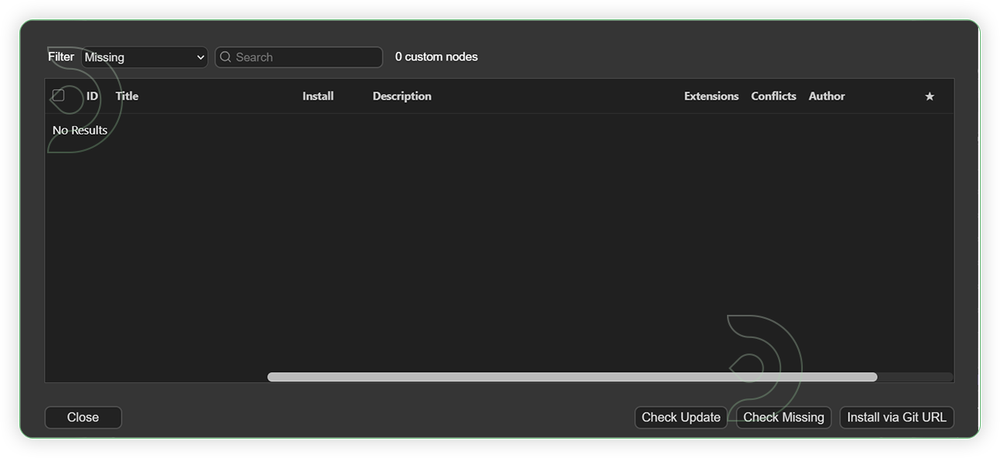
Is your custom nodes list empty?
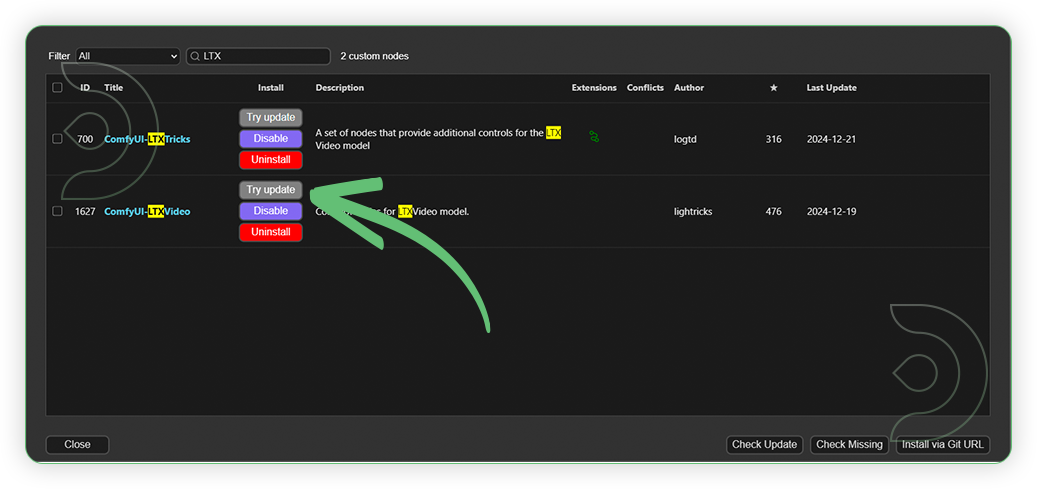
- If your list of missing custom nodes is empty, you might already have LTX installed but an older version. Go to Custom Nodes Manager.
- Search for LTX in the list and Update ComfyUI-LTXVideo. Click Restart and Click Refresh to refresh Node Definition in workspace. Open the workflow again and your issue should be resolved.
Models
For this guide you'll need 4 models. 2 will be auto-downloaded and 2 will have to be downloaded manually.
2. t5xxl_fp16.safetensors
3. Llama-3.2-3B-Instruct (auto download)
4. Florence-2-large-PromptGen-v2.0 (auto download)
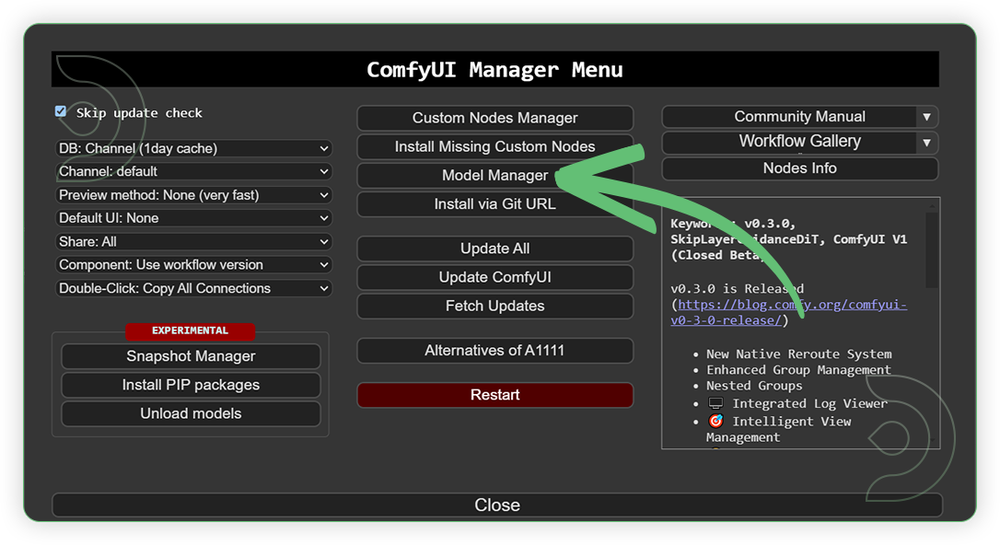
- Go to ComfyUI Manager > Click Model Manager
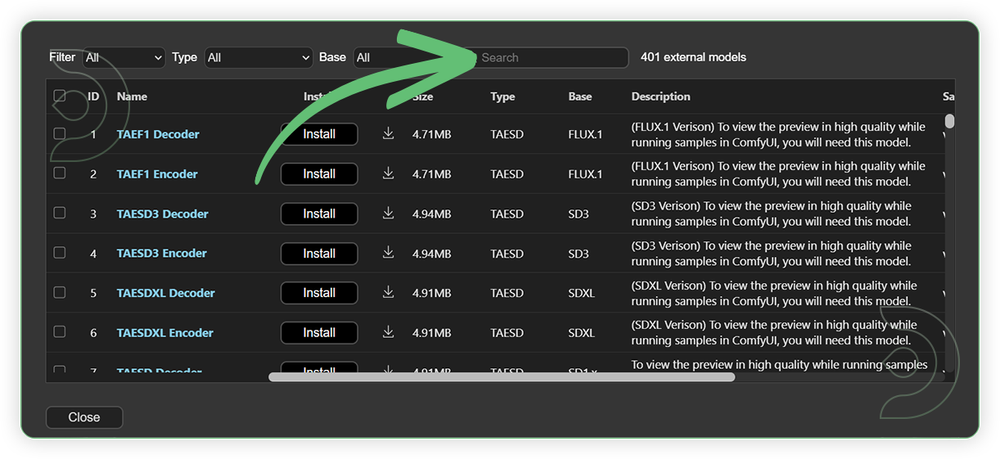
- When you find the exact model that you're looking for, click install and make sure to press refresh when you are finished.
Model Path Source
Use the model path source if you prefer to install the models using model's link address and paste into ThinkDiffusion MyFiles using upload URL.
| Model Name | Model Link Address | ThinkDiffusion Upload Directory |
|---|---|---|
| ltxv-2b-0.9.6-dev-04-25.safetensors | ...comfyui/models/checkpoint/ |
|
| t5xxl_fp16.safetensors | ...comfyui/models/clip/ |
|
| Llama-3.2-3B-Instruct | Auto Downloaded by Node |
Auto Uploaded by Node |
| Florence-2-large-PromptGen-v2.0 | Auto Downloaded by Node |
Auto Uploaded by Node |
Step-by-step Workflow Guide
| Steps | Recommended Nodes |
|---|---|
| 1. Load Image Load an image. Set the resolution up to 1214x704. |
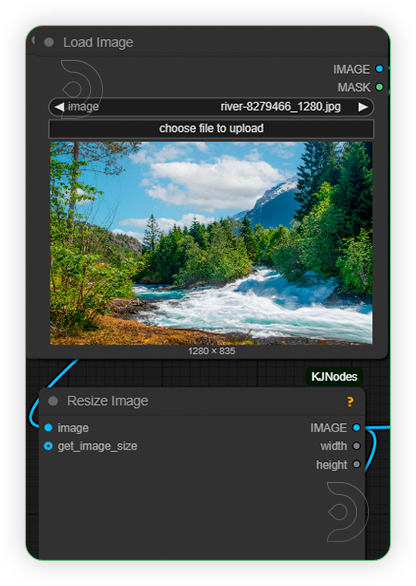 |
| 2. Load Models Load models as seen on the image. |
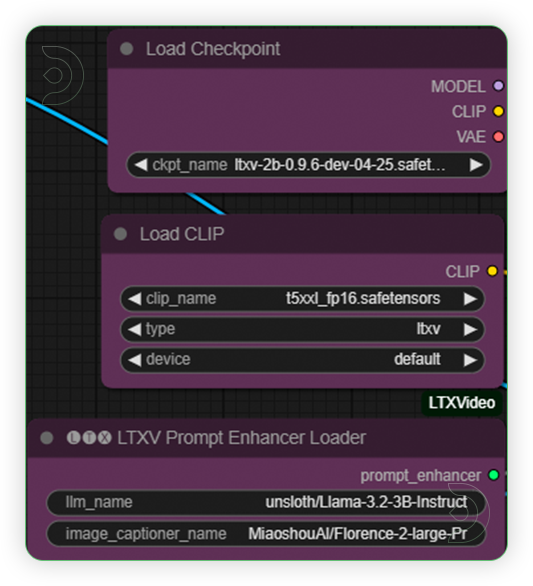 |
| 3. Write Prompt Write your desired prompt according to the image. Prompt should be less than 200 words. |
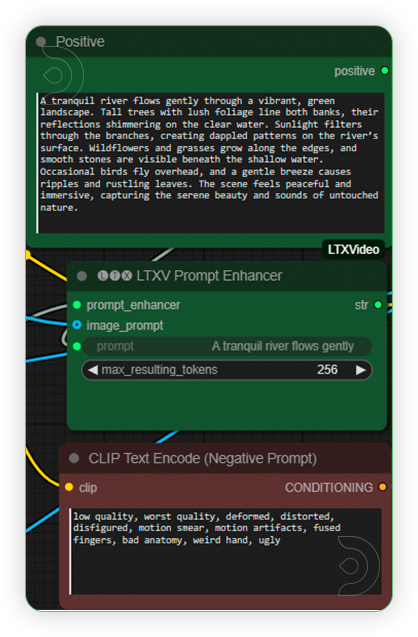 |
| 4. Check Sampling Set the settings as seen on the image. Frames should be under 97. Frame rate can be set to 30. |
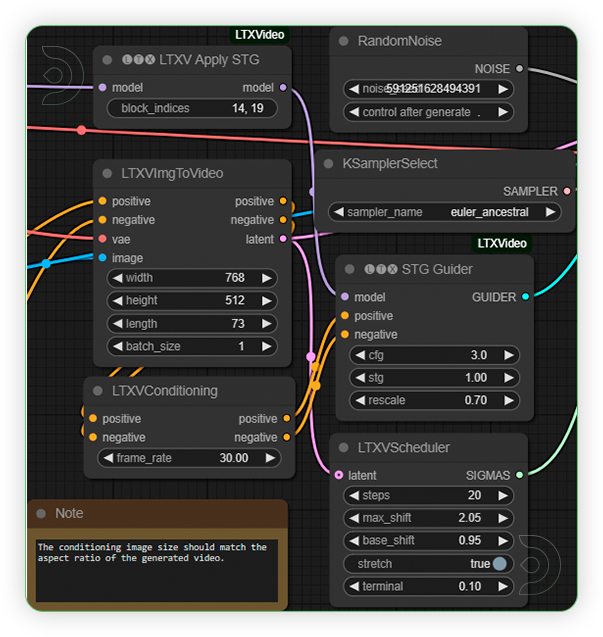 |
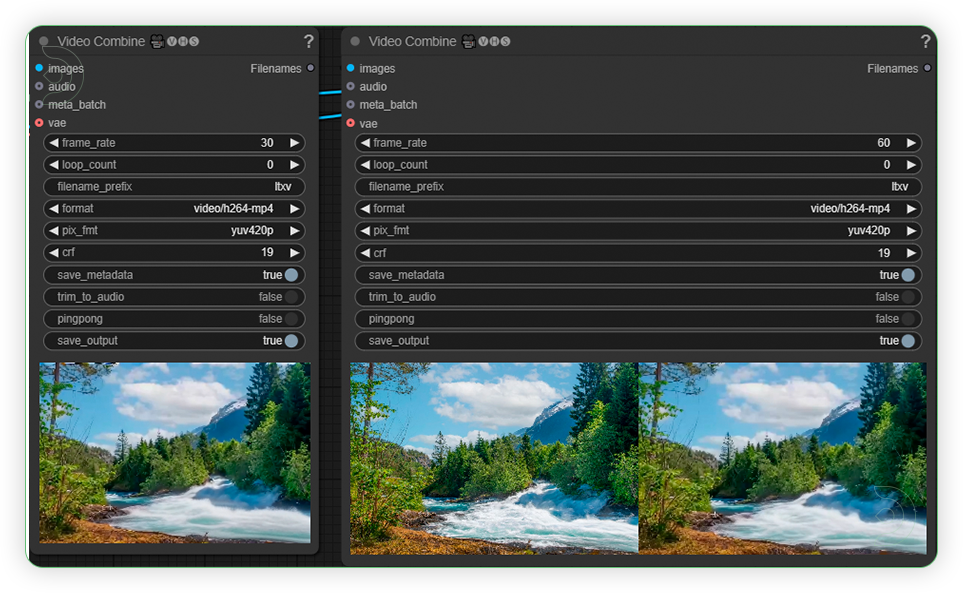
| 5. Check Output |
 |
Examples
Man playing a guitar.
Illustration of running motorcycle.
Drone view from above.
Man relaxing at the port.
Air travel at nature landscape.
Driver third person view
If you’re having issues with installation or slow hardware, you can try any of these workflows on a more powerful GPU in your browser with ThinkDiffusion. While this tutorial focuses on image to video generation for LTX, we've got another one coming up soon for video to video generation for LTX.
If you enjoy ComfyUI and you want to test out creating awesome animations, then feel free to check out this AnimateDiff tutorial here. And have fun out there with your videos!
Member discussion