
Introduction
Harnessing the power of an image prompt in Stable Diffusion AI can significantly influence the outcome of generated images. This guide unveils the process of utilizing image prompts effectively within Stable Diffusion.
Image prompts serve as influential components that impact an output image's composition, style, and color scheme.
For this tutorial, the use of ControlNet is essential. We will be using the following ControlNet models, which are pre-installed on ThinkDiffusion:
- ip-adapter_sd15.pth (for 1.5 models)
- ip-adapter_sd15_plus (for 1.5 models)
- ip-adapter_xl (for SDXL models)
What Constitutes an Image Prompt?
An image prompt acts as an additional input to a Stable Diffusion model alongside the text prompt. Both text and image prompts exert influence over AI image generation through conditioning.
The Image Prompt adapter (IP-adapter), akin to ControlNet, doesn't alter a Stable Diffusion model but conditions it. It's compatible with any Stable Diffusion model and, in AUTOMATIC1111, is implemented through the ControlNet extension.
Text-to-Image Process
Access the Image Prompt feature on the txt2img page of AUTOMATIC1111.
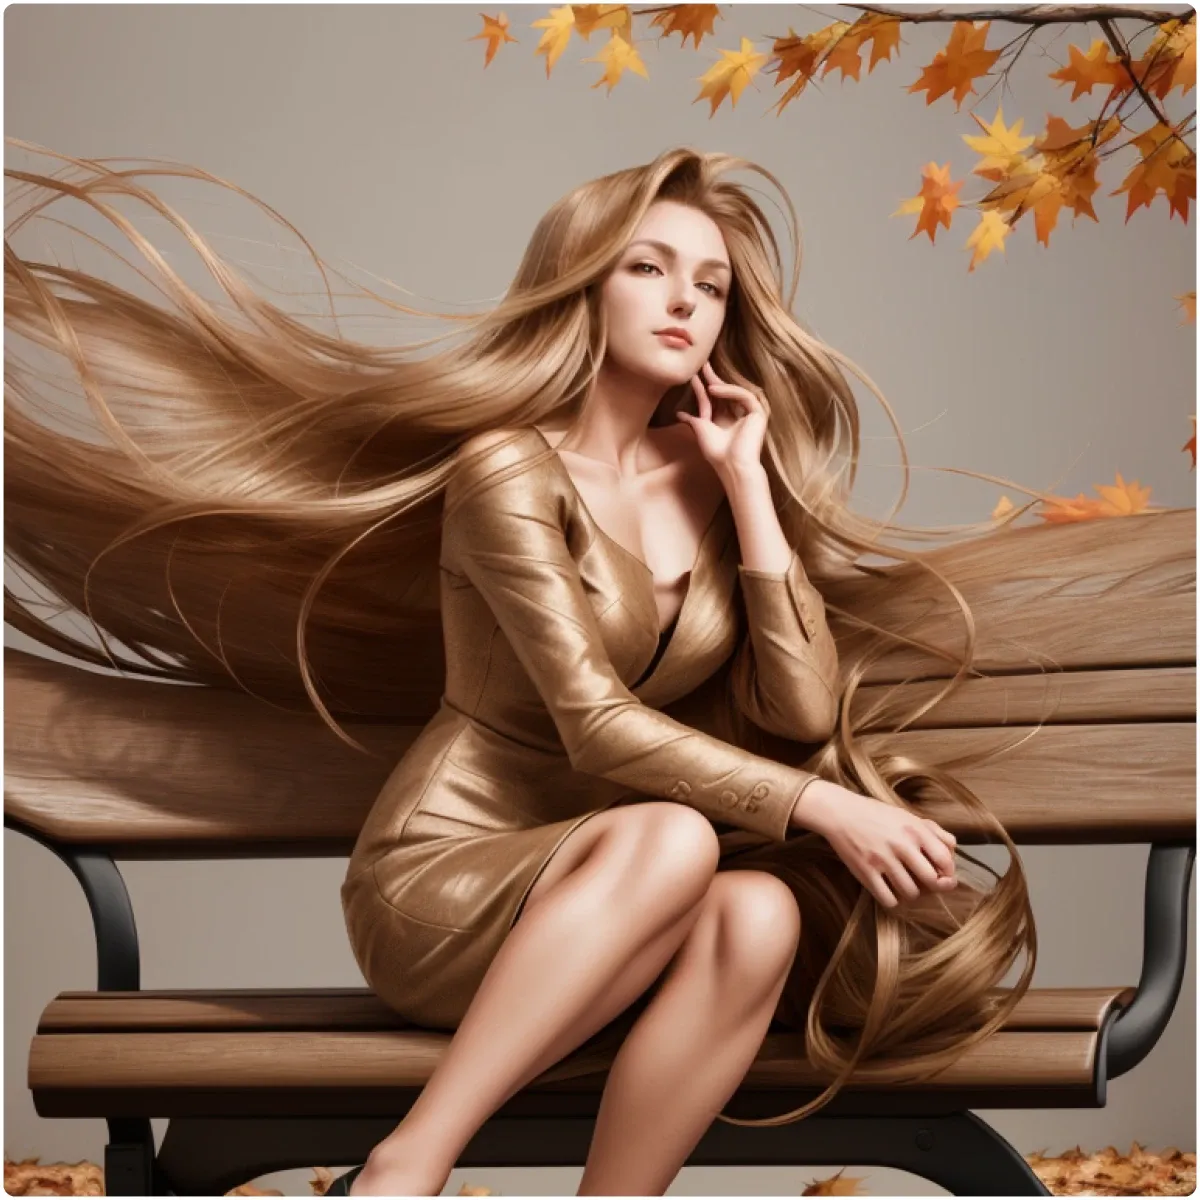
Let's start by generating an image without an image prompt and then adding one to observe its effects.
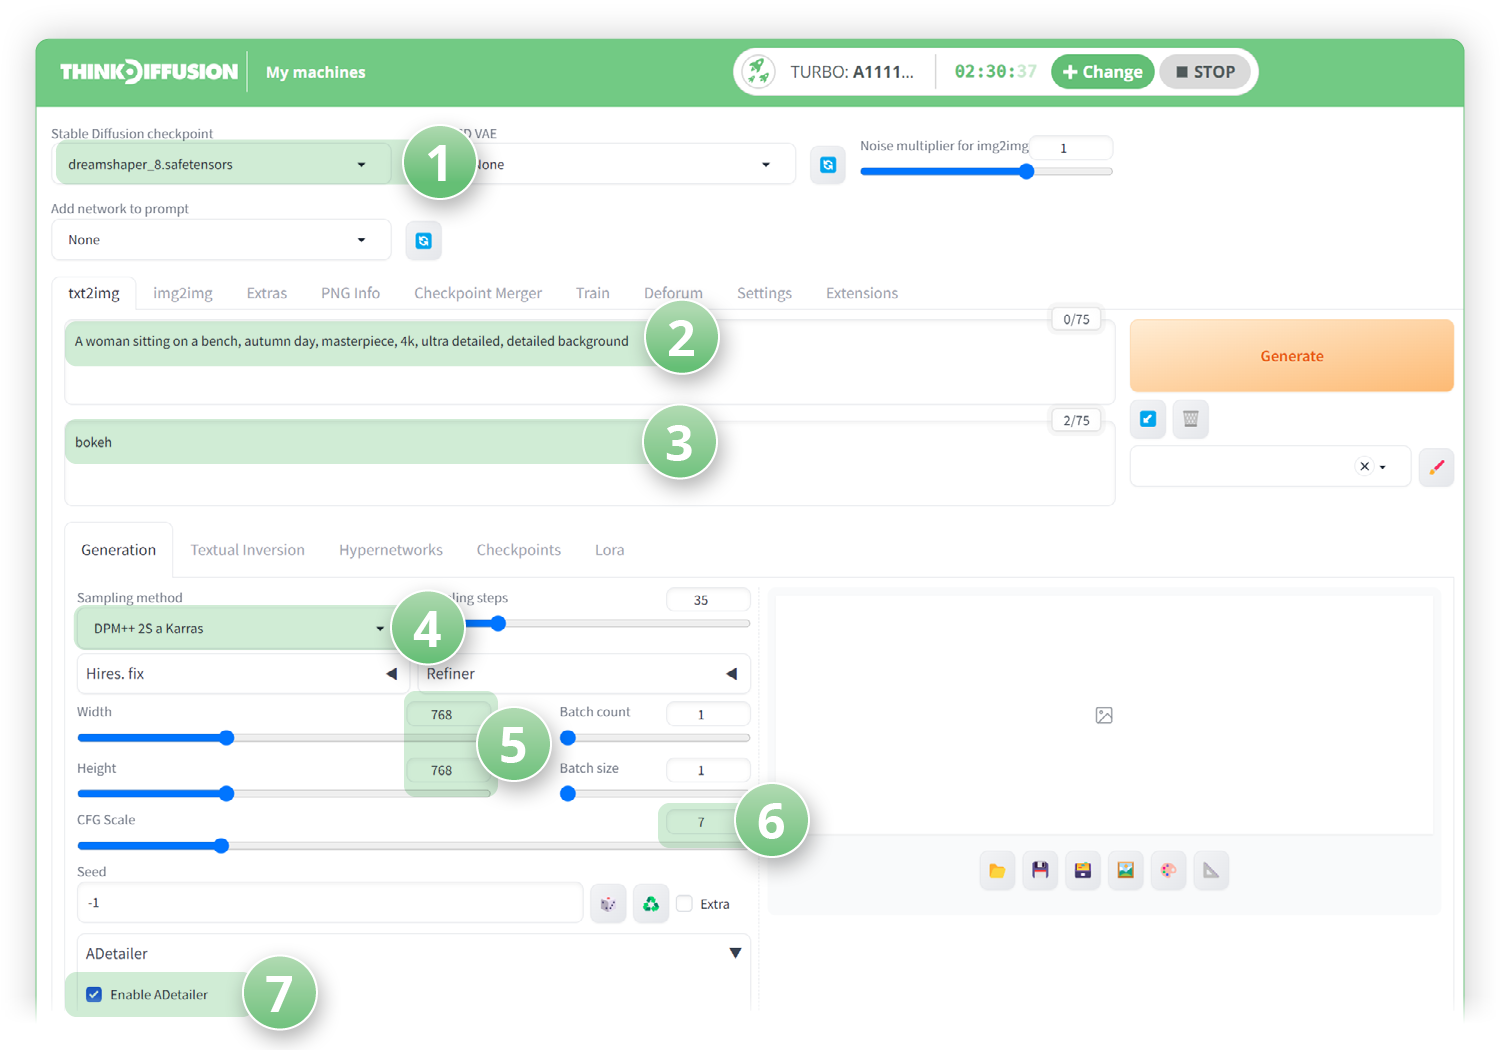
Within the txt2img tab, set the following parameters:
- (1) Model: Dreamshaper_8
- (2) Positive Prompt: A woman sitting on a bench, autumn day, masterpiece, 4k, ultra detailed, detailed background
- (3) Negative prompt: bokeh
- (4) Sampling Method: DPM++ 2S a Karras
- (5) Size: 768 x 768
- (6) CFG Scale: 7
- (7) ✅ Click Enable aDetailer to improve the face
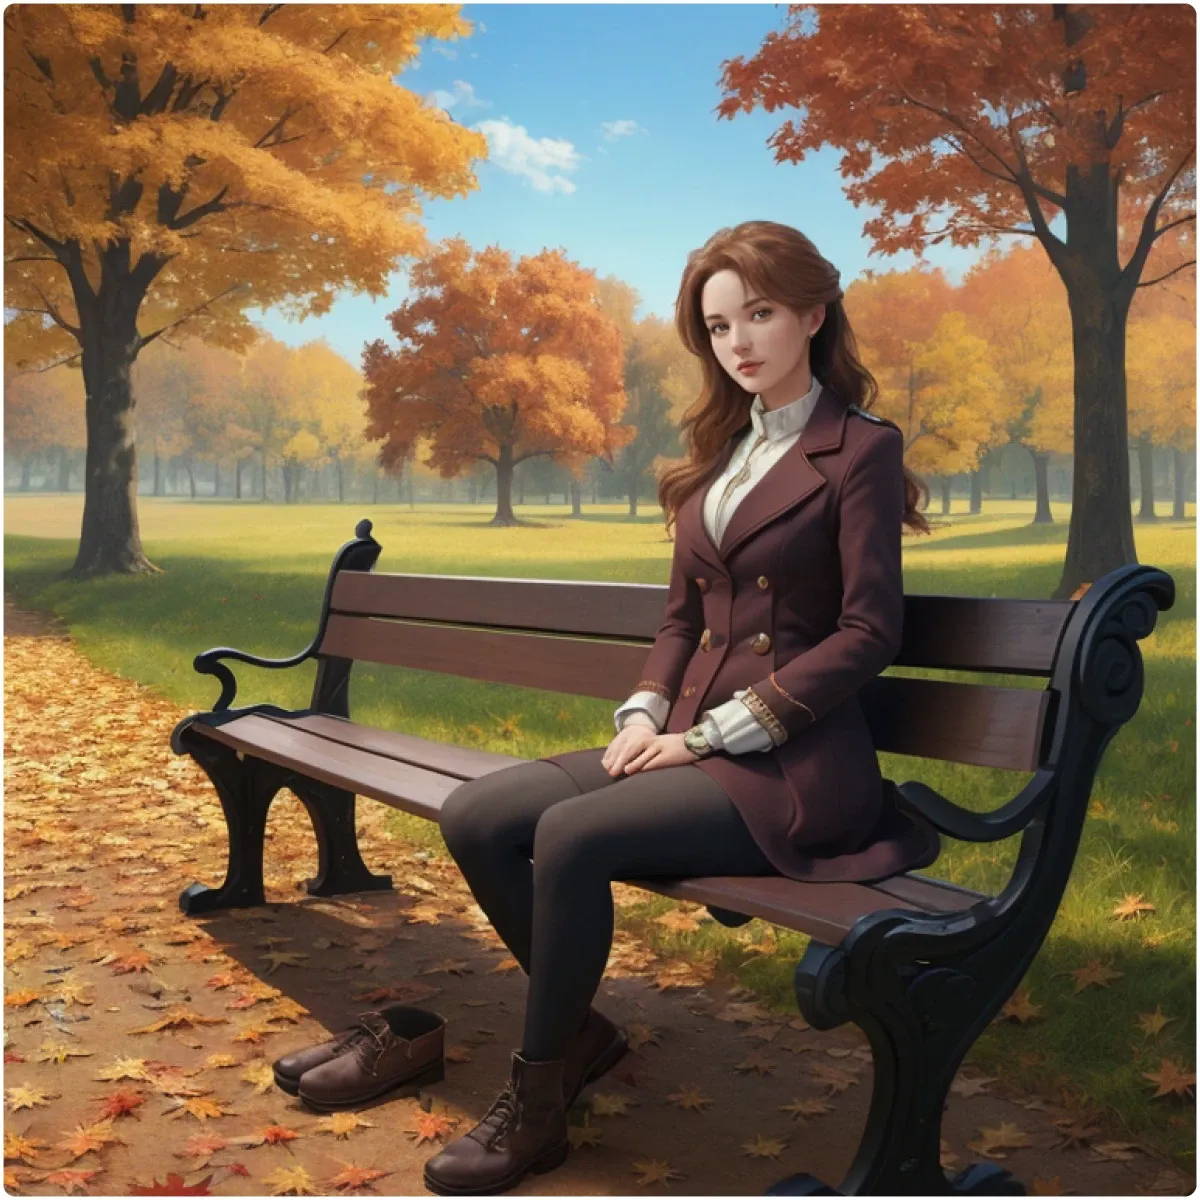
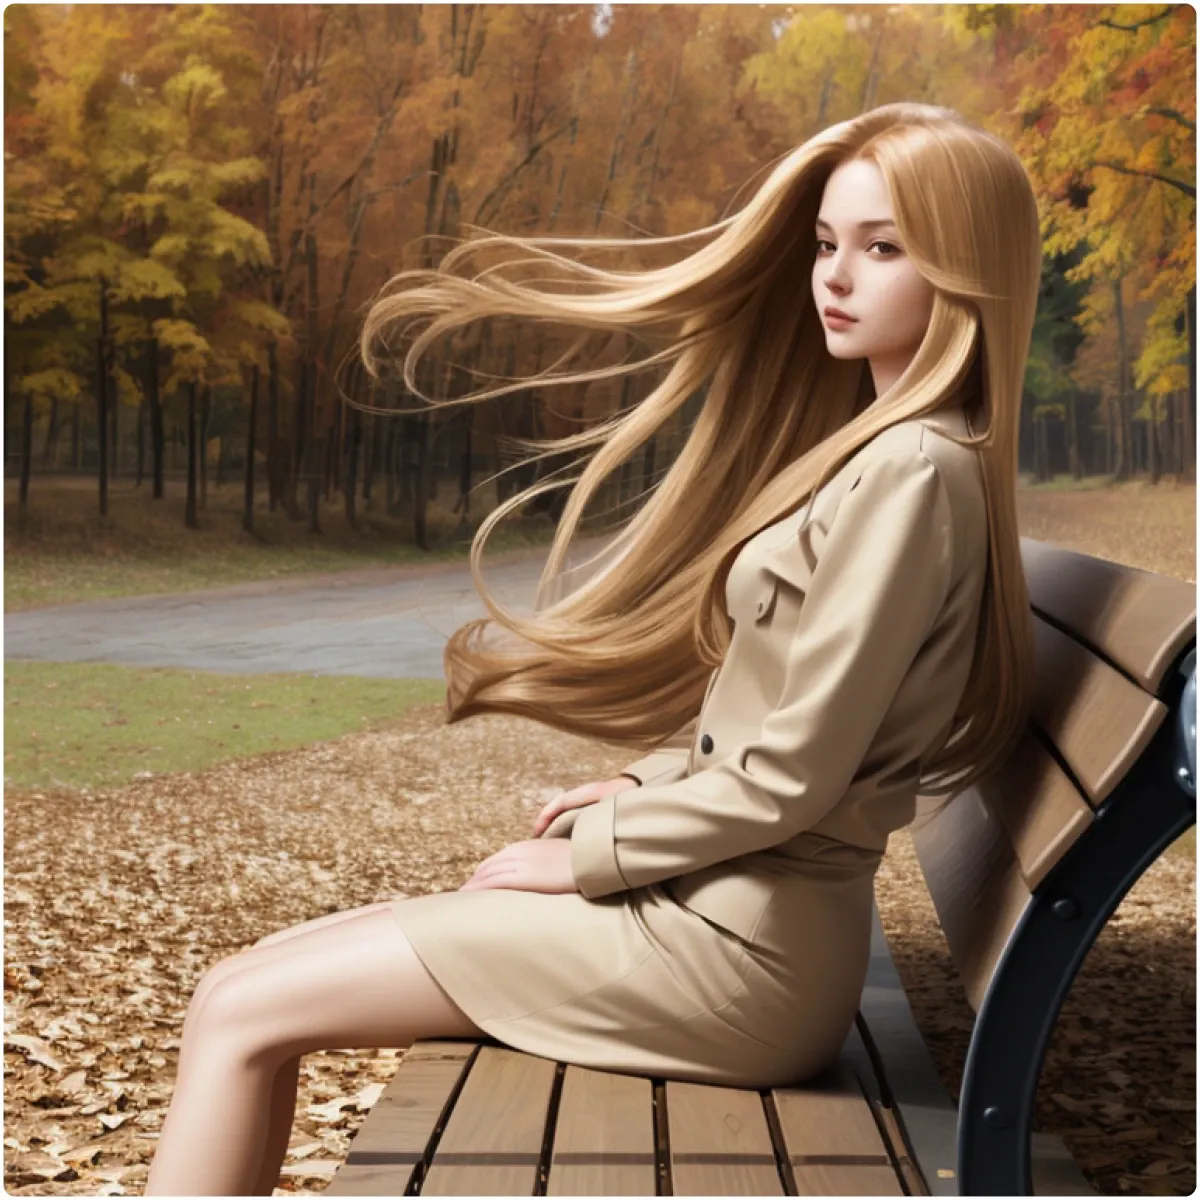
Click Generate and this is what we got:
Adding the Image Prompt (With IP-Adapter)
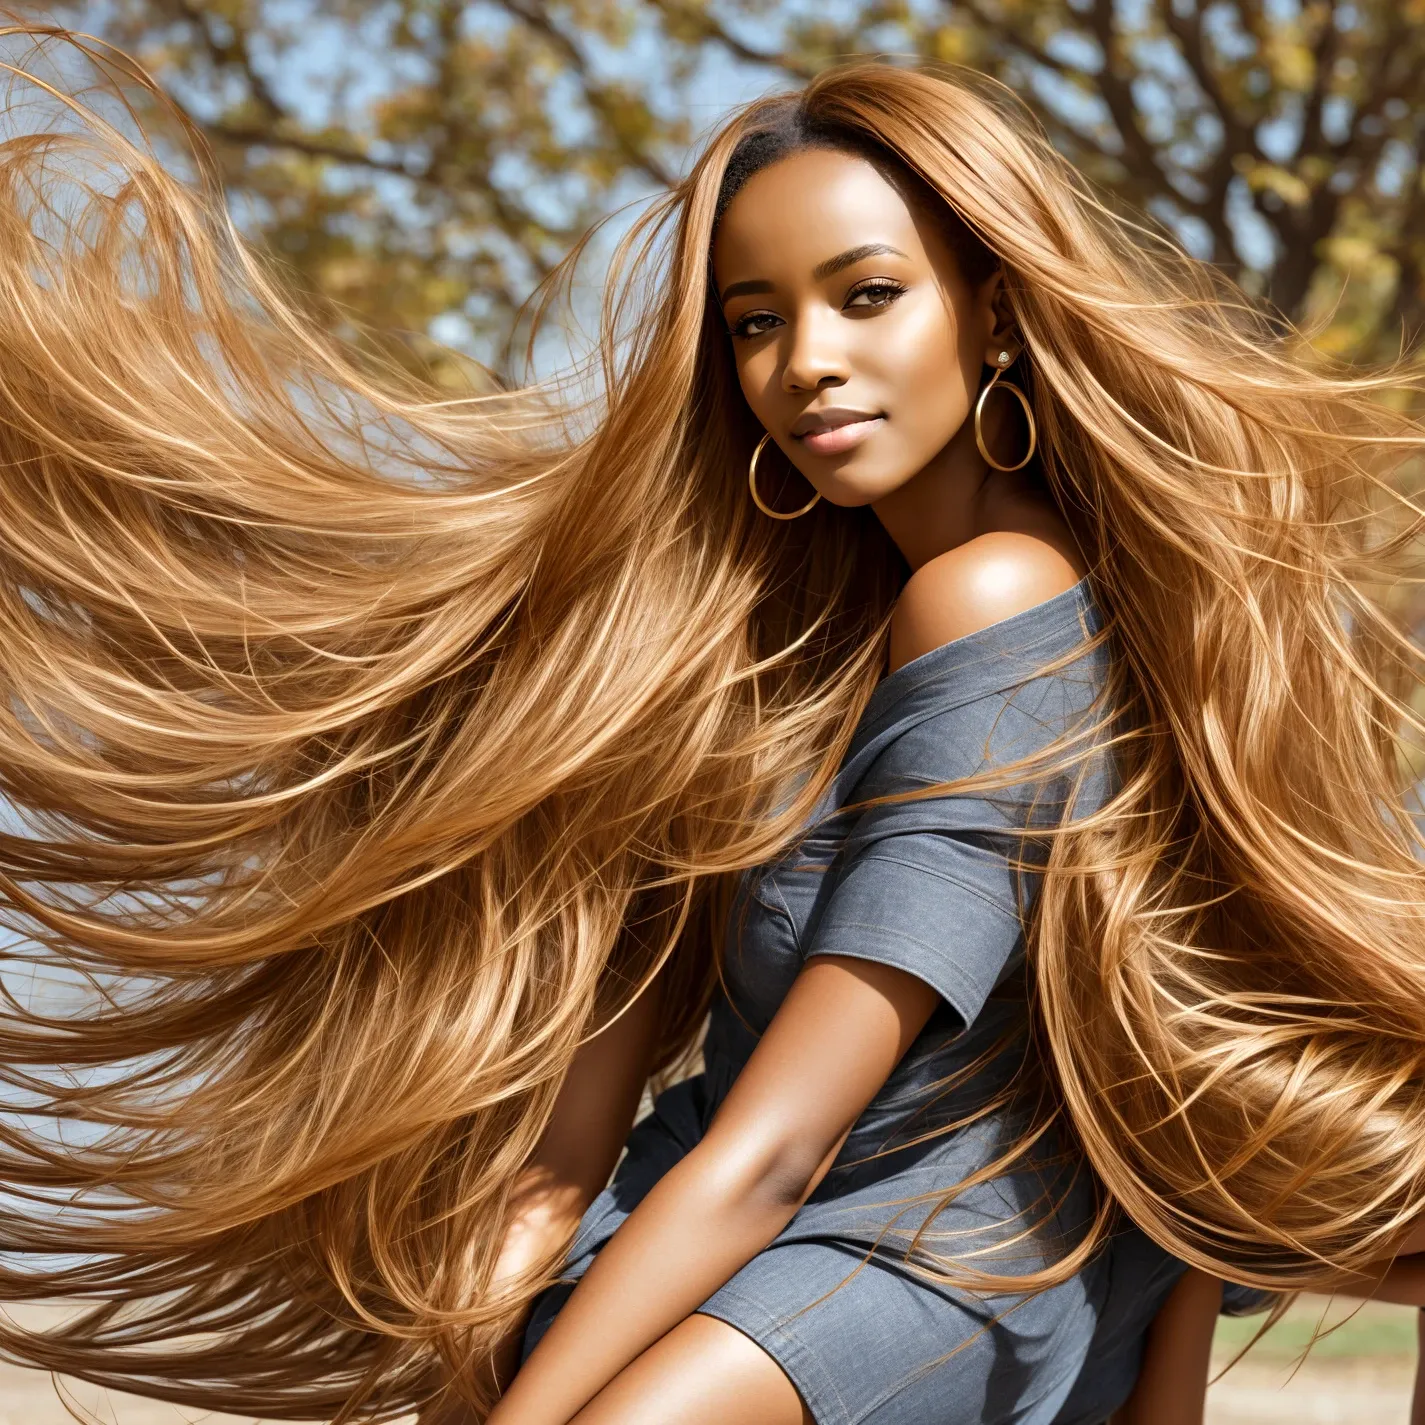
Now we can use another image to stylize our original prompts with.
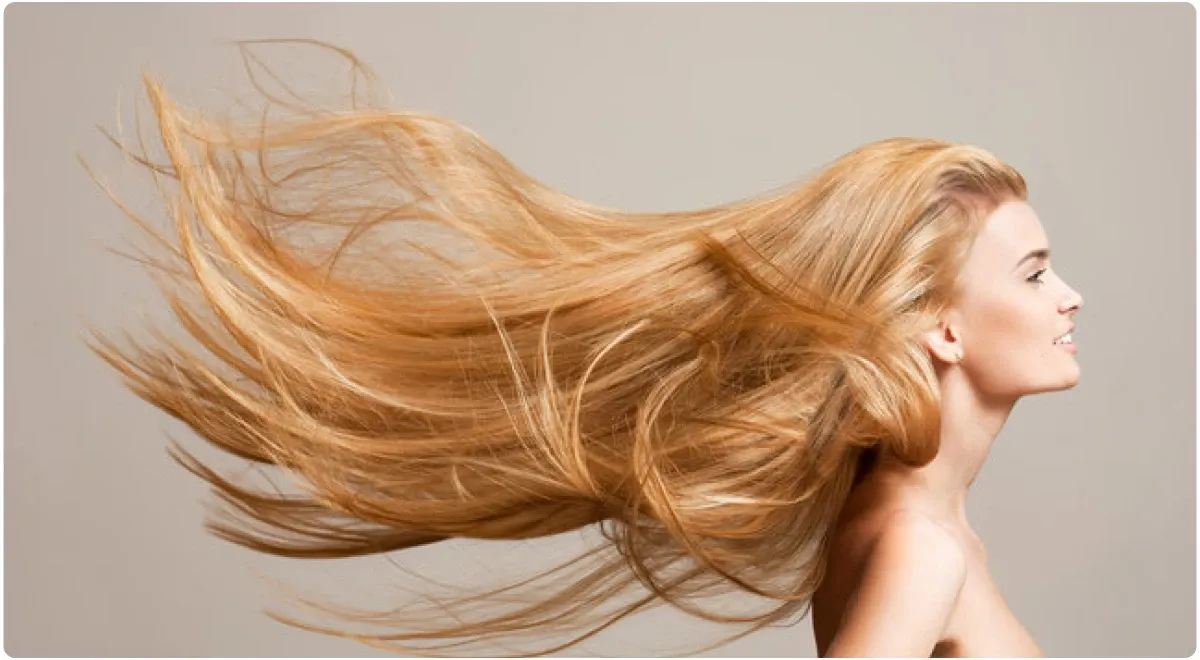
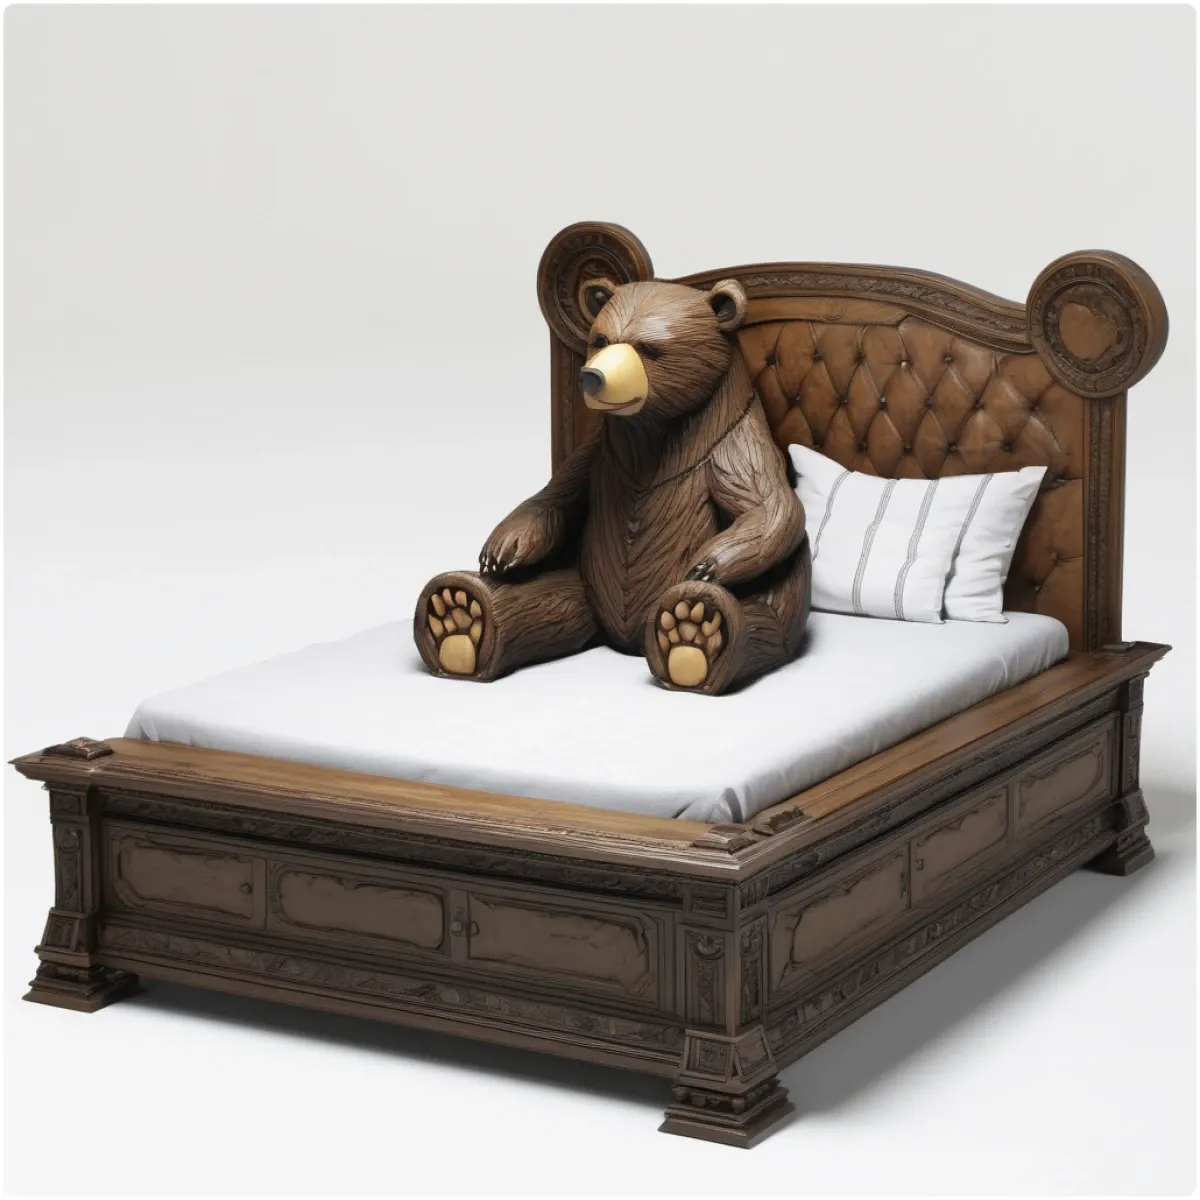
Let's keep all the parameters from above the same. But now we're going to add this image to ControlNet:
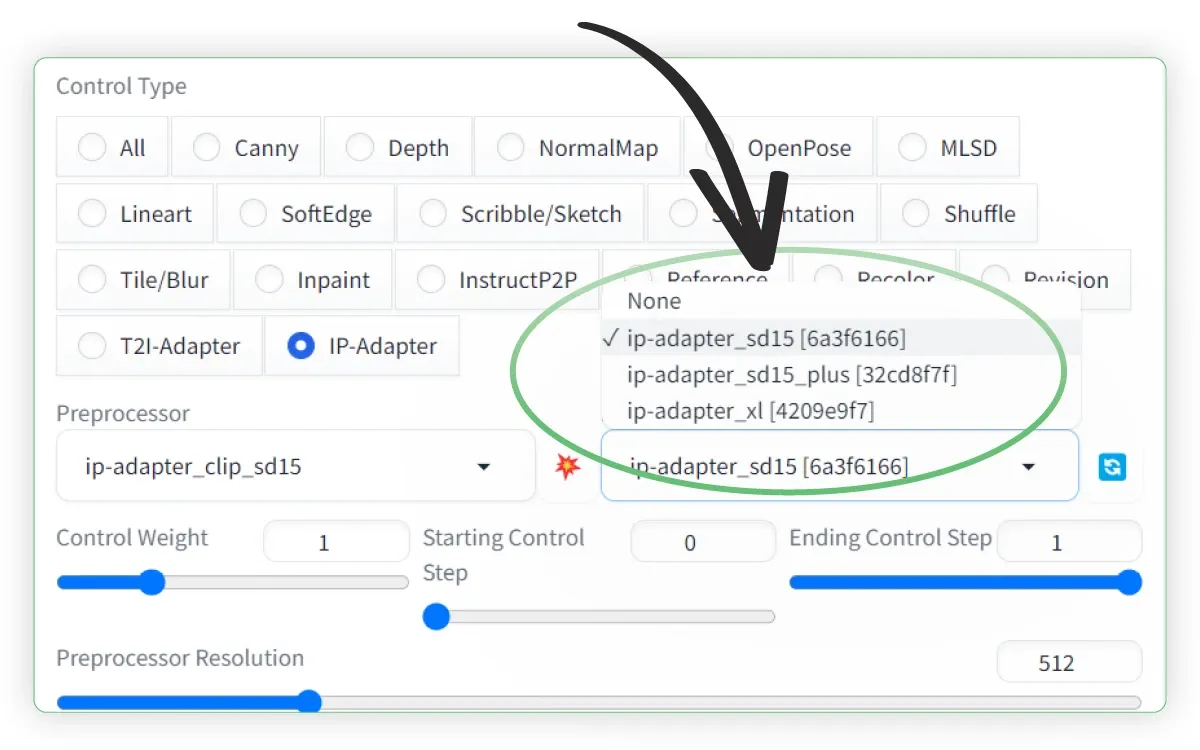
Let's open ControlNet to set up our ip-adapter settings. Scroll down to the controlNet tab and click the dropdown arrow.
- (1) Click ✅ Enable
- (2) Set the Control Type to IP-Adapter
- (3) Set the Preprocessor to ip-adapter_clip_sd15
- (4) Set the ControlNet model to ip-adapter_sd15
- (5) Set the Control Weight to 0.5
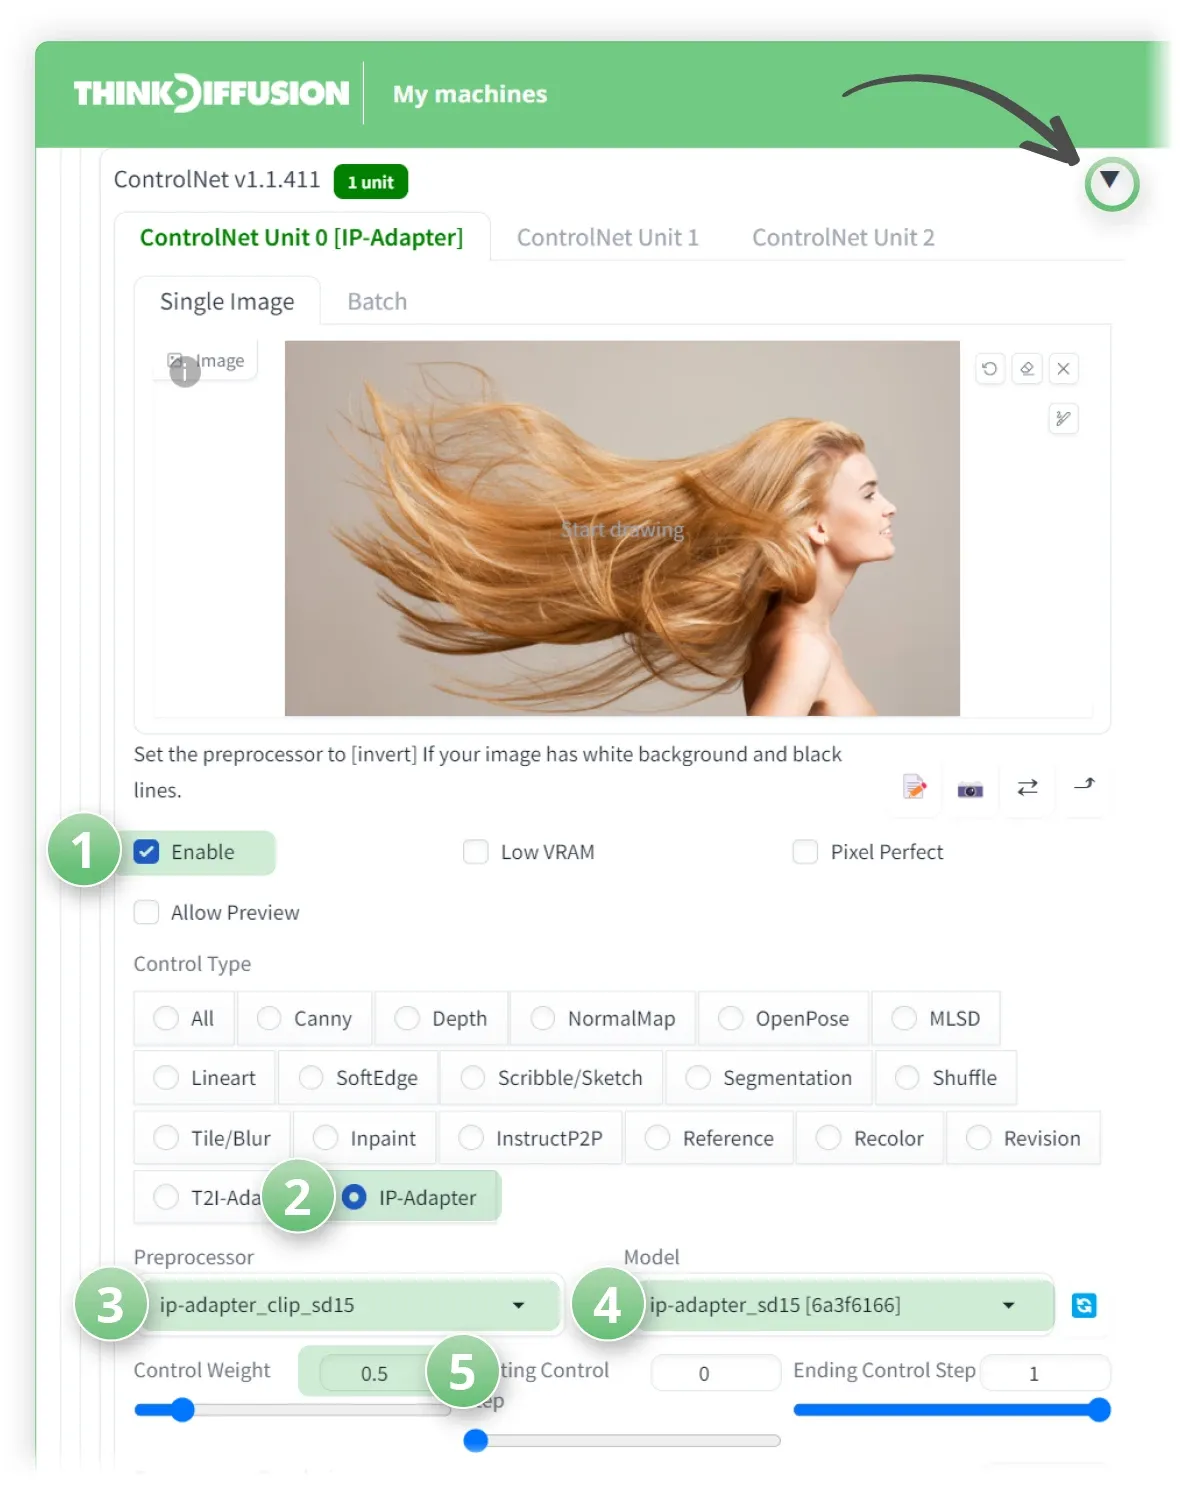
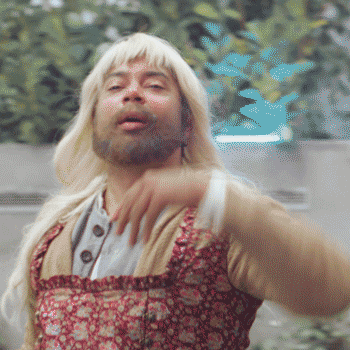
- Hit Generate and we can now see the flowing hair has been pulled into our image!
Trying IP-Adapter Plus
We'll now repeat same with the ip-adapter_sd15_plus, which is essentially the same but the model is a lot more powerful so play around with the Control Weight to get the result you desire.
Within the ControlNet tab, we'll simply update the model in the dropdown box to:
ip-adapter_sd15_plus
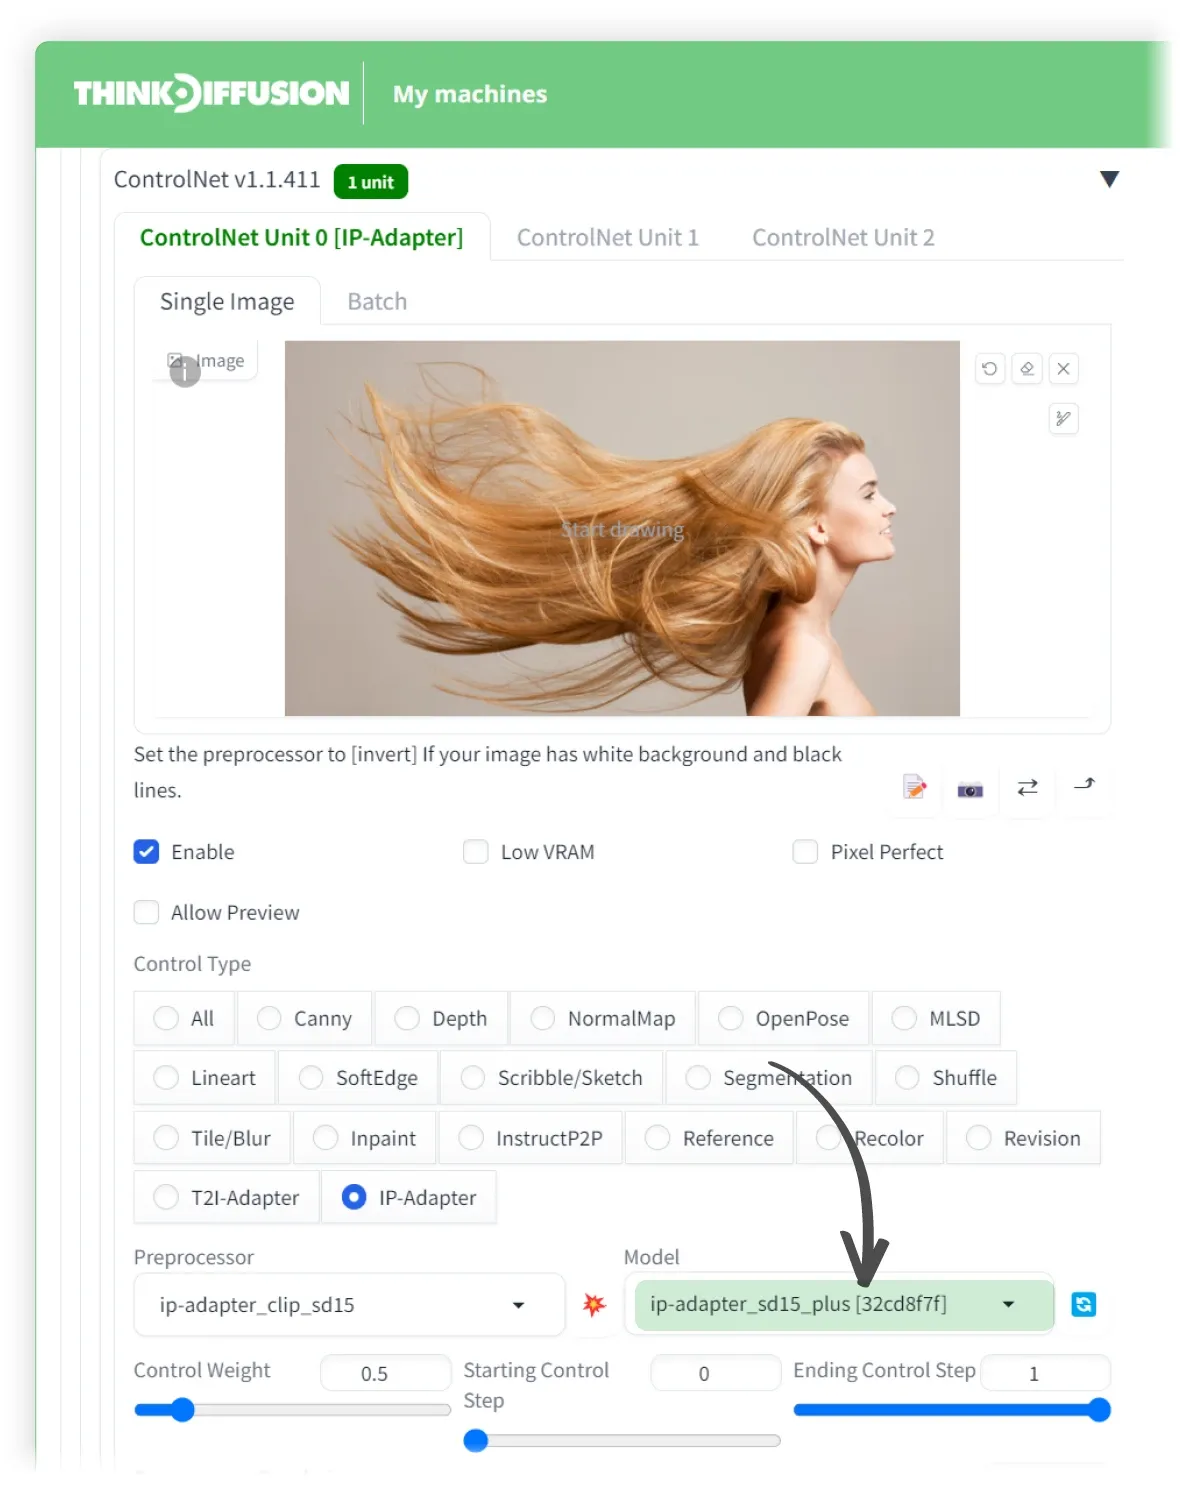
Hit Generate and we can see some crazy hair!
Using Image Prompt with SDXL Model
For higher resolution generations, we'll use SDXL models and the IP model that's compatible with SDXL models: IP-adapter_xl.
What's an SDXL Model?
These are models that are trained on Stable Diffusion's updated base model for resolutions of 1024x1024 and higher.
ControlNet and other extensions that were compatible with the lower resolution SD 1.5 models will not necessarily with SDXL models.
Within the txt2img tab, set the following parameters:
- (1) Model: ThinkDiffusionXL
- (2) Positive Prompt:
A bed shaped like a bear, masterpiece, 4k, ultra detailed - (3) Negative prompt: bokeh
- (4) Sampling Method: DPM++ 2S a Karras
- (5) Size: 1024 x 1024
- (6) CFG Scale: 7
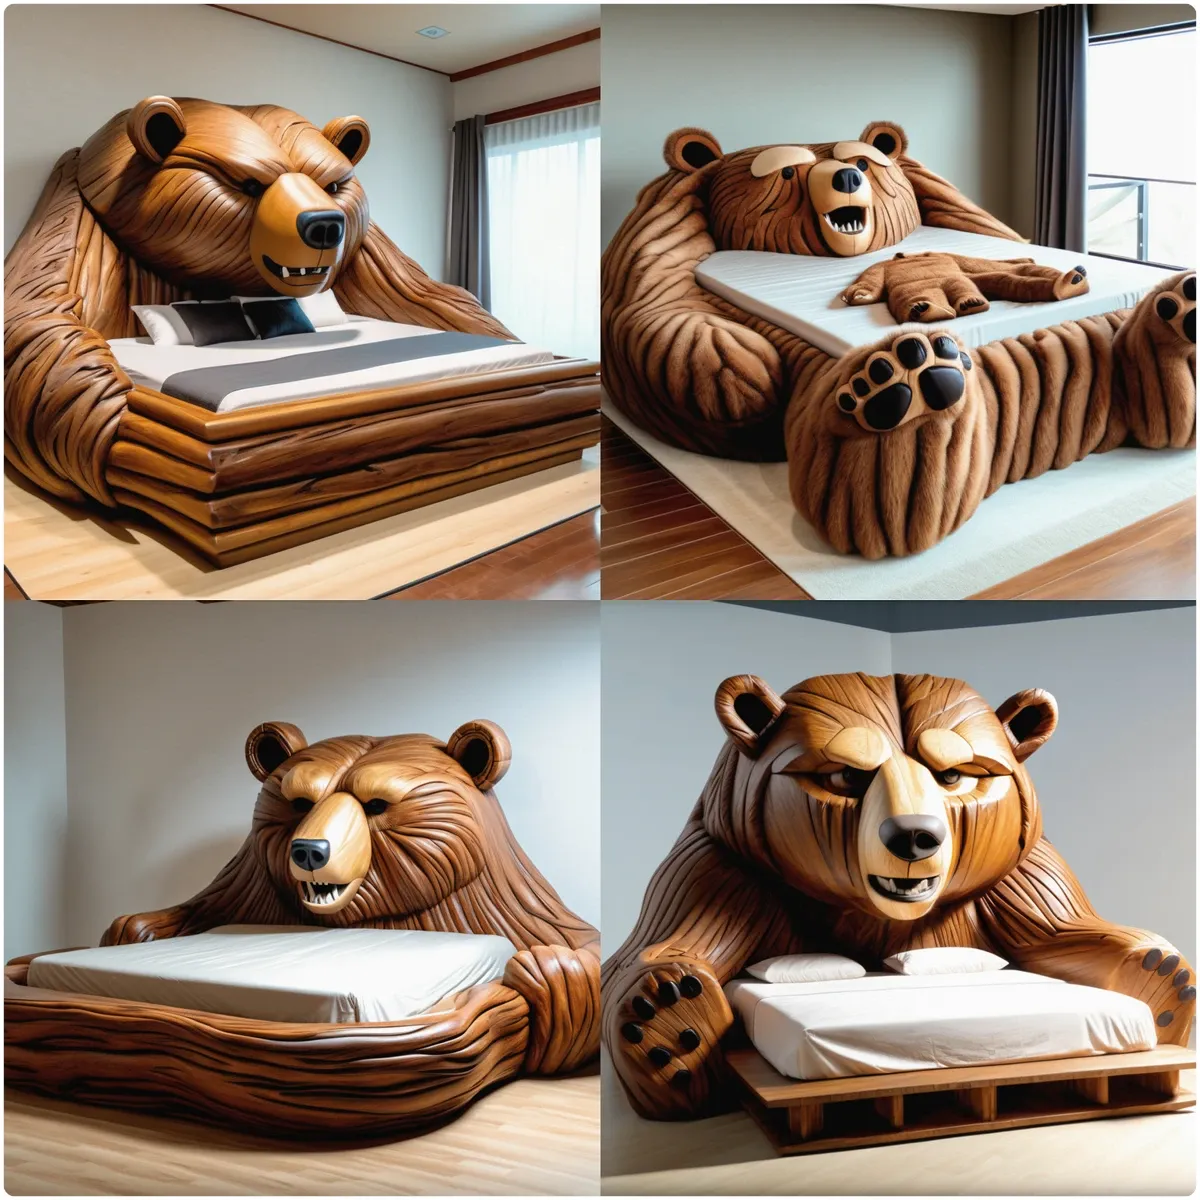
Hit generate and you can see that it places the bear on the bed which is not what we want!
To correct this, let's keep all the settings the same, but add the ControlNet model IP-adapter_xl.
Just like in the previous steps above, Drop down the ControlNet tab:
- (1) Click ✅ Enable
- (2) Set the Control Type to: IP-Adapter
- (3) Set the Preprocessor to: ip-adapter_clip_sdxl
- (4) Set the ControlNet model to: ip-adapter_xl
- (5) Set the Control Weight to 0.5
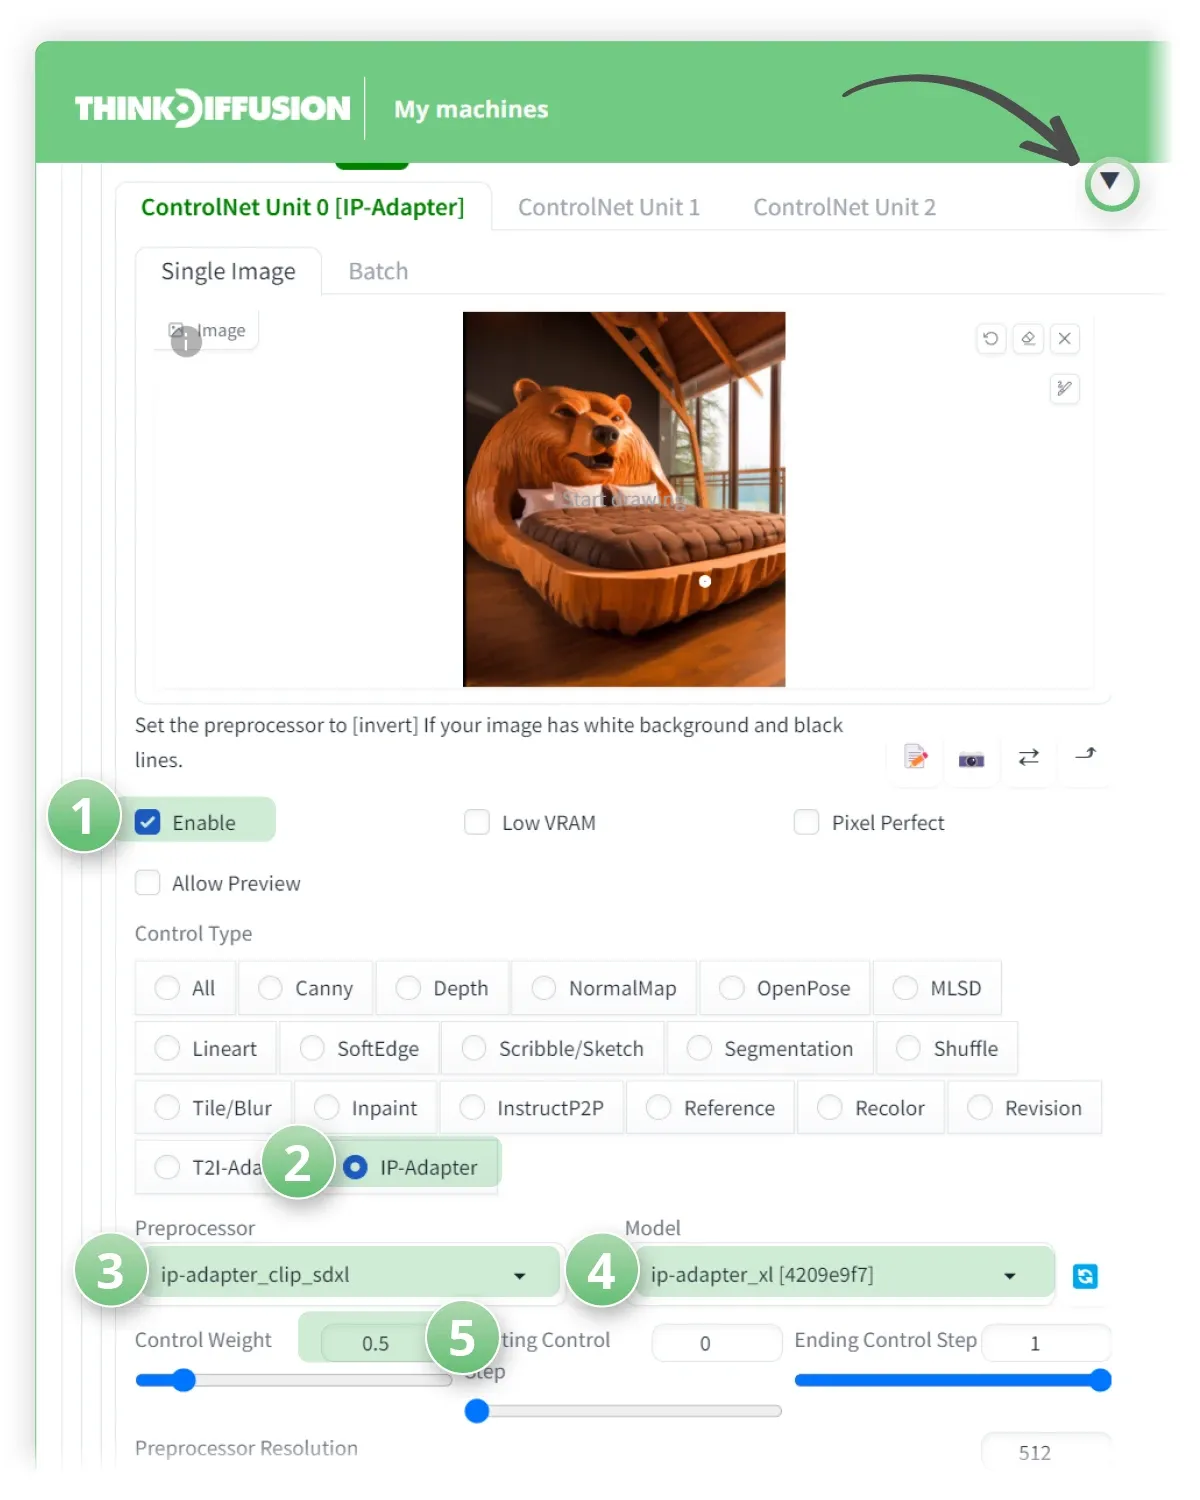
- Hit Generate and now we can see that we have exactly what we want 😄
Any of our workflows including the above can run on a local version of SD but if you’re having issues with installation or slow hardware, you can try any of these workflows on a more powerful GPU in your browser with ThinkDiffusion.
If you’d like a way turn some of your long-flowy-hair-inspired work into animated masterpieces, check out my post creating killer animations with AnimateDiff.
Most importantly, y'all have fun using the ip-adapter models and let us know what you're making!
Member discussion