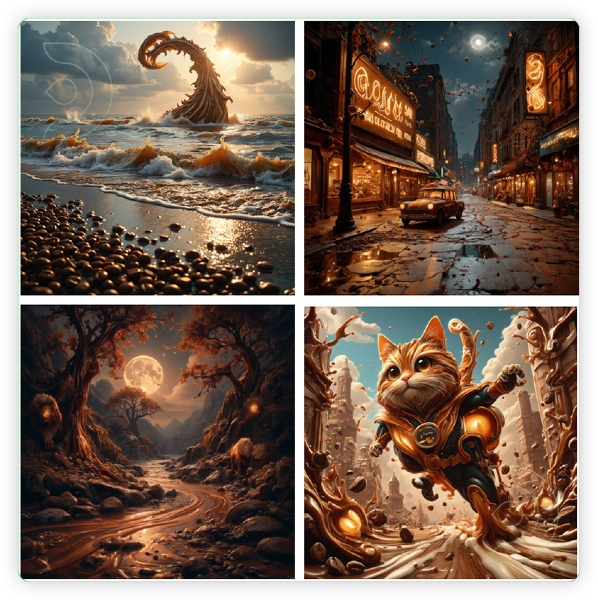
What if you could make every image you generate, conform to a certain style or person? This is exactly what using a LoRA model with Flux AI in ComfyUI does.
In this guide, we'll explore how Flux can help you build stronger, more efficient models with ease. Whether you're new to LoRAs or already familiar, you'll discover helpful tips and tricks to make your LoRA models shine. So, are you ready to see some magic in action? Let's dive in!
We'd like to credit Kijai for his knowledge of the original workflow.
How to Train a LoRA with Flux in ComfyUI
One-Time ComfyUI Setup
Custom Node
If there are red nodes in the workflow, it means that the workflow lacks the certain required nodes. Install the custom nodes in order for the workflow to work.
- Go to ComfyUI Manager > Click Install Missing Custom Nodes
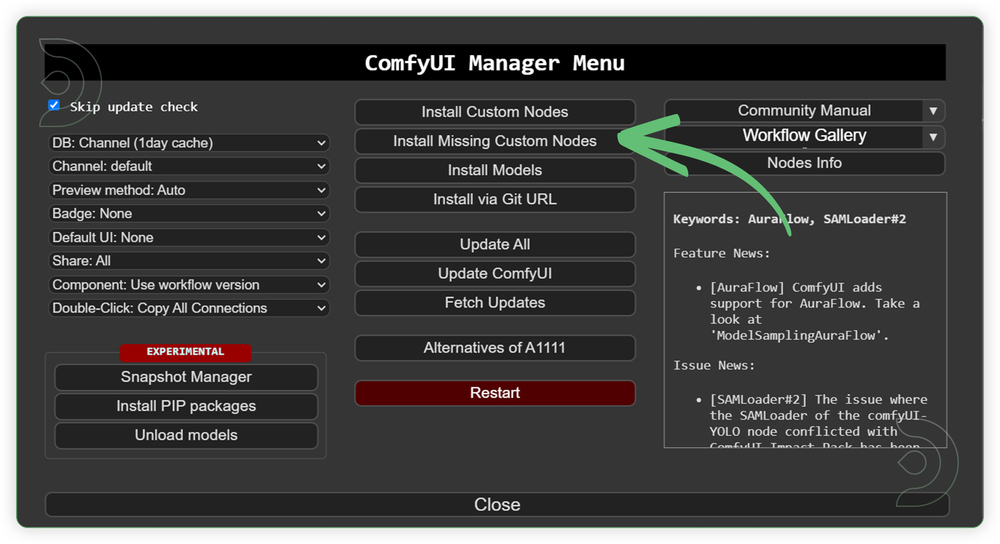
- Check the list below if there's a list of custom nodes that needs to be installed and click the install.

Models
Download the recommended models (see list below) using the ComfyUI manager and go to Install models or Model manager (depending on your version). Refresh or restart the machine after the files have downloaded.
- Go to ComfyUI Manager > Click Install Models/Model Manager
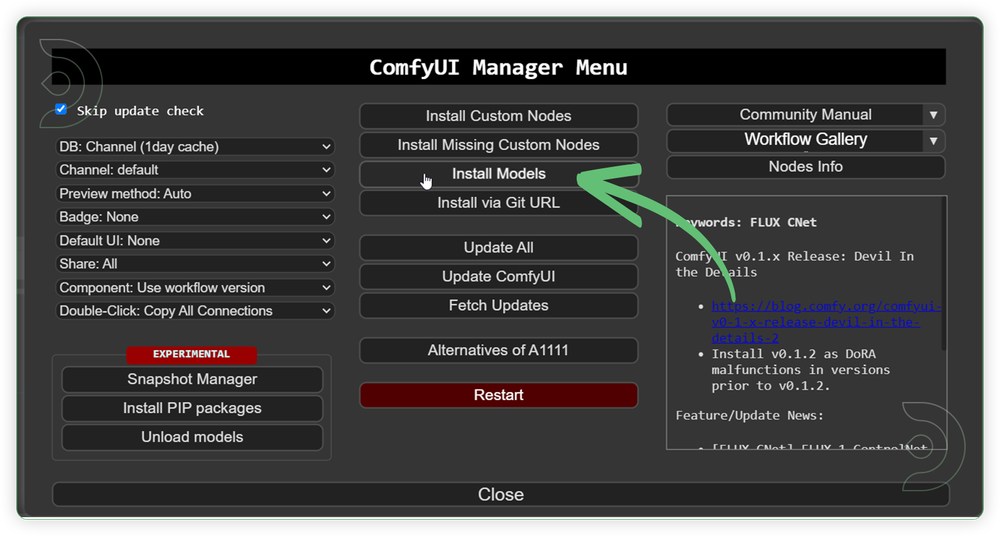
- When you find the exact model that you're looking for, click install and make sure to press refresh when you are finished.
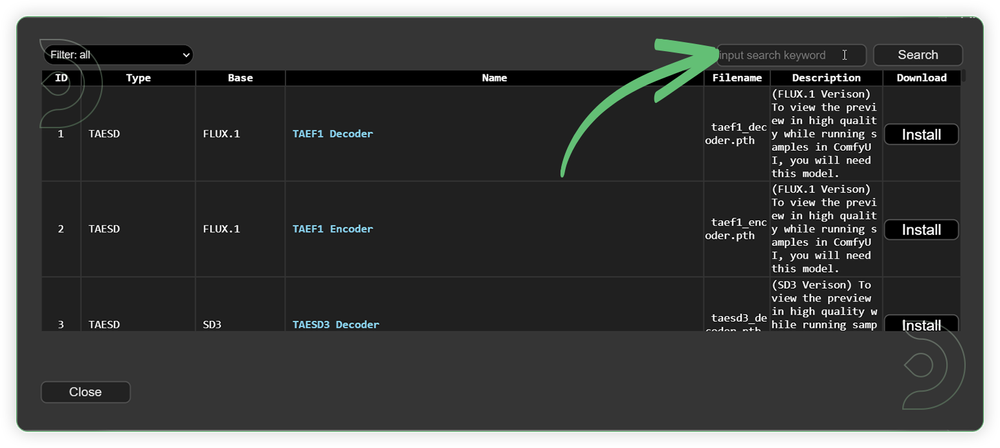
Model Path Source Link
Use the model path source if you prefer to install the models using model's link address and paste into ThinkDiffusion MyFiles using upload by URL.
| Model Name | Model Link Address |
|---|---|
| flux1-dev-fp8.safetensors | |
| flux_vae.safetensors | |
| clip_l.safetensors | |
| google_t5-v1_1-xxl_encoderonly-fp8_e4m3fn.safetensors |
No Link Available Use only the Comfy Manager to Install |
Guide Table for Upload
Datasets Setup
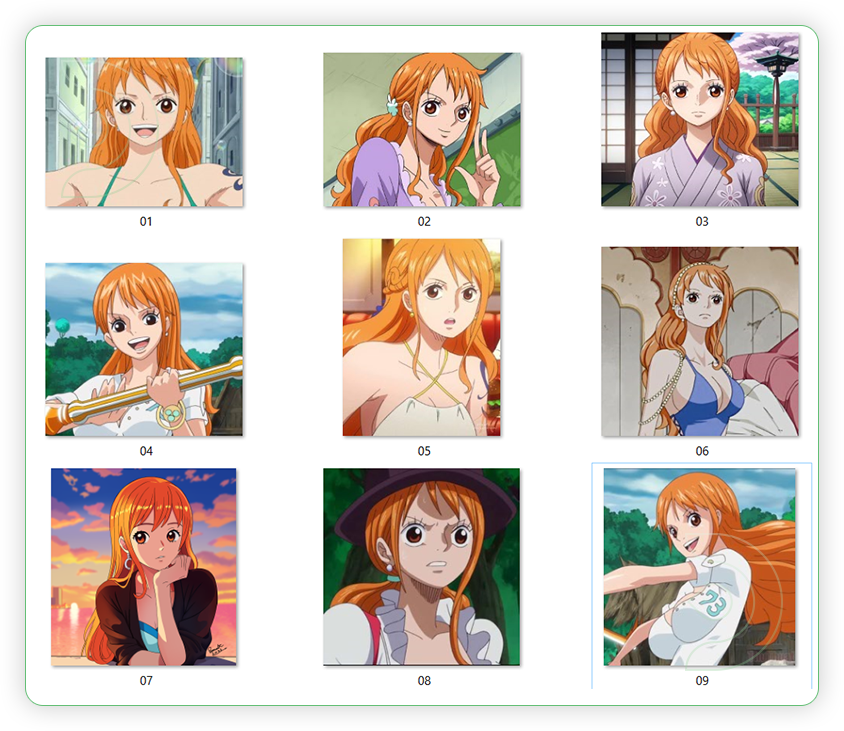
Dataset Collection (images to train on)
The key to a great style LoRA is a great dataset. A dataset is your collection of reference images. Some qualities to look for:
- High resolution images, ideally 1024x1024 or greater.
- Images with no blur, compression artifacts or noise.
- Consistent images that represent the style well.
- Correct ratio with a 1:1 ratio is required. Crop your images accordingly and place the subject in the center.
- Use different angles, lighting, and outfits to make the model more flexible.
- Quality over quantity: If an image is almost qualified but lacks a few properties, either fix it or remove it.
- If you are training a face, include a few high-resolution headshots.
A great site for bulk cropping and resizing is https://www.birme.net/

ThinkDiffusion Directory Path
Input
- Using your collected images for the dataset (about 10-20 images is a good starting point), upload it to …comfyui/datasets/<new FOLDER of LORA>. If there’s no datasets folder, create it manually and create a new folder of LoRA inside of it.
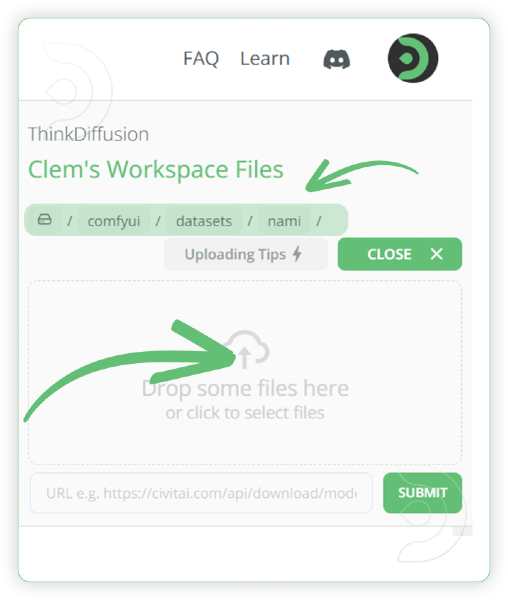
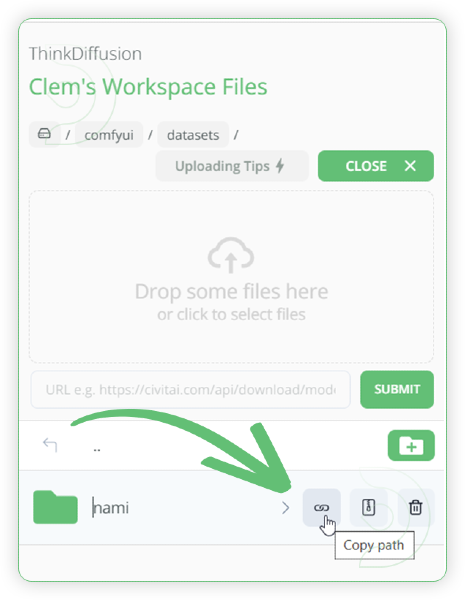
- Copy the File Path
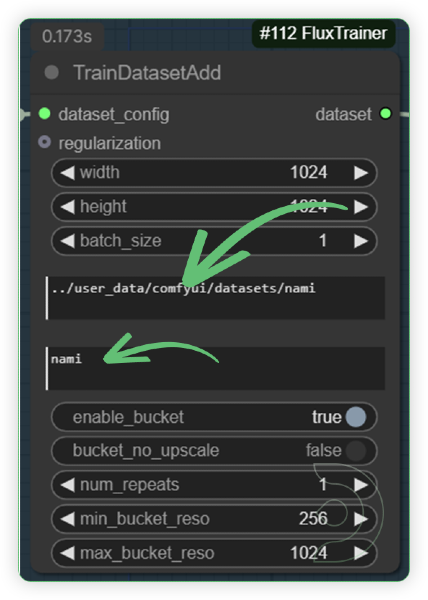
- Paste the copied File Path to the TrainDatasetAdd node in ComfyUI and placed it into the first text box. The second box is for trigger word
Output
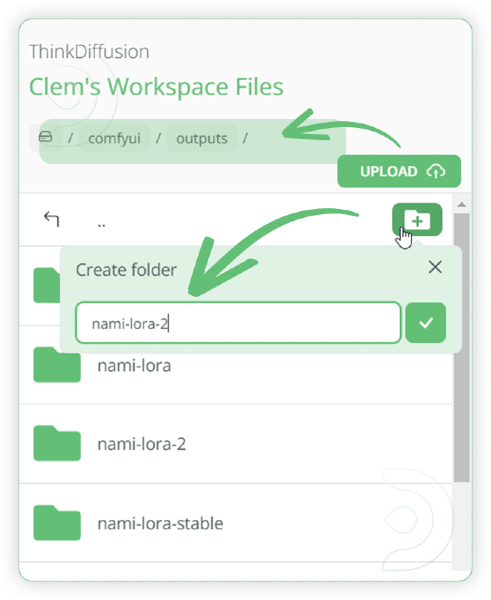
- Go to …/comfyui/outputs directory. Create a new LoRA folder within the outputs folder, this folder is where your generated LoRA will be saved.
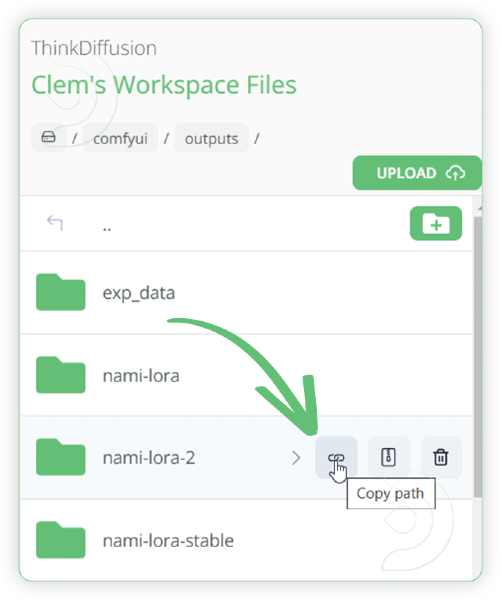
- Copy the File Path of your created LoRA folder
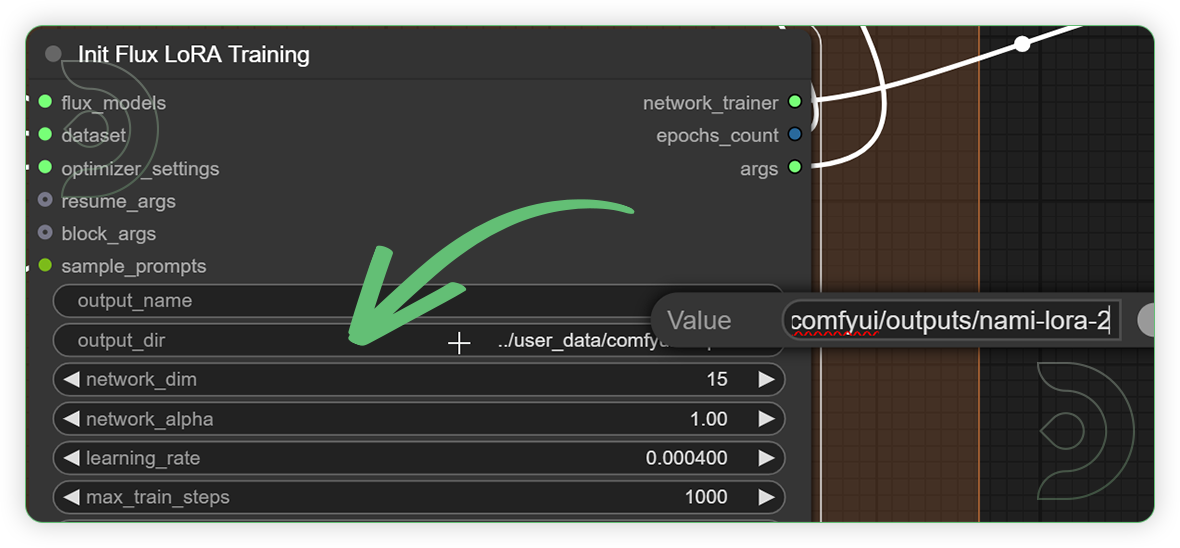
- Go to Init Flux LoRA Traning node in ComfyUI. Paste the copied File Path into the output_dir widget. In the output_name, type your desired LoRA name.
How to use Flux LoRA on ComfyUI?
| Steps | Default Nodes to Follow |
|---|---|
| 1. Set the Dataset | 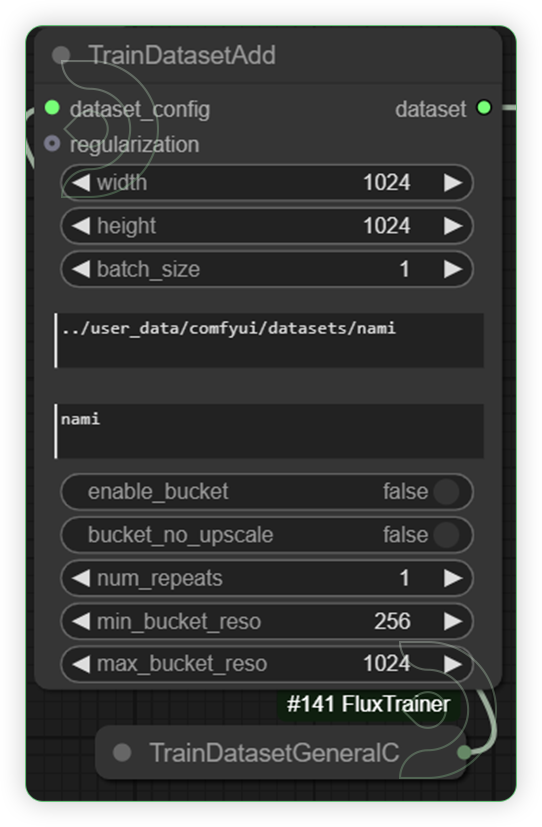 |
| 2. Set the Models | 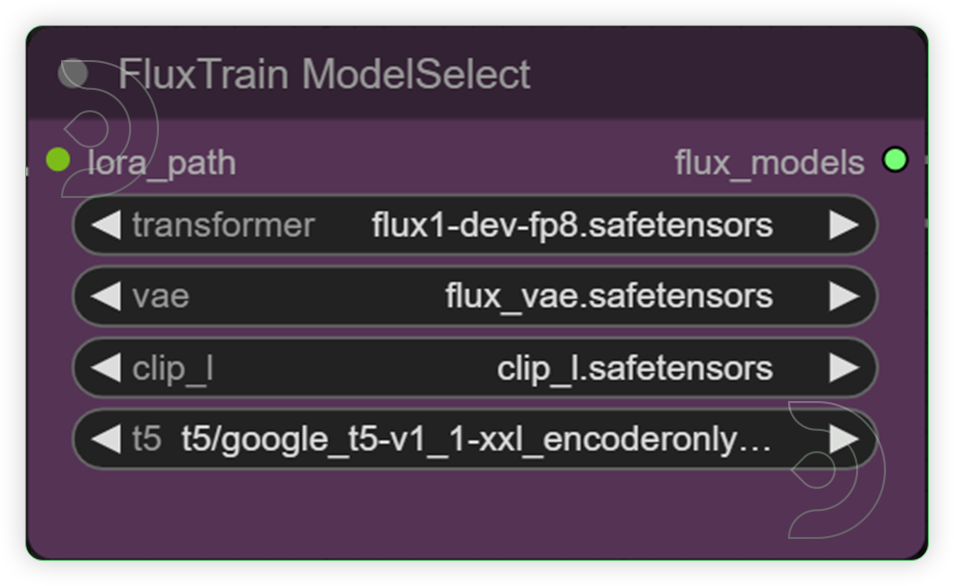 |
| 3. Set the Training Settings | 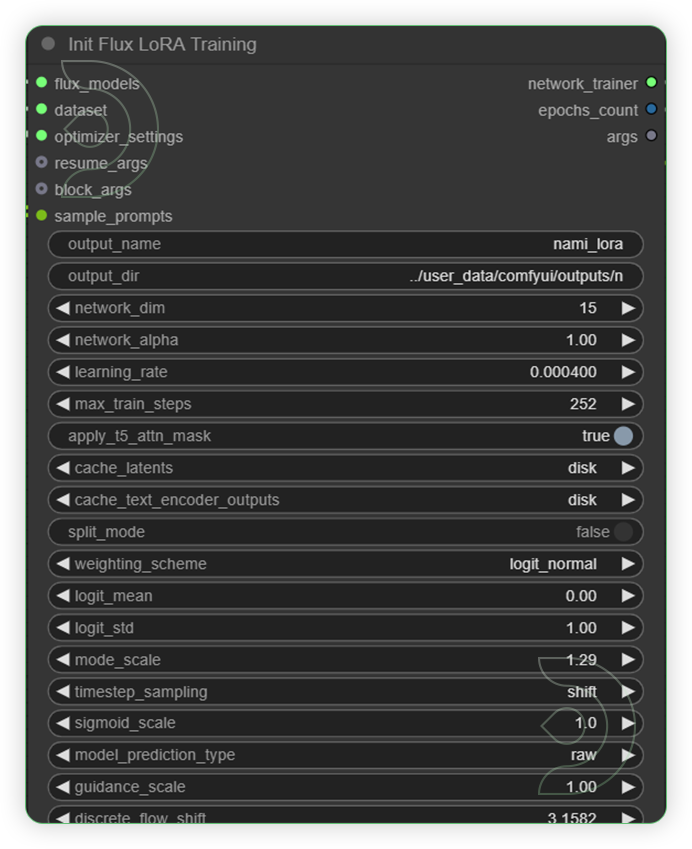 |
| 4. Check the Configuration | 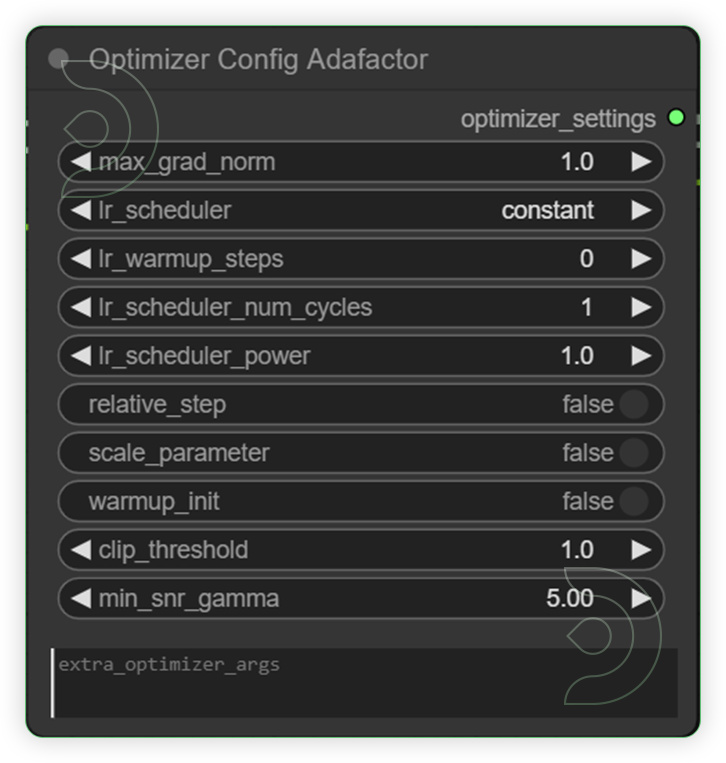 |
| 5. Write the Training Prompts Write 4 prompts that each use the trigger word in them. Each prompt can describe a different scene that you would like to see along with your model. Separate each prompt by a vertical bar symbol. The purpose of this step of creating a prompt for each training module in the training group helps train the trigger word itself. |
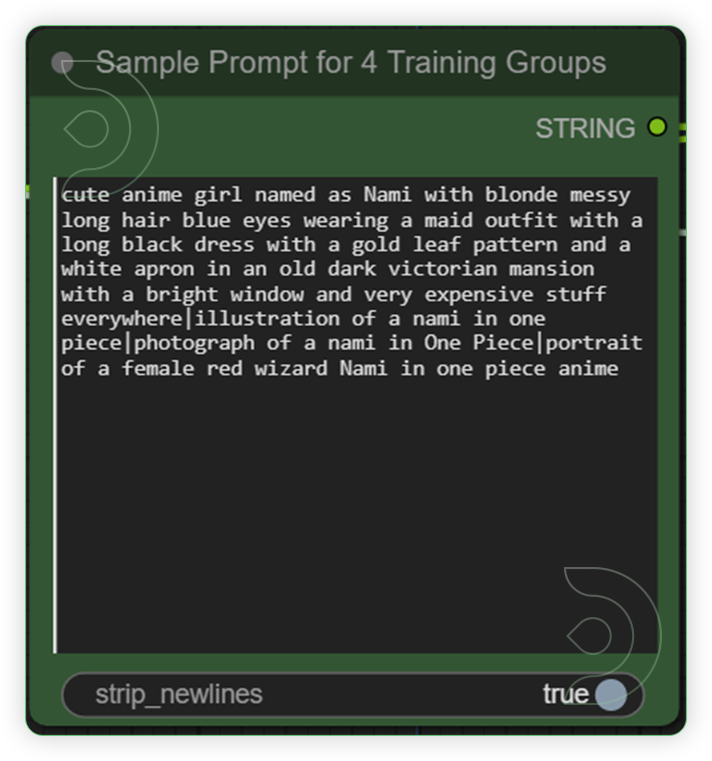 |
| 6. Set the Training Steps The steps input in each training group must be one fourth of Total Max Train from Step 3 for example, 2000 Max Train Steps is divided by 4 = 500 steps |
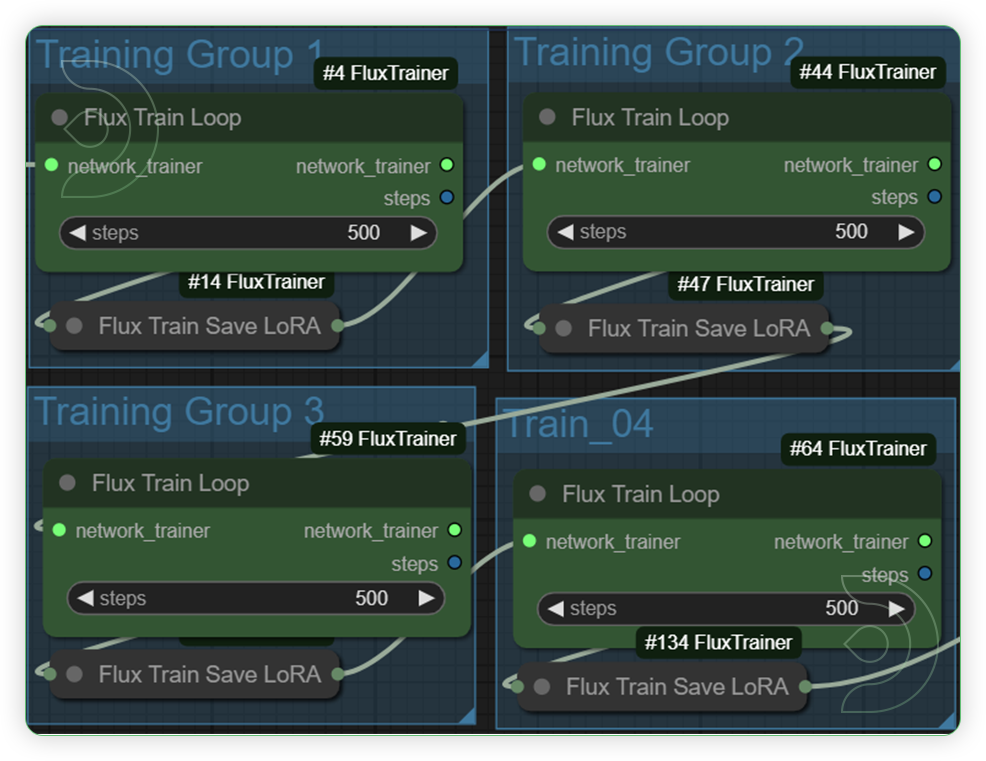 |
| 7. Run the Prompt | |
| 8. Check the new LoRA File in the ThinkDiffusion output | 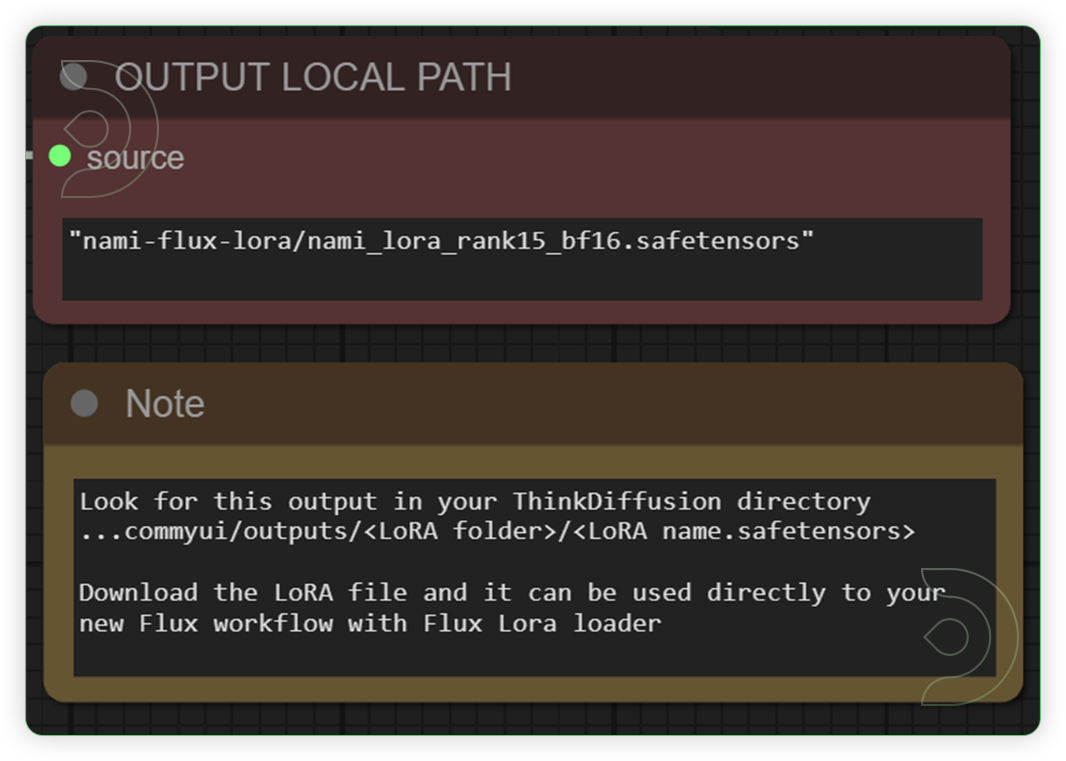 |
Tips
1. for logo and objects network_dim is [10 - 15] and network_alpha is 10
2. for character, network_dim is [16 - 32] and network_alpha is 20
3. for style, network_dim is [32 - 50] and network_alpha is 20
1. for logo and objects - 10 images at 2000 training steps
2. for character - 10-20 images at 2000 training steps
3. for style - 20-30 images at 3000 training steps
Examples using the Trained Flux AI LoRA
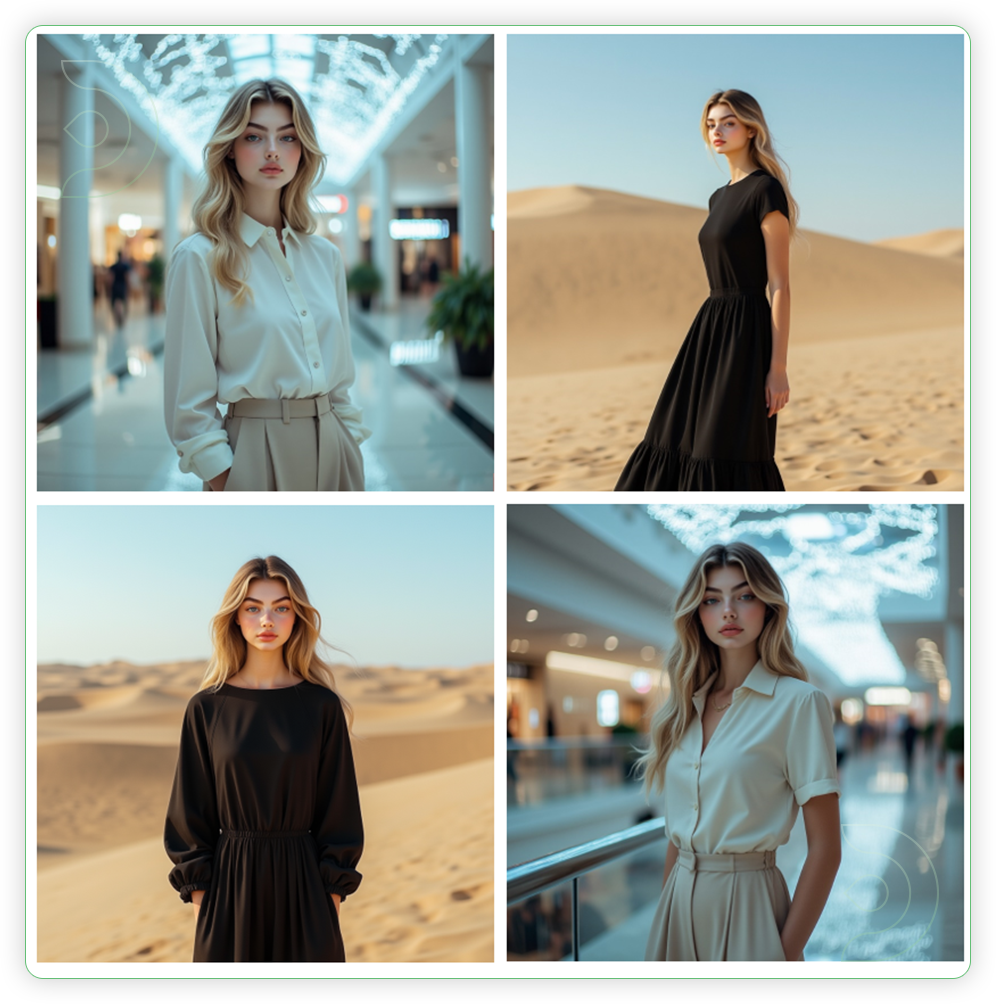

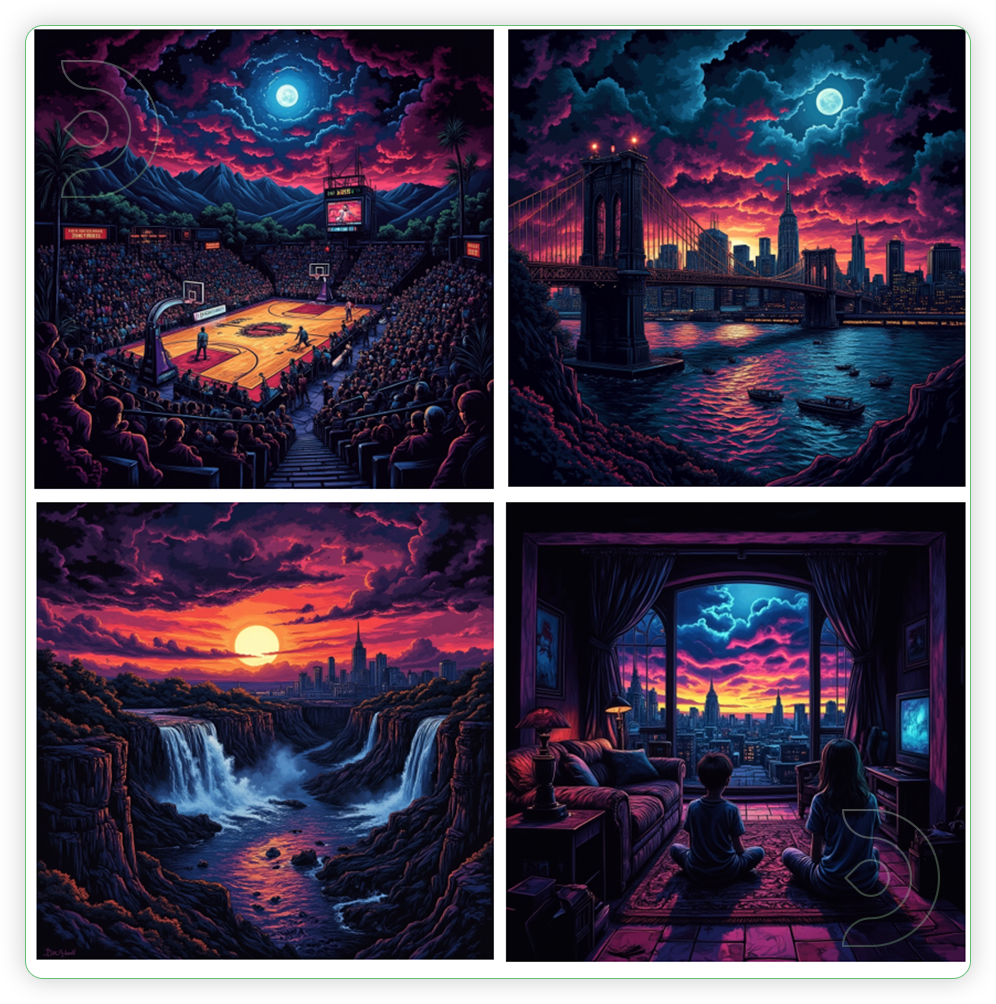
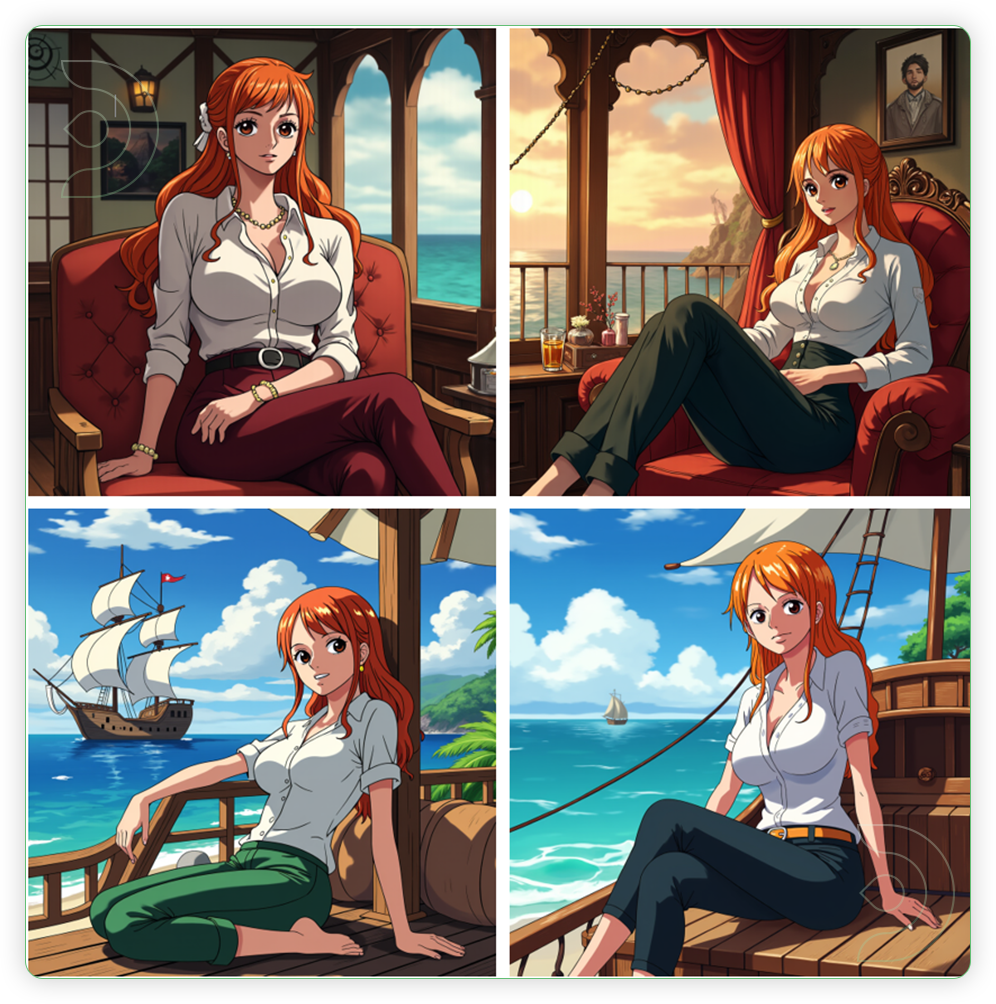
Check the Settings Used Below
Ukrainian Influencer Model
- LoRA Type - Character LoRA
- Trigger Word - pretty Ukrainian model
- Base Model - dev-fp8
- Training Steps - 2000
- Dataset - 17 Images
- network_dim - 32
- network_alpha - 20
- learning_rate - 0.0004
- optimizer - using optimizer adafactor node, max_grad_norm - 1, lr_scheduler - constant
Fitness World Logo
- LoRA Type - Object LoRA
- Trigger Word - fitness world logo
- Base Model - dev-fp8
- Training Steps - 2000
- Dataset - 10 Images
- network_dim - 16
- network_alpha - 10
- learning_rate - 0.0004
- optimizer - using optimizer adafactor node, max_grad_norm - 1, lr_scheduler - constant
Dan Mumford Art
- LoRA Type - Style LoRA
- Trigger Word - danmumford art
- Base Model - dev-fp8
- Training Steps - 3000 steps training
- Dataset - 18 images
- network_dim - 50
- network_alpha - 20
- learning_rate - 0.0004
- optimizer - using optimizer adafactor node, max_grad_norm - 1, lr_scheduler - constant
We would like to credit Dan Mumford for the concept and style of his art. It serves as inspiration for the training of our LoRA's dataset.
Nami
- LoRA Type - Character LoRA
- Trigger Word - nami
- Base Model - dev-fp8,
- Training Steps - 2000 steps training
- Dataset - 10 images
- network_dim - 30
- network_alpha - 15
- learning_rate - 0.0004
- optimizer - using optimizer adafactor node, max_grad_norm - 1, lr_scheduler - constant
FAQ
- How long does it take to train Flux LoRA?
Training a Flux LoRA model typically takes 1.5 to 4.5 hours, depending on factors like GPU performance, dataset size, resolution, and training steps. For instance, using a powerful GPU like an RTX 4090 with a moderate dataset size can result in training times around 2-4 hours. Larger resolutions and batch sizes may extend this duration. - Can I run flux locally?
Yes, you can run Flux locally if you have a compatible GPU (e.g., NVIDIA RTX 20-series or higher), sufficient VRAM, and the necessary software like PyTorch and Stable Diffusion frameworks installed. It's easier to use platforms like ThinkDiffusion, with no installation required :)
If you’re having issues with installation or slow hardware, you can try any of these workflows on a more powerful GPU in your browser with ThinkDiffusion.
If you enjoy ComfyUI and you want to test out creating awesome animations, then feel free to check out this AnimateDiff tutorial here. And have fun out there with your noodles!



Member discussion