

Several sectors rely on picture processing and editing, including e-commerce, marketing, and more. Isolating an image's subject from its background—a procedure known as "background removal"—is one of the most difficult aspects of image editing. Using specialized software and painstaking physical labour are commonplace in traditional ways of background removal. The advent of AI, however, has completely altered the nature of this work. Artificial intelligence can automate the process of removing image backdrops, allowing you to devote more time and energy to making eye-catching visuals that will captivate your audience.
What is Background Removal and Replacement?
Removing or changing the background of a picture or video is called background removal. It finds widespread application across numerous fields, including but not limited to photography, advertising, graphic design, and online shopping. By removing all background elements, artists can draw attention solely to the topic of a photograph, be it a person or a product.

For photos to look polished and professional, removing the background is a must. It changes the picture's tone and atmosphere and draws attention to the subject matter. For instance, while shopping online, people are more likely to buy things with a plain white background because it makes them look more trustworthy. When it comes to graphic design, the ability to remove backgrounds opens up a world of possibilities. By combining diverse parts from multiple sources, artists can create a one-of-a-kind piece by simply switching out the original backdrop for a different landscape or hue. Therefore, background removal isn't just for looks; it may be a potent tool for narrative and communication as well.
BRIA AI RMBG
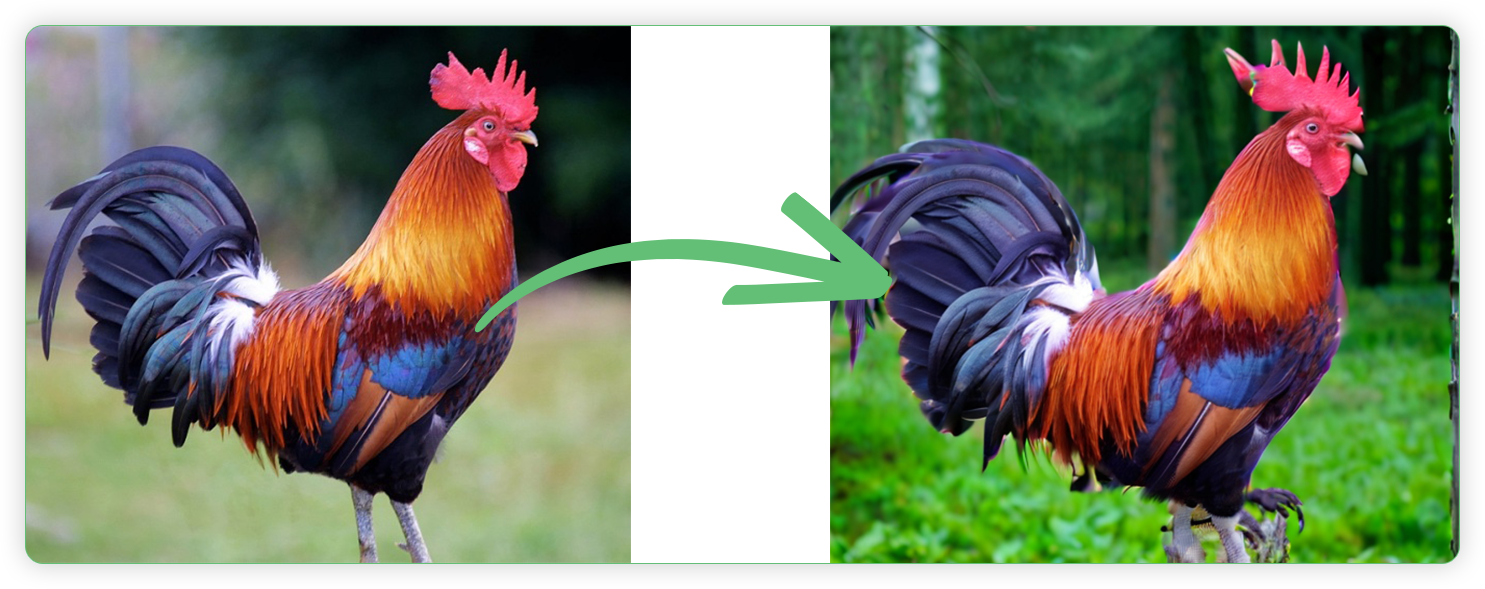
The Bria AI RMBG is a custom node intended for ComfyUI. It is an Unofficial implementation of BRIA Background Removal v1.4 The most effective model for removing video backgrounds that BRIA is currently working on; it is batch-processable. Based on BRIA AI, ZhoZho has a version for ComfyUI and it does a better job in image background removal and replacing a new one. ZhoZho is an outstanding AI architect and AI Designer who has a good reputation in creating ComfyUI workflows.
There are 2 available nodes for Bria AI RMBG:
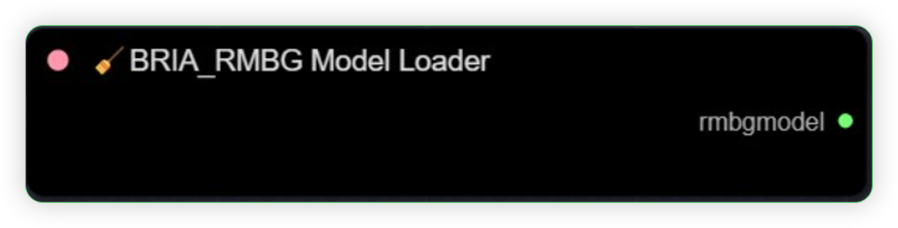
- BRIA_RMBG Model Loader: Automatically load the Remove v1.4 model
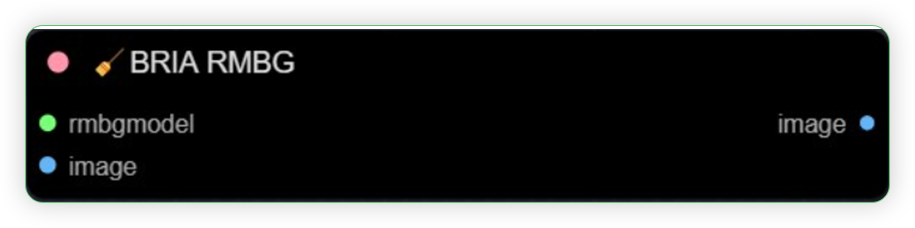
- BRIA RMBG: remove background
One-Time Setup
Required Files
BRIA AI RMBG custom node
- BRIA AI RMBG custom node - Install this custom node using the ComfyUI Manager. Search “bria” in the search box, select the ComfyUI-BRIA_AI-RMBG in the list and click Install. Restart the ComfyUI machine in order for the newly installed custom node to take effect.

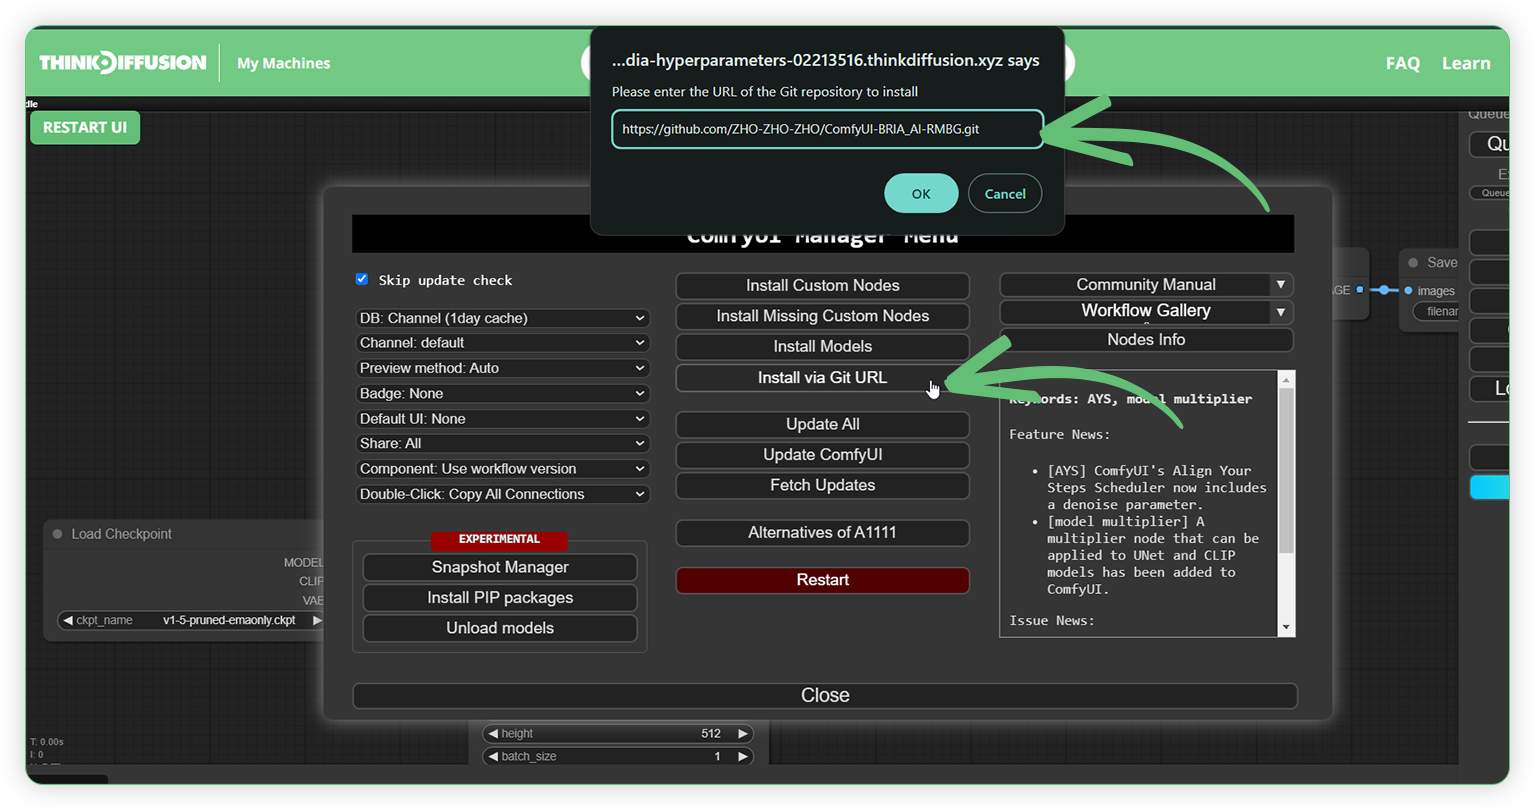
- If ComfyUI-BRIA_AI-RMBG is not available in ComfyUI Manager, you need a manual install using the Git web url. Go to https://github.com/ZHO-ZHO-ZHO/ComfyUI-BRIA_AI-RMBG and copy the web url.
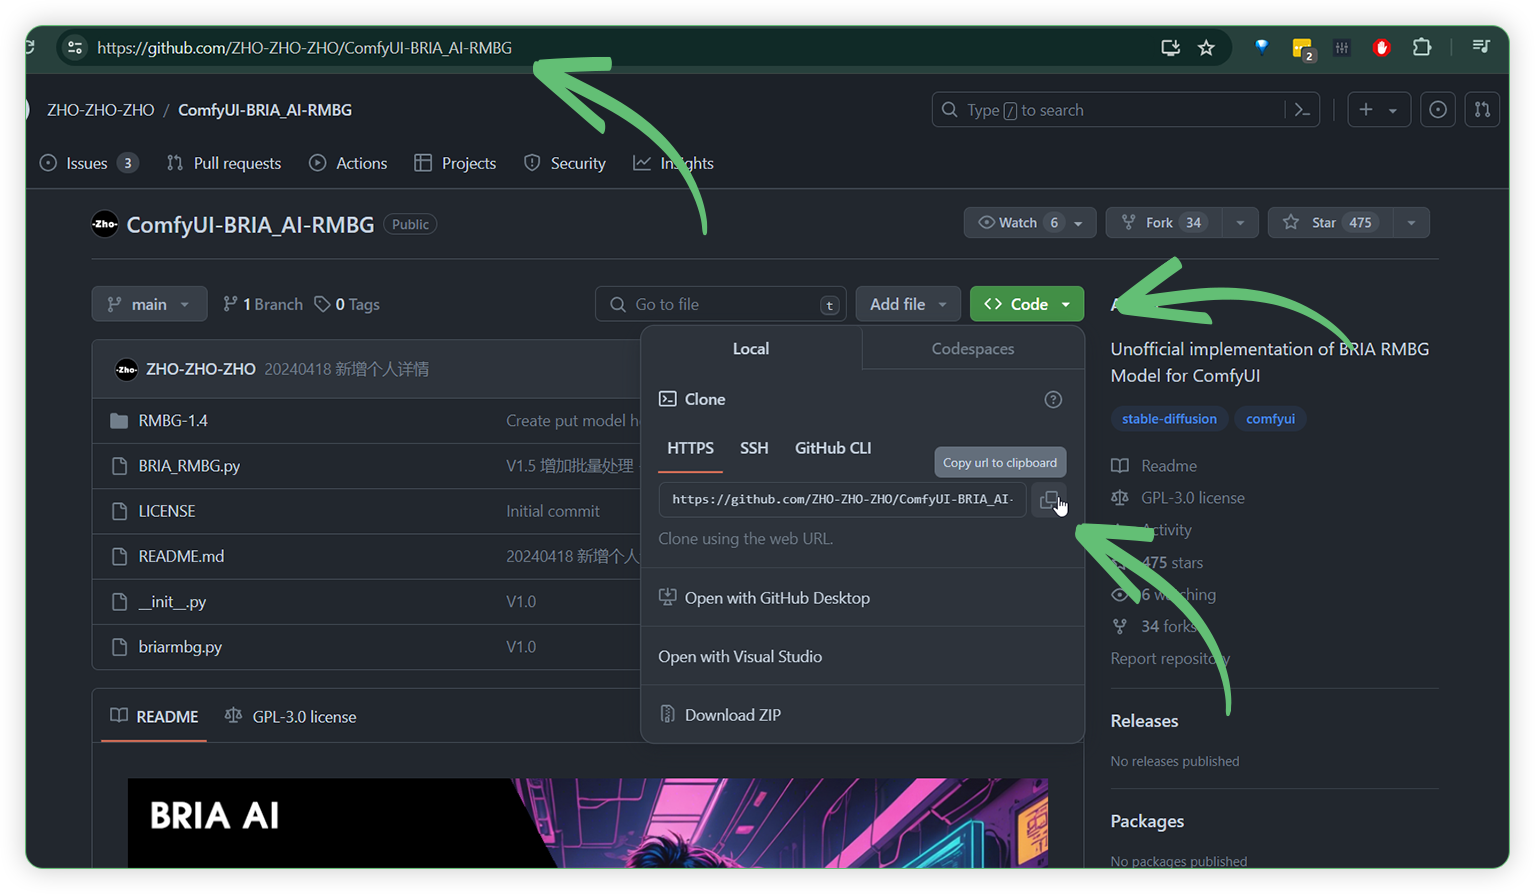
- Go to ComfyUI Manager, click Install via Git URL and paste the copied Git web URL into the url box and click OK. Restart the ComfyUI machine in order for the newly installed custom node to take effect.
RMBG 1.4 Model
- In order for the workflow to work, you need an RMBG 1.4 model. Go to https://huggingface.co/briaai/RMBG-1.4/tree/main and click the download icon.
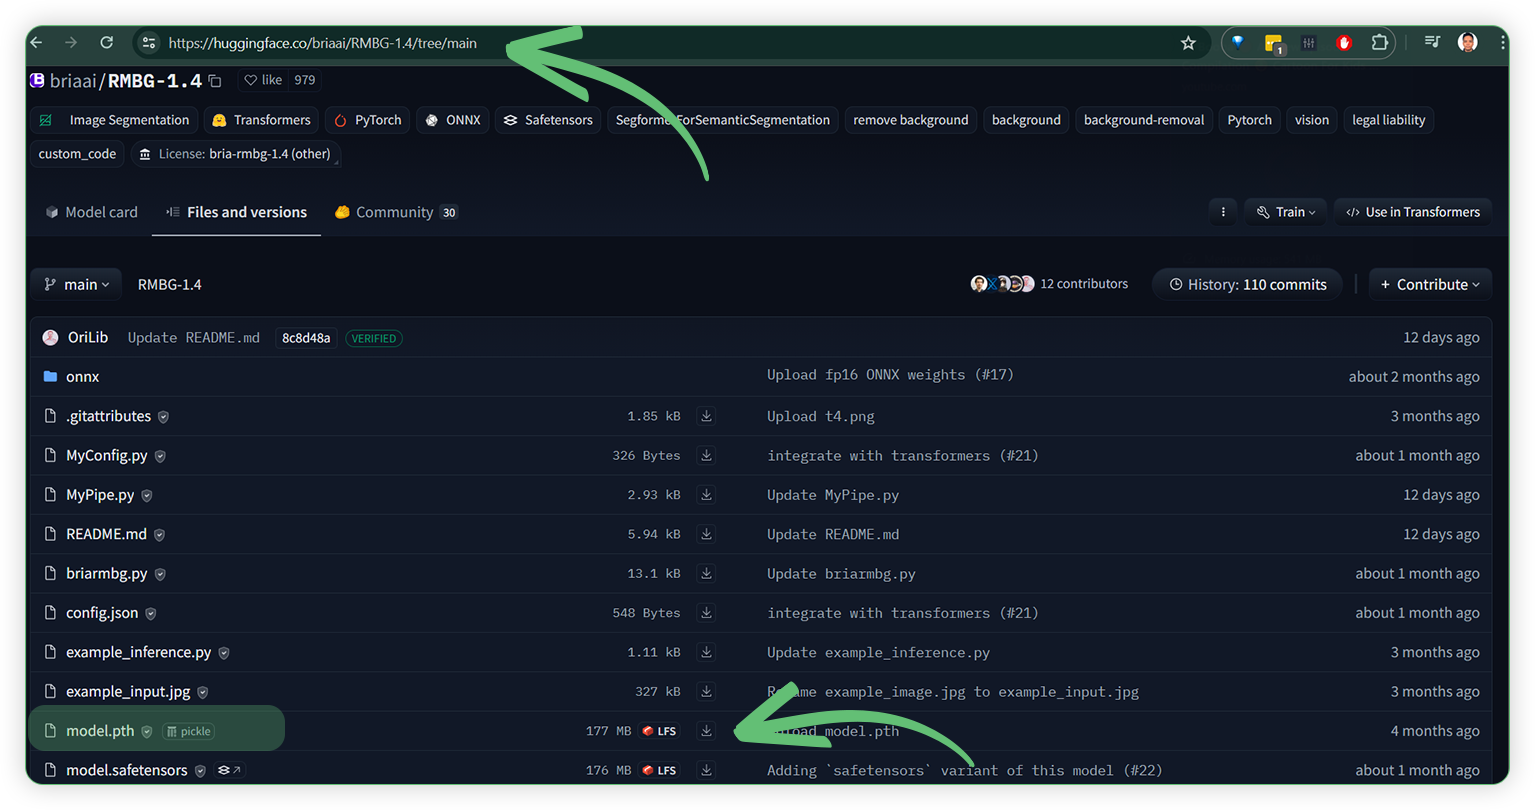
- After you had downloaded the file. Upload it to the ComfyUI machine using this ThinkDiffusion my files file directory: …comfyui/custom_nodes/ComfyUI-BRIA_AI-RMBG/RMBG-1.4/ . Restart the ComfyUI machine in order for the newly installed model to take effect.
RealVisXL Base Model
- Go to https://huggingface.co/lowercase/misc/tree/main and download the realvisxlV30Turbo_v30TurboBakedvae.safetensors, with a file size of 7GB. This file will be used as the base model in this workflow.

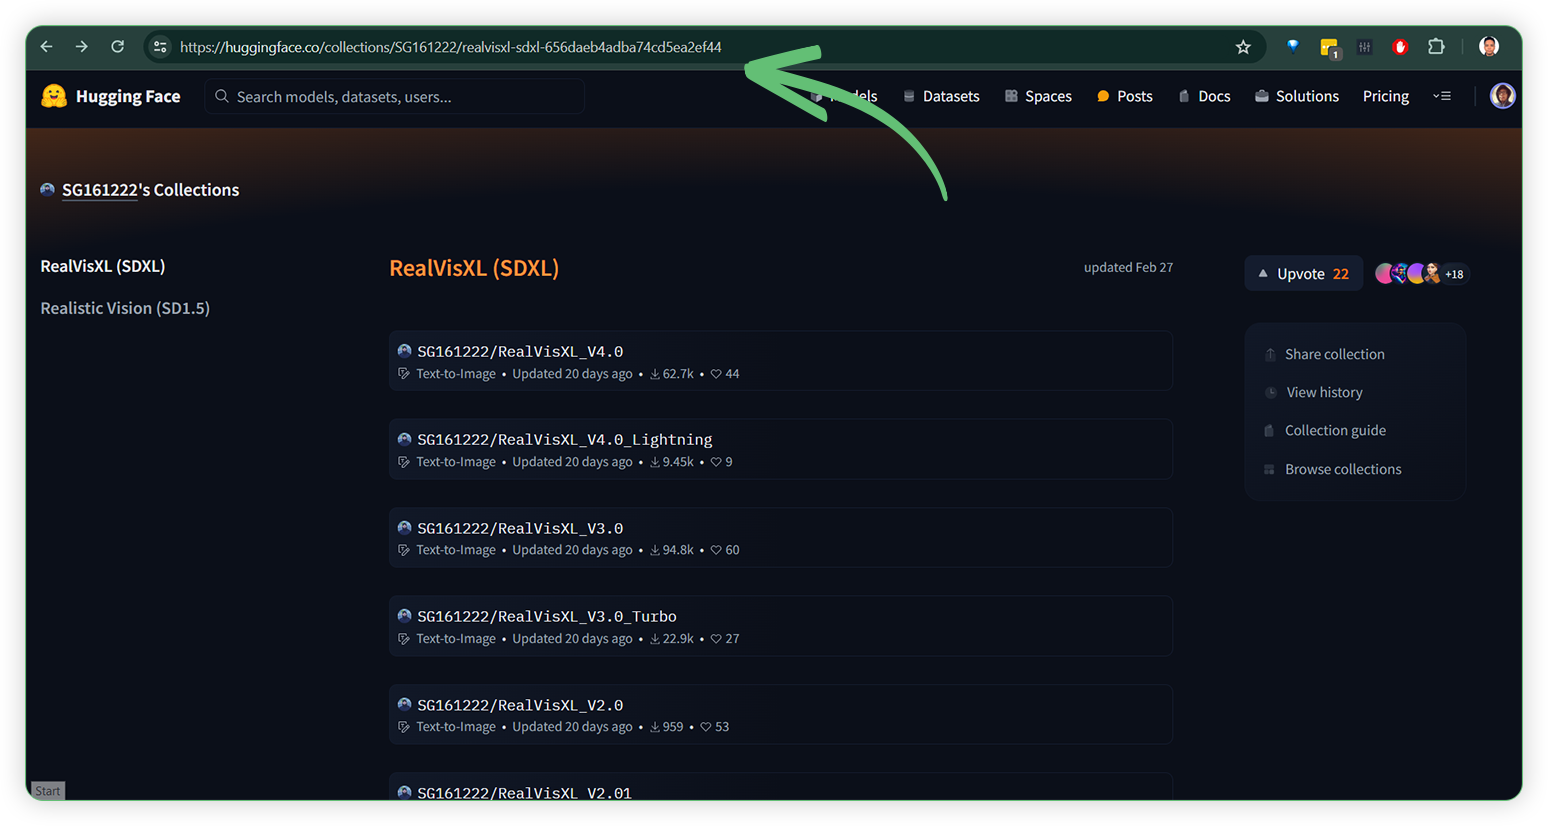
- If you wish to download another version of RealVisXL Base Model, you can try the RealVisXL Huggingface Collection here.
- After you had downloaded the file. Upload it to the ComfyUI machine using this ThinkDiffusion My Files file directory: …/comfyui/models/checkpoints/. Since the file is large and above 2GB size, follow the instruction here UPLOAD HELP by using Google Drive method, then upload it to the ComfyUI machine using a Google Drive link. Restart the ComfyUI machine in order for the newly installed model to take effect.
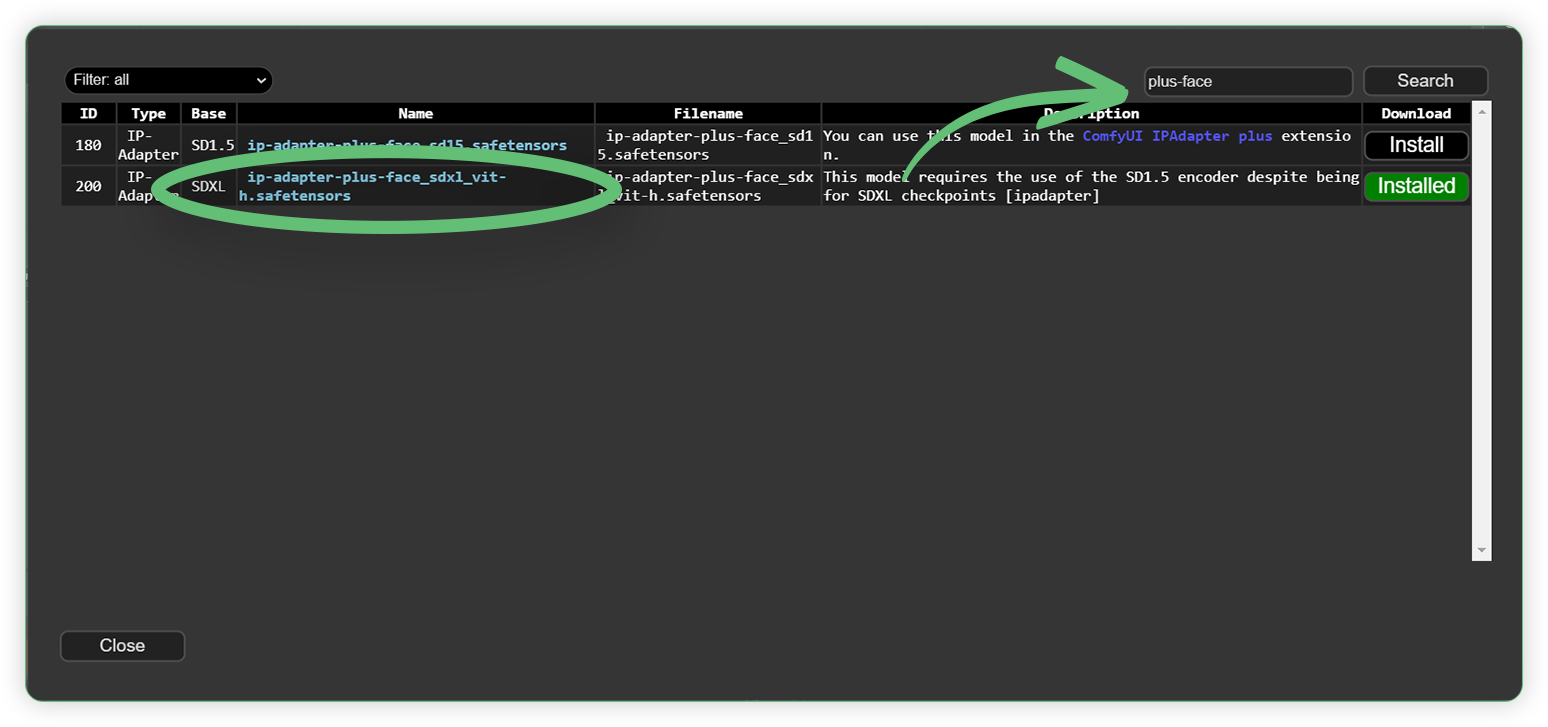
IPAdapter Plus Face SDXL Vit H model
Install this model using the ComfyUI Manager. Search “plus-face” in the search box, select the ip-adapter-plus-face_sdxl_vith.safetendors in the list and click Install. Restart the ComfyUI machine in order for the newly installed model to take effect.
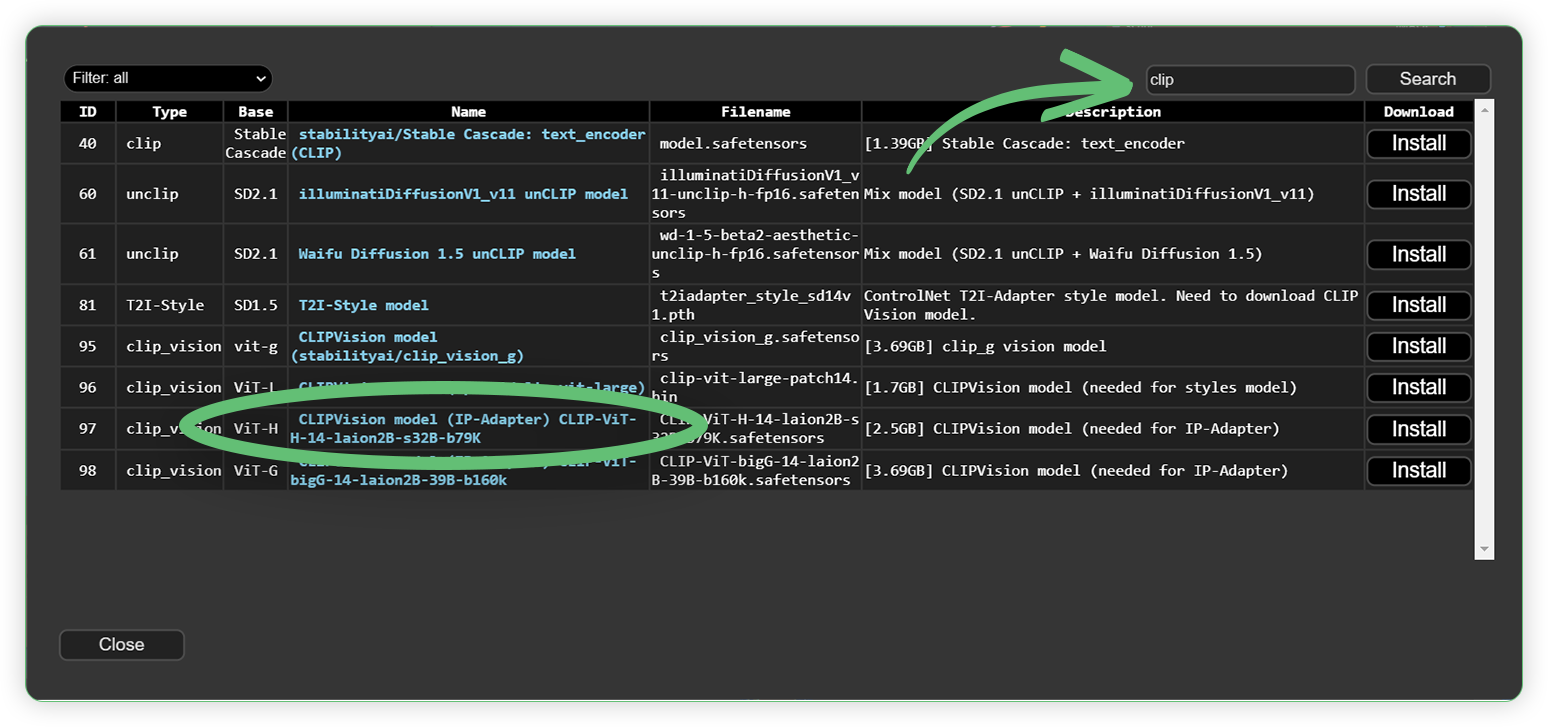
IPAdapter Clip Vision Model
- Install this model using the ComfyUI Manager. Search “clip” in the search box, select the CLIPVision model (IP-Adapter) CLIP-ViT-H-14-laion2B-s32B-b79K.safetensors in the list and click Install. Restart the ComfyUI machine in order for the newly installed model to take effect.
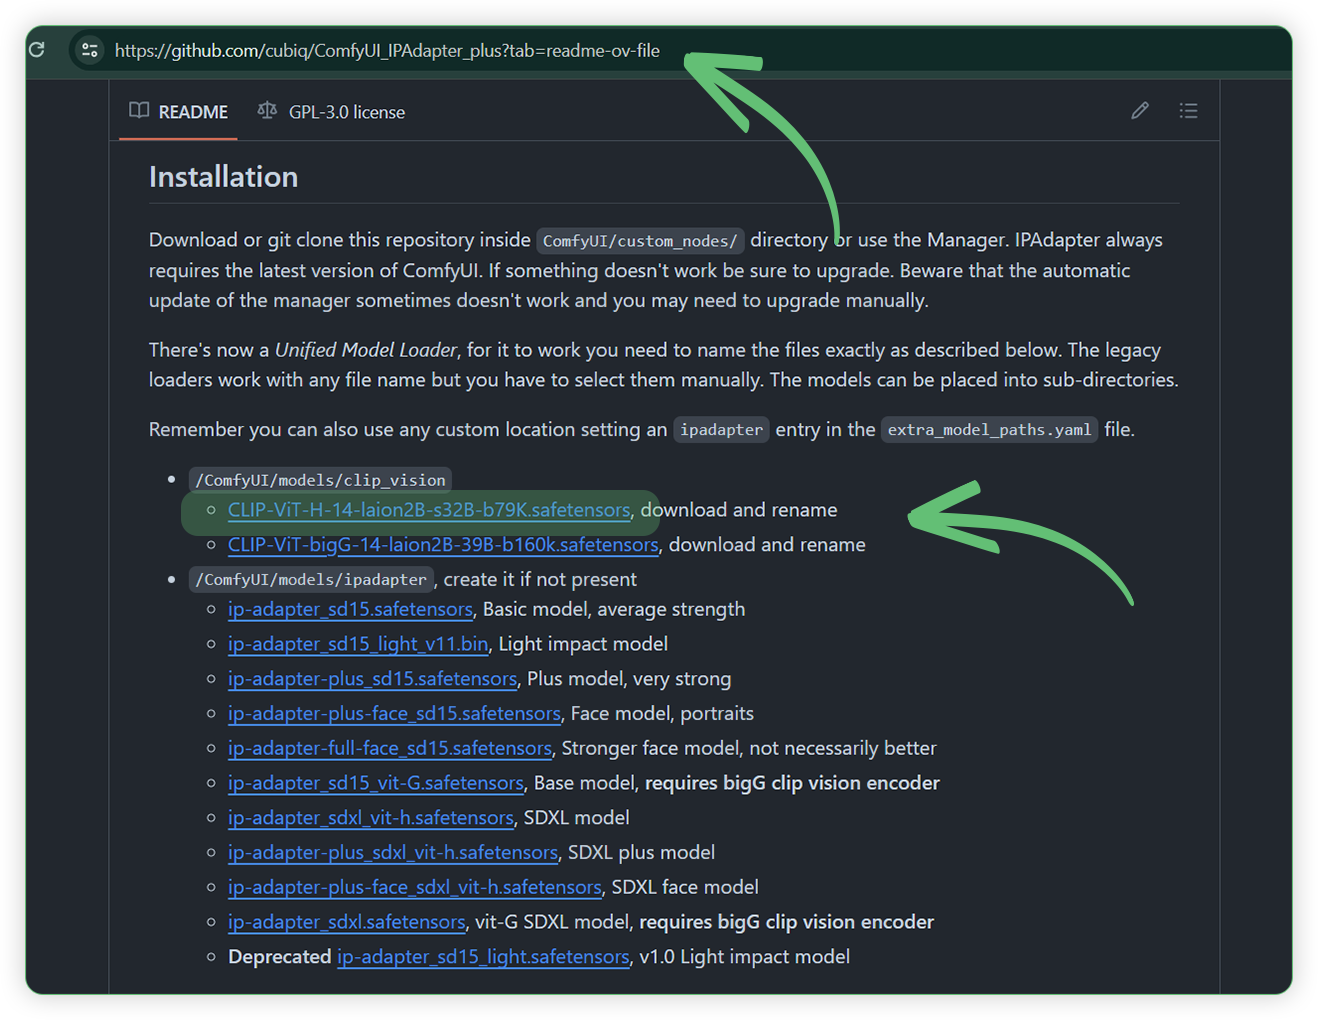
- If not working, you can download the IPAdapter Clip Vision model directly from this link https://github.com/cubiq/ComfyUI_IPAdapter_plus, scroll down and look for CLIP-ViT-H-14-laion2B-s32B-b79K.safetensors. Upload the downloaded file to the ComfyUI machine using this ThinkDiffusion My Files file directory: …/comfyui/models/clipvision/. Restart the ComfyUI machine in order for the newly installed model to take effect.
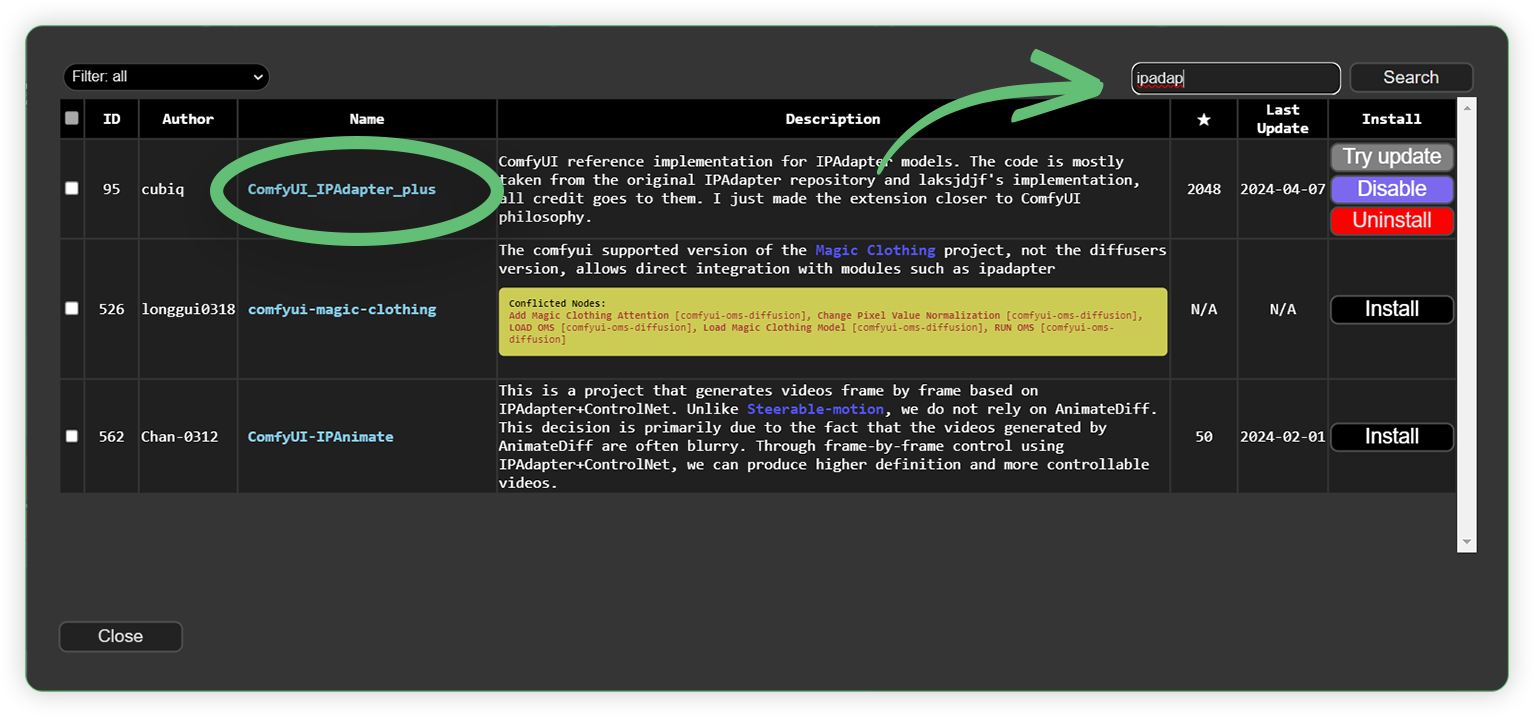
IPAdapter Plus
Install this custom node using the ComfyUI Manager. Search “ipadapter” in the search box, select the ComfyUI_IPAdapter_plus in the list and click Install. Restart the ComfyUI machine in order for the newly installed model to take effect.
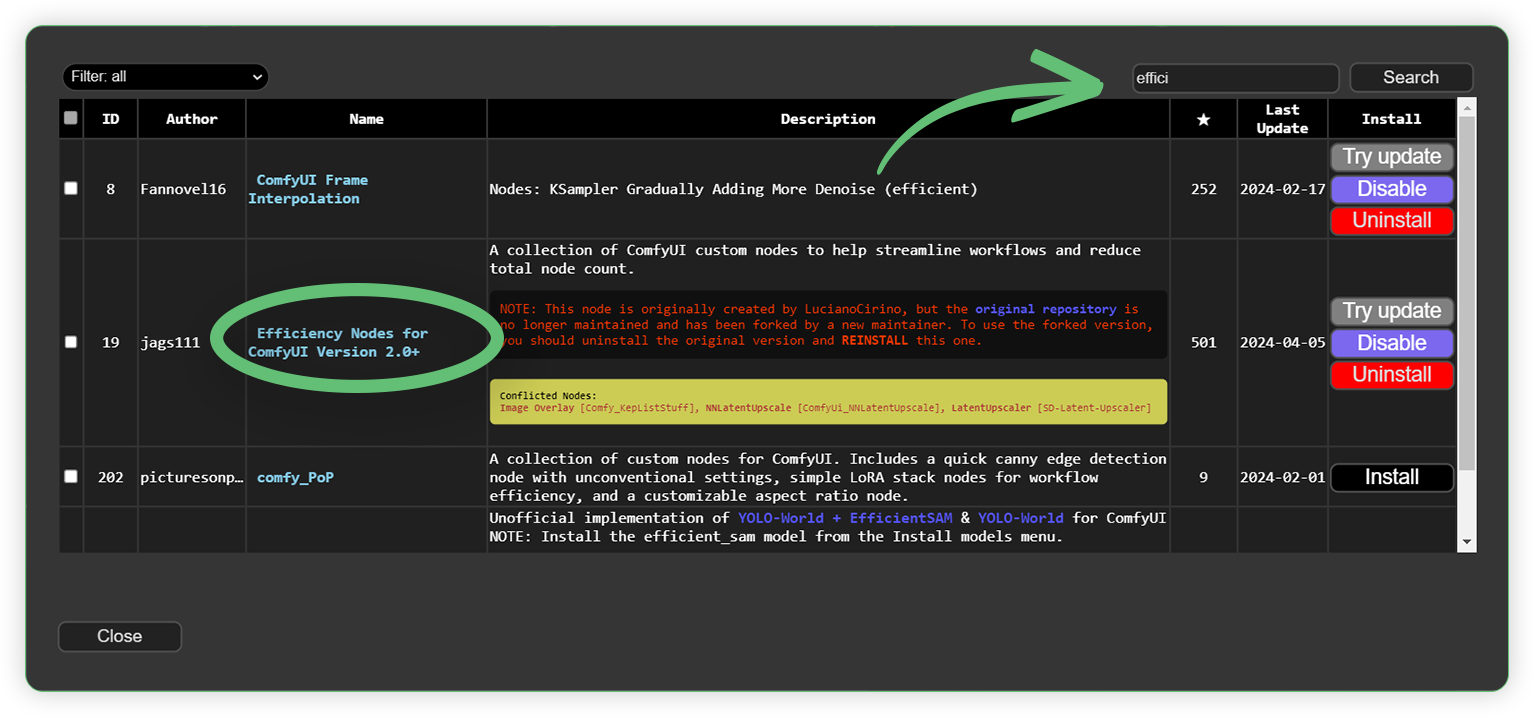
Efficiency Nodes
Install this custom node using the ComfyUI Manager. Search “efficiency” in the search box, select the Efficiency Nodes for ComfyUI Version 2.0+ in the list and click Install. Restart the ComfyUI machine in order for the newly installed model to take effect.
How to Use
Download free stock videos clips here Pixabay videos
Download free stock images here Pixabay and Pexels.
Background Removal
Using Image
Download the workflow here Image Background Removal
This image below is a sample of the simple workflow that uses the BRIA AI RMBG. Follow this simple node placement and you can have accurate image background removal. Load your desired simple image and run the Queue prompt.
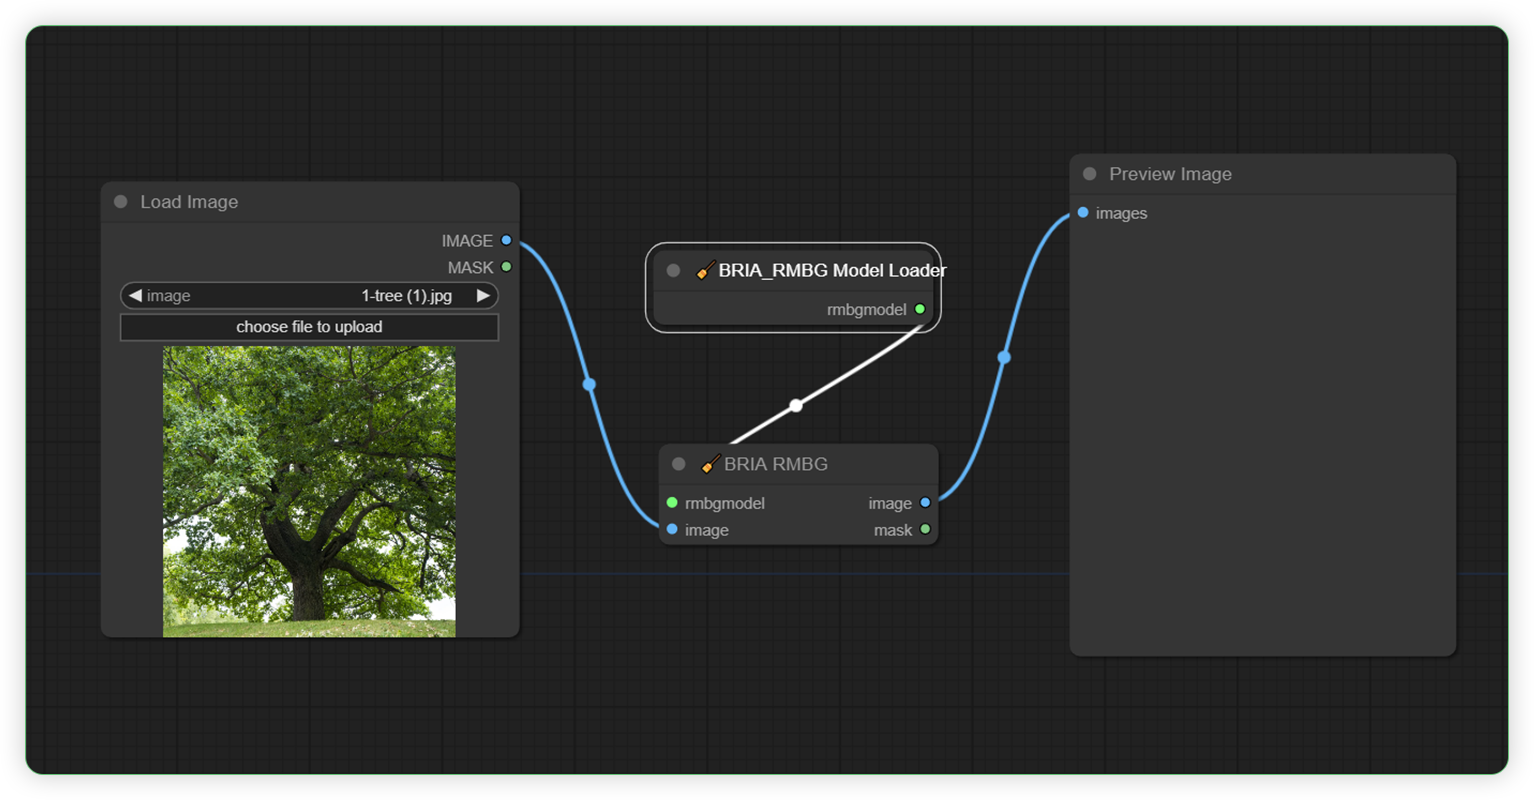
Note: The Bria AI RMBG has a higher accuracy of image background removal. As shown in the image below, the 1st image preview (using Bria AI) has an excellent result compared to the rest of the image removal custom nodes such as the Abg-comfyui, Pfaeff-comfyui, rcsaquino, Rembg, and ComfyUI Essentials.

Using Video
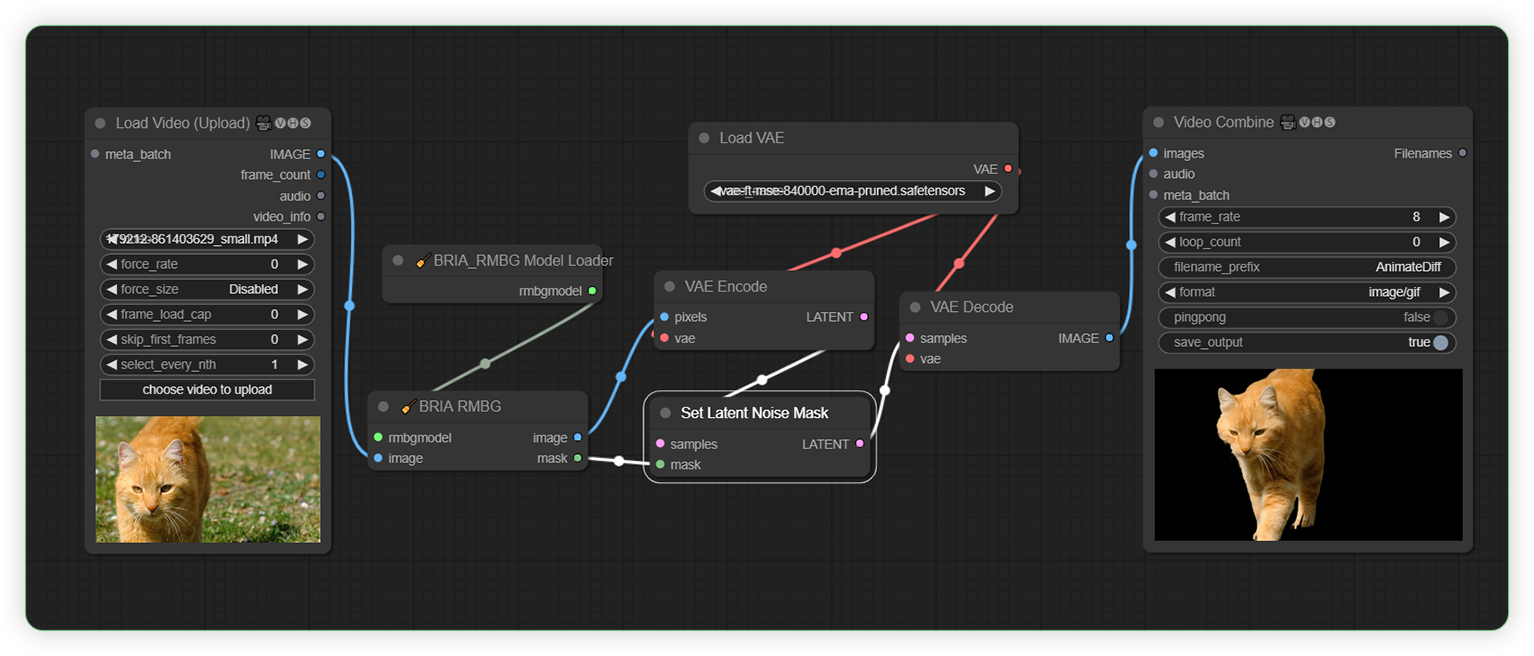
Download the workflow here Video Background Removal
This image below is a simple workflow that uses the BRIA AI RMBG. Follow this simple node placement and you can have a video background removal. Take note that you need to be in Turbo Mode when using this workflow due to its long duration of image processing. Load a short video clip which focuses on a subject and run the Queue prompt.
Background Replacement
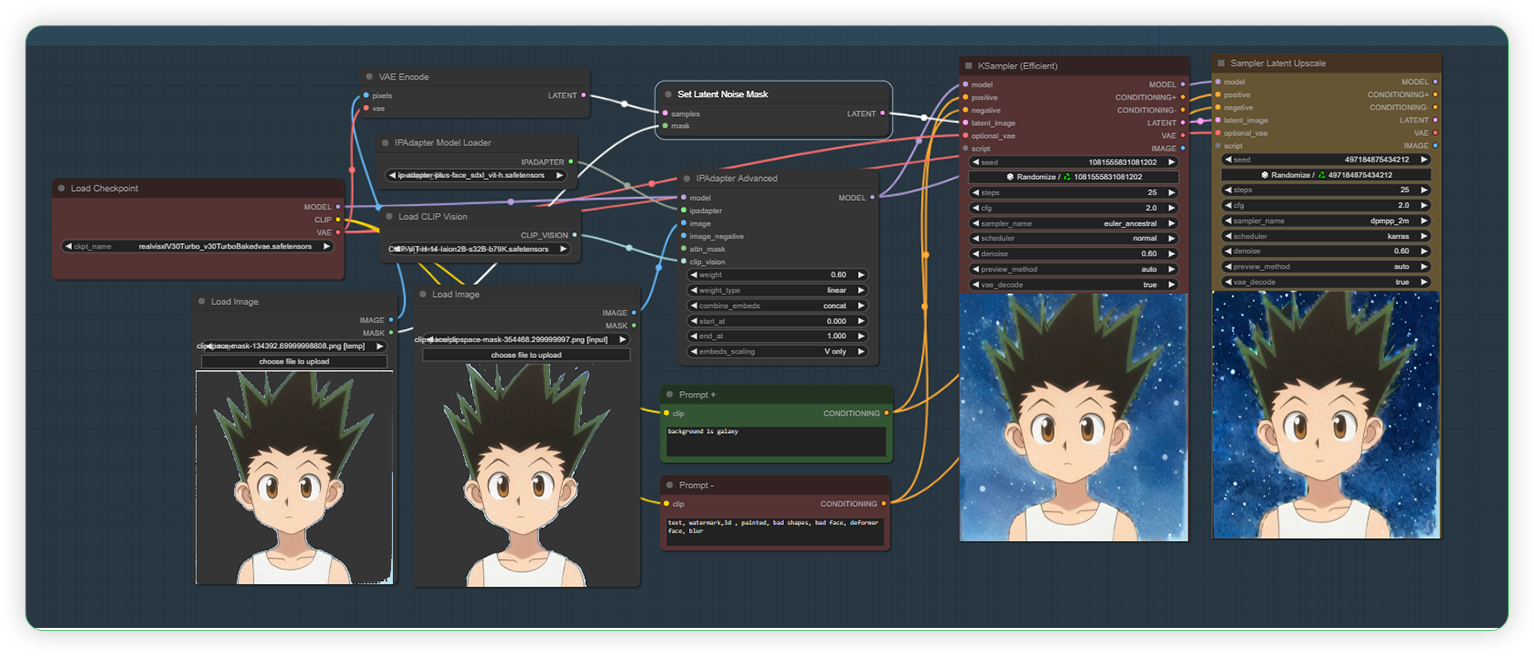
Download the workflow here Background Replacement
After attaining the file, open the workflow using your ComfyUI machine in Turbo Mode. This workflow uses an SDXL model and works only on images and it demonstrates how stable diffusion works to replace the background.
| Steps | Description / Impact | Default / Recommended Values | Required Change |
|---|---|---|---|
| Load your desired image in the 2 Load Image Node at the same time. It is recommended that images must contain subject within. | The Load Image node can be used to load an image. Images can be uploaded by starting the file dialog or by dropping an image onto the node. Once the image has been uploaded they can be selected inside the node. | 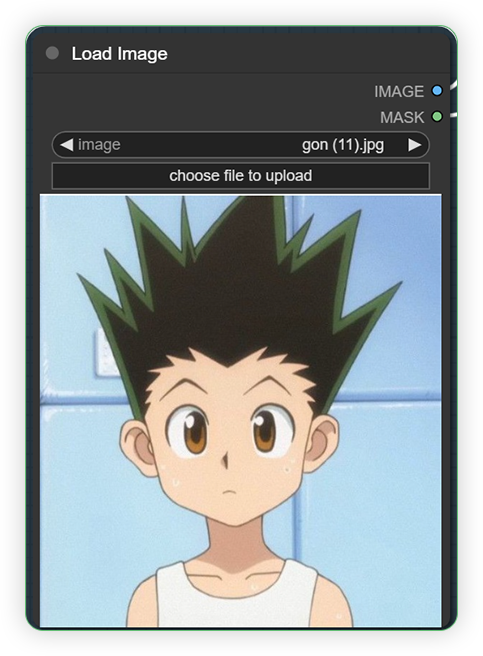 |
YES |
| In the first Load Image, right click the image and open in SAM Detector. Using the SAM Detector, place 1-5 dots in major color outside the subject and play with the confidence bar and click detect. Observe the 2 images on the right. Where it shows a proper detection of SAM after clicking the Detect. 1. 2 dots placed in side of the subject 2. After clicking detect it has a good separation of colors. The subject became darker and his background became off white. | Segment Anything Model is important in allowing you to generate a segment mask. | 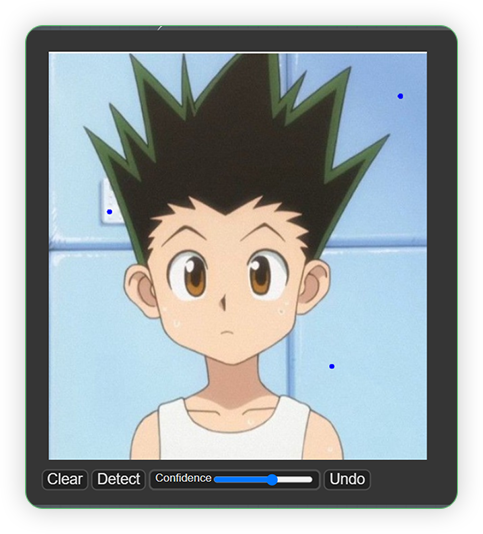 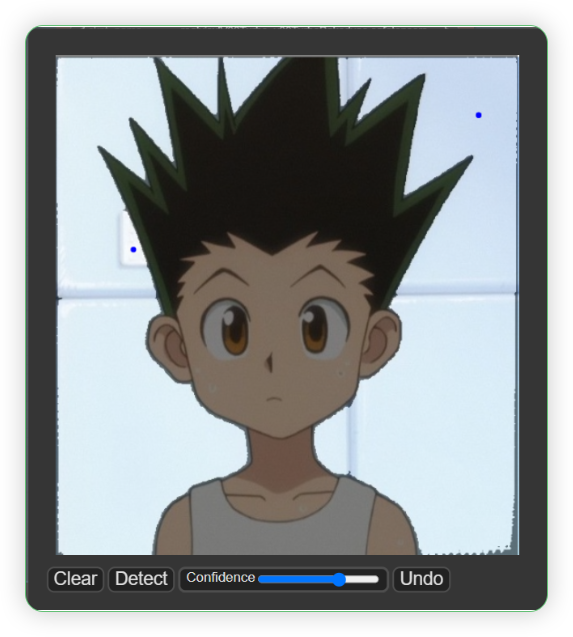 |
YES |
| In the second Load Image, right click the image and click open in MaskEditor. Inpaint the area of the image that you want to change the background. | Mask editing tool where you want to generate based on the text prompt given. | 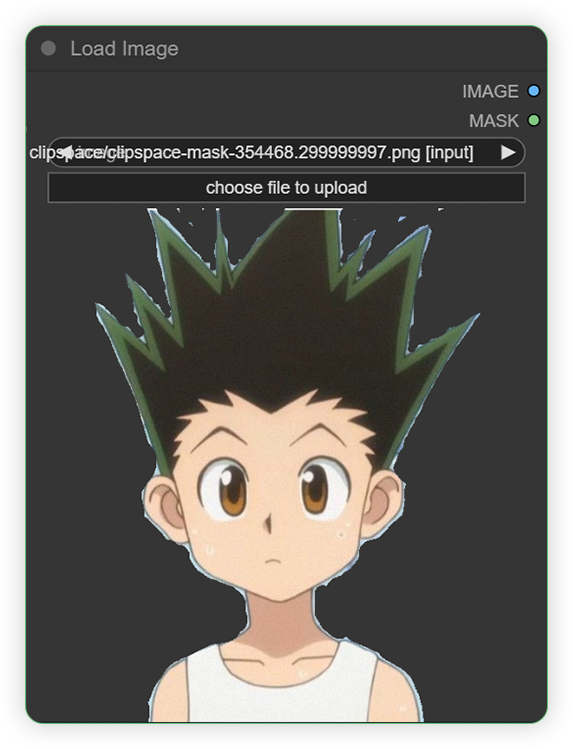 |
YES |
| Write a simple text prompt that describes your desired background. | Text prompt which consists of positive and negative. | 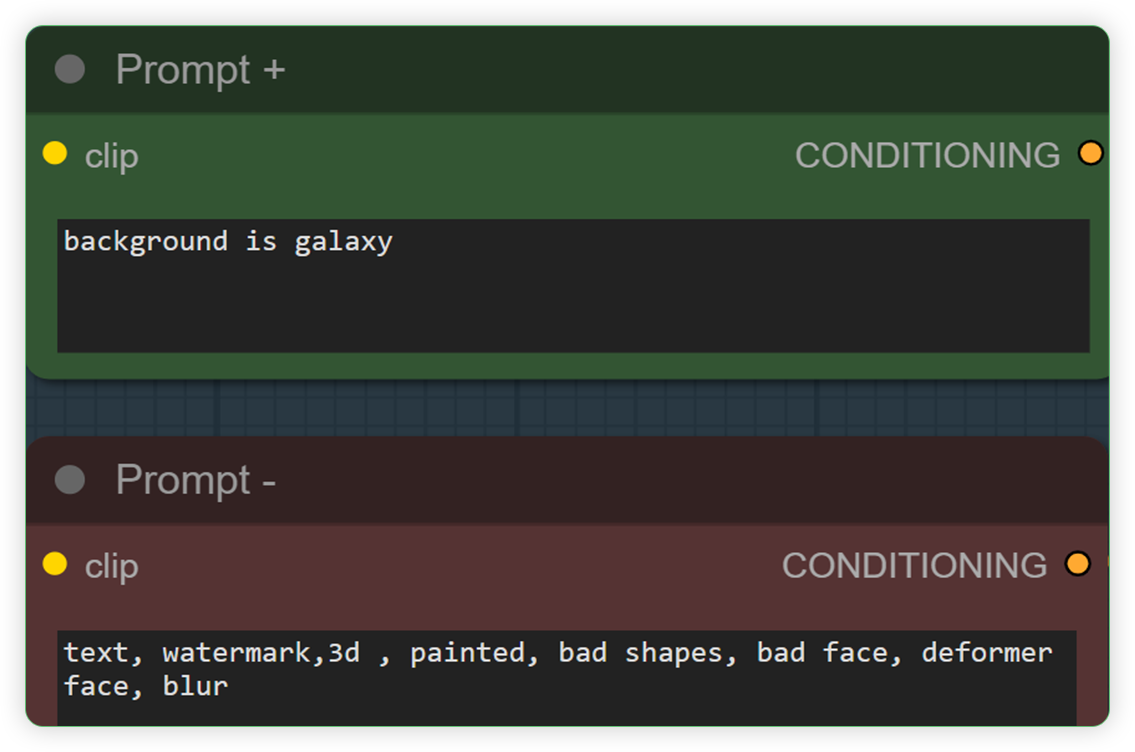 |
YES |
| Set the Load Checkpoint | A node where you can set the base model. It is used to load a diffusion model, diffusion models are used to denoise latents. This node will also provide the appropriate VAE and CLIP model. | 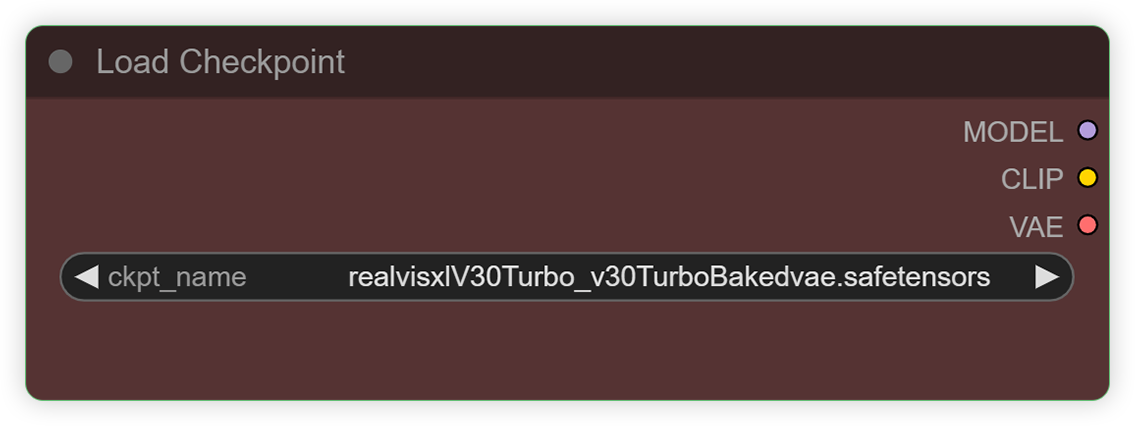 |
|
| Set the IPAdapter | A node which can select an ipadapter model. It adds image prompting capabilities to a diffusion model. This adapter works by decoupling the cross-attention layers of the image and text features. | 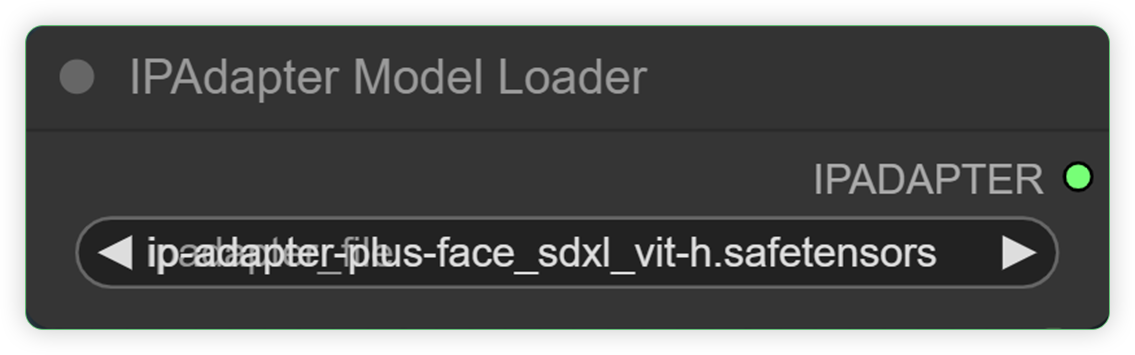 |
|
| Set the Load Clip Vision | A node which can select a clip vision model. It can be instructed in natural language to predict the most relevant text snippet, given an image, without directly optimizing for the task. | 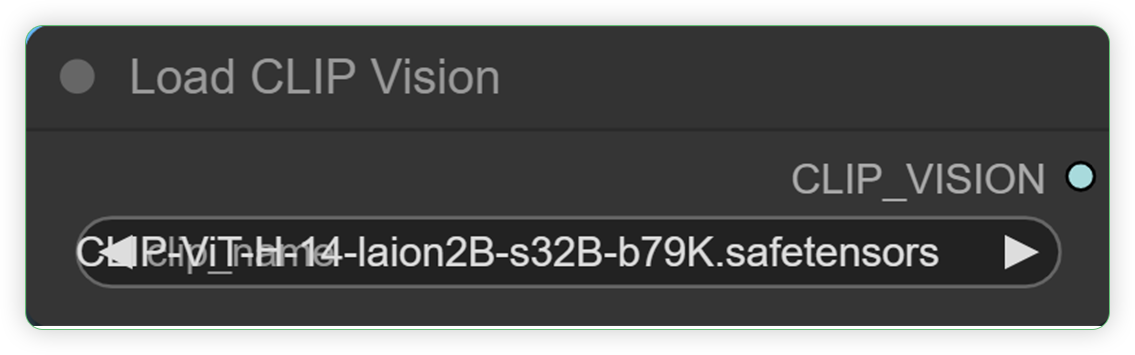 |
|
| Adjust the weight values when needed. | Area where you can set the weights of IPAdapter. | 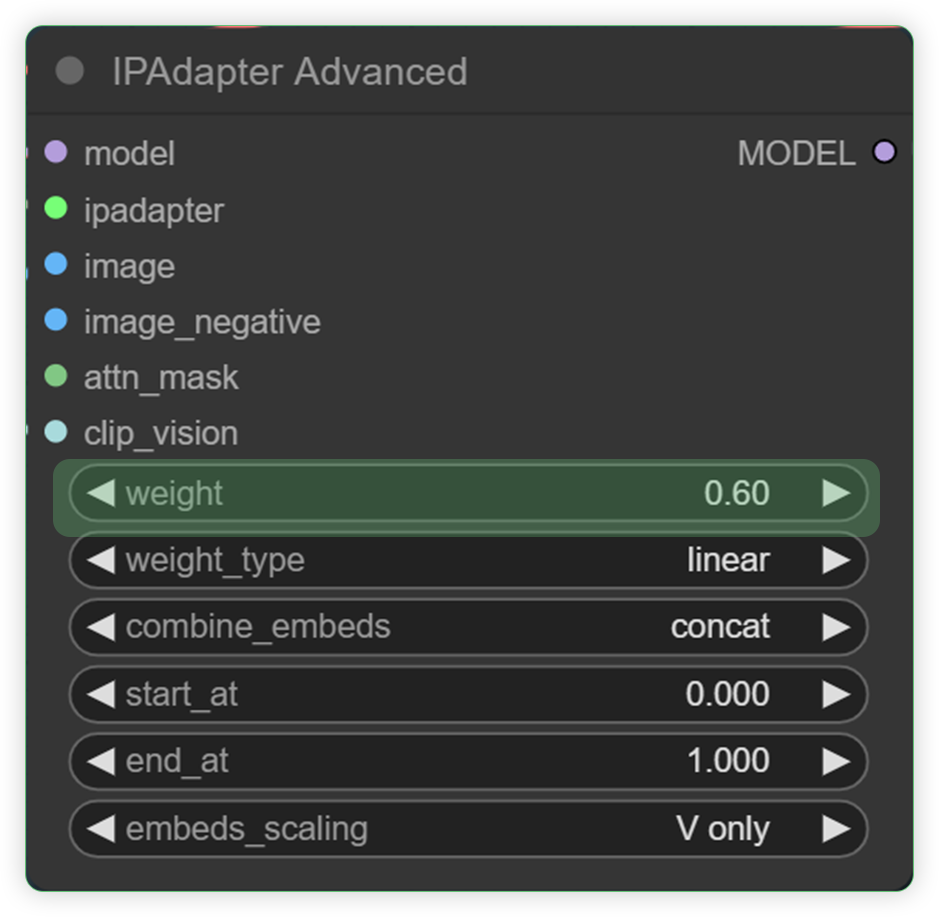 |
|
| Run the QUEUE prompt. |
Input / Output
You can download input / out files here Google Drive
The Samples
| Settings | Input | Output |
|---|---|---|
| no settings - quick background by Bria AI |  |
 |
| 3 dots in SAM, background is city prompt, 50 Steps, 2 CFG | 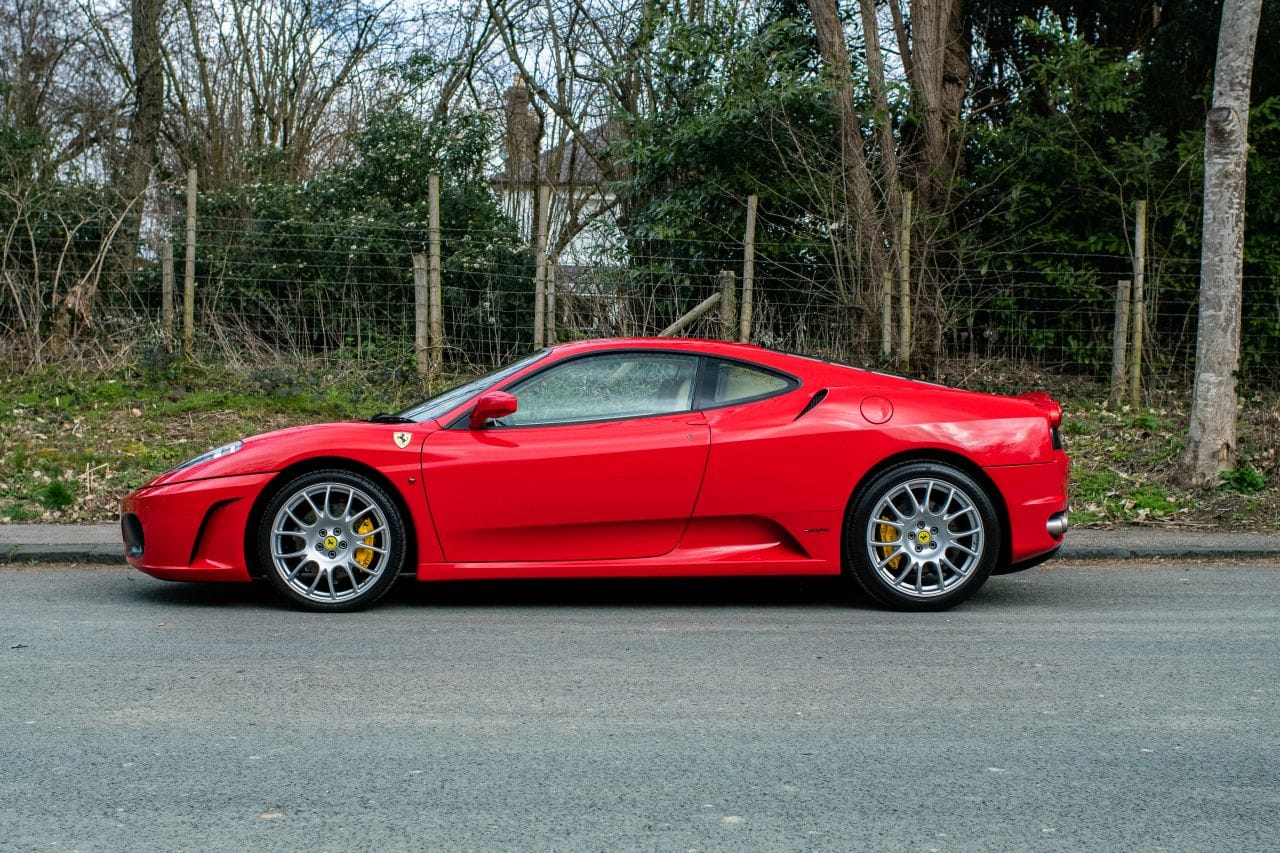 |
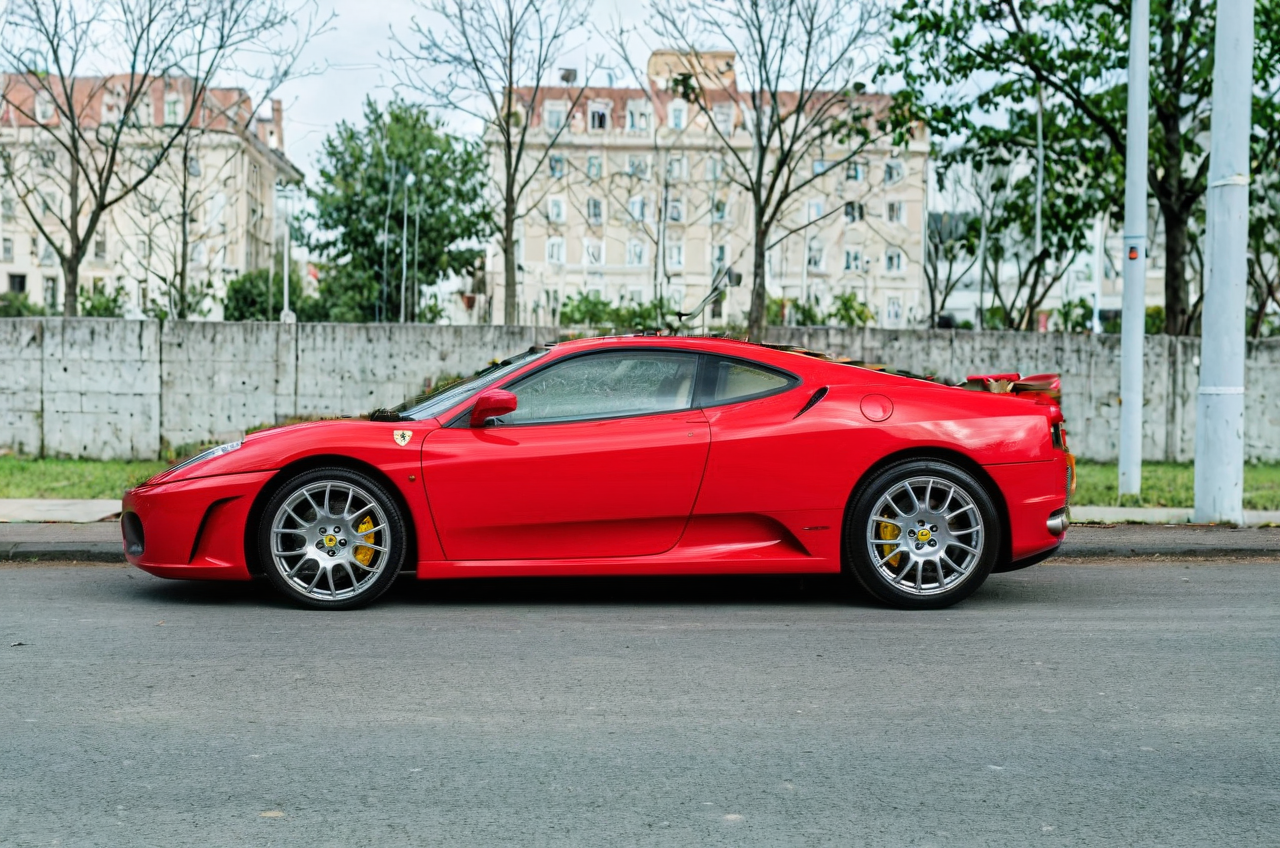 |
| 2 dots in SAM, background is galaxy, 25 Steps, 2 CFG | 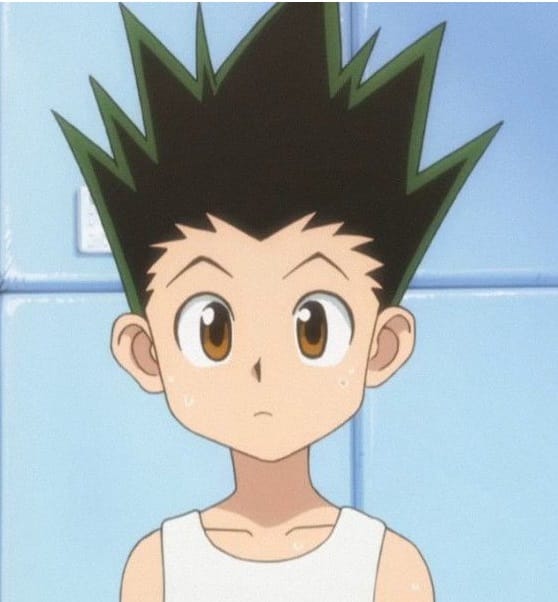 |
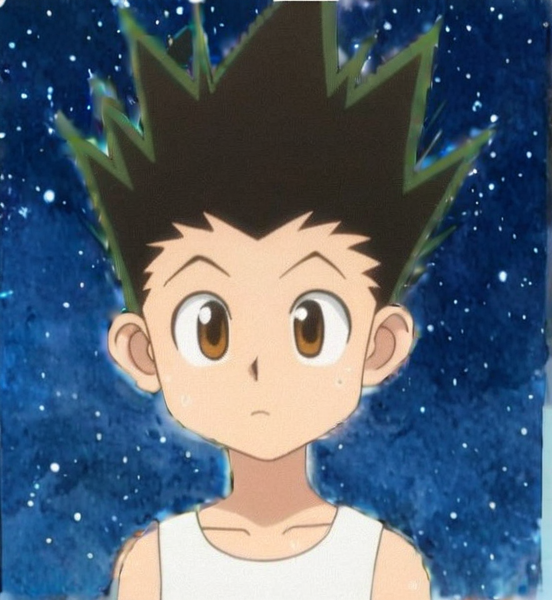 |
Summary
It is our expectation that this custom node would further enhance Bria AI RMBG, which now functions well. After running some tests, I can confirm that removing the background improves the accuracy. With the help of the IPAdapter, it can adjust to the appropriate background. The aesthetic attractiveness, clarity, and consistency of the finished product or the artwork are greatly impacted by the background, making its removal or replacement an essential stage.
Any of our workflows including the above can run on a local version of SD but if you’re having issues with installation or slow hardware, you can try any of these workflows on a more powerful GPU in your browser with ThinkDiffusion.
If you are feeling inspired and want to learn about LoRA's then check out this ultimate guide to LoRA's in ComfyUI Here.
Member discussion