

There are multiple fields in Kohya that can be quite daunting if you're new to training LoRA's. In this guide we're going to go through a super simple workflow to get you training a LoRA in less than 20 mins... It's an ideal starting place for newcomers.
This guide was created using ThinkDiffusion's Kohya ULTRA machines running Kohya v24.1.4.
TIP: To train larger models, try ULTRA machines with 48GB VRAM.
Loading up pre-defined settings
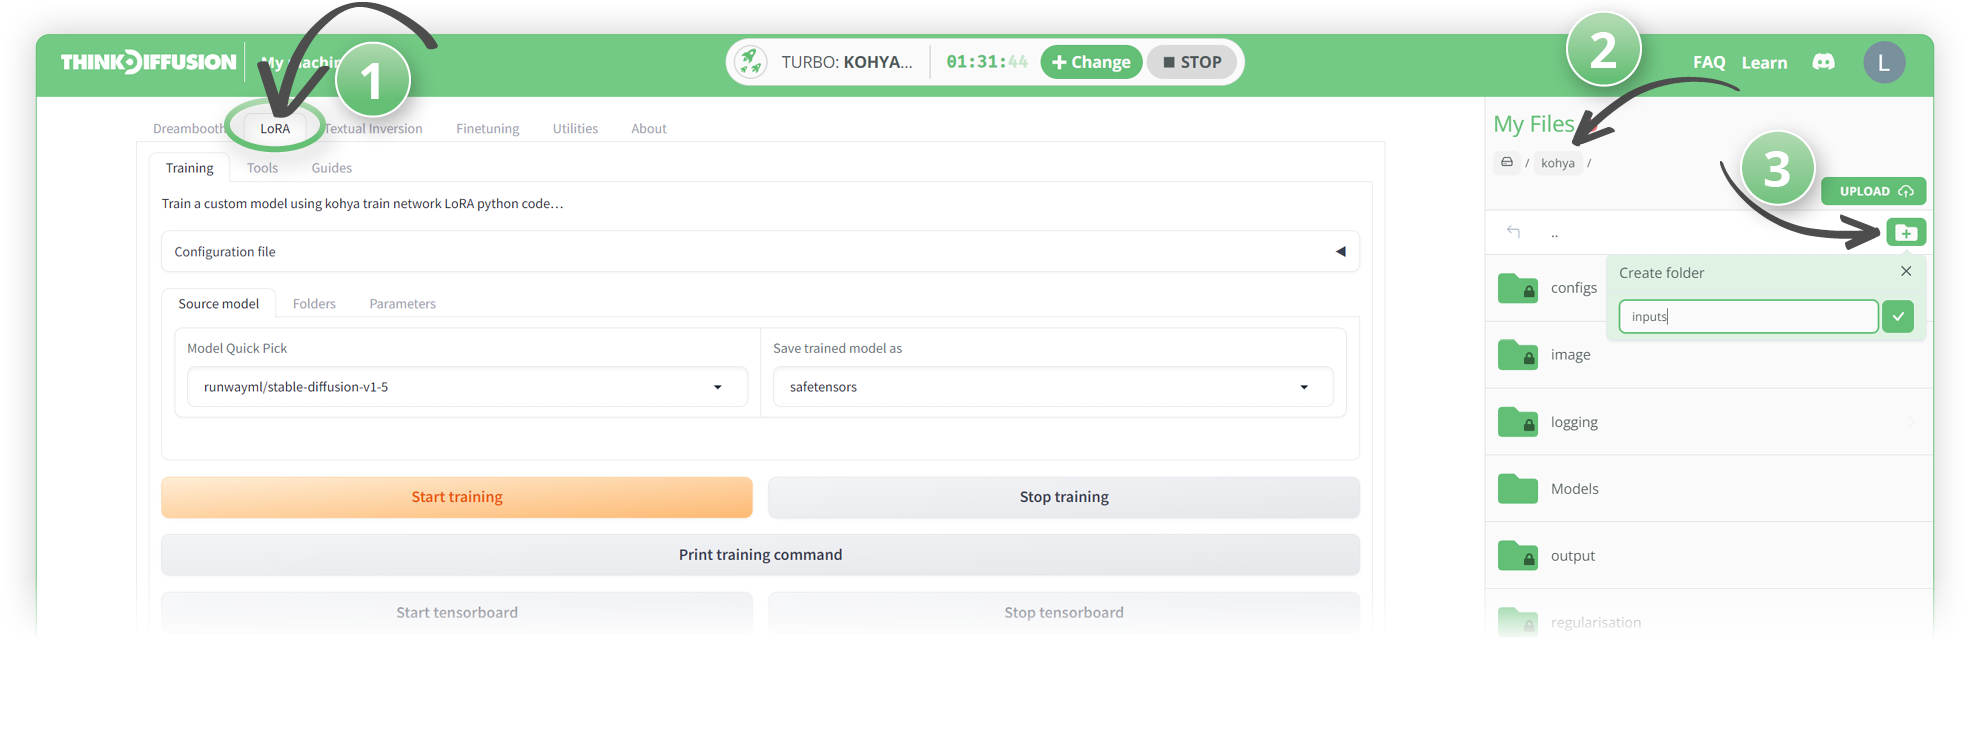
- (1) Head over to the LoRA tab at the top (Not the Dreambooth tab!)
- (2) Navigate to the Kohya directory
- (3) Create a folder in the root Kohya directory called 'inputs'
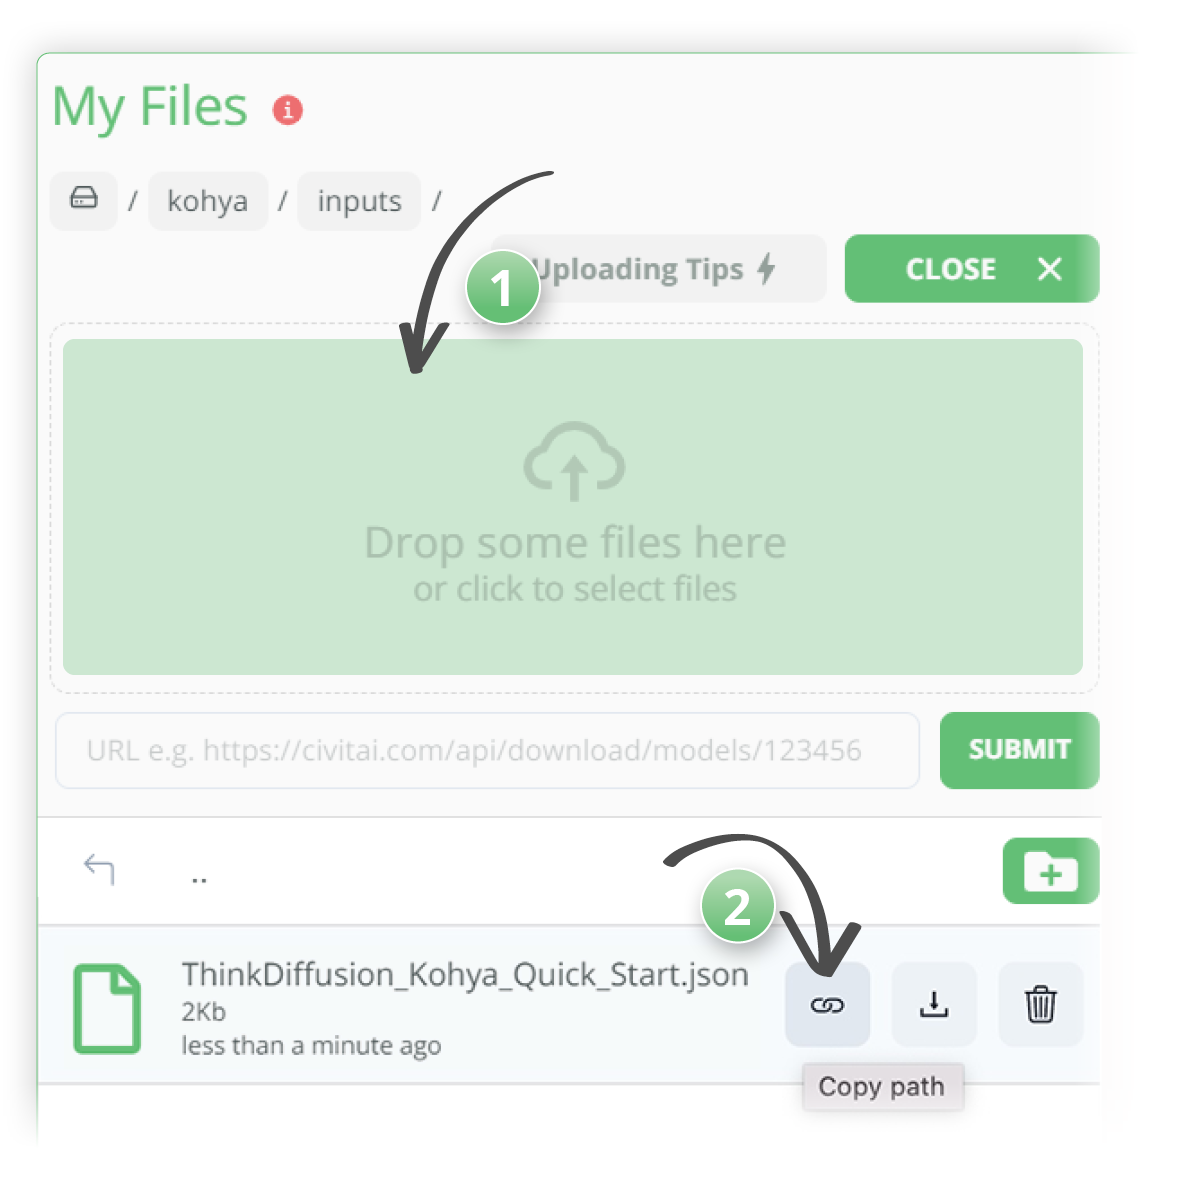
Nice, now download the following Quick Start .json file to your desktop.
Once you've got the Quick Start file on your computer:
- (1) Upload that file to your inputs folder that you just created.
- (2) Copy the link path of the ThinkDiffusion_Kohya_Quick_Start.json file
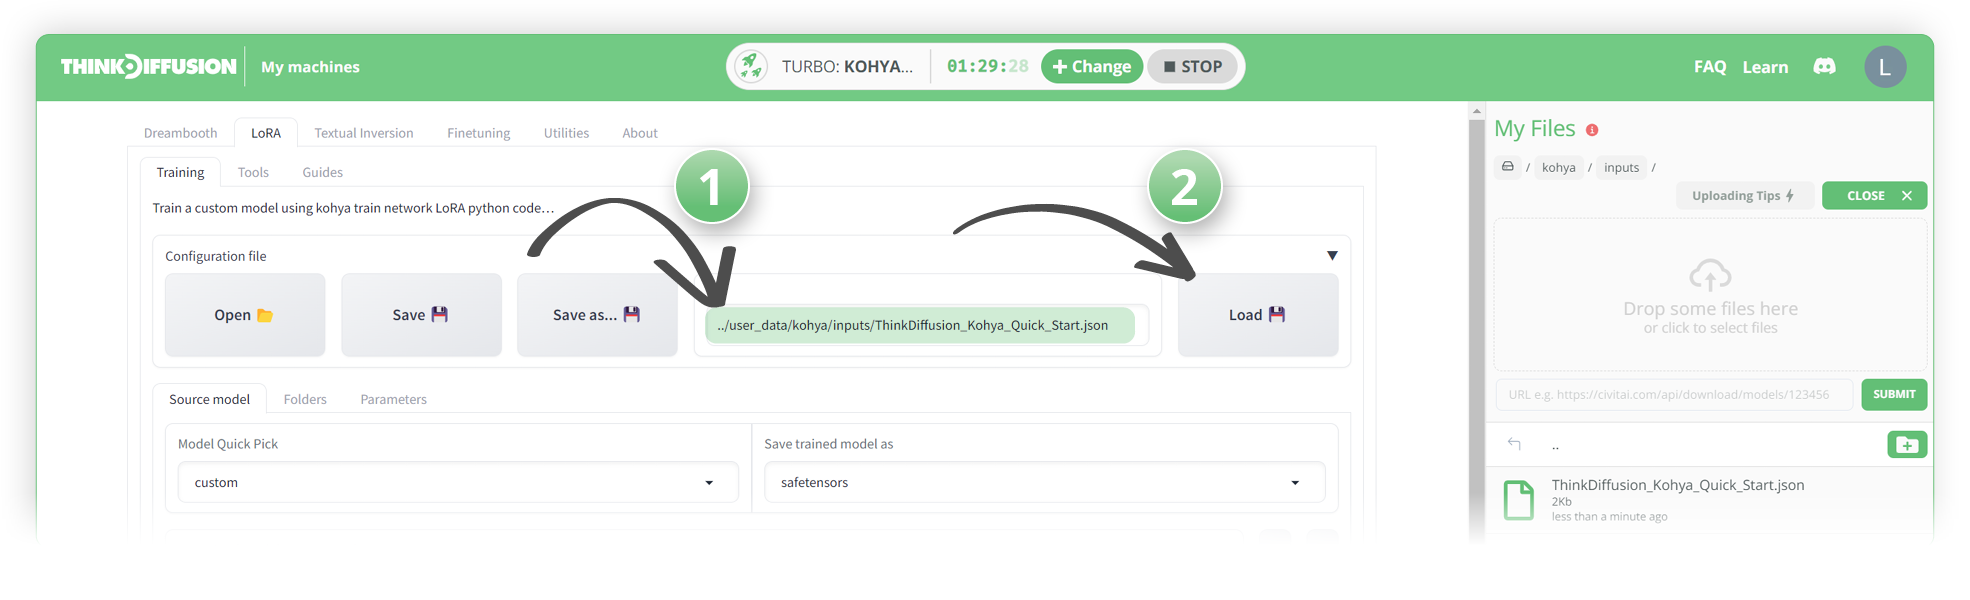
- (1) Paste the file path into the field as shown below.
The path should be something like: ../user_data/kohya/inputs/ThinkDiffusion_Kohya_Quick_Start.json - (2) Click the 'Load 💾' button
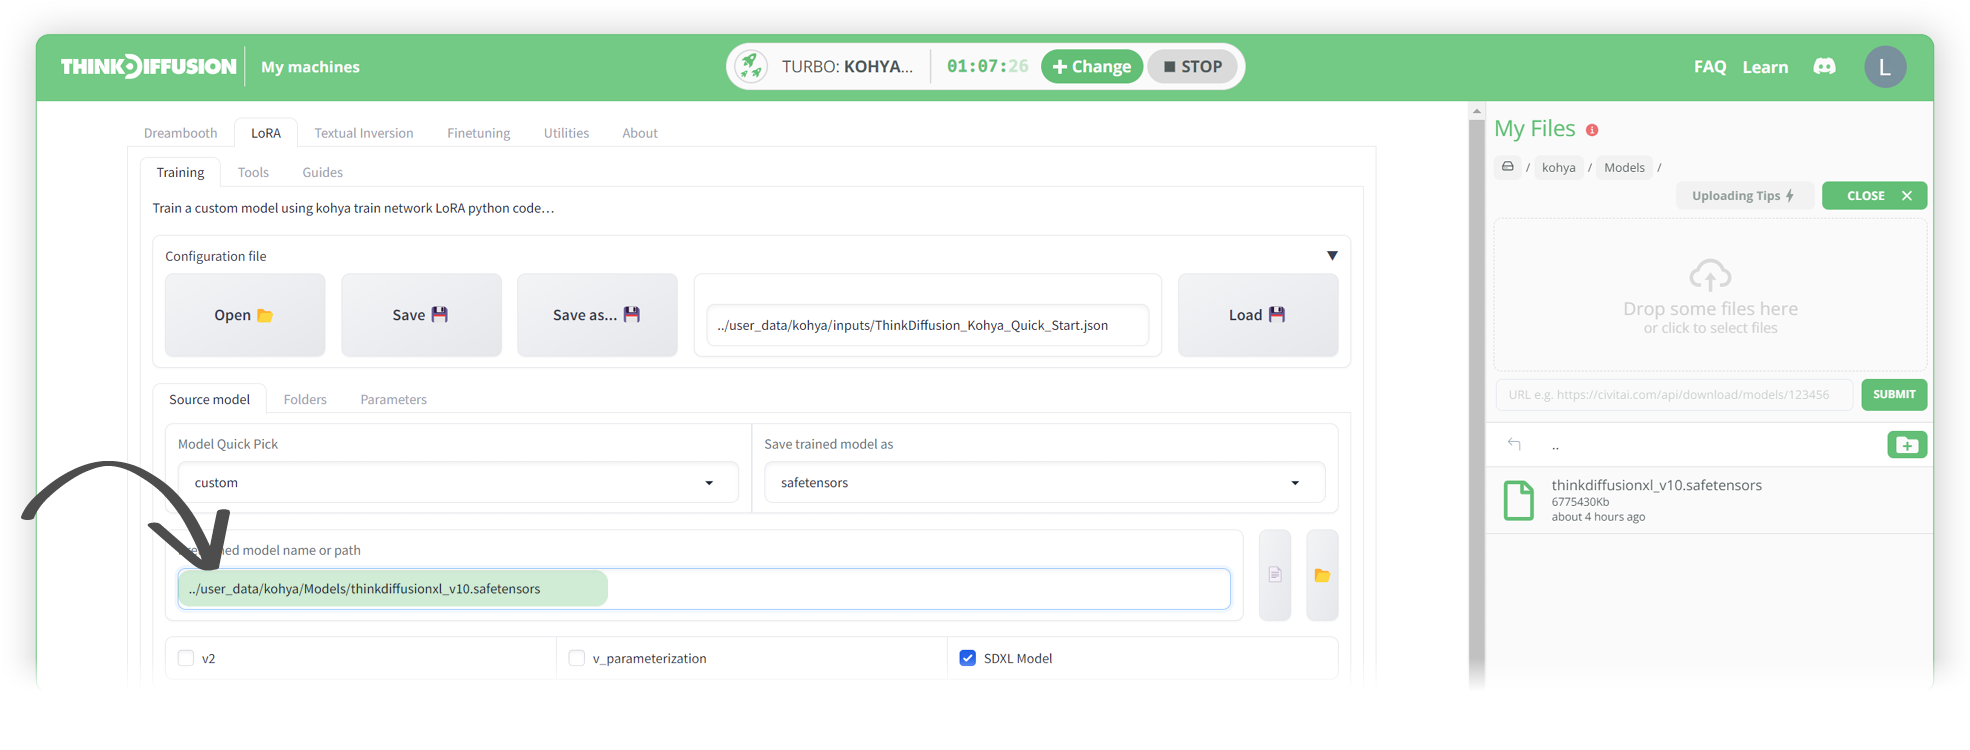
- We can now select the model we want to use. It is recommended to use the SDXL base model but I have used the ThinkDiffusion-XL model for the purposes of this tutorial. (You must upload your model if you want to use something different to the SDXL base model)
PROTIP💡: If you do decide to add your own model
Create a new folder called "models", upload it there, and copy the path just like you did above. There are several easy ways for uploading including:
- uploading from your computer,
- by link, or
- from a google drive.
Your settings and parameters are now complete and we can create our folder structure to upload your images 🙌🏾
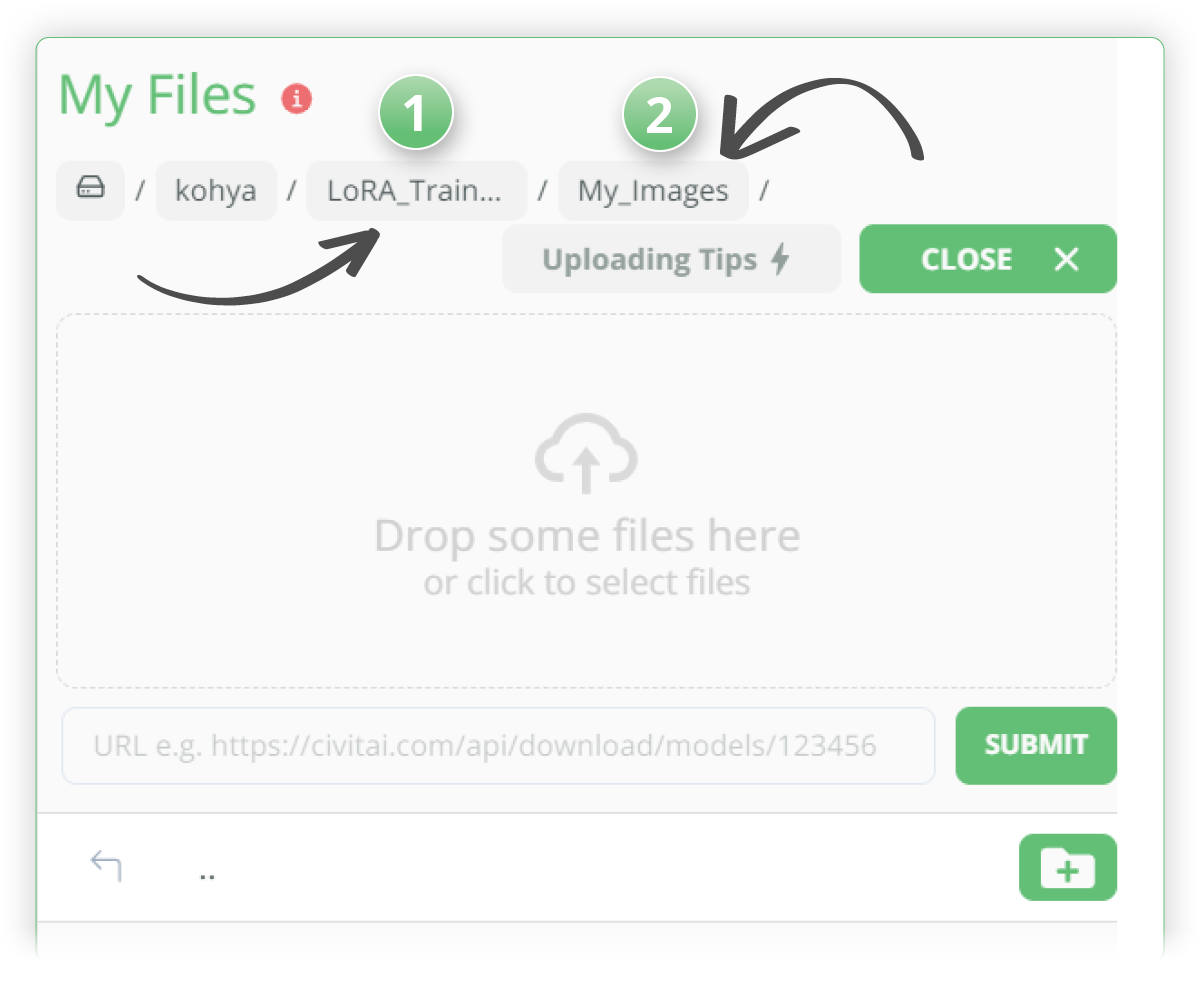
Creating folder structure
- (1) Create a folder called LoRA_Training at the root level
- (2) Within this folder create a folder called My_Images
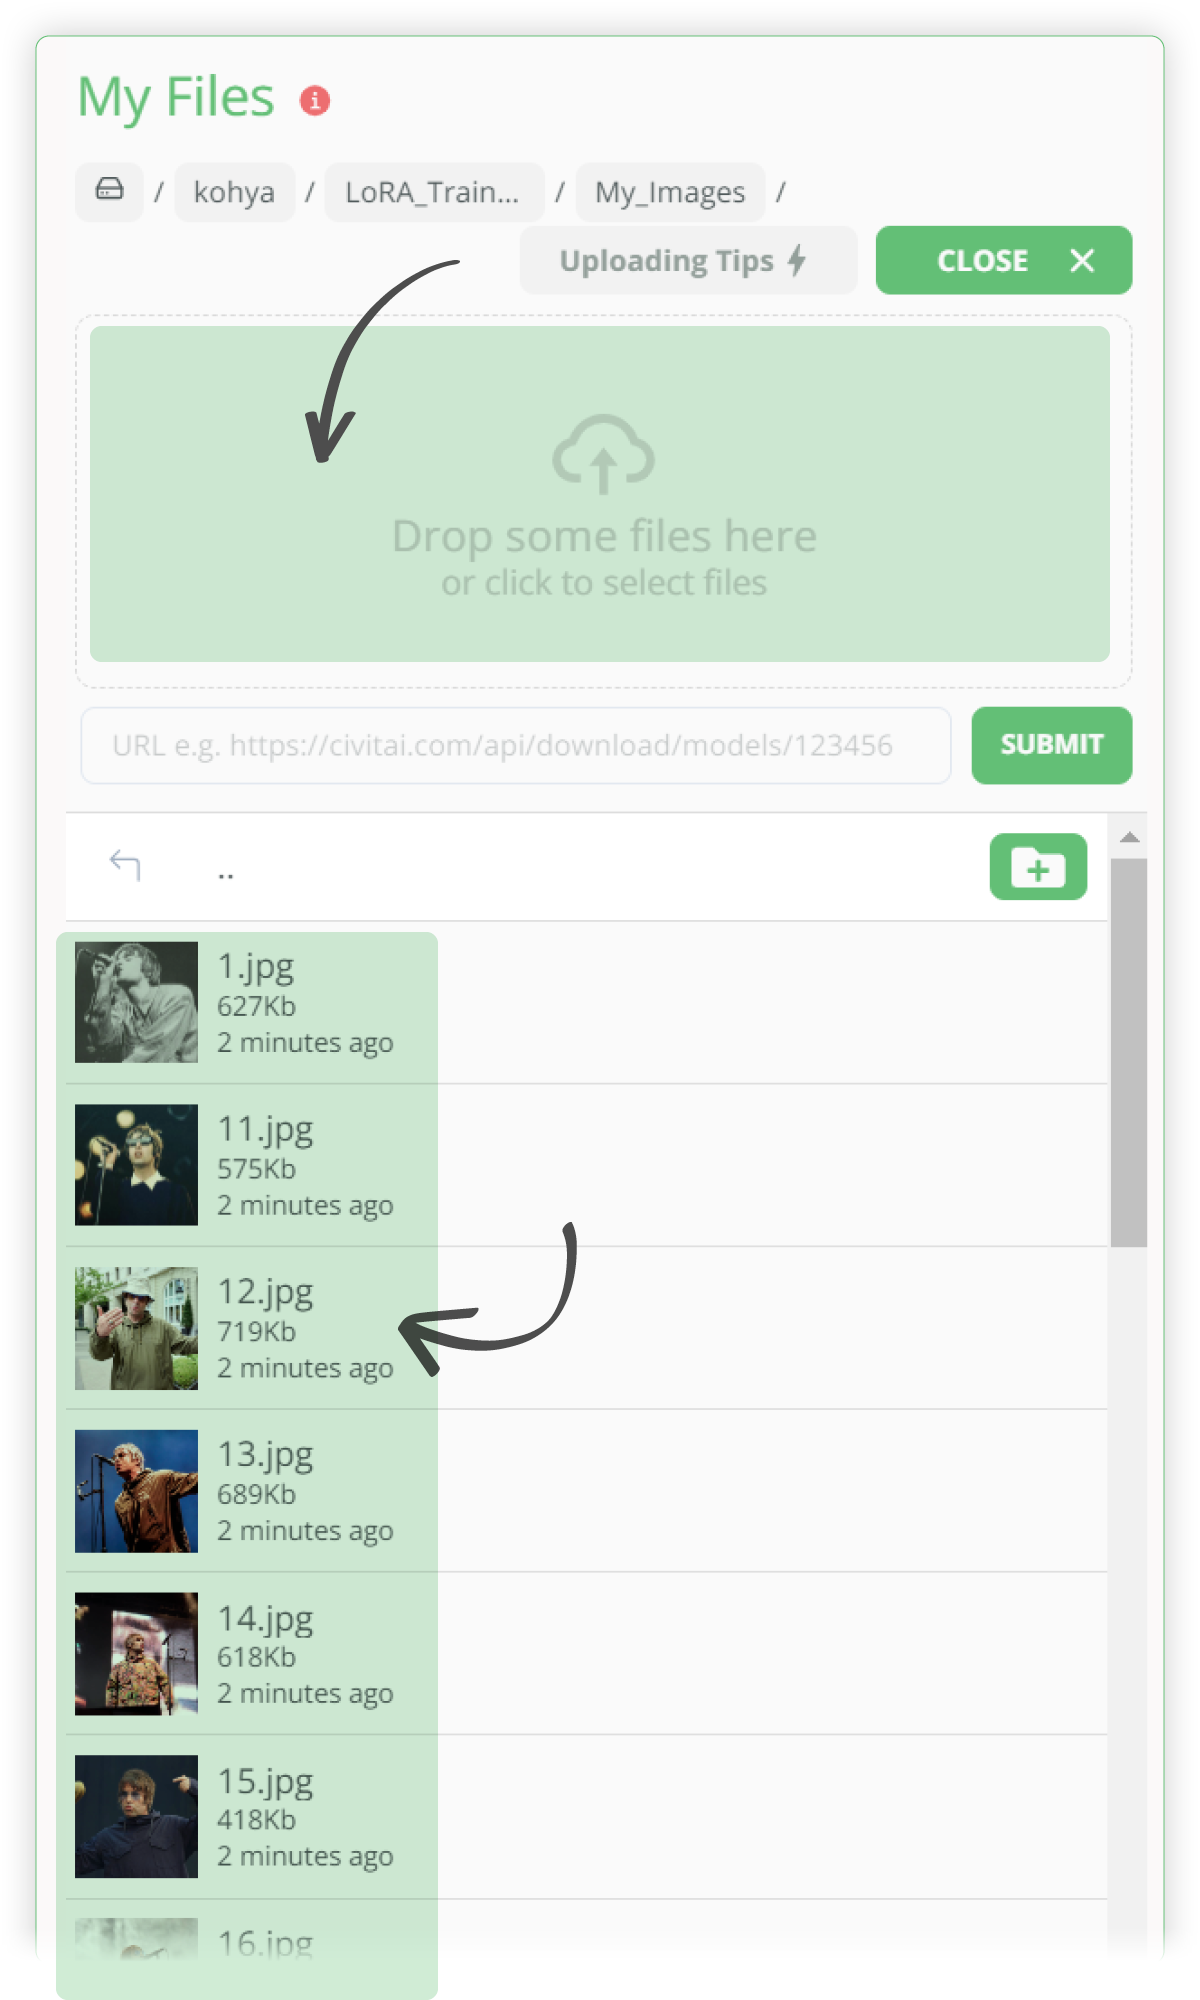
We now want to upload your images to the My_Images folder. 20 to 30 images is a good starting point for your 1st LoRA.
Source Image Protips💡: Try to have the subject in different clothing, looking to the left, to the right etc... The more variety the better the end result will be. Also as a starting point, have these images at a minimum resolution of 1024 x 1024 as we are working with SDXL models.
I have uploaded 30 images of Liam Gallagher from the band Oasis. I'm doing my best job here with this tutorial, so don't look back in anger.
Finalize the folder structure and prepare your training data
Head over to the Tools tab and then to the Dataset Preparation tab
- (1) In the instance prompt field, type something unique to your subject that would not be recognized by Stable Diffusion. I have used Li4m_G4ll4gh3r
- (2) For your class prompt enter a generic description. I have used 'a photo of a man'
- (3) For the training images field, copy the path of where you uploaded your training images to
- (4) Change the repeats to 1
- (5) Enter the Destination training directory to ../user_data/kohya/output
- With the number of images I have uploaded this will take around 2,025 steps to complete the training
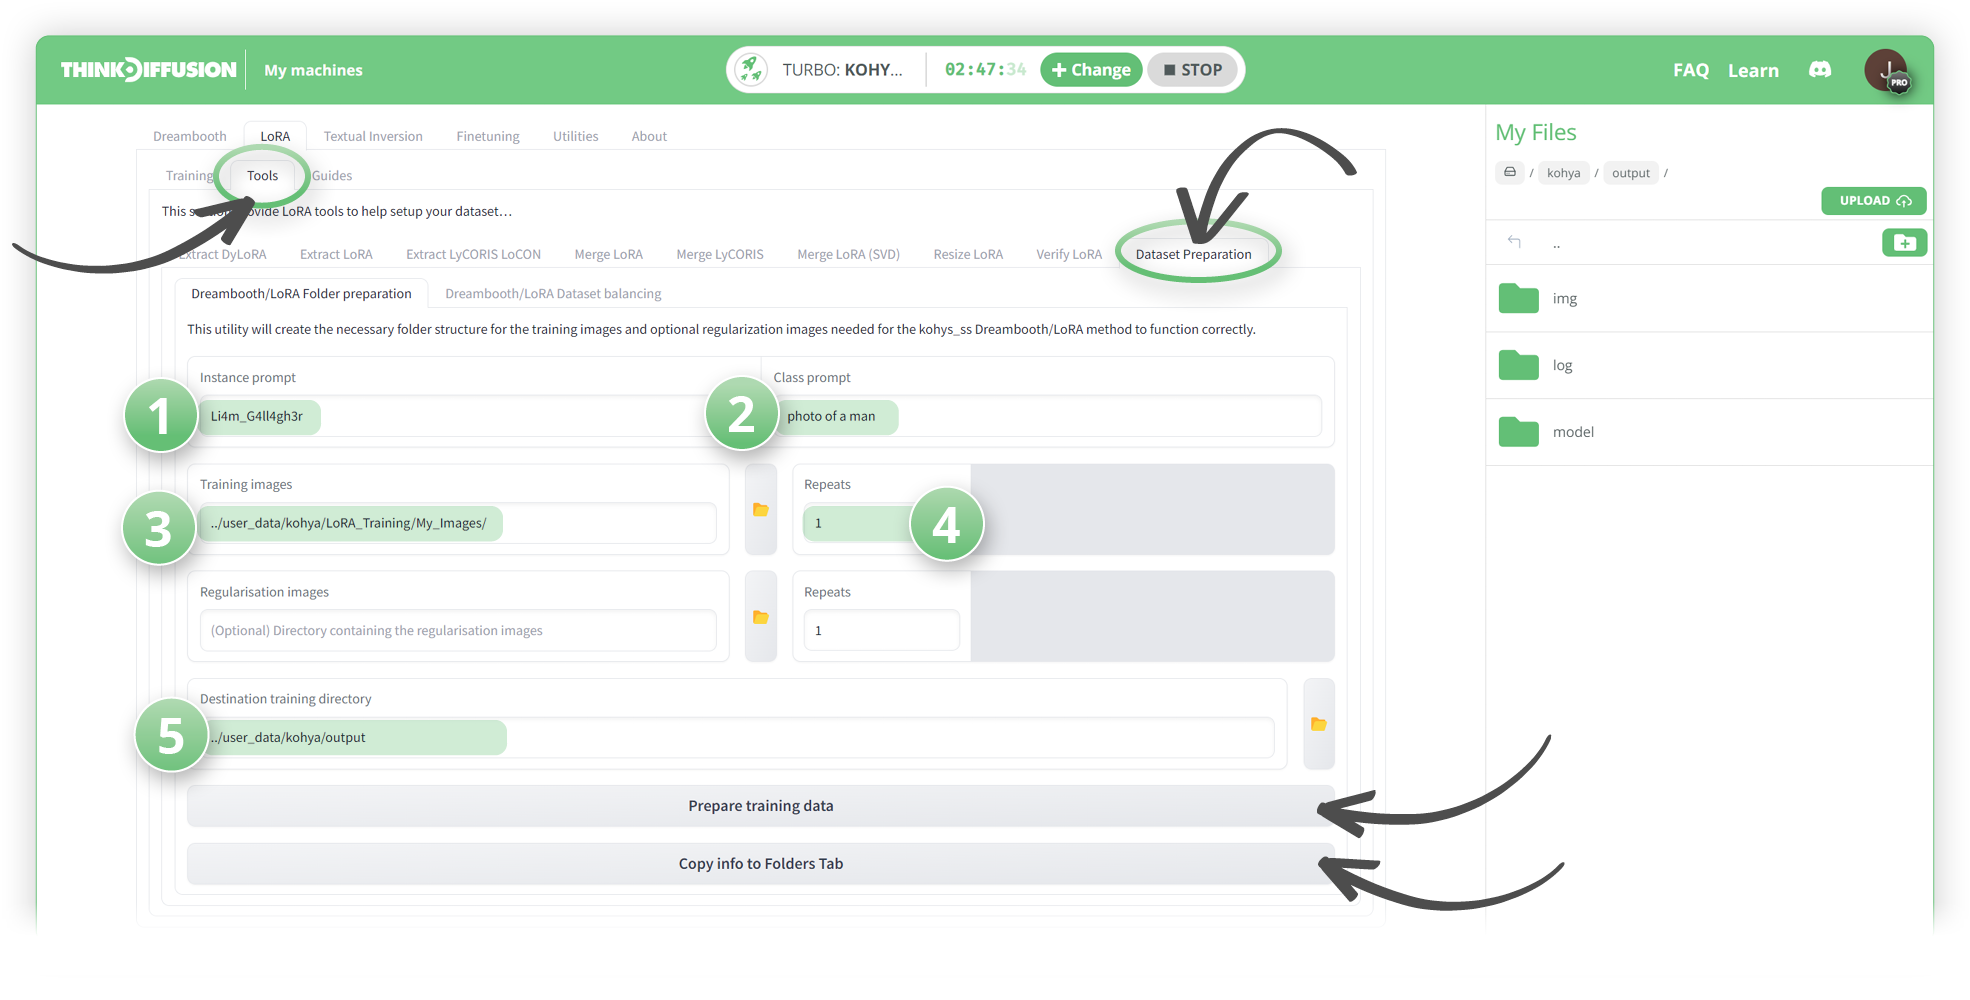
- You can now click Prepare Training Data and you should see 3 new folders created in the output folder as shown below:

- We can now click 'Copy info to folders tab' and we will see our folders populated.
- Select your Model output name to something you want, I have simply used Li4mG4ll4gher and the same for the training comment
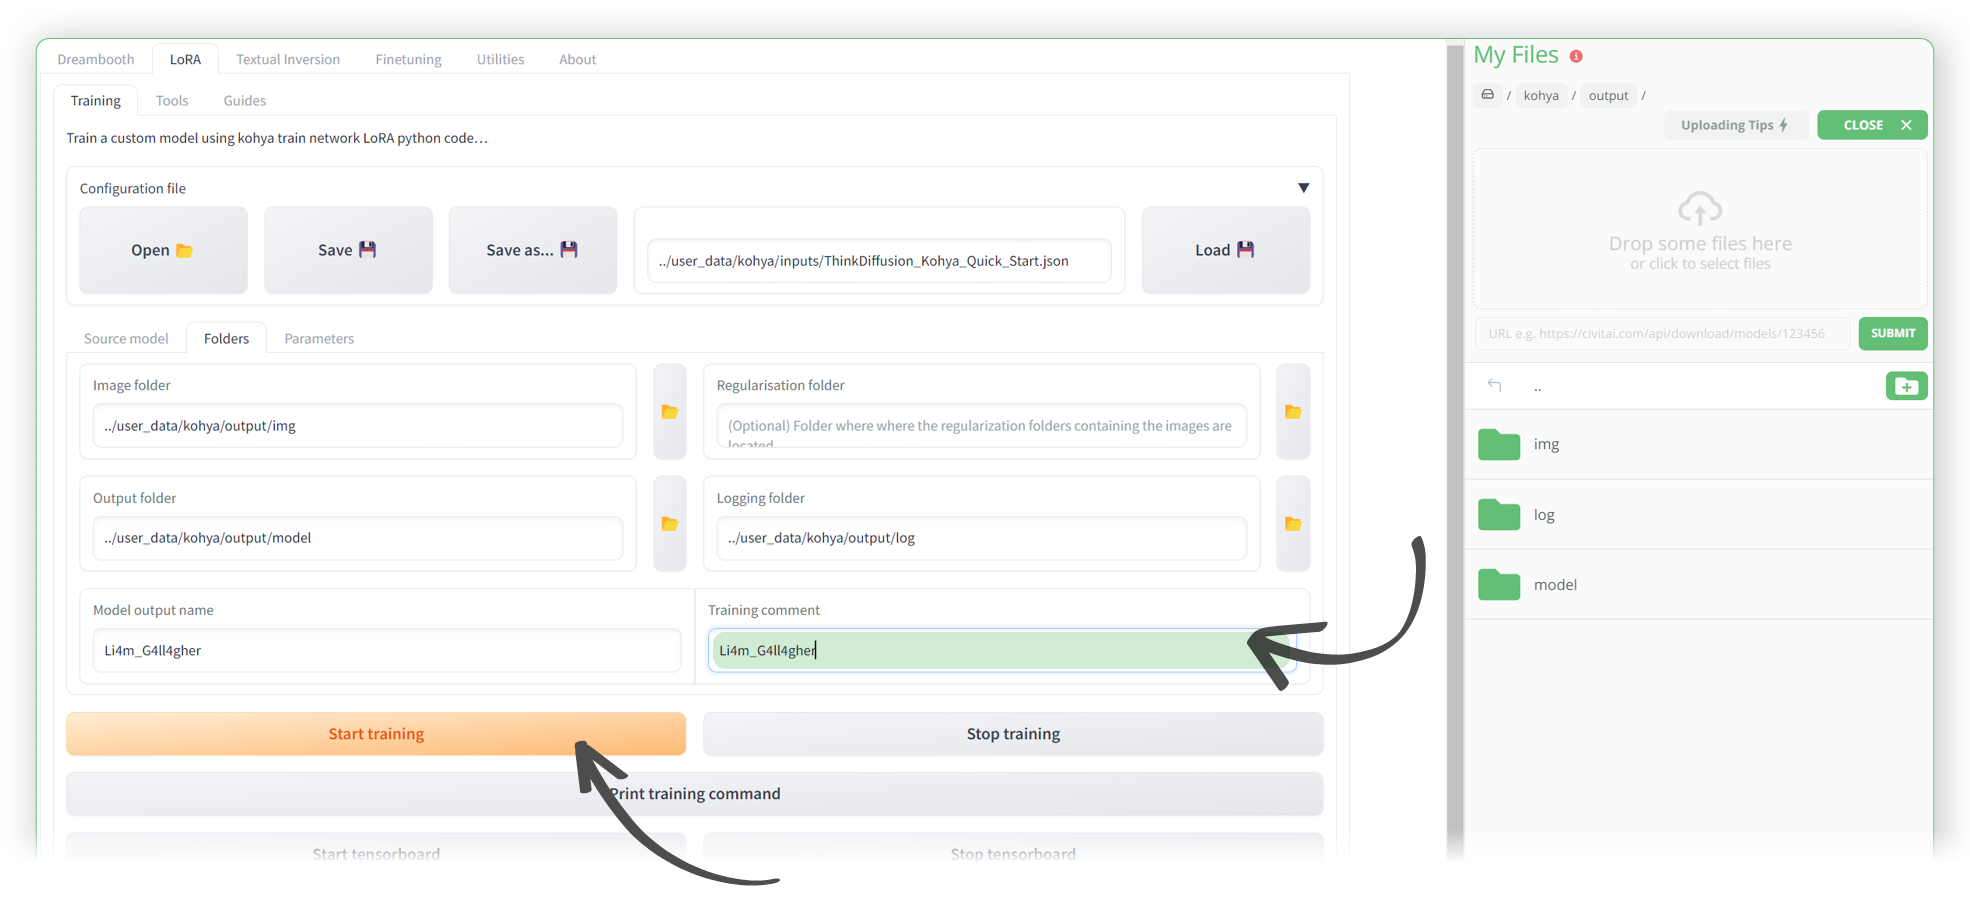
- Now you can simply hit 'start training' to start generating your LoRA
Checking your progress
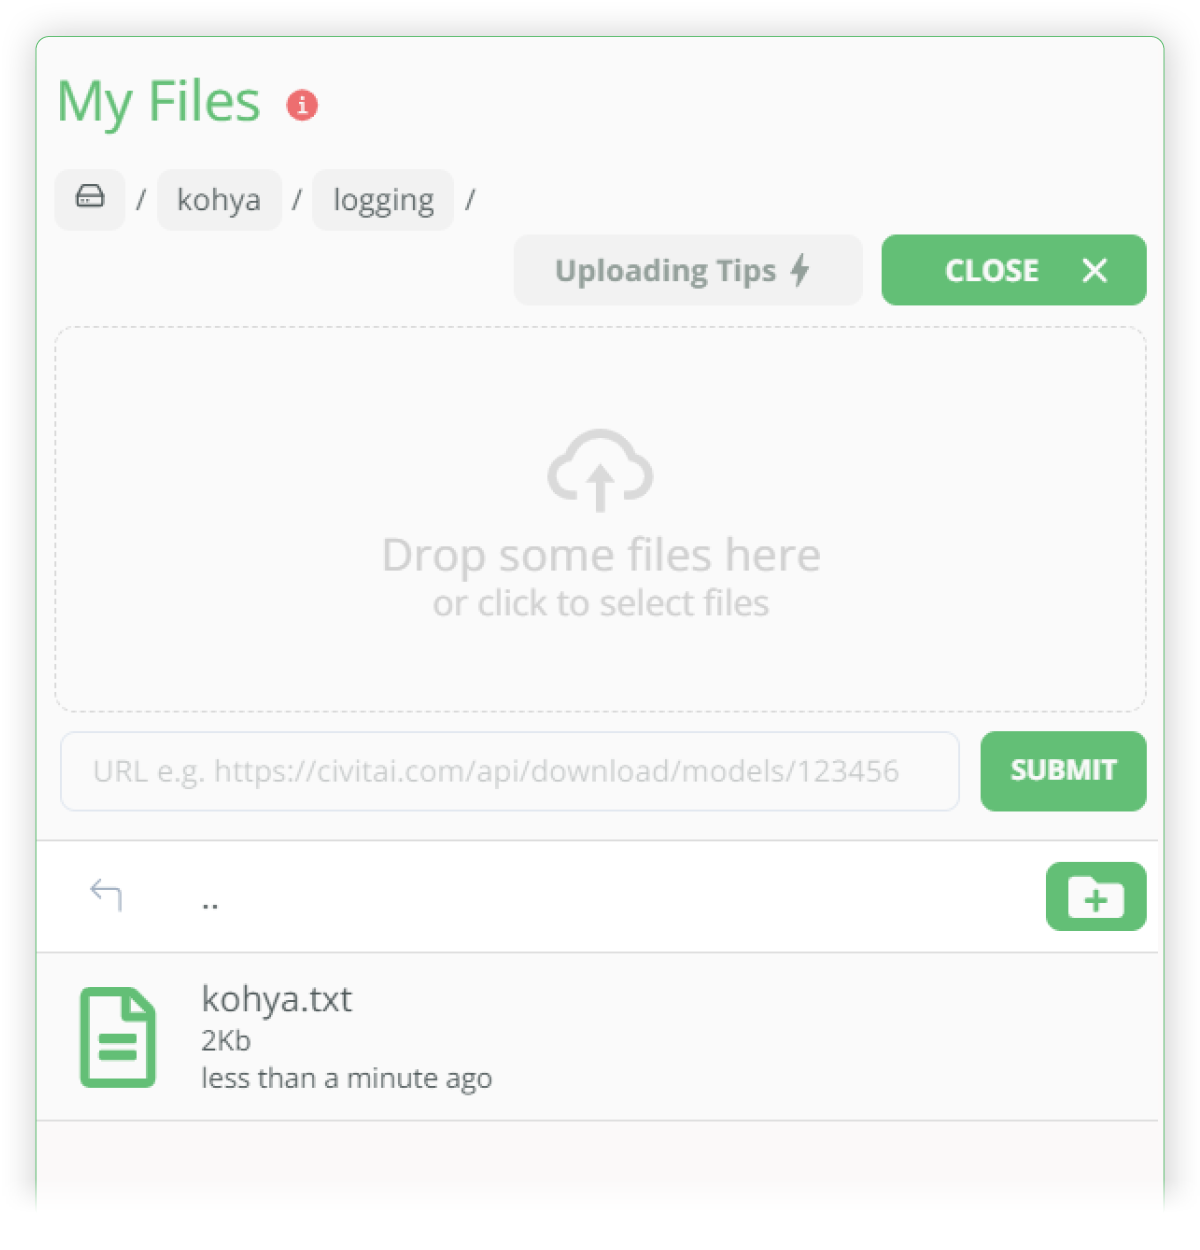
- Please note that there is no indicator bar on the front end of Kohya (yet), so you have to go to the logging folder to check the kohya.txt file.
- Click on that text file, which will open in a new browser, to see the progress. You can simply hit refresh on your browser (F5 on a PC) to keep refreshing this.
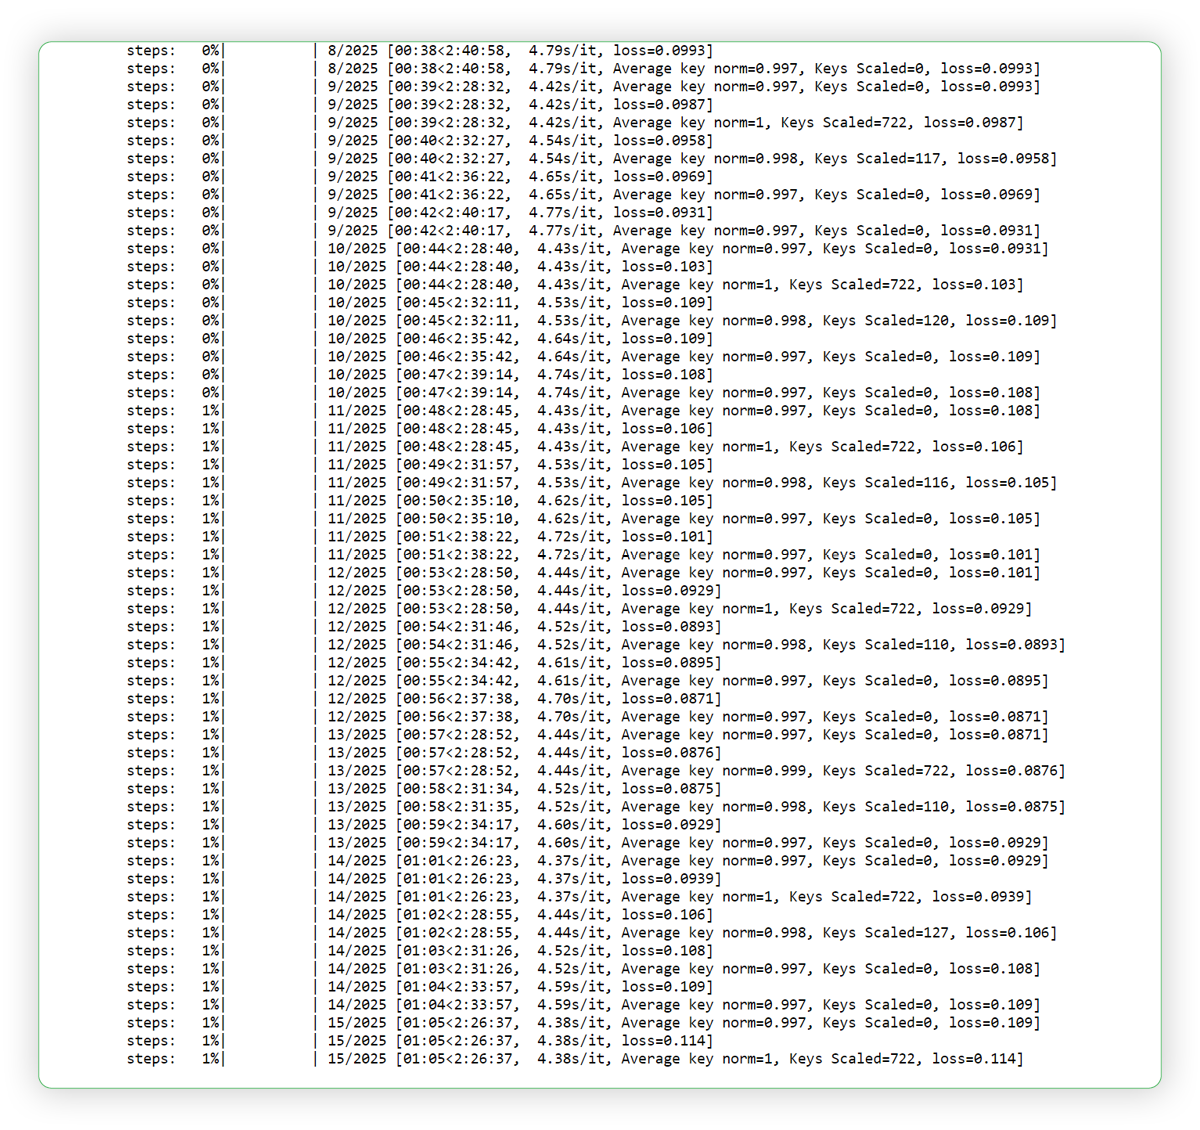
- If I wait a minute or so and click F5 then this will be updated and I can now see the LoRA being created.
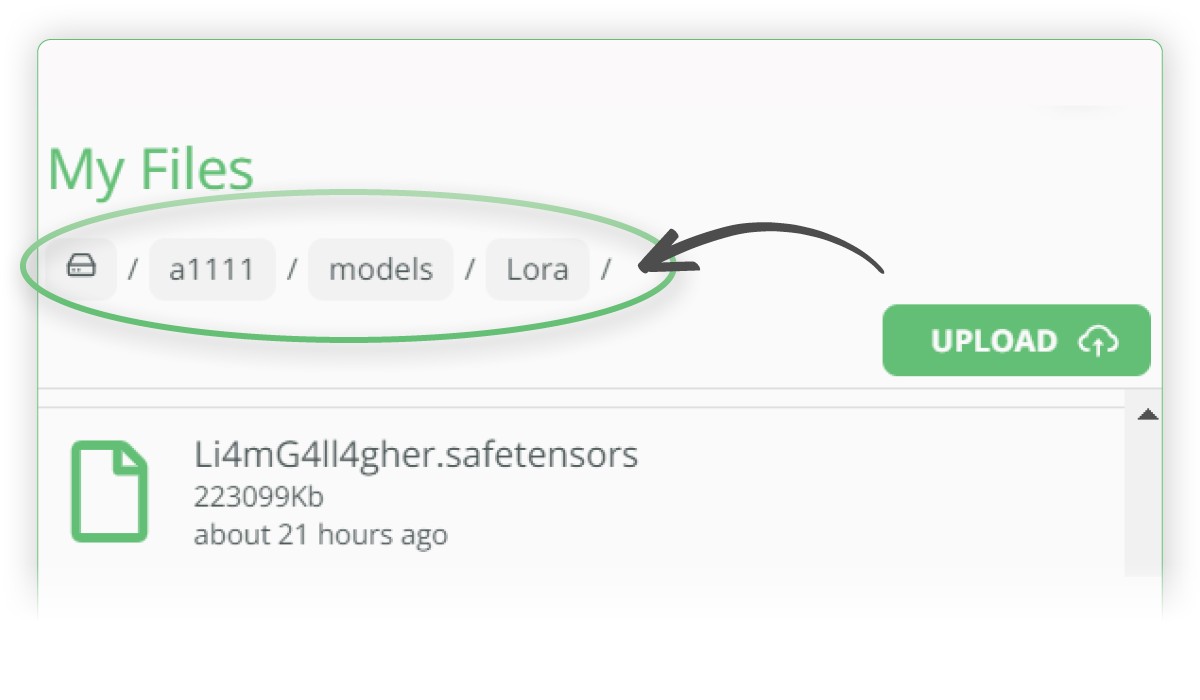
- Once your LoRA has been completed you can find your finished .safetensors file in the following folder ../user_data/kohya/output/model/
- You can download this file to your desktop and then upload it to you version of Auto1111 in the following folder:
Trying out your new LoRA in Automatic1111
- To test things out, head over to the txt2img tab in auto1111, enter your positive and negative prompts
- To activate the LoRA you need to enter the trigger word in angled brackets as shown below:
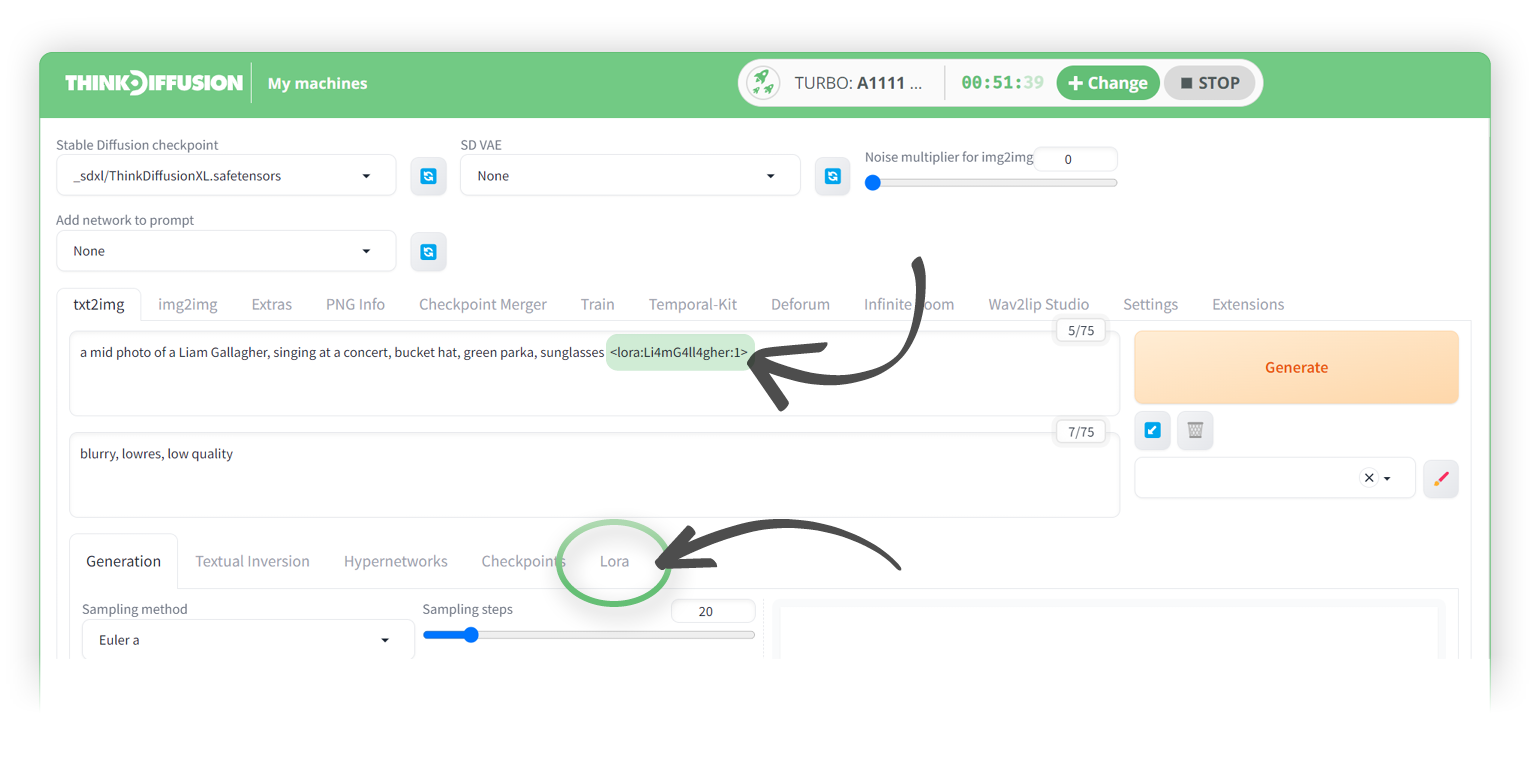
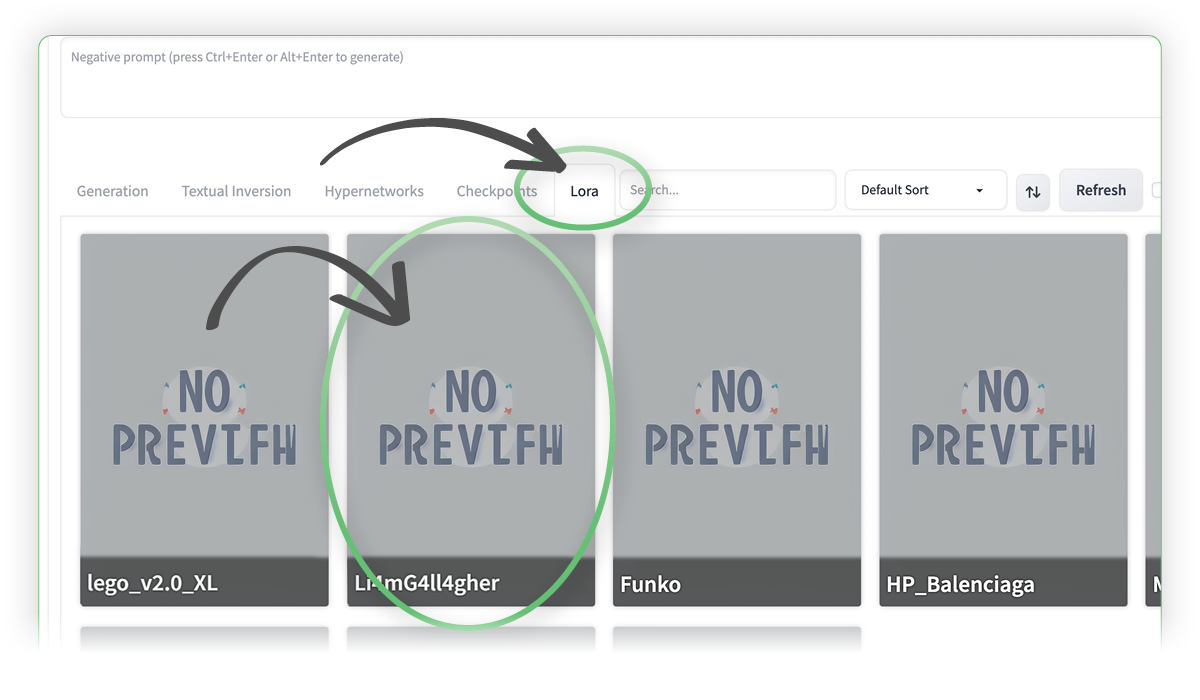
- If you rather not type it out manually, another way to trigger your LoRA is to select the LoRA sub tab in txt2Img and simply click on the LoRA thumbnail, and it will write it out / activate it in the positive prompts
- Hit generate and see your results!

Let's get training!
Any of our workflows including the above can run on a local version of SD but if you’re having issues with installation or slow hardware, you can try any of these workflows on a more powerful GPU in your browser with ThinkDiffusion.
If you’d like a way turn some of your LoRA-trained work into animated masterpieces, check out my post creating killer animations with AnimateDiff.
Most importantly, y'all have fun out there getting training, and let us know what you're making!
Member discussion