

Introduction
Before we get into the tutorial we wanted to give a huge shout out to Pierre Villedieu who created the original workflow. Please support his gumroad Here.
Cinemagraphs have become increasingly popular on the internet, particularly on e-commerce and social media sites, thanks to the proliferation of GIFs. Pictures still make a statement, and people can devour the material fast. The artist and cinemagraph maker Lindsay Adler says that viewers pause videos to really absorb the information.
Animating a still image with the ComfyUI Cinemagraph workflow
Cinemagraphs combine the two styles into one, allowing for a more compact end product than traditional video while yet capturing all the essential elements. Internet users are inundated with advertisements all the time and view thousands of images daily. To succeed as a creative or as a business, "you have to discover new ways to grab people's attention," says Adler. With that subtle movement, cinemagraphs captivate viewers and keep their interest for a longer period of time. You ask yourself, "Hold on, is this a static picture?" Does it contain video? Instagram advertising and companies will look into cinemagraphs, which are surprising, if they can find a way to make users stop scrolling. That is why you can see them popping up all over Instagram, particularly in ad formats.
What is Cinemagraph?
Cinemagraphs are still images that incorporate short, repeating movements to create the illusion of motion. They can create the impression of watching an animation when presented as an animated GIF or other video format. A video snapshot is a variant on this theme. It's composed like a still photo, but instead of using the shutter release, it captures the subject's movement—like their eye blinks—through the video recording function together with its audio track. Audio snapshots, which are still photos connected to an audio file made at the same time the photo is captured by specific cameras that have this feature, are another variant.
Animating a still image with the ComfyUI Cinemagraph workflow
To create a cinemagraph, one must first record video or take a series of still images, and then use image editing software to composite the individual frames into a continuous loop. The technique is employed in such a manner that when a portion of the subject moves between exposures (such as a dangling leg), it appears as though the motion is ongoing, in contrast to the rest of the image which remains still.
Do not be confused. Cinematograph is not the same as cinemagraph, which is a noun meaning an early instrument. It is a prefix for a number of different film technologies used in the early days of the cinema. Film projectors and movie cameras, or equipment that could print films in their whole, were also referred to by this moniker.
The importance of Cinemagraph
Cinemagraphs, just like images and videos, have an immense number of potential applications. A large number of artists are gravitating towards the medium in order to take advantage of its novelty and to test the limits of how they can express themselves.
A popular tool for digital marketing, cinemagraphs are characterized by the fact that they combine both static and dynamic elements. It is becoming increasingly common for companies and brands to produce cinemagraphs for the many forms of marketing content they provide. The following are some more particular examples of examples of how and when cinemagraphs might be used:
- Digital advertisements
- Websites, landing pages, and blogs
- Email/newsletters
- Social media
- Digital displays and billboards
- Long form videos
- Museum and galleries
AutoCinemagraph in ComfyUI
Running the AutoCinemagraph Comfyui workflow
Designed specifically for a modified and complex process, ComfyUI is a web-based Stable Diffusion interface. When dealing with Stable Diffusion, a sophisticated artificial intelligence text-to-image generation model, it is a modular framework that was created to augment the user experience and increase productivity. ComfyUI has the ability to process a Cinemagraph workflow. An efficient ComfyUI procedure that allows users to animate any image in any desired manner with just one click. It utilizes the most recent IPAdapter nodes and SD1.5 Animatediff LCM models to animate your static images. The workflow for AutoCinemagraph has a complex design and structure. It has 9 groups of nodes and each of the groups contain several individual nodes that need to be checked and tweaked in order to achieve the desired results. Be amazed with the next section and see how to setup and run the workflow according to the steps.
One-Time Setup
Let's get the hard work out of the way, this is a one time set up and once you have done it, your custom nodes will persist the next time you launch a machine.
- Download the workflow here AutoCinemagraph
- Launch a ThinkDiffusion machine. You can use the Turbo machine when running this machine as it is quite intensive on the graphics card.
- Drag and drop the workflow .json files into your ComfyUI machine workspace to test the missing custom nodes.
- If there are red coloured nodes, download the missing custom nodes using ComfyUI manager or by using the Git URL.
- If there are red coloured nodes, download the missing models using ComfyUI manager or by using the Git URL.
Custom Nodes
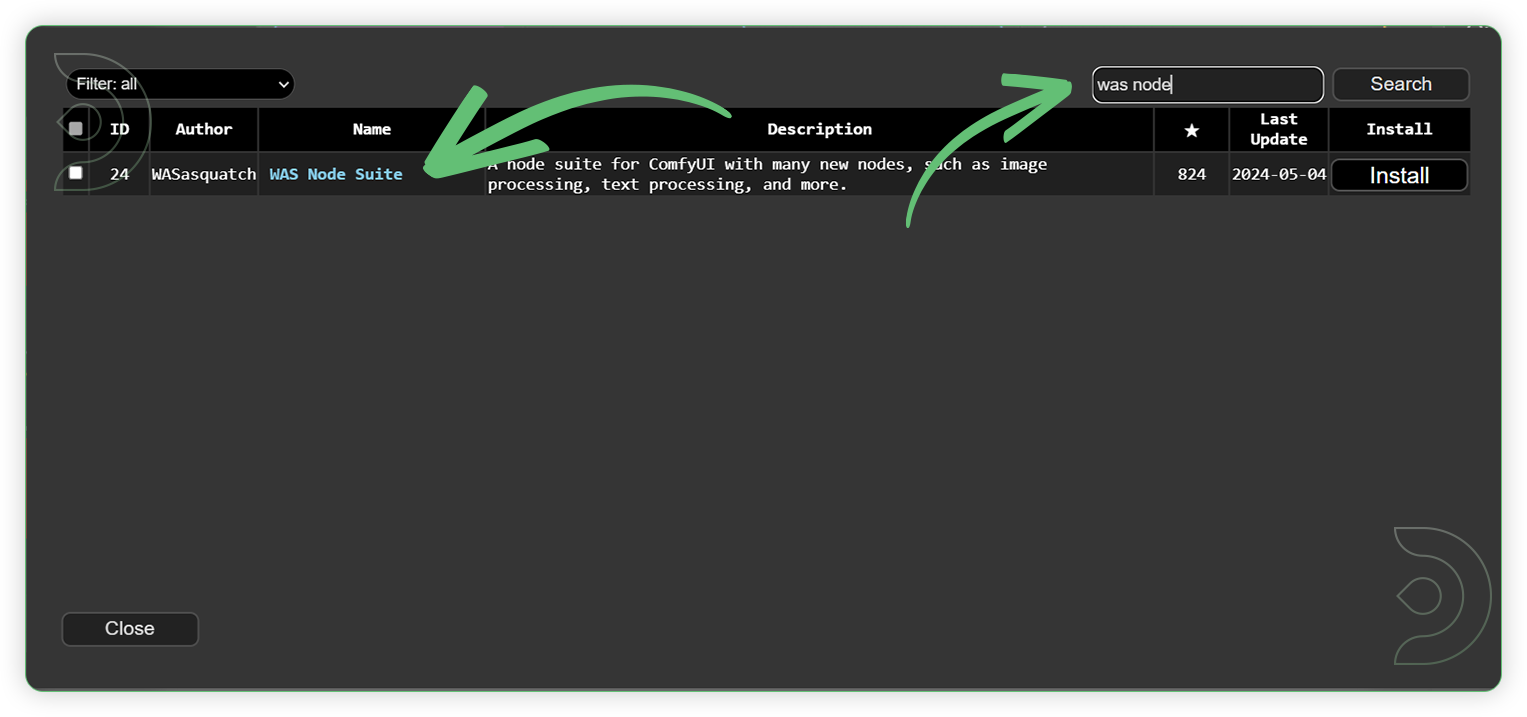
Was Node Suite
Install this custom node using the ComfyUI Manager. Search “was node” in the search box, select the Was Node Suite in the list and click Install. Restart the ComfyUI machine in order for the newly installed model to show up.
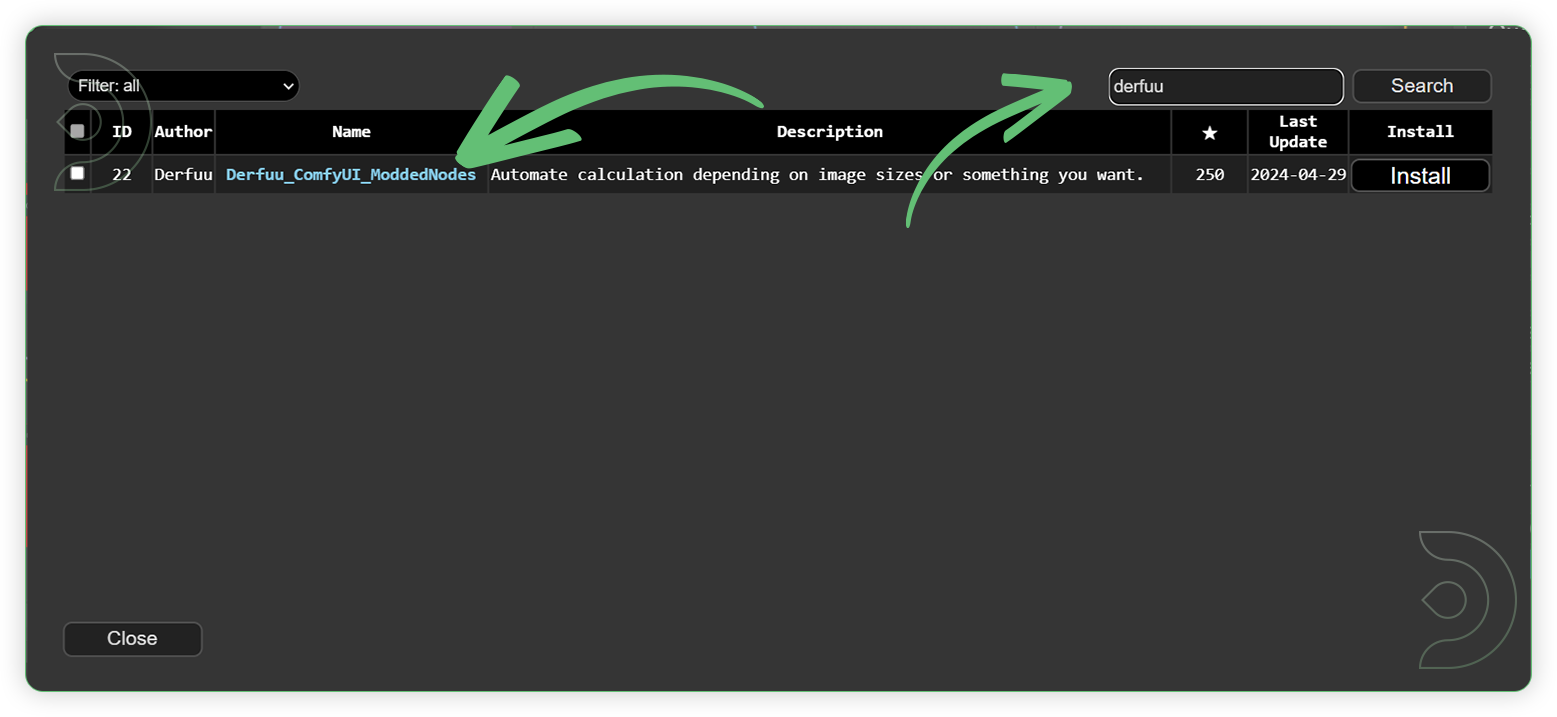
Derfuu
Install this custom node using the ComfyUI Manager. Search “derfuu” in the search box, select the Derfuu_ComfyUI_ModdedNodes in the list and click Install. Restart the ComfyUI machine in order for the newly installed model to show up.
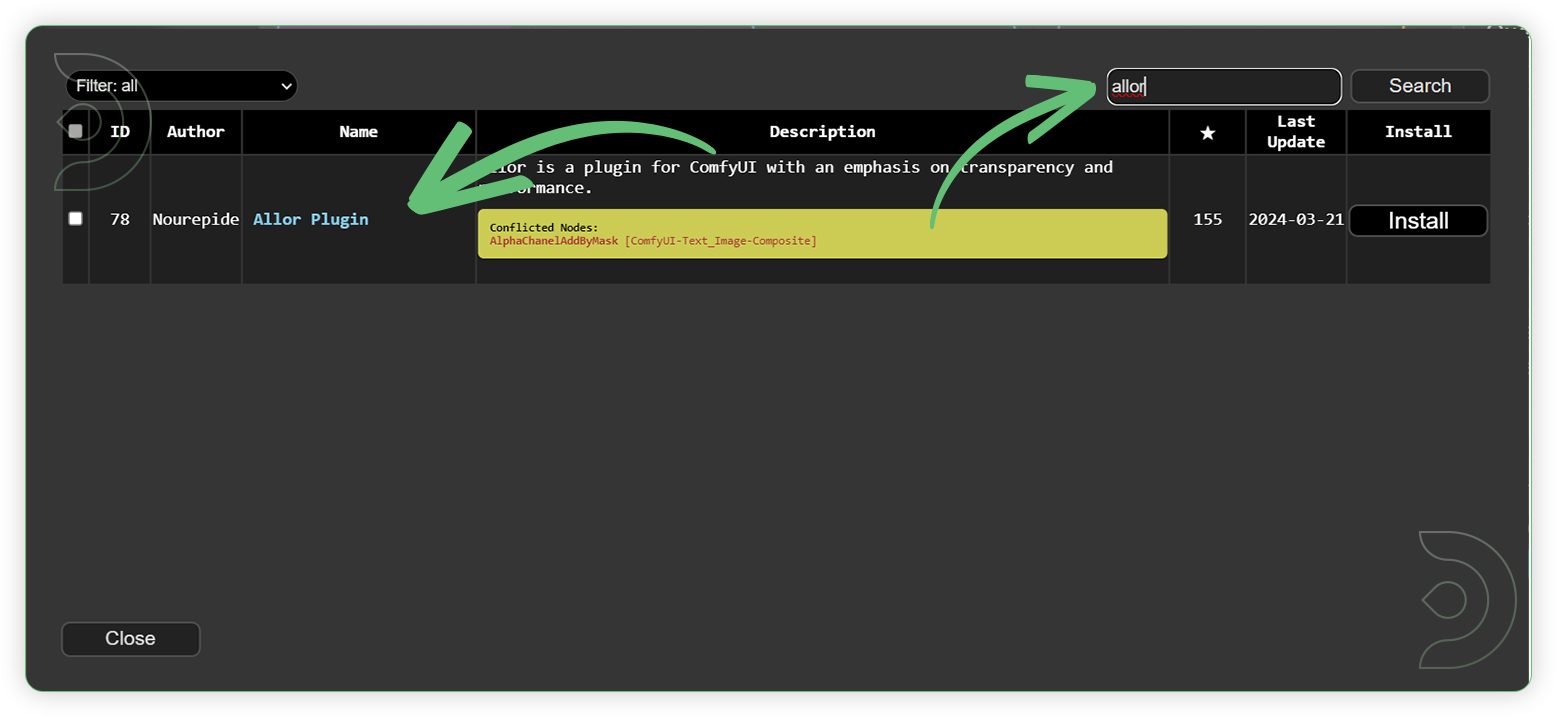
Allor Plugin
Install this custom node using the ComfyUI Manager. Search “allor” in the search box, select the Allor Plugin in the list and click Install. Restart the ComfyUI machine in order for the newly installed model to show up.
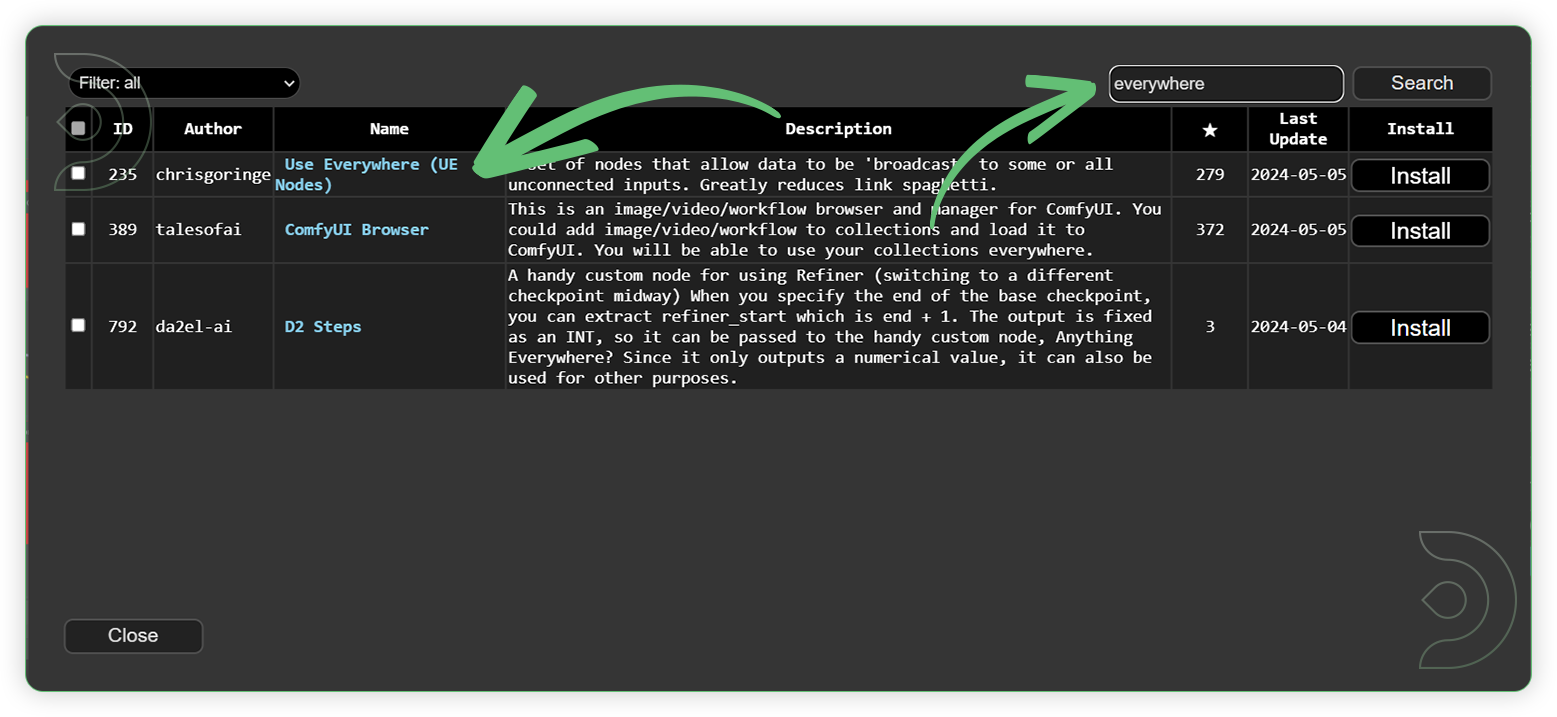
Use Everywhere (UE Nodes)
Install this custom node using the ComfyUI Manager. Search “everywhere” in the search box, select the Use Everywhere (UE Nodes) in the list and click Install. Restart the ComfyUI machine in order for the newly installed model to show up.
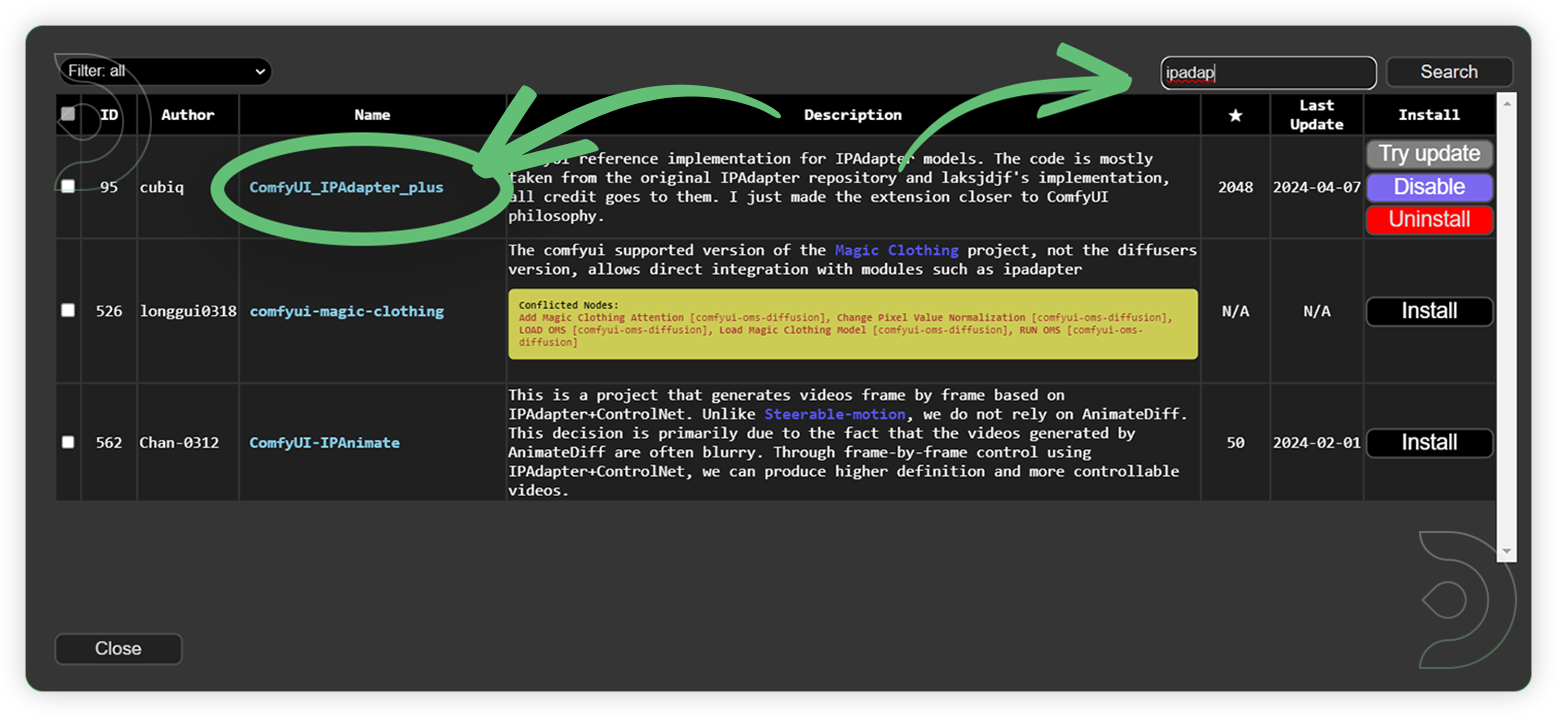
IPAdapterPlus
Install this custom node using the ComfyUI Manager. Search “ipadapter” in the search box, select the ComfyUI_IPAdapter_plus in the list and click Install. Restart the ComfyUI machine in order for the newly installed model to show up.
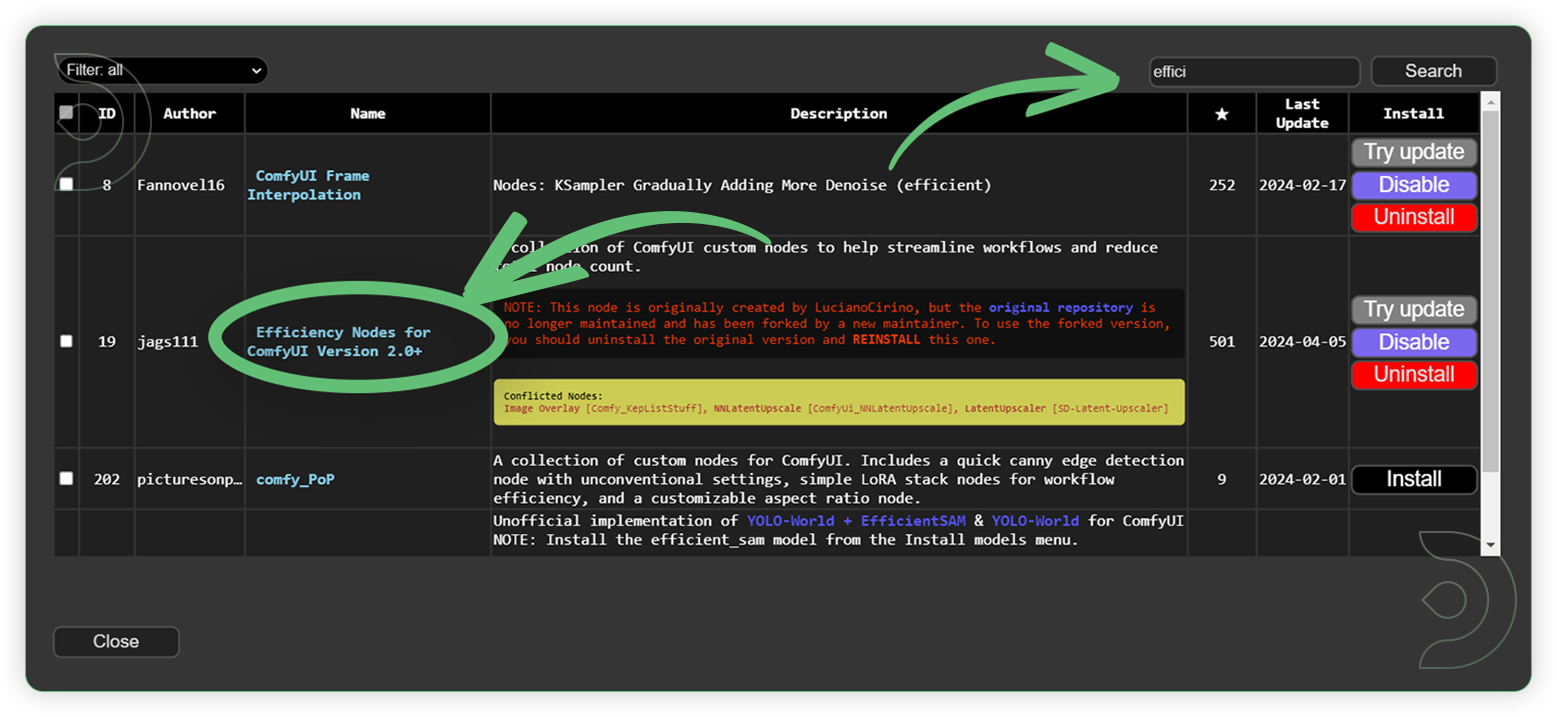
Efficiency Nodes
Install this custom node using the ComfyUI Manager. Search “efficiency” in the search box, select the Efficiency Nodes for ComfyUI Version 2.0+ in the list and click Install. Restart the ComfyUI machine in order for the newly installed model to show up.
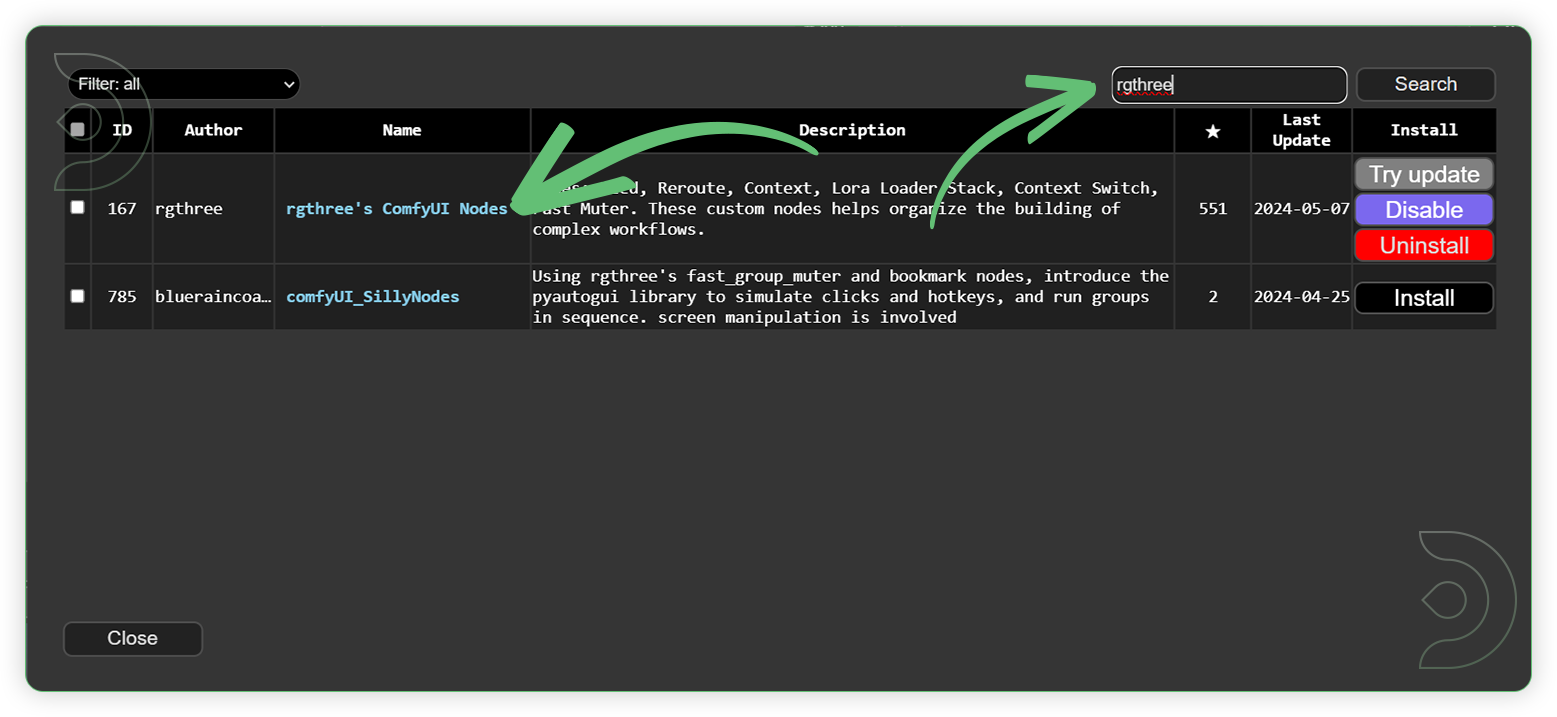
Rgthree
Install this custom node using the ComfyUI Manager. Search “rgthree” in the search box, select the rgthree’s ComfyUI Nodes in the list and click Install. Restart the ComfyUI machine in order for the newly installed model to show up.
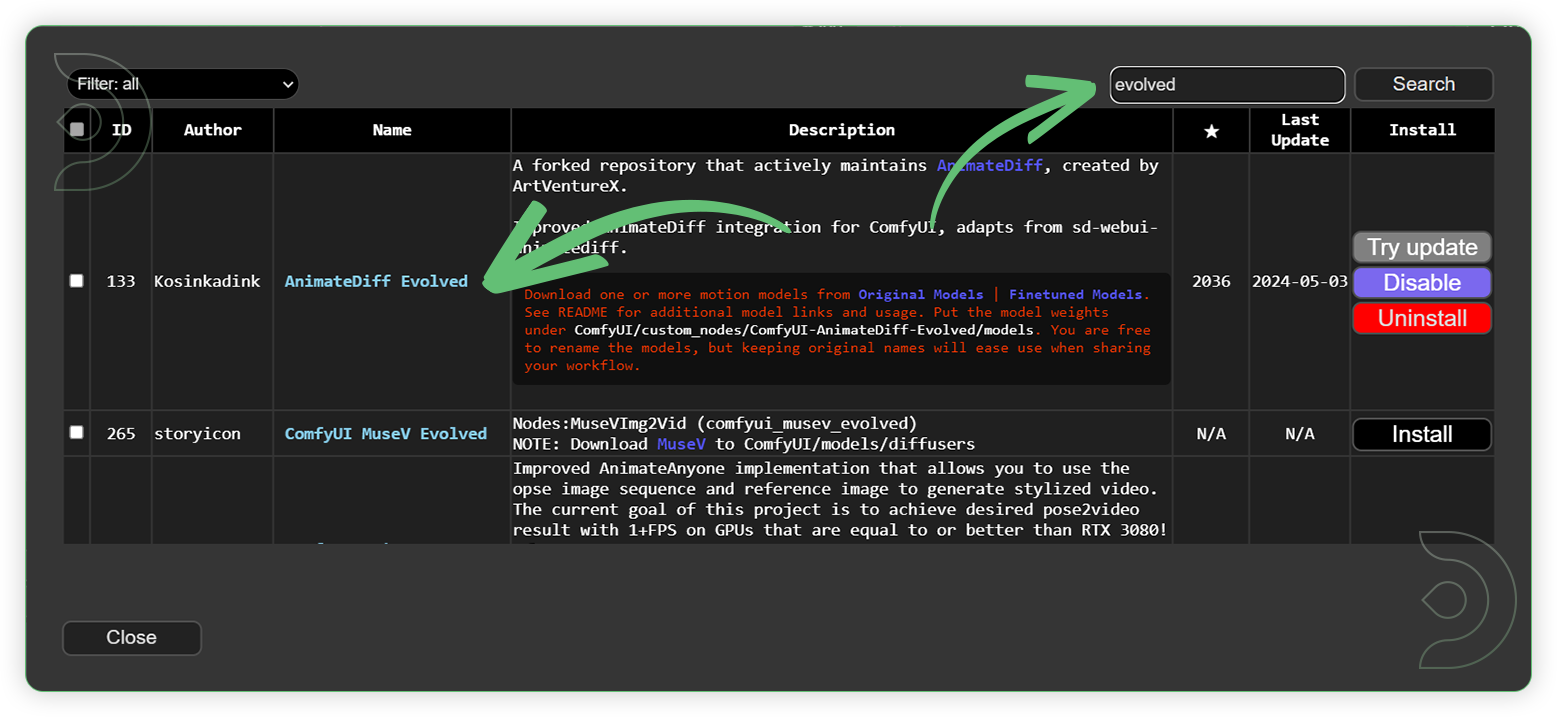
AnimateDiff Evolved
Install this custom node using the ComfyUI Manager. Search “evolved” in the search box, select the AnimateDiff Evolved in the list and click Install. Restart the ComfyUI machine in order for the newly installed model to show up.
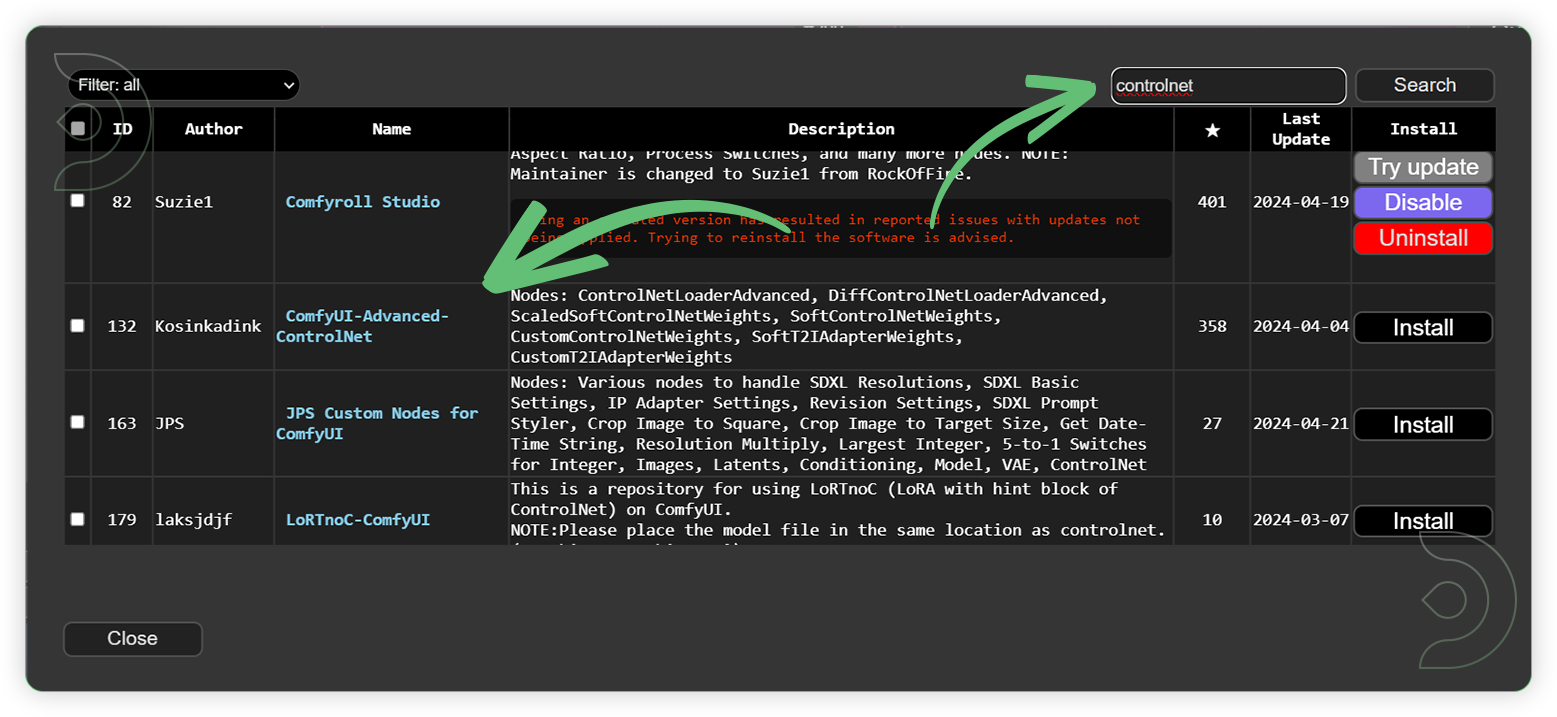
Advanced ControlNet
Install this custom node using the ComfyUI Manager. Search “controlnet” in the search box, select the ComfyUI-Advanced-ControlNet in the list and click Install. Restart the ComfyUI machine in order for the newly installed model to show up.
Models
Download these recommended models using the ComfyUI manager and restart the machine after uploading the files in your ThinkDiffusion My Files.
Some of the files are larger and above 2GB size, follow the instructions here UPLOAD HELP by using Google Drive method, then upload it to the ComfyUI machine using a Google Drive link. Restart the ComfyUI machine in order for the newly installed model to show up. Another method is copy link address of download button/icon from civitai or huggingface and paste into the Upload section of ThinkDiffusion My Files using the copied URL.
For ease of use, here is a google drive link to the models
How to Use
Now that the hard work is out of the way, let's get creative and animate some images. For most use cases, you only need to do the steps that are marked required change. You need to follow the steps from 1 to 9. The workflow is a one-click process and you don’t need to worry if there’s a default model that was already installed them in your ThinkDiffusion My Files.
| Step | Description / Impact | Default / Recommended Values | Required Change |
|---|---|---|---|
| 1 - Load Here | This is the first step to be initialized. Upload an image that you want to cinemagraph. | 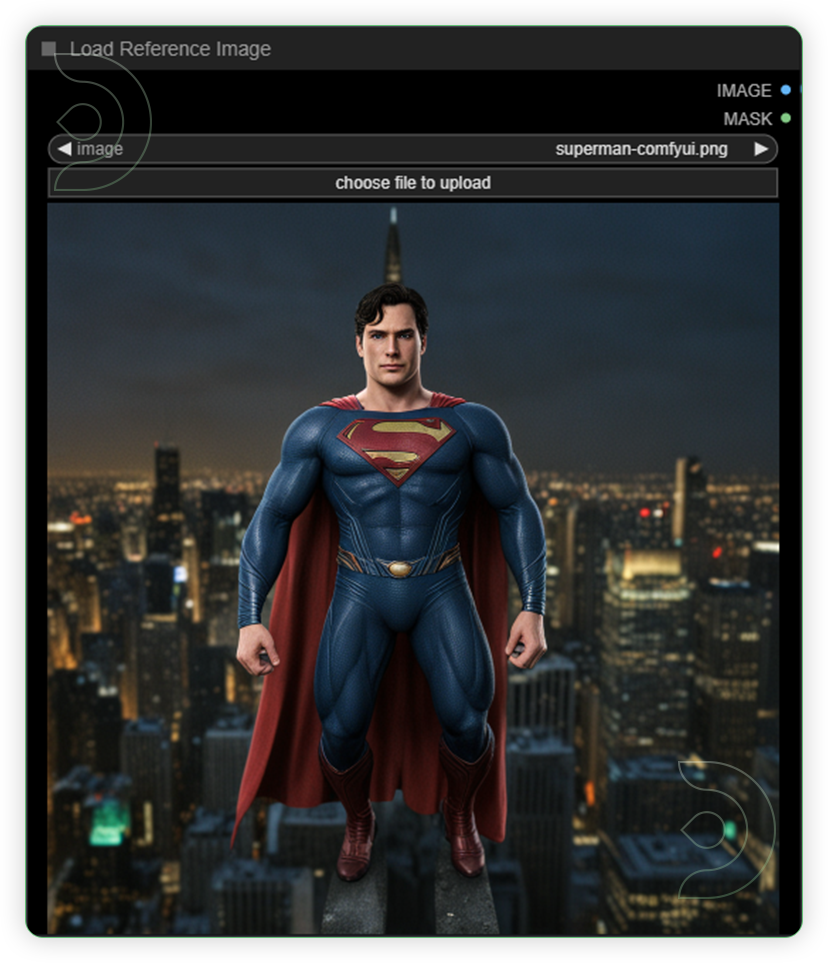 |
YES |
| 2 - Frames and Aspect Ratio | Put a time limit on your animation. Your reference image's Aspect Ratio is now calculated automatically. | 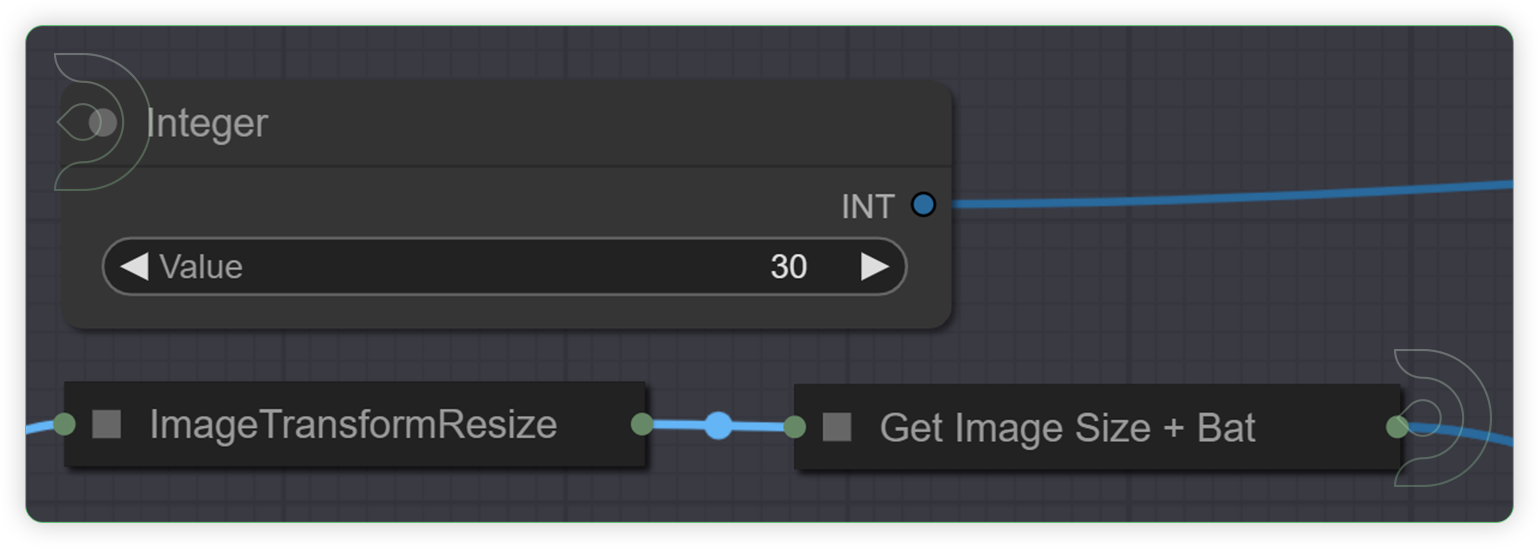 |
YES |
| 3 - Checkpoints | Here are two choices for you. Because it is fast and trained with LCM motion data, I highly recommend downloading Photon LCM if you want photorealistic results. Because of this, the Motion Lora is superfluous. Get it linked up with the sendModel node directly. Nonetheless, you are free to select any other sd1.5 model or combine models if you so like. In order to accomplish this, connect it using the Motion Lora node. Remember to include link the checkpoint clip you've chosen to sendClip. | 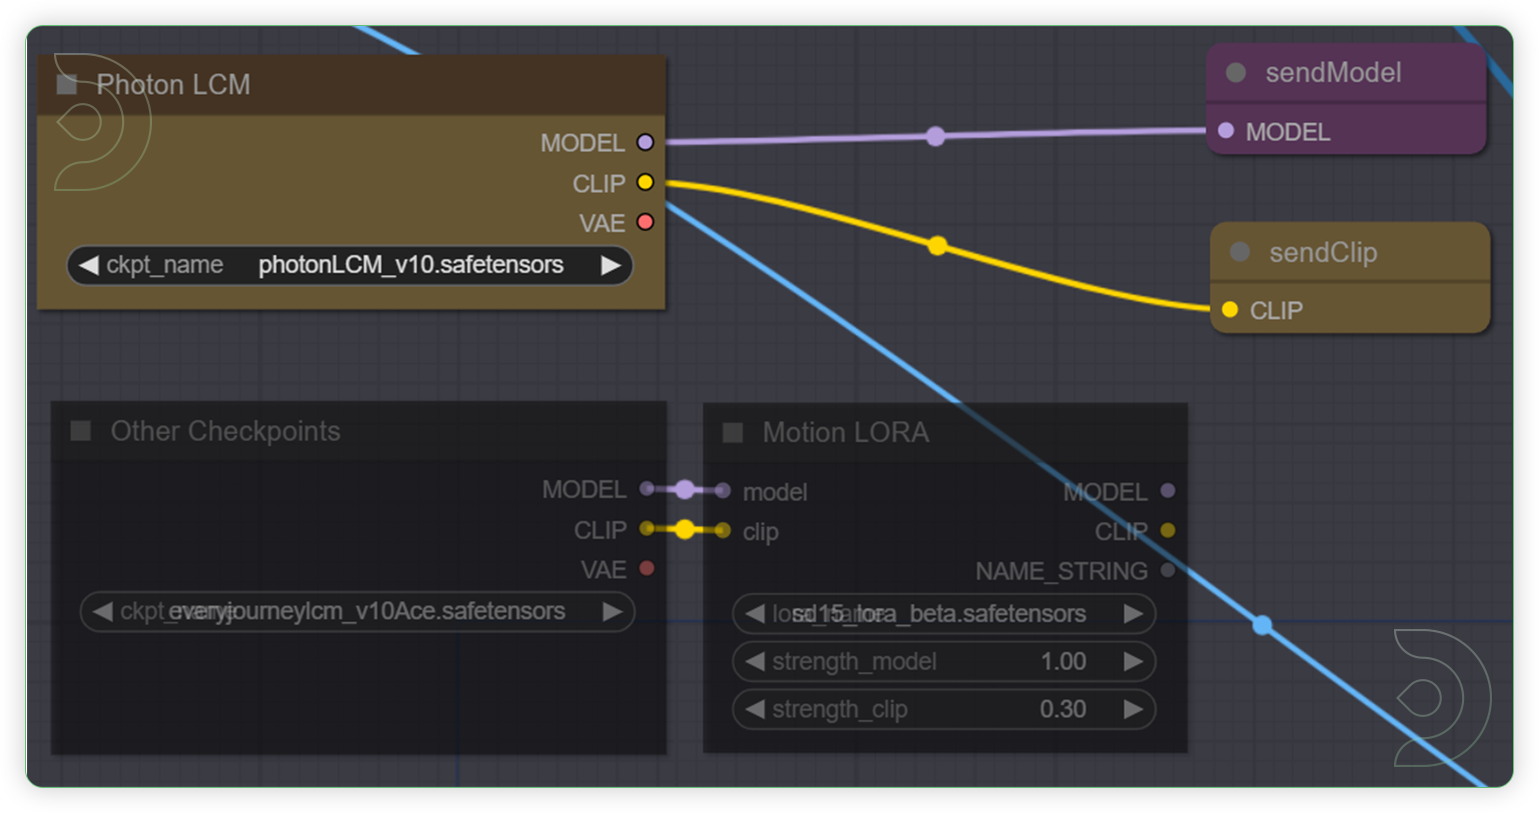 |
YES |
| 4 - Prompt | Here you can emphasize or enhance specific parts of your image. I learned that one word may make a big difference, so it's best to keep things basic so as not to overload the conditioning. Typically, it is acceptable to add nothing. | 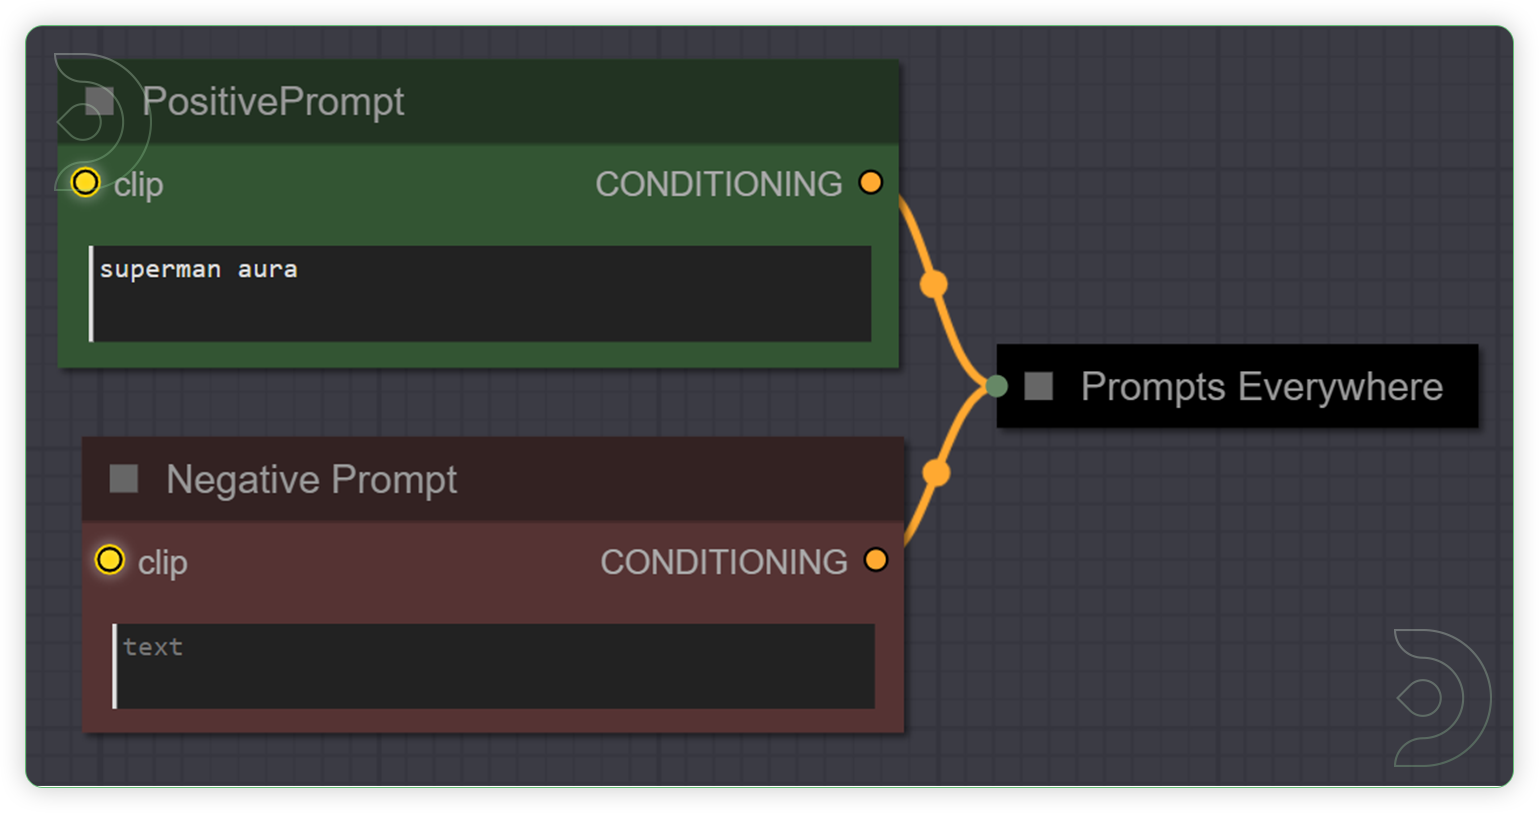 |
YES |
| 5 - AnimateDiff | You can change the amount of movement in your animation here by adjusting the value of motion_scale. Results between 0.8 and 1.3 are satisfactory based on my tests. Please do your best if you wish to experiment with more significant values. | 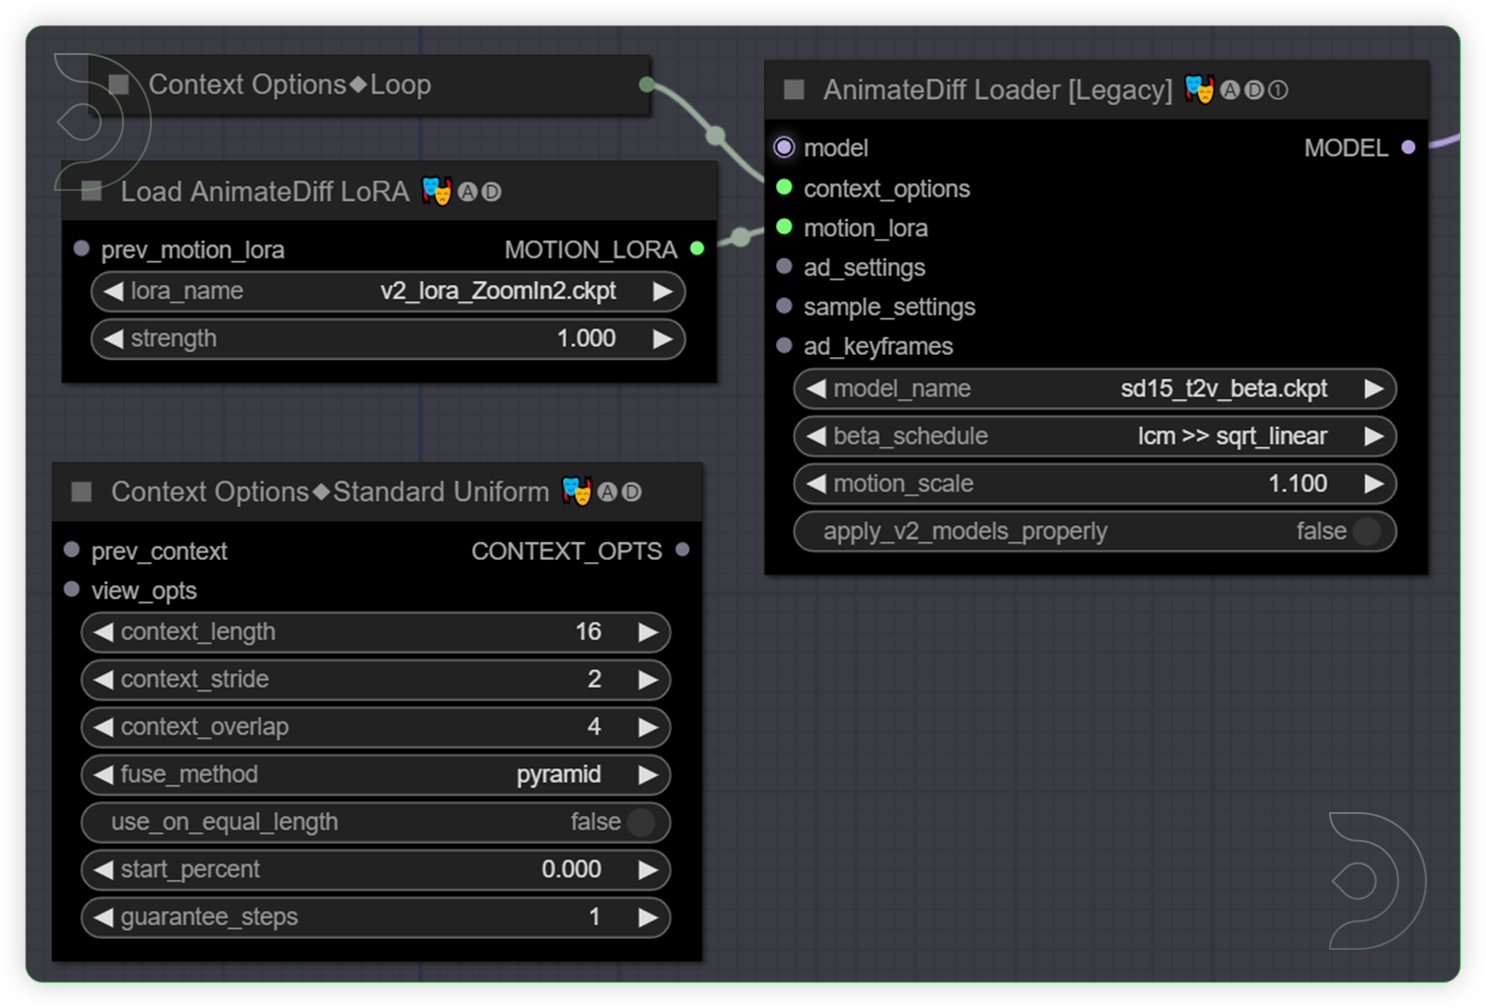 |
YES |
| 6 - IPAdapter Plus | This is the driving force behind this process. Quite simply, this node is a miracle worker. To begin, pick the appropriate default. Personally, I prefer using Plus for wide-angle shots, Plus Face for character shots, and Full Face for close-up portraits. Try something new if you want. If you're willing to sacrifice some degree of similarity to your reference image in exchange for better animations, VIT-G is a fantastic choice. In certain situations, you may be able to tweak the settings to make them perform better, but in most circumstances, they're fine the way they are. You can also attach it to the IPAdapter Tiled for more sophisticated control, which is useful for big aspect ratios. | 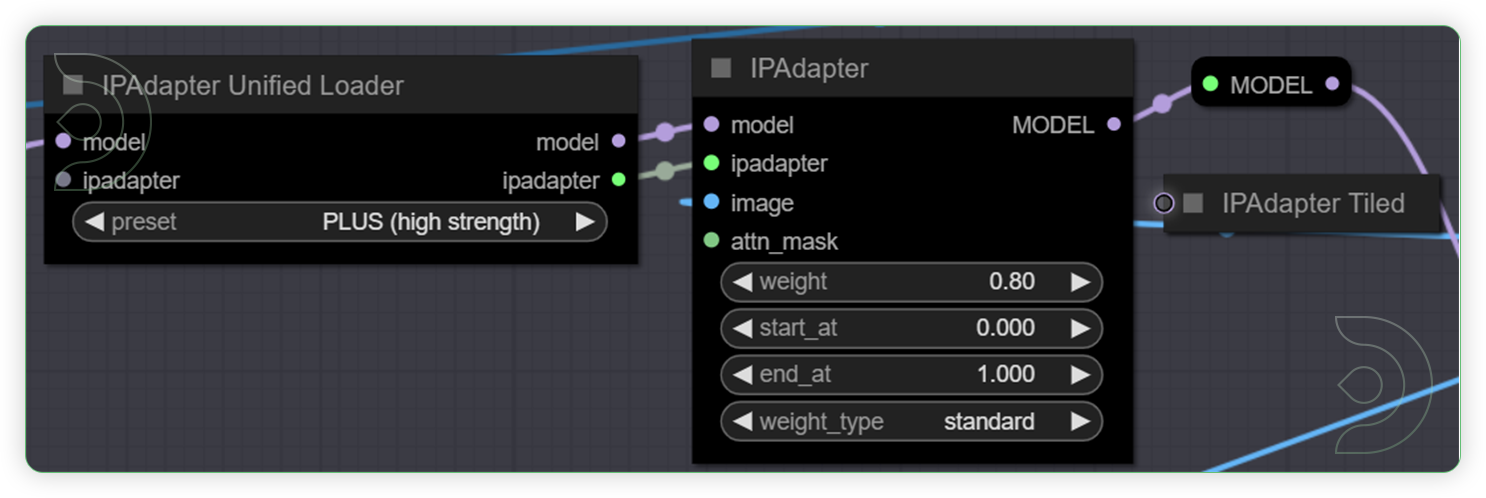 |
YES |
| 7 - ControlNet | Improved the image's consistency with the reference by adding a rudimentary controlNet setup. You have the option to change the final percentage. If you want to avoid really static graphics, I suggest keeping it under 0.3. Another option is to use motion_scale in the 05 - AnimateDiff as a form of compensation; however, the exact details will depend on the reference image you're working with. To remain on the "One Click" spectrum, just keep things simple with controlNets, though there are many more methods to do it. | 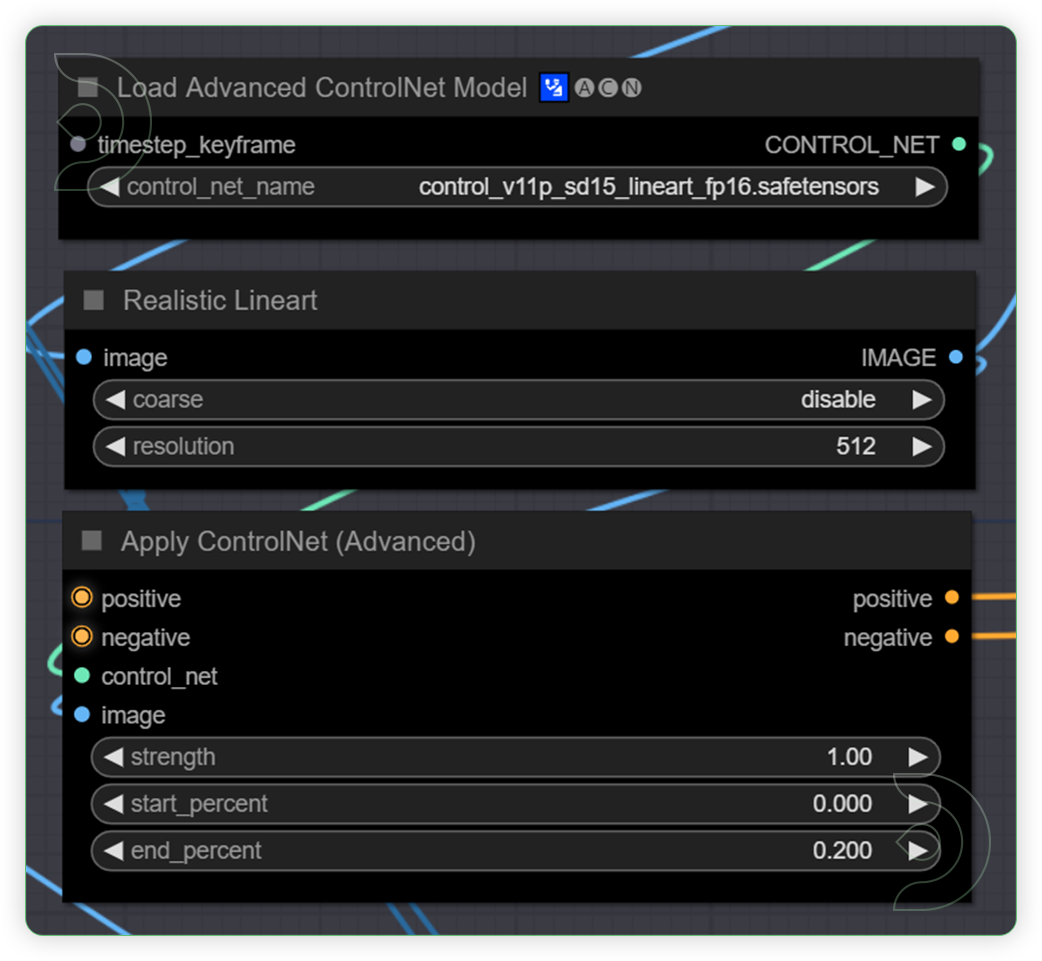  |
YES |
| 8 - Upscale | An optional upscale node is available. I recommend keeping it bypassed during testing and enabling it once you are satisfied with the results. Please note that using the upscale node may significantly increase rendering time, with the extent of the increase depending on the value specified in the upscale_by box. | 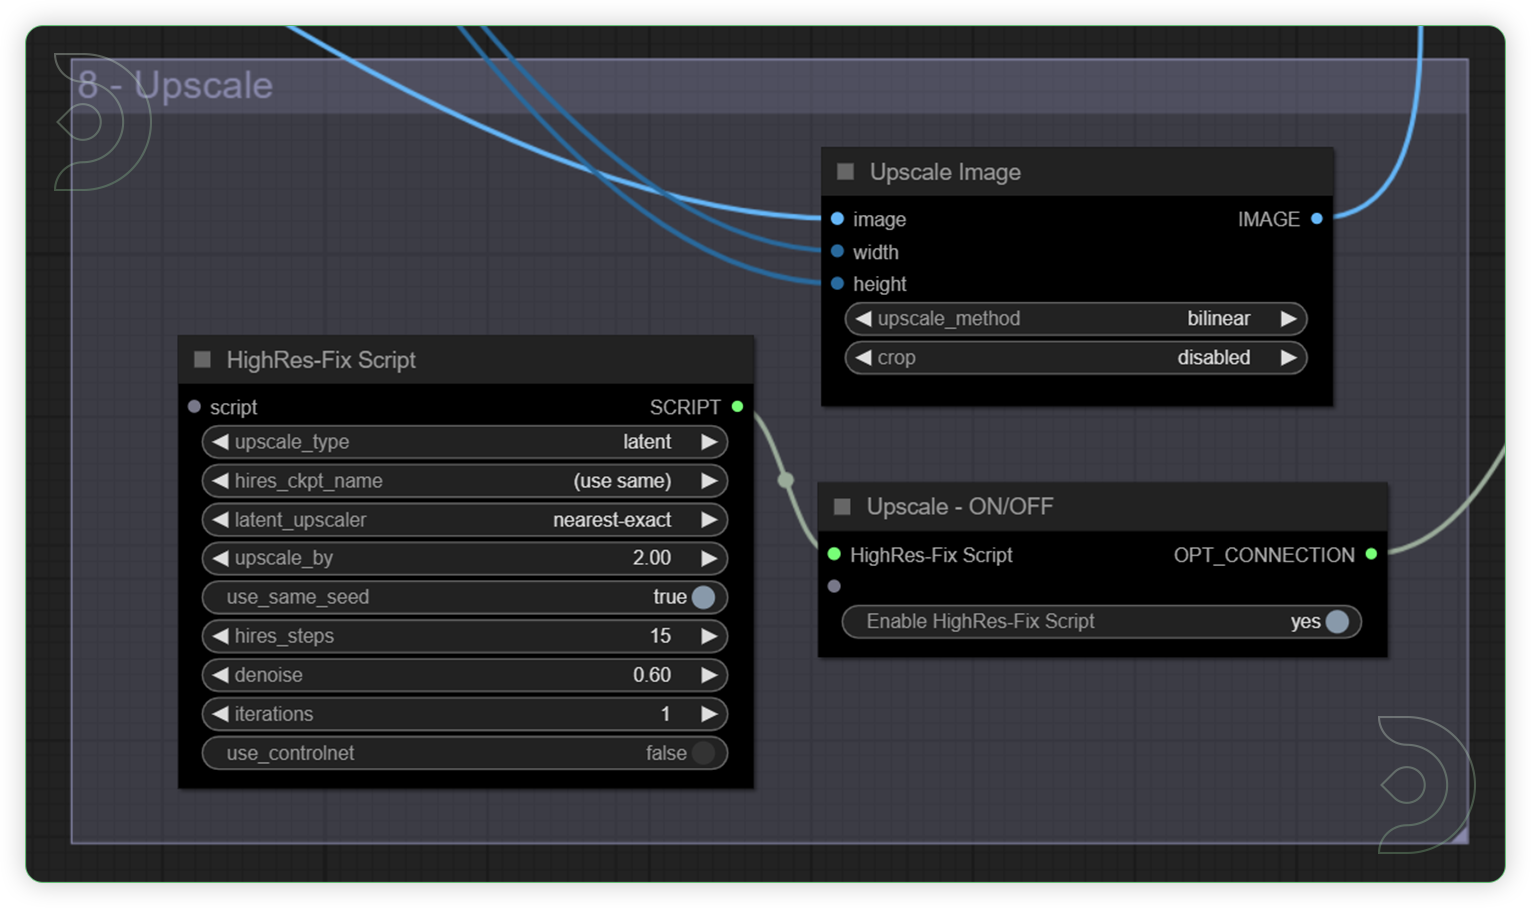 |
|
| 9 - Output | To maintain simplicity, I recommend keeping those values unchanged. However, if you possess the necessary knowledge and expertise, you are welcome to engage in experimentation. You can play the settings of steps and cfg. | 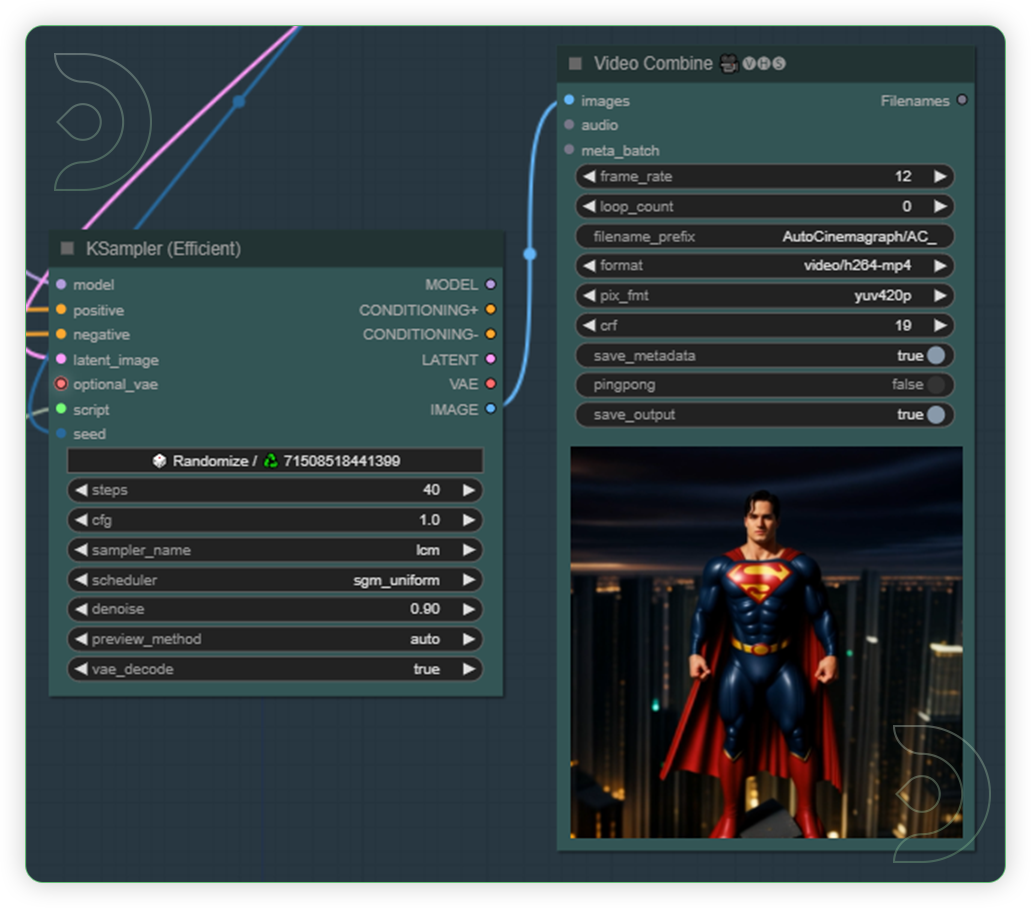 |
|
| 10 - Run Queue Prompt |
More Examples
Download the examples HERE
Settings - prompt: car, wonderful ; 30 frames ; IPAdapter Plus - High ; motion lora - pan left ; steps 40; cfg 1 ; frame_rate 24; loop 1; checkpoint photonLCM
Settings - frames 30, photonLCM checkpoint; prompt - superman aura; motion lora - zoomin; IPAdapter - Plus; steps 40; cfg
Settings - 45 frames; prompt - mountain, nature beauty; checkpoint - photonLCM; IPAdapter - PLUS; motion lora - Motion Meteor Shower; steps - 40; cfg - 1; frame rate 12, loop - 1
Summary
Upon setting up the workflow, you may find yourself perplexed by the extensive arrangement of nodes. Fortunately, this tutorial will assist you in testing it and you will be able to notice the efficient functioning of LCM. The LCM operates more efficiently compared to alternative checkpoints that may be utilized. LoRAs are quite beneficial for implementing a low rank adaptation model to your reference image. There is no reason for concern if there is no written prompt. To start with, it is most effective to make little adjustments to the frames, weight, strength, and selection of IPAdapter types.
Frequently asked questions
What is ComfyUI?
ComfyUI is a node based web application featuring a robust visual editor enabling users to configure Stable Diffusion pipelines effortlessly, without the need for coding.
What is cinemagraph?
A cinemagraph is a combination of a still image and a video, where most of the scene is stationary, while a section moves on a continuous loop.
ComfyUI in the cloud
If you’re having issues with installation or slow hardware, you can try any of these workflows on a more powerful GPU in your browser with ThinkDiffusion.
If you enjoy ComfyUI and you want to test out creating awesome animations, then feel free to check out this AnimateDiff tutorial here.
Member discussion