
Prompt: A view of the forest in a upward camera view.
Original Link - https://www.youtube.com/watch?v=b69Qs0wvaFE&t=311s
Uni3C is a ComfyUI model by Alibaba that converts static images into dynamic videos by transferring camera movements from reference videos. This tutorial covers complete setup and usage.
What is Uni3C?
Source: The Uni3C
Uni3C is a unified 3D-enhanced framework integrated into ComfyUI that enables precise, simultaneous control over both camera motion and human animation within video generation workflows. By leveraging a lightweight plug-and-play control module, Uni3C extracts and transfers motion—such as camera movements and character actions—from reference videos directly onto new scenes or images, eliminating the need for complex manual rigging or joint annotation.
This technology is especially valuable for digital artists, animators, filmmakers, virtual avatar creators, educators, and anyone in content creation seeking to bring static visuals to life with realistic, controllable movement—all with the creative freedom and modular workflow of ComfyUI.
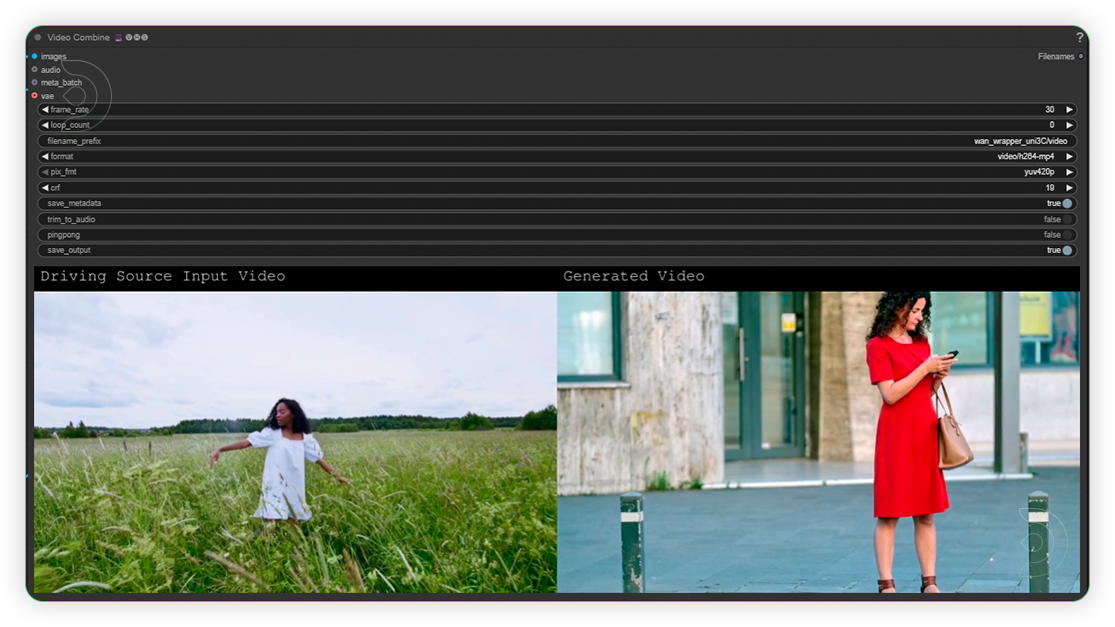
Prompt: A woman in a man sitting and it follows the camera angle.
Whether you’re just starting out or looking to elevate your animation game, let’s explore together how a few simple steps can transform your scenes from static to spectacular!
Download Workflow
Installation guide
- Download the workflow file
- Open ComfyUI (local or ThinkDiffusion)
- Drag the workflow file into the ComfyUI window
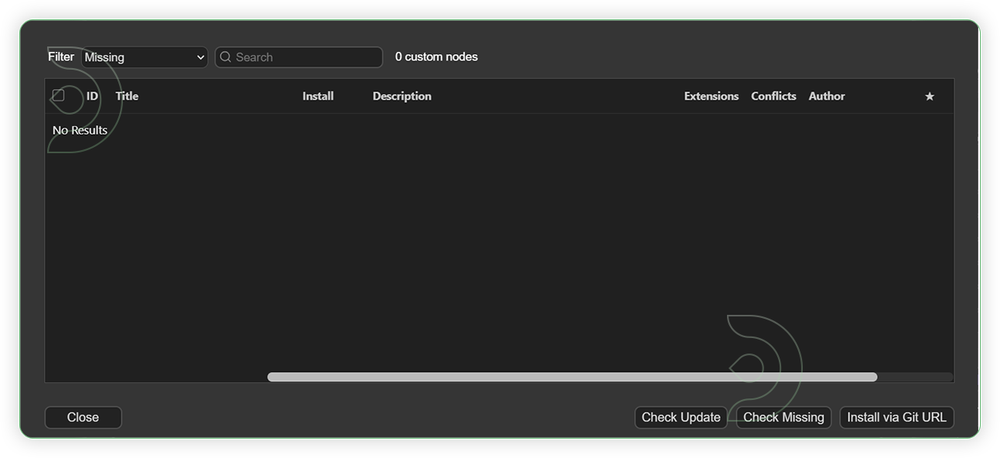
- If you see red nodes, install missing components:
- ComfyUI Manager > Install Missing Custom Nodes
Verified to work on ThinkDiffusion Build: June 27, 2025
ComfyUI v0.3.44 with the use Wan2_1-I2V-14B-720P_fp8_e4m3fn.safetensors and
Wan21_Uni3C_controlnet_fp16.safetensors
Note: We specify the build date because ComfyUI and custom node versions updated after this date may change the behavior or outputs of the workflow.
Minimum Machine Size: Ultra
Use the specified machine size or higher to ensure it meets the VRAM and performance requirements of the workflow
Custom Nodes
If there are red nodes in the workflow, it means that the workflow lacks the certain required nodes. Install the custom nodes in order for the workflow to work.
- Go to the ComfyUI Manager > Click Install Missing Custom Nodes

- Check the list below if there's a list of custom nodes that needs to be installed and click the install.
Required Models
For this guide you'll need to download these 6 recommended models.
2. umt5-xxl-fp16.safetensors
3. Wan21_T2V_14B_lightx2v_cfg_step_distill_lora_rank32.safetensors
4. clip_vision_h.safetensors
5. Wan2_1_VAE_bf16.safetensors
6. Wan21_Uni3C_controlnet_fp16.safetensors
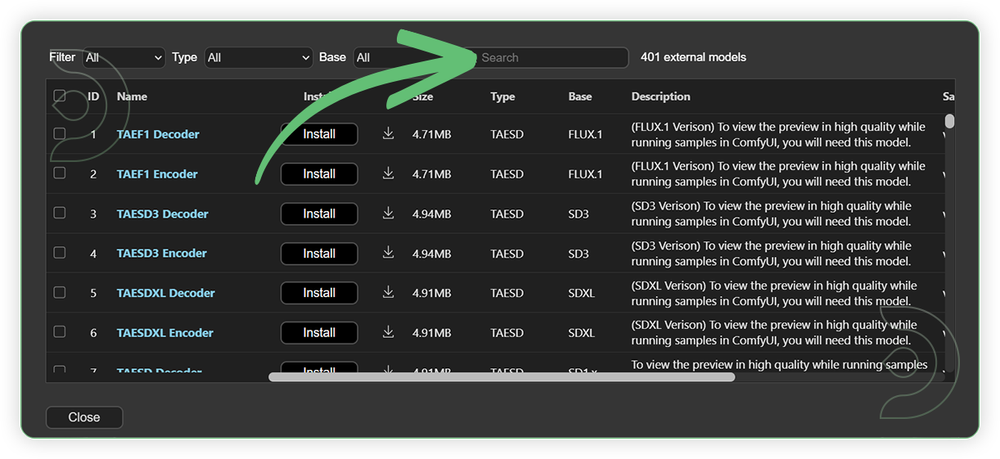
- Go to ComfyUI Manager > Click Model Manager

- Search for the models above and when you find the exact model that you're looking for, click install, and make sure to press refresh when you are finished.
If Model Manager doesn't have them: Use direct download links (included with workflow) and upload through ThinkDiffusion MyFiles > Upload URL. Refer our docs for more guidance on this.
You could also use the model path source instead: by pasting the model's link address into ThinkDiffusion MyFiles using upload URL.
| Model Name | Model Link Address | ThinkDiffusion Upload Directory |
|---|---|---|
Wan2_1-I2V-14B-720P_fp8_e4m3fn.safetensors |
.../comfyui/models/diffusion_models/ |
|
| umt5-xxl-fp16.safetensors | .../comfyui/models/text_encoders/ |
|
| Wan21_T2V_14B_lightx2v_cfg_step_ distill_lora_rank32.safetensors |
.../comfyui/models/loras/ |
|
| clip_vision_h.safetensors | .../comfyui/models/clip/ |
|
| Wan2_1_VAE_bf16.safetensors | .../comfyui/models/vae/ |
|
| Wan21_Uni3C_controlnet_fp16.safetensors | .../comfyui/models/diffusion_models/ |
Step-by-step Workflow Guide
This workflow was pretty easy to set up and runs well from the default settings. Here are a few steps where you might want to take extra note.
| Steps | Recommended Nodes |
|---|---|
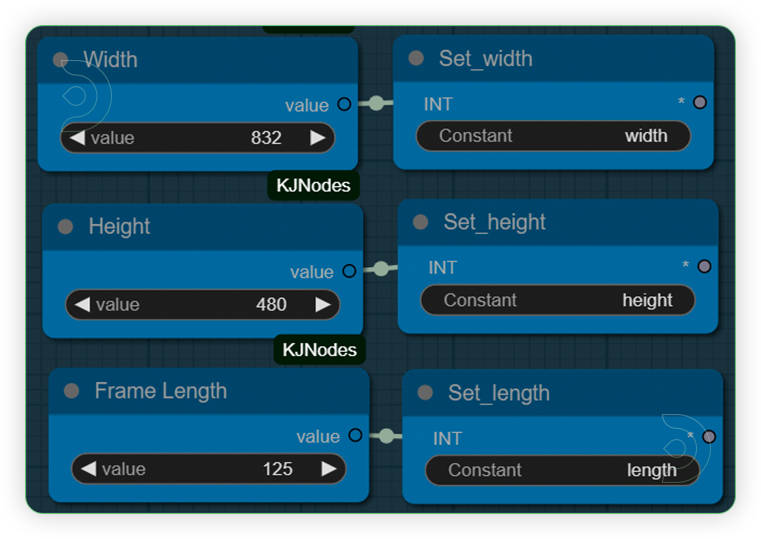
| 1. Set the Height, Weight and Frames Set the frames up to 125. You can set the resolution up to 720 or 1080. |
 |
| 2. Load an Input Video for Control Reference Load an any type of video. The video must have a scene of camera movement. |
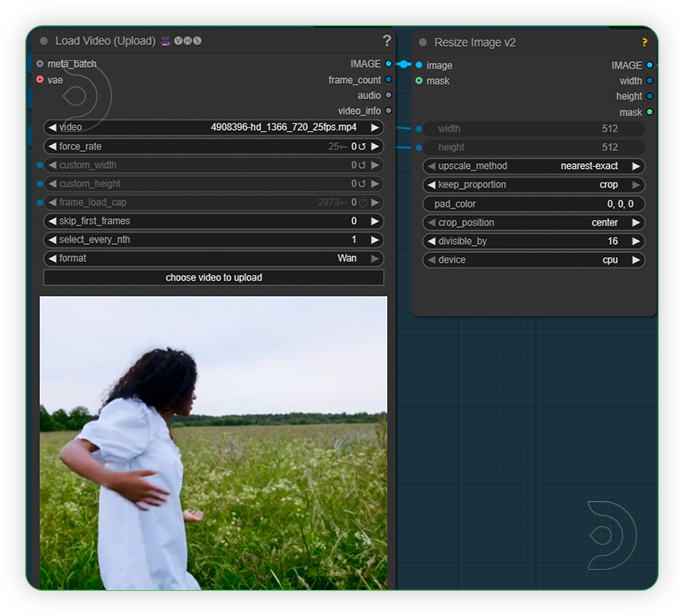 |
| 3. Load an Input Image Upload an image which serves as the base image for the generation. It works with no subject or even in multiple subject. |
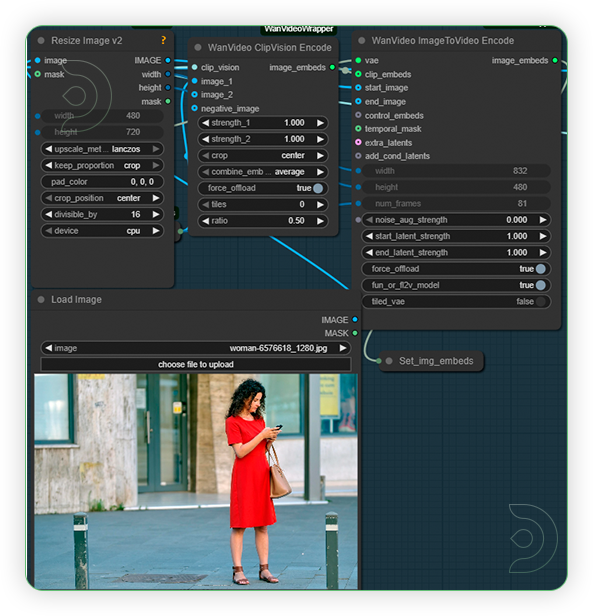 |
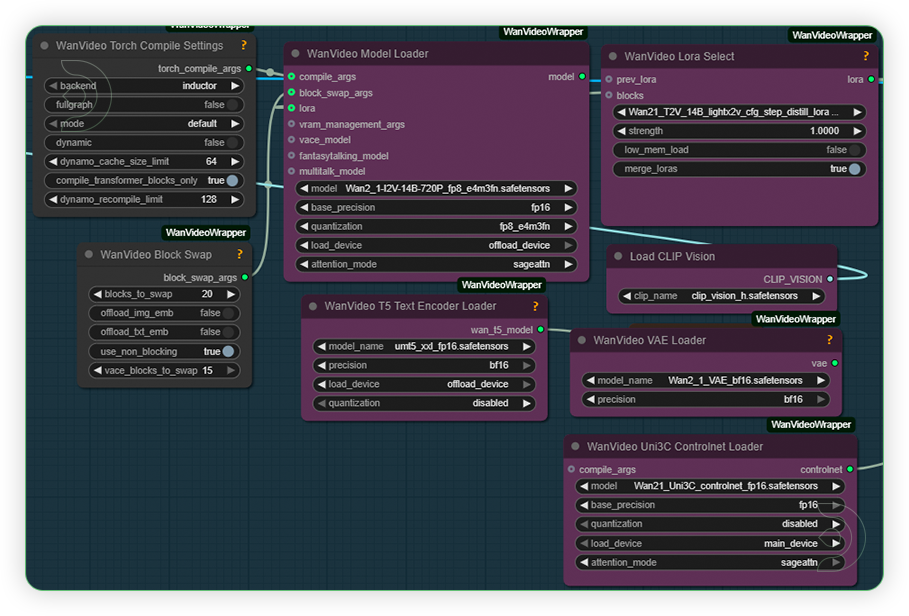
| 4. Set the Models Set the models as seen on the image. |
 |
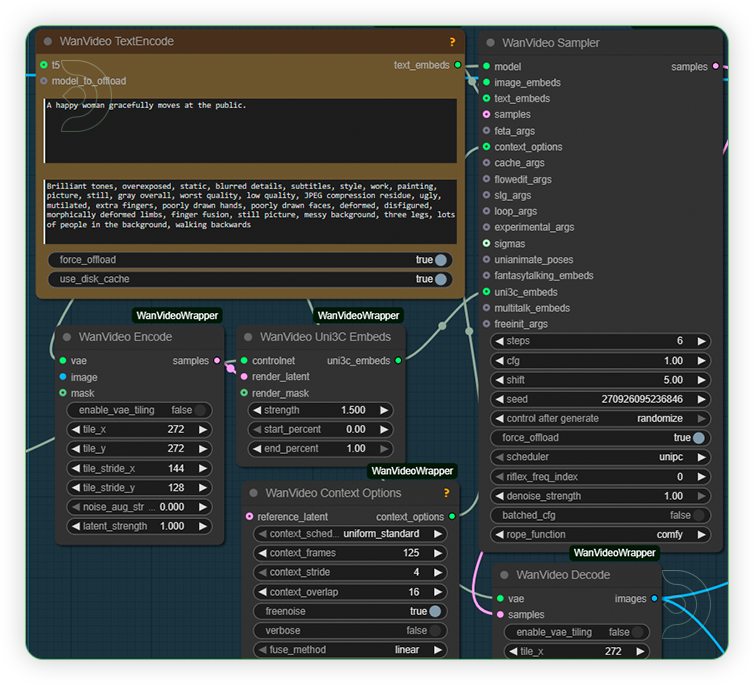
| 5. Write Prompt and Check Sampling Write a simple prompt which support the kind of camera or depth movement. Check the sampling settings as seen on the image. |
 |
| 6. Check the Output |
 |
Examples
Prompt: A cat at the grass and follows the camera view.
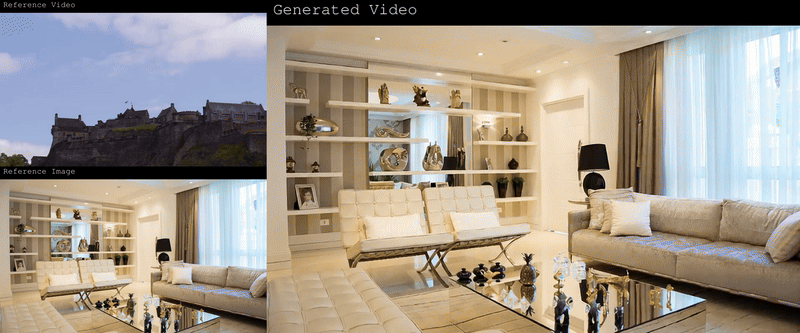
Prompt: A view of the living and follows the camera view.
Prompt: A view of a woman reading at the table.
Troubleshooting
Red Nodes: Install missing custom nodes through ComfyUI Manager
Out of Memory: Use smaller expansion factors or switch to Ultra machine
Poor Quality: Check input image resolution and adjust kontext strength
Visible Seams: Lower strength and ensure good prompt description
If you’re having issues with installation or slow hardware, you can try any of these workflows on a more powerful GPU in your browser with ThinkDiffusion.
Member discussion