
Ever needed to add something to an image that wasn't there before? That's where Flux Fill and Flux Redux come in – they're changing the game for image editing by making inpainting (filling in parts of images) look natural and professional.
By using models such as Flux Fill and Flux Redux, image editors are now capable of achieving results that were previously unimaginable.
This tutorial will delve into the intricacies of these methods, providing a comprehensive guide on how to seamlessly integrate reference images into your inpainting workflow. Whether you're looking to remove unwanted objects, restore damaged areas, or simply enhance the overall aesthetic of your images, this guide will equip you with the best workflow. As you embark on this journey, remember that the art of inpainting is not just about fixing flaws, but about breathing new life into your images. So, let's dive in and explore.
What is Flux Fill and Flux Redux?
Flux Fill and Flux Redux are specialized AI models designed for image inpainting and editing tasks within the Stable Diffusion ecosystem.
Flux Fill is an AI model specifically created for filling in missing or masked parts of images. It excels at generating content that seamlessly blends with the existing image, maintaining consistency in style, lighting, and context. It's particularly useful when you need to add new elements or remove unwanted objects from photos.
Flux Redux is a complementary model that focuses on enhancing the quality and coherence of the inpainted areas. It helps refine the results from Flux Fill by improving details, ensuring better integration with the original image, and maintaining visual consistency across the edited regions.
Together, these models create a powerful workflow for image editing that produces more natural and professional results than standard inpainting approaches. They're particularly effective when used with reference images, which help guide the AI to generate content that matches your specific needs.
Why Use Reference Images for Flux Inpainting?
How to Run Image Inpainting with Reference Images in ComfyUI
Installation guide
Custom Nodes
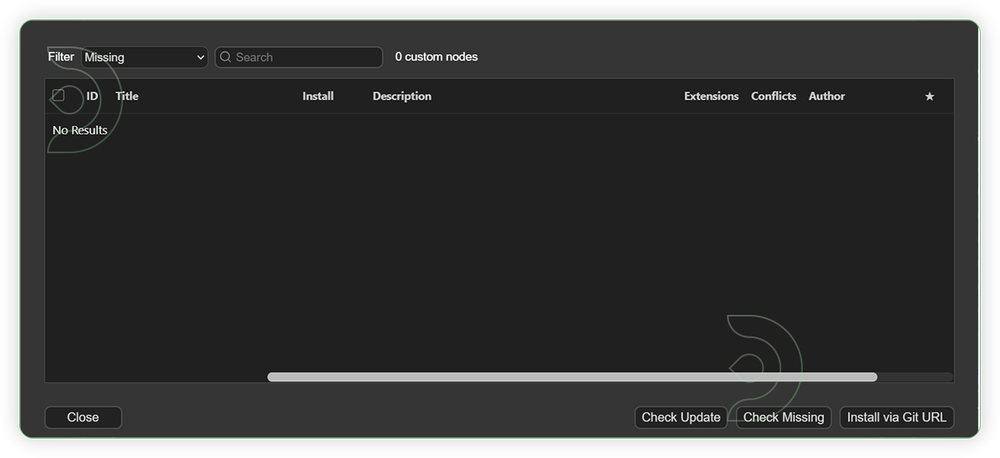
If there are red nodes in the workflow, it means that the workflow lacks the certain required nodes. Install the custom nodes in order for the workflow to work.
- Go to ComfyUI Manager > Click Install Missing Custom Nodes
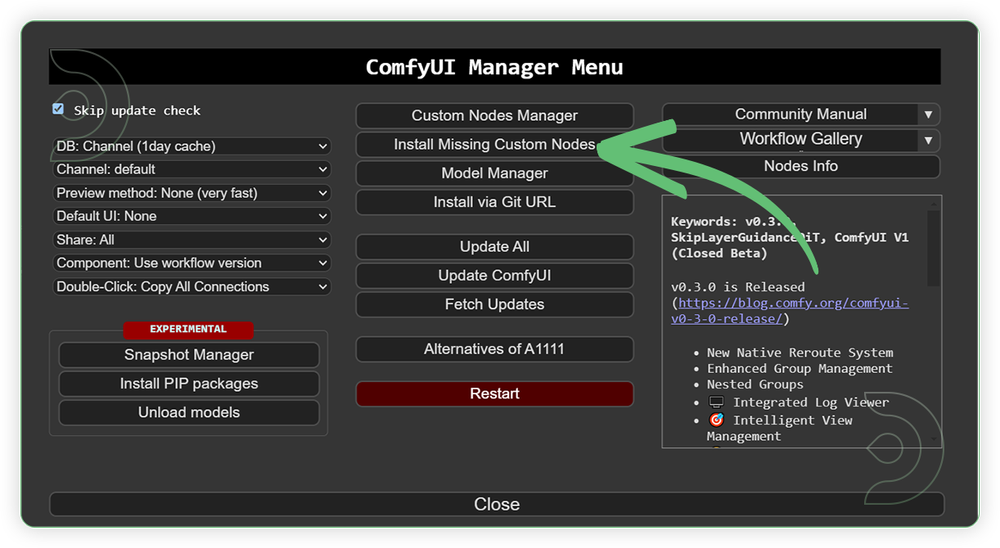
- Check the list below if there's a list of custom nodes that needs to be installed and click the install.
Models
For this guide you'll need to download these 6 recommended models and 1 model that will be auto-downloaded.
- flux1-fill-dev.safetensors
- flux1-redux-dev.safetensors
- t5xxl_fp16.safetensors
- clip_l.safetensors
- gokaygokay/Florence-2-SD3-Captioner (auto-download)
- ae.safetensors
Models can be downloaded from Comfy.Org or the model manager.
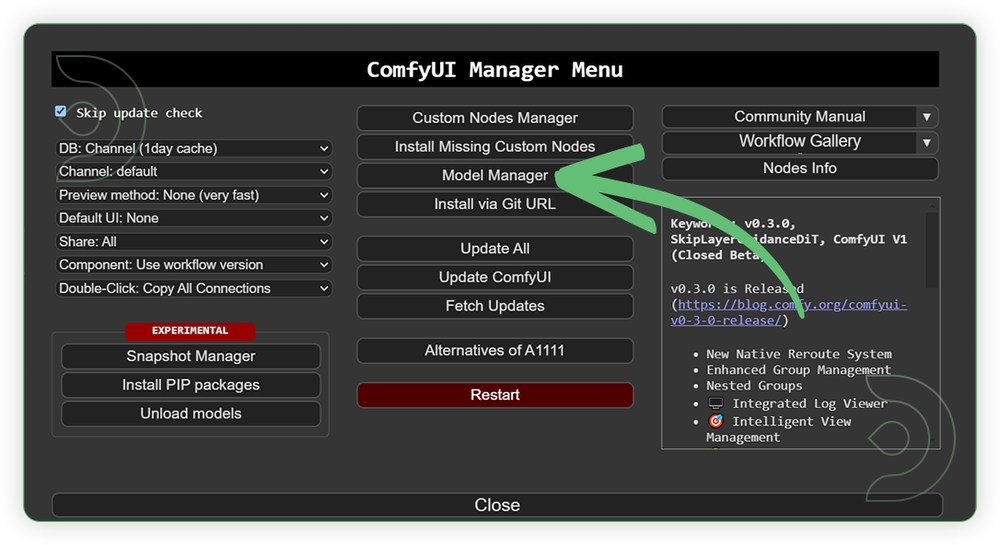
- Go to ComfyUI Manager > Click Model Manager
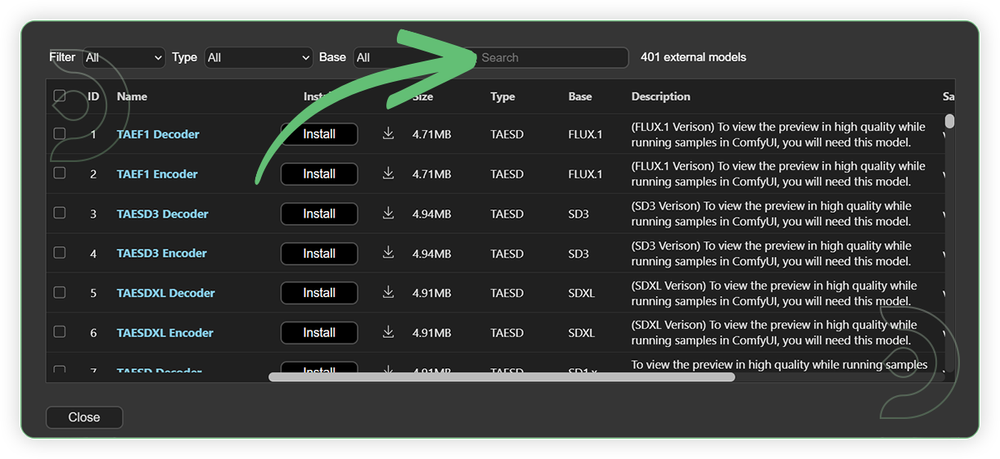
- Search for the models above and when you find the exact model that you're looking for, click install, and make sure to press refresh when you are finished.
Optional Model Path Source
Some of these models may not be available in the model manager.
You could also use the model path source instead: by pasting the model's link address into ThinkDiffusion MyFiles using upload URL.
| Model Name | Model Link Address | ThinkDiffusion Upload Directory |
|---|---|---|
sigclip_vision_patch14_384.safetensors |
.../comfyui/models/clip_vision/ |
|
| flux1-fill-dev.safetensors | .../comfyui/models/diffusion_models/ |
|
| flux1-redux-dev.safetensors | .../comfyui/models/style_models/ |
|
| t5xxl_fp16.safetensors | .../comfyui/models/clip/ |
|
| clip_l.safetensors | .../comfyui/models/clip/ |
|
| gokaygokay/Florence-2-SD3-Captioner | auto-download |
auto-download |
| ae.safetensors | .../comfyui/models/vae/ |
Step-by-step Workflow Guide
This workflow was pretty easy to set up and runs well from the default settings. Here are a few steps where you might want to take extra note.
| Steps | Recommended Nodes |
|---|---|
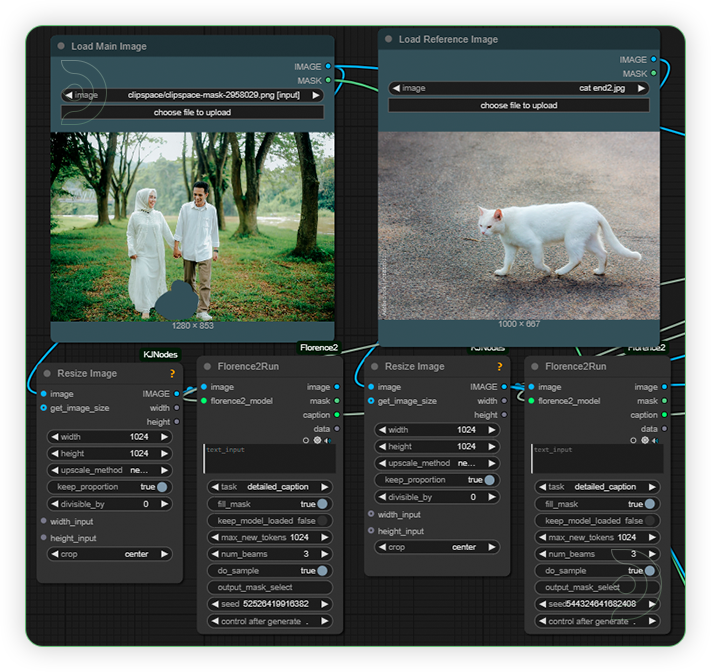
| 1. Load Image Load images for main and reference images. Just keep the settings for Florence. Reference image should serve as a subject for inpainting and should be a high quality, high resolution, and not blurred. |
 |
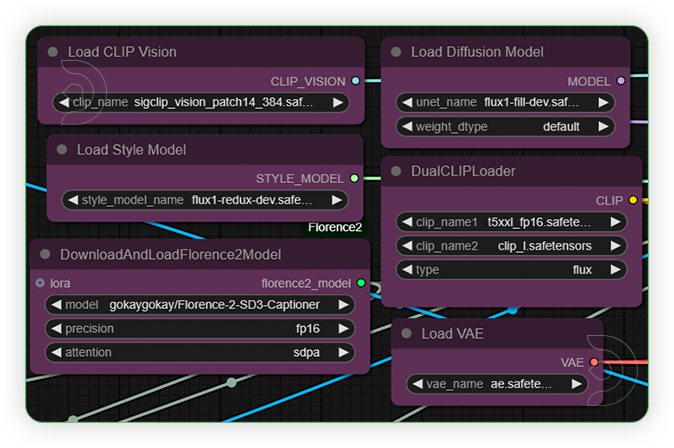
| 2. Set Models Set the exact models as seen on the image. |
 |
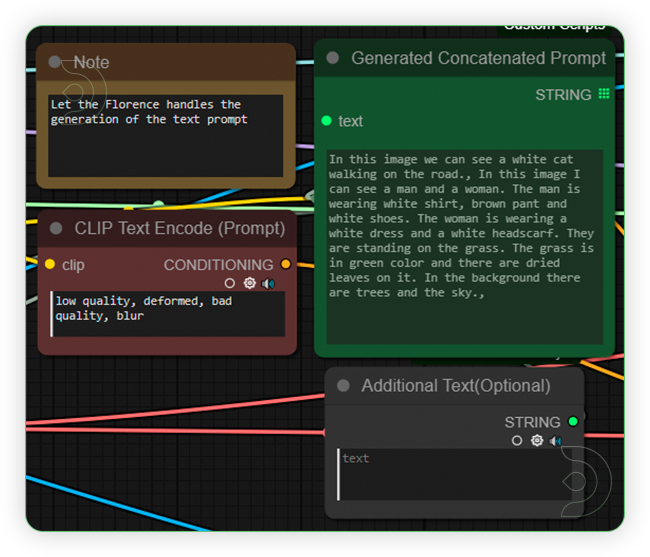
| 3. Check the Prompt Check if the prompt generated by Florence describes the reference image along with the main image. It cannot be edited but you can add a few prompts in the next node. |
 |
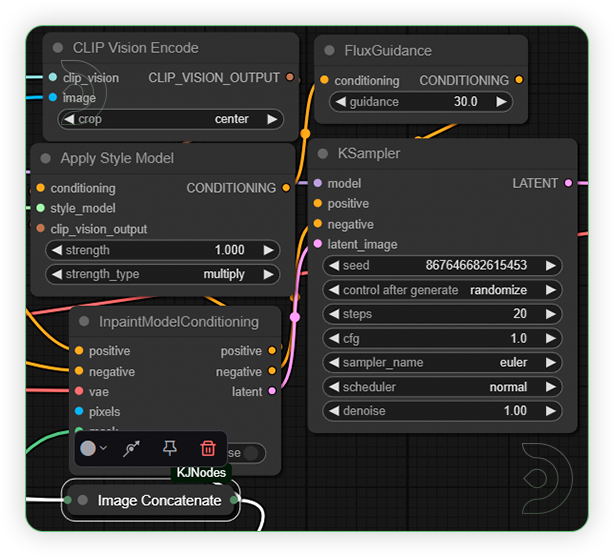
| 4. Check the Generation Settings Keep the settings as seen with image. |
 |
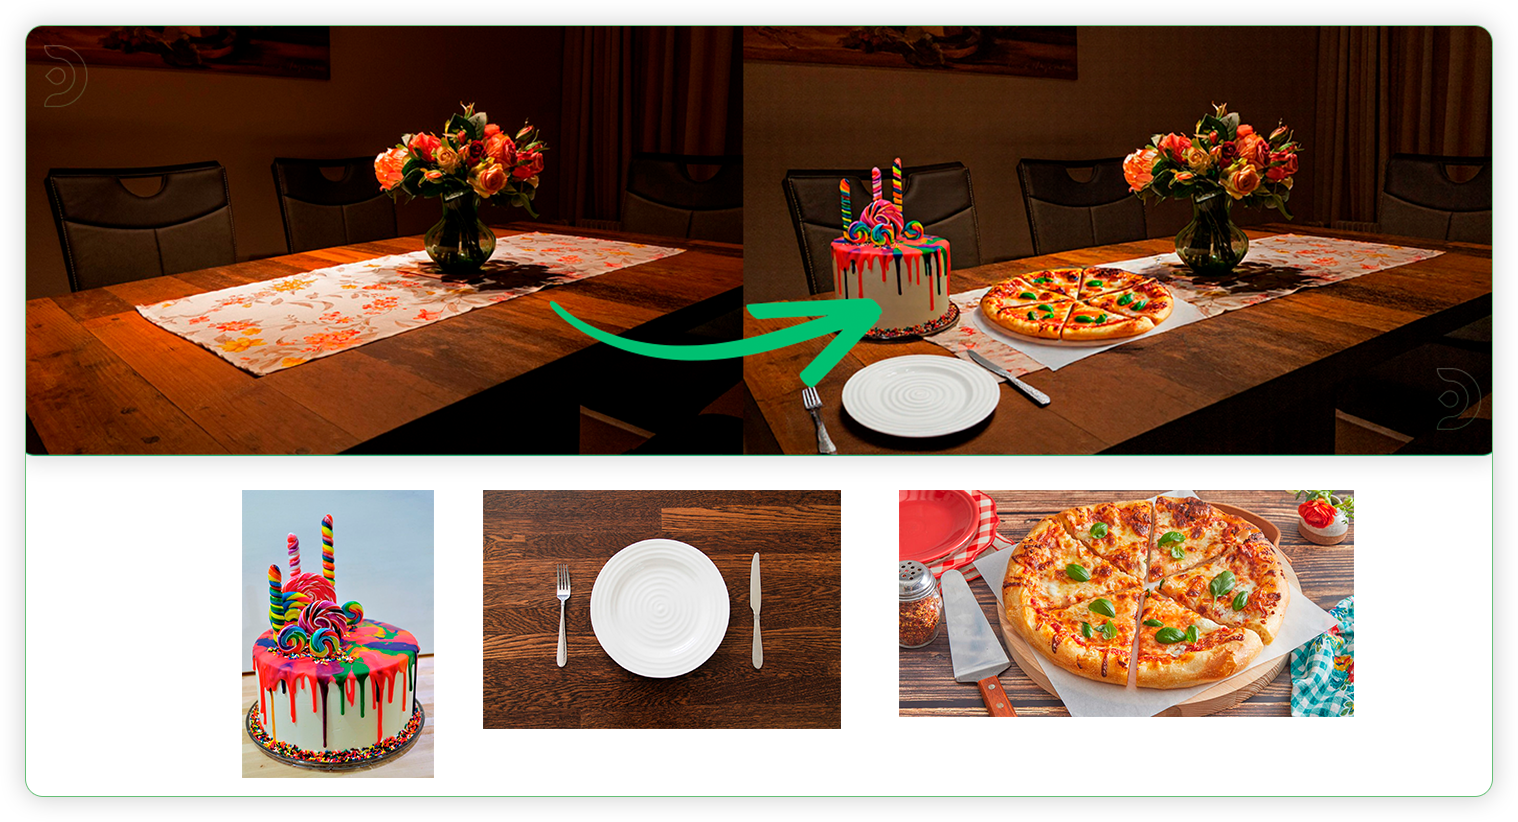
| 5. Check the Generated Image There are two image preview nodes. The left is for the comparison between the reference and inpainted image. The right node is preview for the cropped image. |
 |
Examples
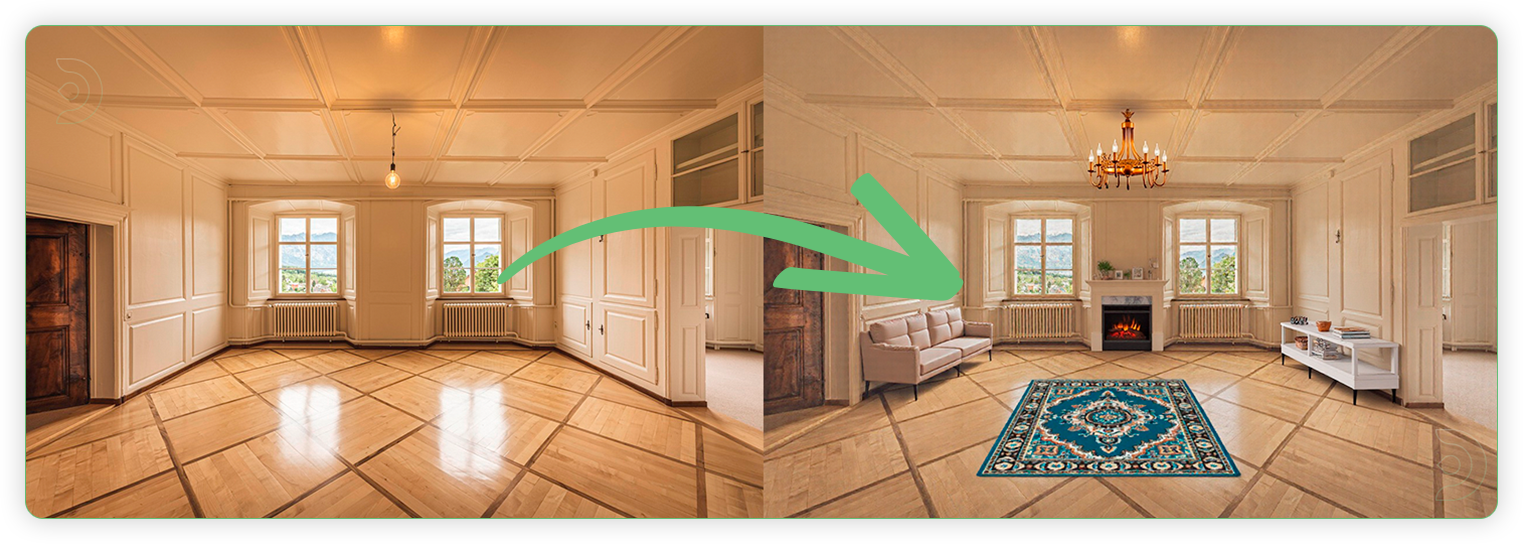
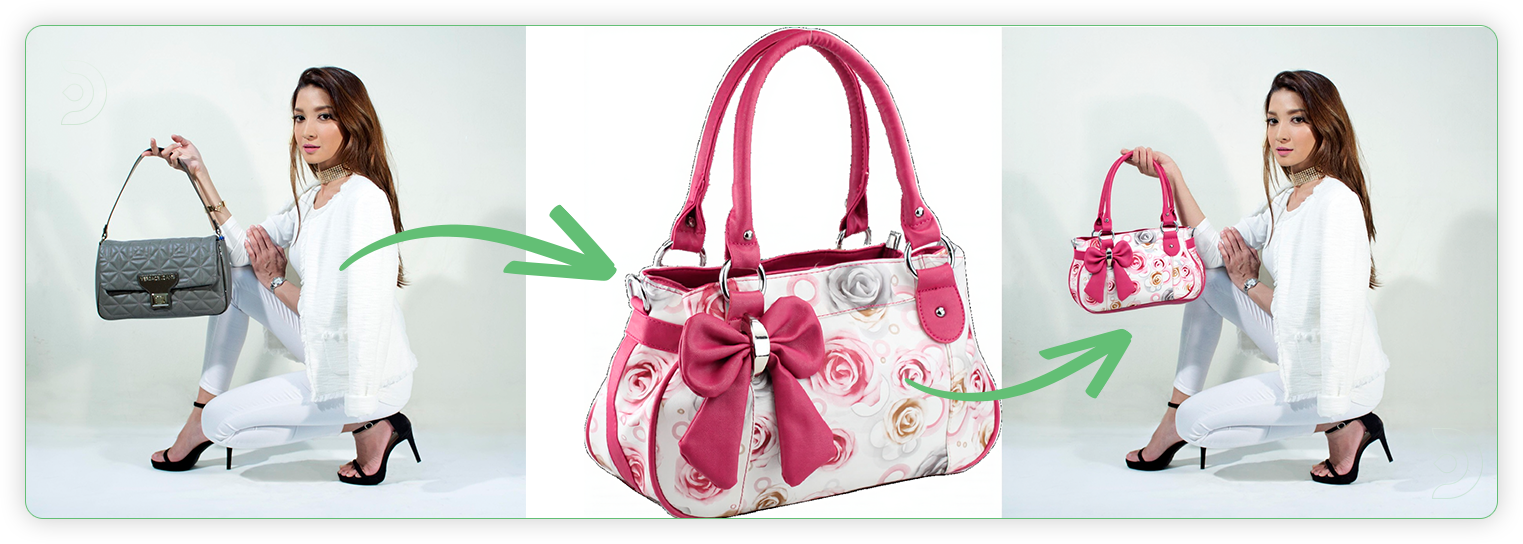
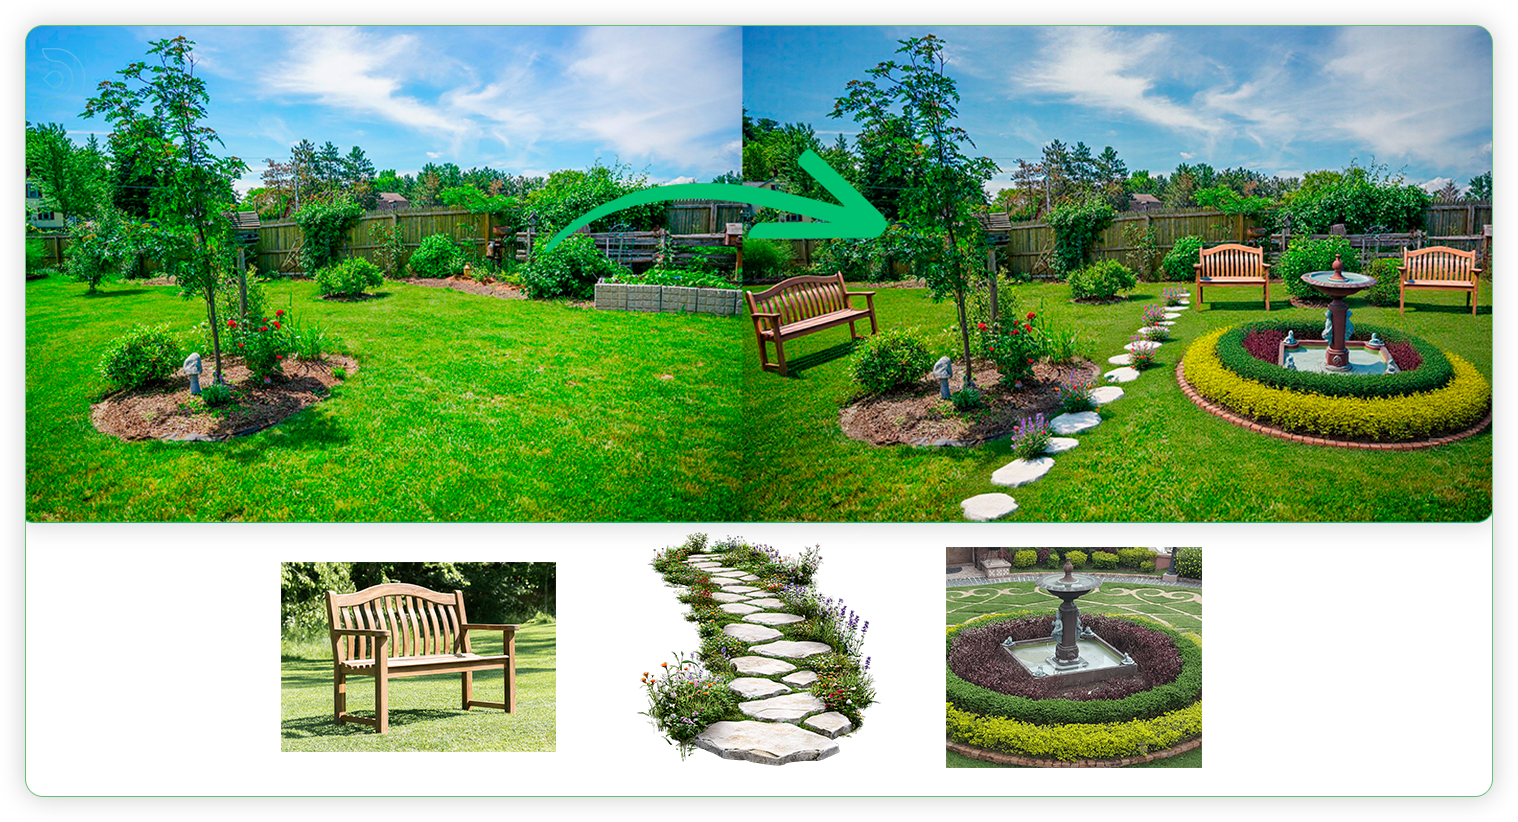
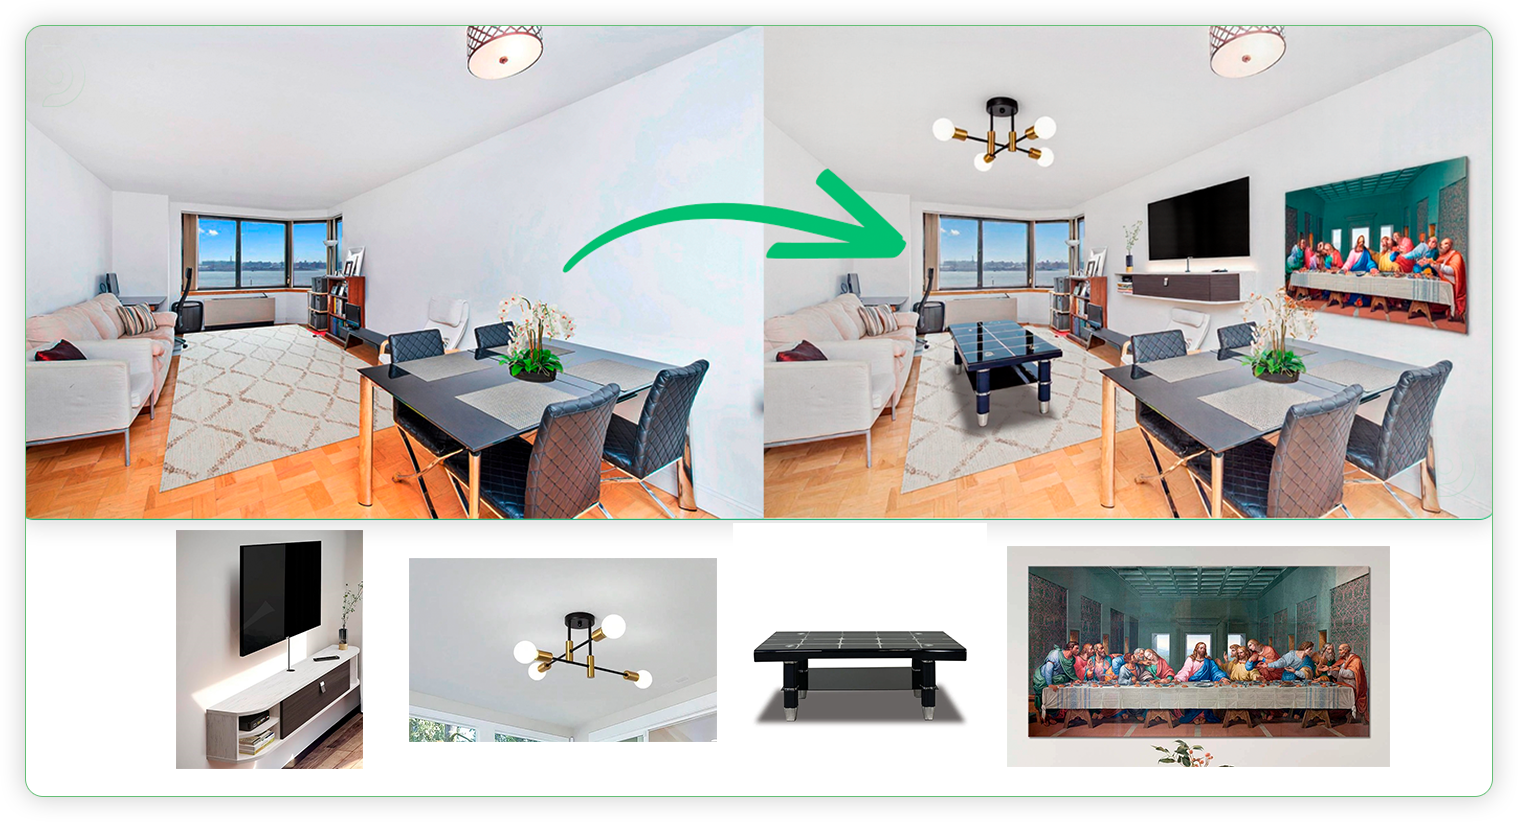
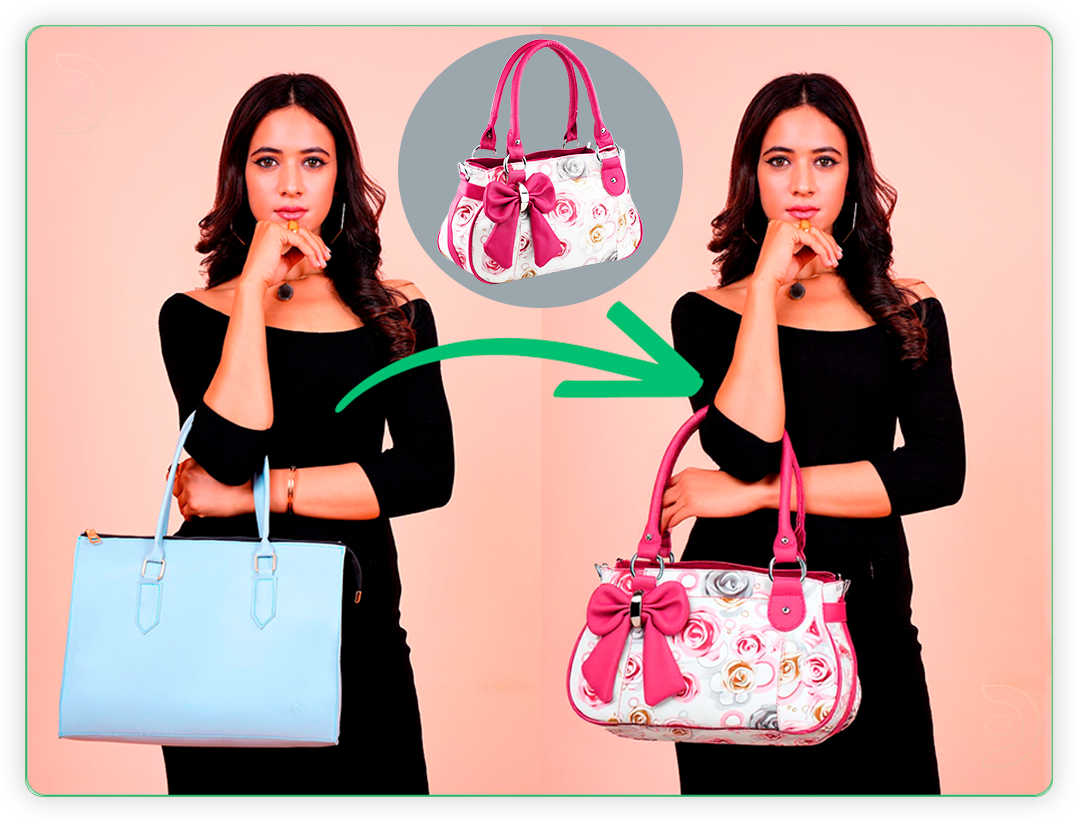
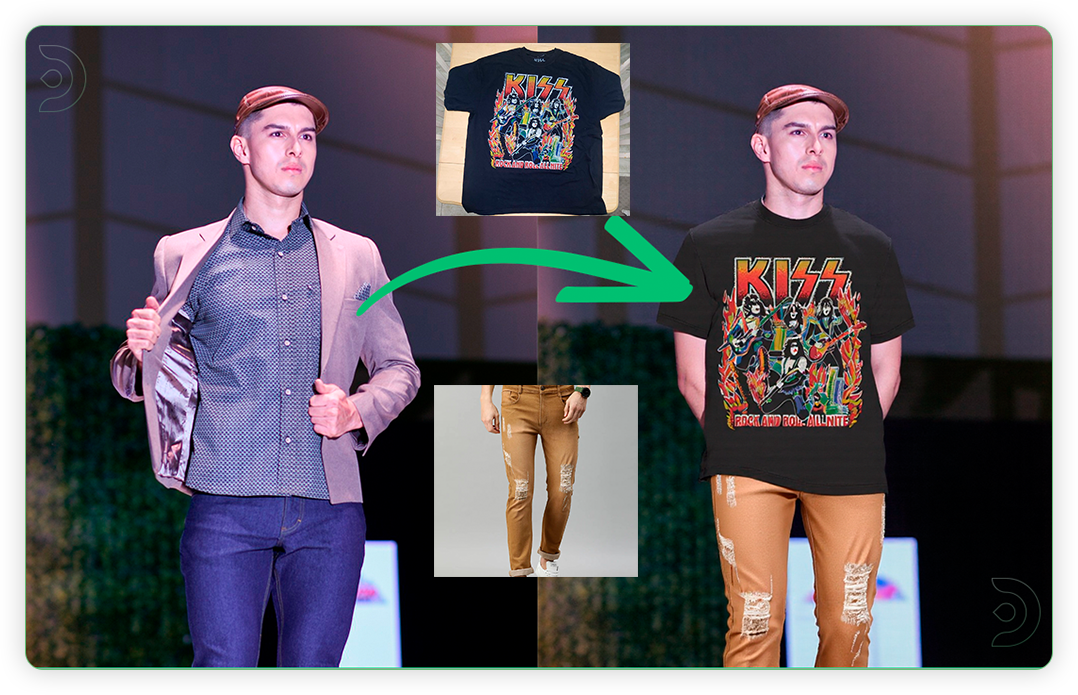
Below are the examples I generated, along with the various input reference images. These examples show a significant improvement in the main image where the newly object placed definitely adapts to angles and depth of the image.
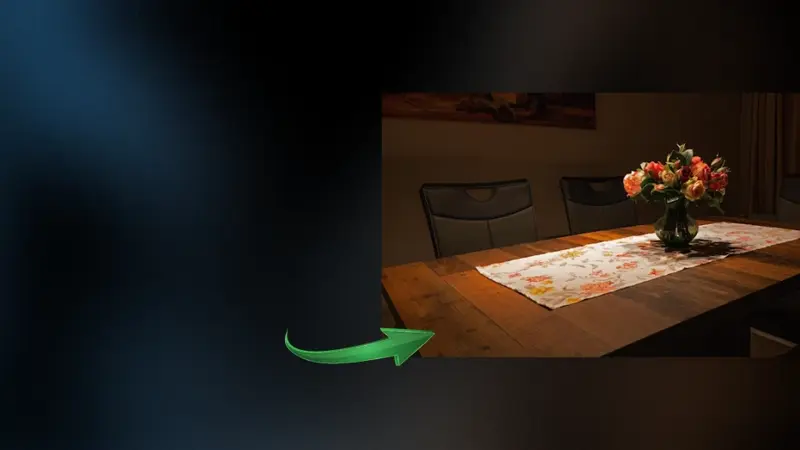
Table Area Mockup
Landscaping
Interior Designing
Product Editing
Apparel Editing
If you’re having issues with installation or slow hardware, you can try any of these workflows on a more powerful GPU in your browser with ThinkDiffusion.
If you enjoy ComfyUI and you want to test out HyperSD in ComfyUI and Blender in real-time, then feel free to check out this Real-Time Creativity: Leveraging Hyper SD and Blender with ComfyUI. And have fun out there with your videos!
Member discussion