
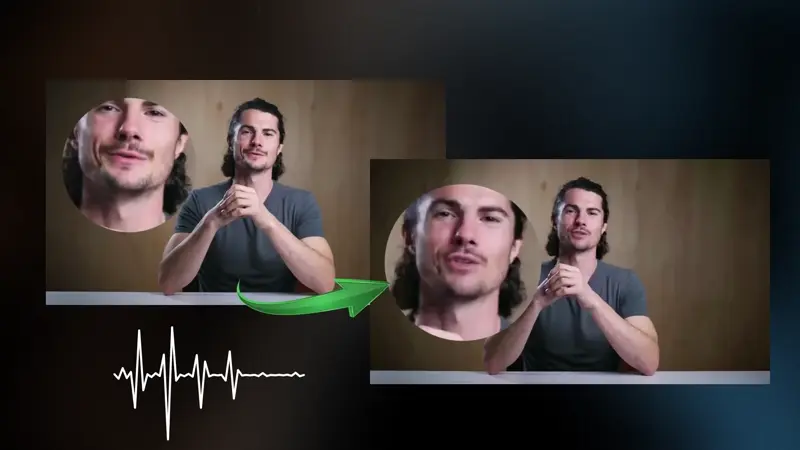
Lip synced video from just an audio clip and a base video? We got you!
LatentSync is an advanced lip sync framework that creates natural-looking speech by analyzing audio and generating matching lip movements. It uses audio-conditioned models to ensure accuracy and integrates with ComfyUI, a powerful AI workflow tool, to refine the process.
One of the biggest challenges is maintaining smooth and consistent lip movements across frames for a realistic result, something we will explore today!
We've also written another guide on an alternate lip syncing technique with Automatic1111 and SadTalker:

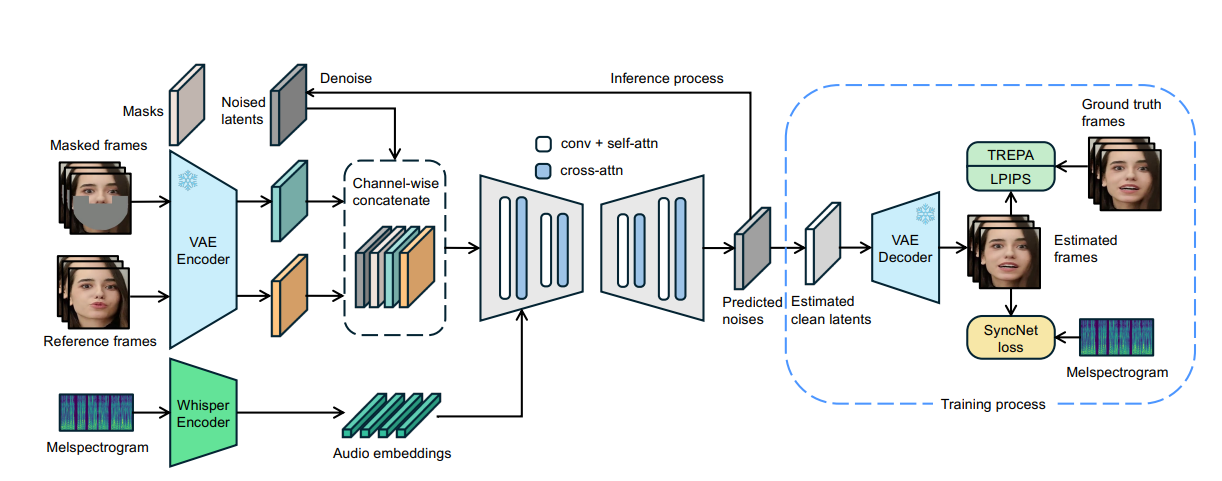
The Framework
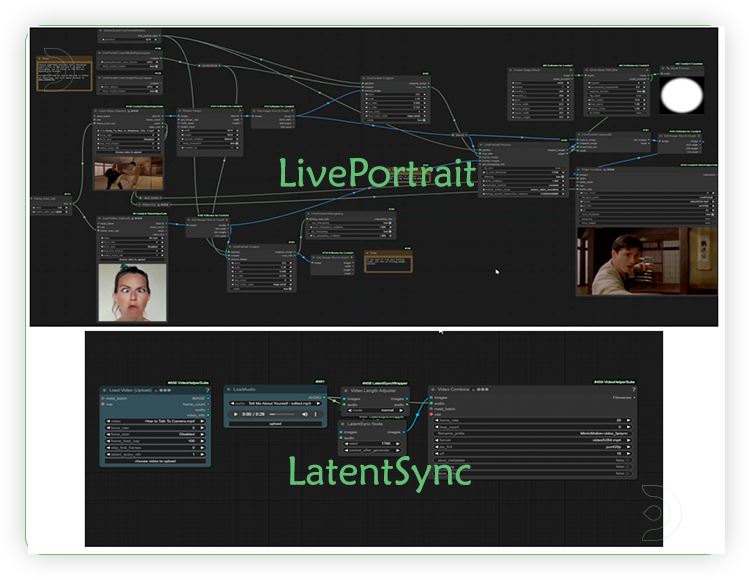
Difference of LatentSync & LivePortrait
How to run LatentSync in ComfyUI
Installation guide
Verified to work on ThinkDiffusion Build: June 27, 2025
ComfyUI v0.3.47 with LatentSync 1.6 model support.
Why do we specify the build date? ComfyUI and custom node versions that are part of this workflow that are updated after this date may change the behavior or outputs of the workflow.
Minimum Machine Size: Ultra
Use the specified machine size or higher to ensure it meets the VRAM and performance requirements of the workflow
Custom Node
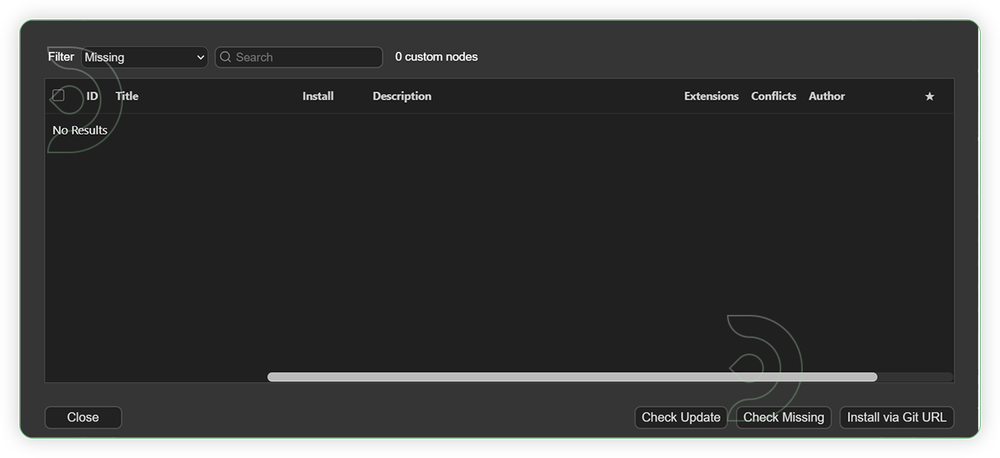
If there are red nodes in the workflow, it means that the workflow lacks the certain required nodes. Install the custom nodes in order for the workflow to work.
- Go to ComfyUI Manager > Click Install Missing Custom Nodes
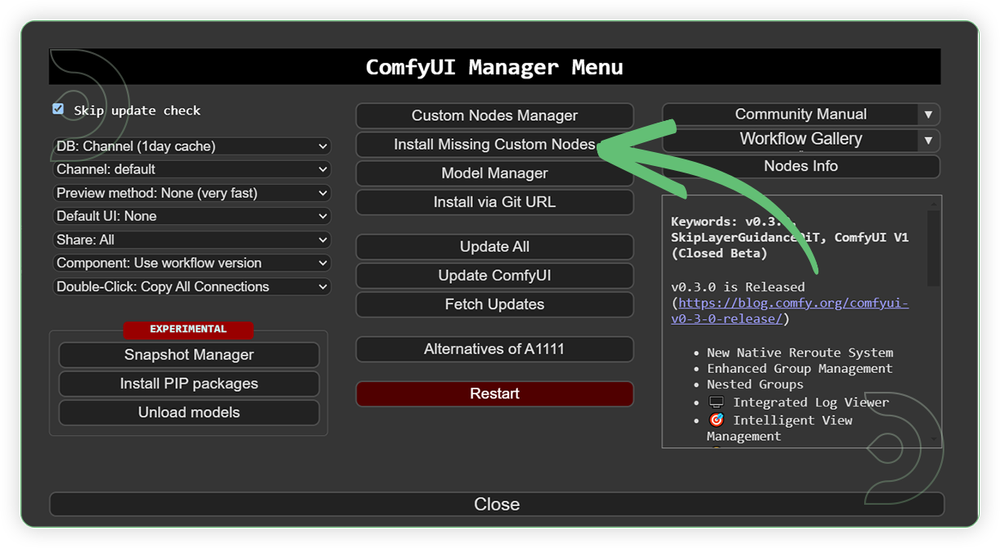
- Check the list below if there's a list of custom nodes that needs to be installed and click the install.
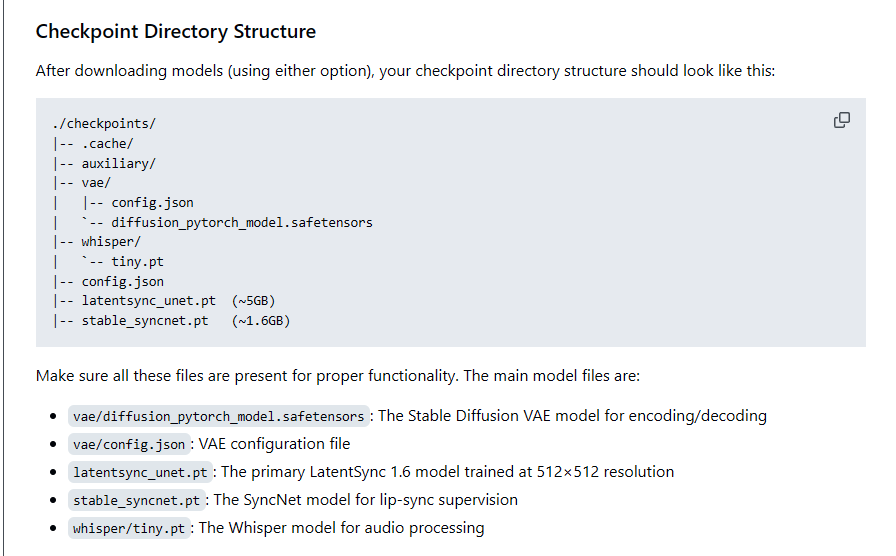
Models
For this guide you'll need 5 models for this.
| Model Name | Model Link Address | ThinkDiffusion Upload Directory |
|---|---|---|
| latentsync_unet.pt | ...comfyui/custom_nodes/ComfyUI-LatentSyncWrapper/checkpoints/ |
|
| tiny.pt | ...comfyui/custom_nodes/ComfyUI-LatentSyncWrapper/checkpoints/whisper/ |
|
| stable_syncnet.pt | ...comfyui/custom_nodes/ComfyUI-LatentSyncWrapper/checkpoints/ |
|
| vae/config.json | ...comfyui/custom_nodes/ComfyUI-LatentSyncWrapper/checkpoints/vae/ |
|
| vae/diffusion_pytorch_model.safetensors | ...comfyui/custom_nodes/ComfyUI-LatentSyncWrapper/checkpoints/vae/ |
LatentSync File Structure
Step-by-step Workflow Guide
This workflow was pretty easy to set up and runs well from the default settings. Here are a few steps where you might want to take extra note.
| Steps | Recommended Nodes |
|---|---|
| 1. Input the Video and Audio Load a video with clear front-facing face, realistic, 25 fps and does not contain more than one face. The resolution should not go beyond 1080p. Load an audio file that has no background music and noise. It should be a clear vocal voice. |
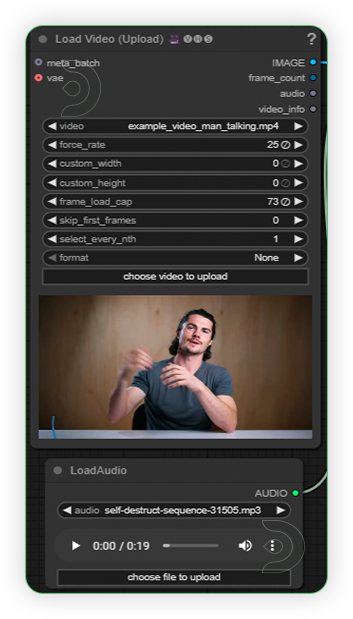 |
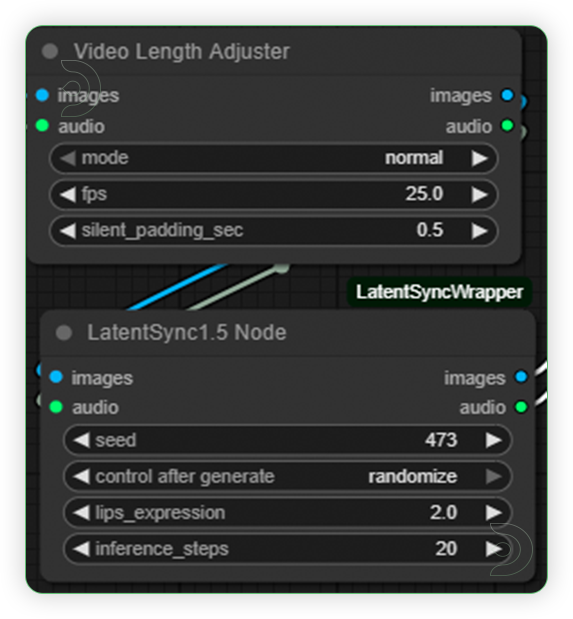
| 2. Check Sampling Video Length Adjuster Node includes three modes: "Normal" passes frames with padding to prevent loss, perfect for standard lip-syncing. "Pingpong" creates a forward-backward video loop for back-and-forth animations. "looptoaudio" repeats frames to match longer audio durations, maintaining synchronization. |
 |
| 3. Check Output Check the results of your generation. If unsatisfactory, generate again. |
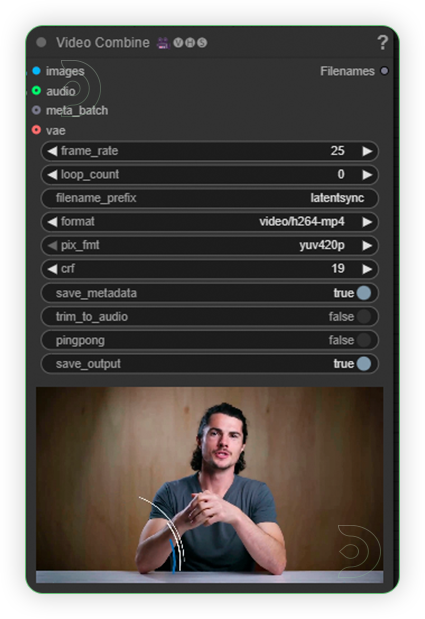 |
Limitations of LatentSync
While testing this, I noticed a few certain limitations:
- It works best with videos showing clear, front-facing views of faces.
- It doesn't support anime or cartoon faces.
- The video should be at 25 frames per second.
- The face should stay visible the whole time in the video and don't use videos with more than one face.
Examples
Man reciting a number countdown.
Woman as an Optimus Prime.
Man in desk initiating a sequence.
If you’re having issues with installation or slow hardware, you can try any of these workflows on a more powerful GPU in your browser with ThinkDiffusion.
If you enjoy ComfyUI and you want to test out creating awesome animations, then feel free to check out some more workflows below. And have fun out there with your videos!

Member discussion