
Flux Kontext expands your images into panoramic views directly in ComfyUI. Instead of cropping or stretching, it intelligently generates new content that extends beyond your image borders, creating seamless panoramic scenes.
What You'll Get
This workflow takes a standard image and generates extended panoramic versions by:
- Analyzing your input image's context and style
- Generating new content that naturally extends the scene
- Creating horizontal panoramas up to 3x the original width
- Maintaining consistent lighting, perspective, and artistic style
Best for: Landscapes, cityscapes, interior shots, and any scene where you want to reveal "what's beyond the frame."
What is Image-to-Panorama?
A panorama is an image that captures a much wider field of view than a standard photograph, often stretching across an entire landscape or environment to reveal far more than what a single frame can show. Traditionally created by stitching together multiple overlapping photos, panoramas provide a seamless, immersive scene that can be horizontal, vertical, or even a full 360-degree view. In image generation, panoramas are especially useful because they allow creators to expand the context and storytelling potential of a single image, offering a broader perspective and more detail. This capability is valuable for photographers and artists seeking to produce striking, high-resolution visuals, as well as for architects and real estate professionals who need to showcase spaces in a comprehensive, interactive way.
Marketers, educators, and those in travel or tourism can also benefit, using image-to-panorama and 3D view features to create virtual tours, interactive content, and engaging educational materials. Ultimately, panoramas and 3D views transform ordinary images into immersive experiences, making them more informative, captivating, and useful for a wide range of creative and professional applications.
Get ready to see your pictures in a whole new light!
Download Workflow
Installation guide
- Download the workflow file
- Open ComfyUI (local or ThinkDiffusion)
- Drag the workflow file into the ComfyUI window
- If you see red nodes, install missing components:
- ComfyUI Manager > Install Missing Custom Nodes
Original Civitai Link: https://civitai.com/models/682349/360-degree-flux-and-kontext
Verified to work on ThinkDiffusion Build: June 27, 2025
ComfyUI v0.3.42 with the use flux1-kontext-dev.safetensors
Note: We specify the build date because ComfyUI and custom node versions updated after this date may change the behavior or outputs of the workflow.
Minimum Machine Size: Ultra
Use the specified machine size or higher to ensure it meets the VRAM and performance requirements of the workflow
Custom Nodes
If there are red nodes in the workflow, it means that the workflow lacks the certain required nodes. Install the custom nodes in order for the workflow to work.
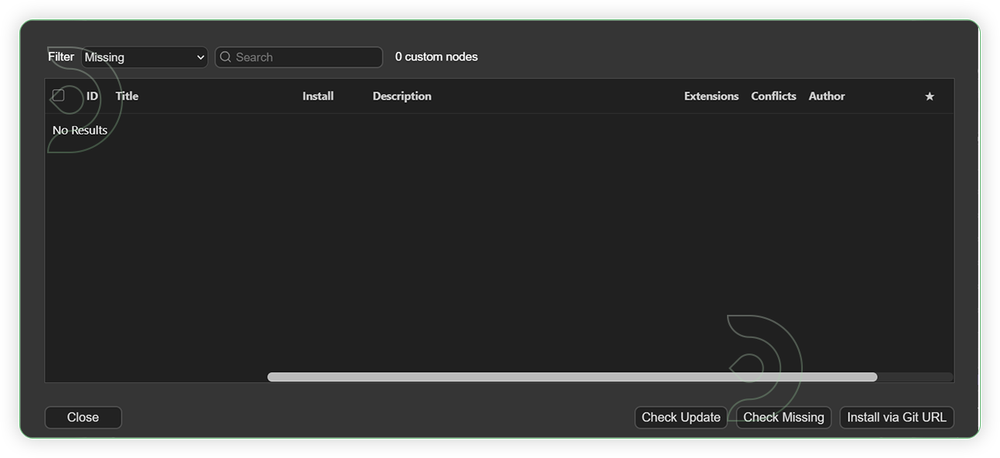
- Go to the ComfyUI Manager > Click Install Missing Custom Nodes
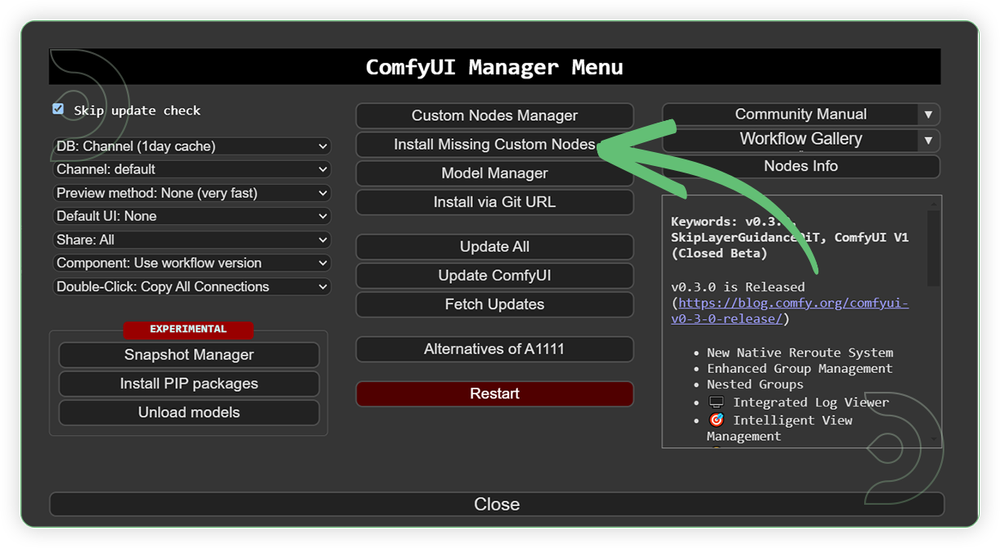
- Check the list below if there's a list of custom nodes that needs to be installed and click the install.
Required Models
For this guide you'll need to download these 8 recommended models.
2. clip_l.safetensors
3. t5xxl_fp16.safetensors
4. ae.safetensors
5. alimama-creative-FLUX1-Turbo-Alpha.safetensors
6. HDR360.safetensors
7. 4x-ClearRealityV1.pth
8. Florence-2-base
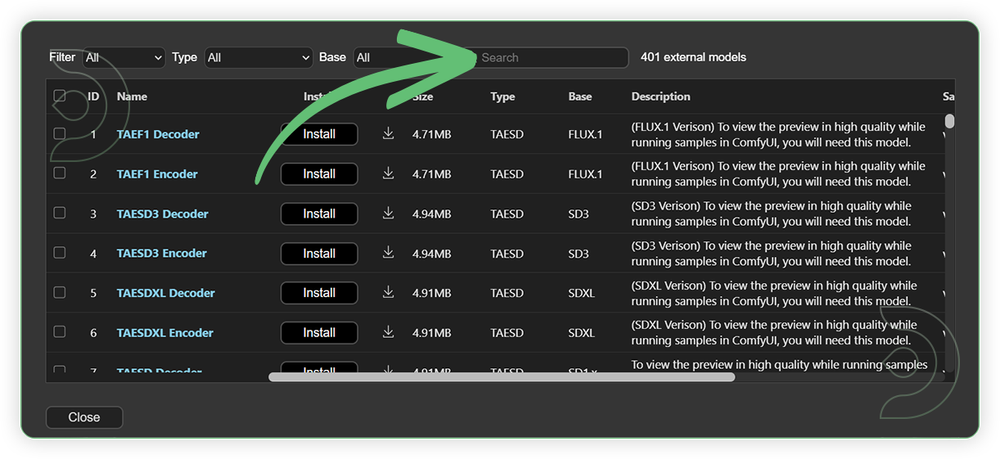
- Go to ComfyUI Manager > Click Model Manager
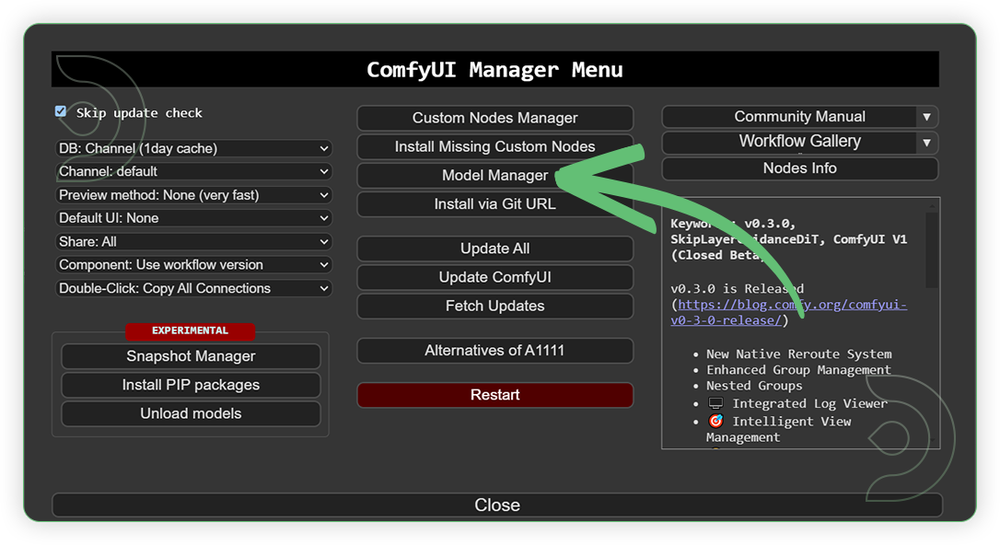
- Search for the models above and when you find the exact model that you're looking for, click install, and make sure to press refresh when you are finished.
If Model Manager doesn't have them: Use direct download links (included with workflow) and upload through ThinkDiffusion MyFiles > Upload URL. Refer our docs for more guidance on this.
You could also use the model path source instead: by pasting the model's link address into ThinkDiffusion MyFiles using upload URL.
| Model Name | Model Link Address | ThinkDiffusion Upload Directory |
|---|---|---|
flux1-kontext-dev.safetensors |
.../comfyui/models/diffusion_models/ |
|
| clip_l.safetensors | .../comfyui/models/clip/ |
|
| t5xxl_fp16.safetensors | .../comfyui/models/text_encoders/ |
|
| ae.safetensors | .../comfyui/models/vae/ |
|
| alimama-creative-FLUX1-Turbo-Alpha.safetensors | .../comfyui/models/loras/ |
|
| HDR360.safetensors | .../comfyui/models/loras/ |
|
| 4x-ClearRealityV1.pth | .../comfyui/models/upscale_models/ |
|
| Florence-2-base | Auto Download |
Auto Upload |
Step-by-step Workflow Guide
This workflow was pretty easy to set up and runs well from the default settings. Here are a few steps where you might want to take extra note.
| Steps | Recommended Nodes |
|---|---|
| 1. Load an Image Load an image that is good for 3D panorama view somthing like surrounding, landscape, interior, etc. |
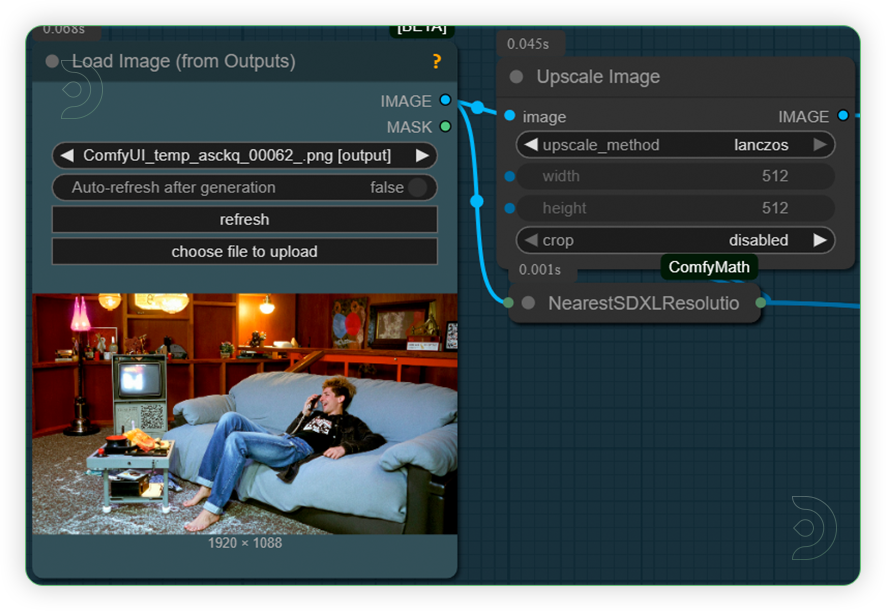 |
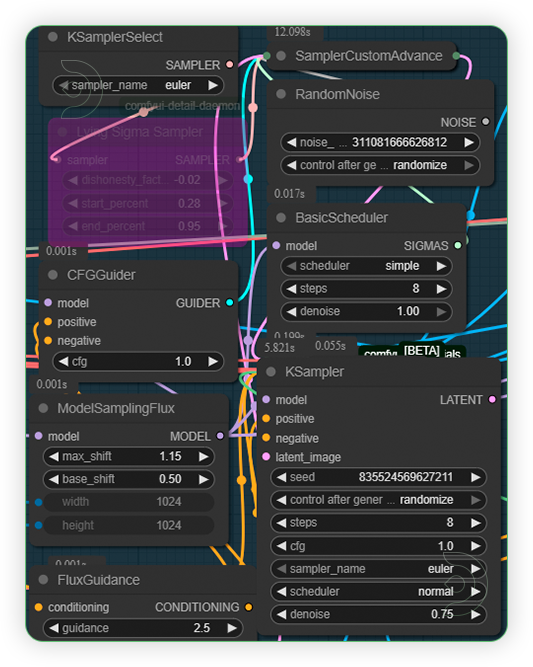
| 2. Set the Models Set the models as seen on the image. |
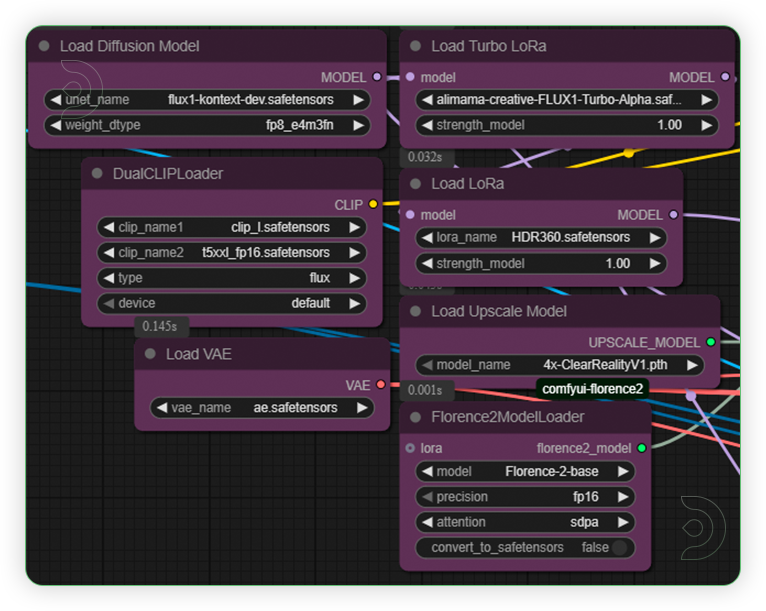 |
| 3. Check Prompt Check the prompt. You don't need to write anymore. |
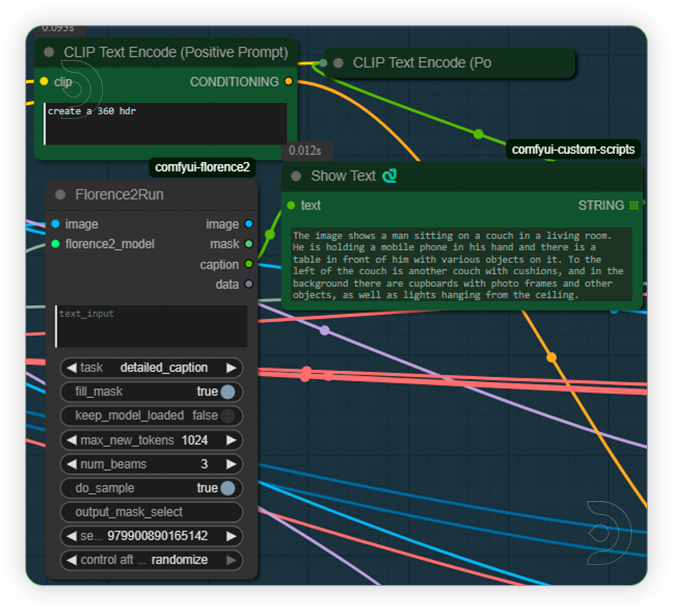 |
| 4. Check Sampling Check the sampling settings it should be the same as seen on the image. |
 |
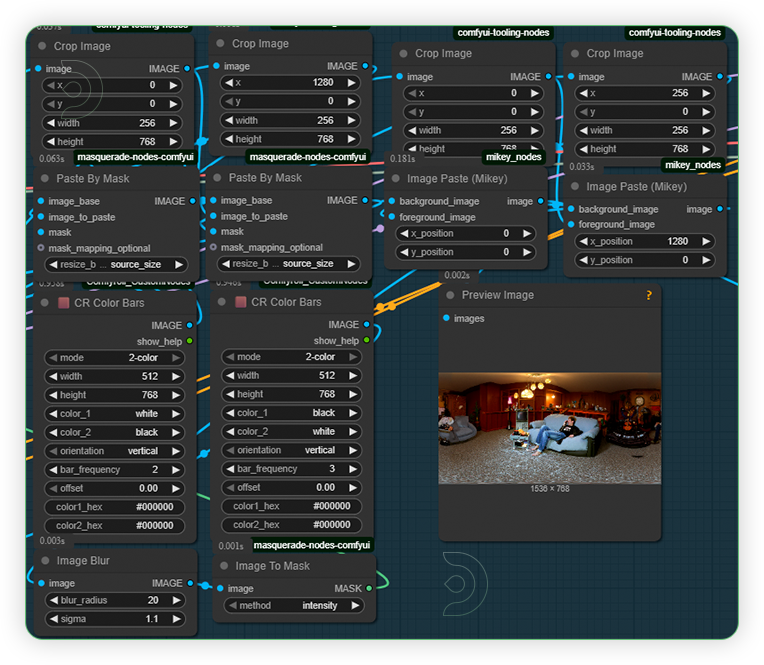
| 5. Check Crop and Panorama Settings Don't change the settings for crop and other settings. |
 |
| 6. Check Upscale Check the upscale settings. It should x2 only for upscale. Otherwise the workflow will crash. |
 |
| 7. Check Output |
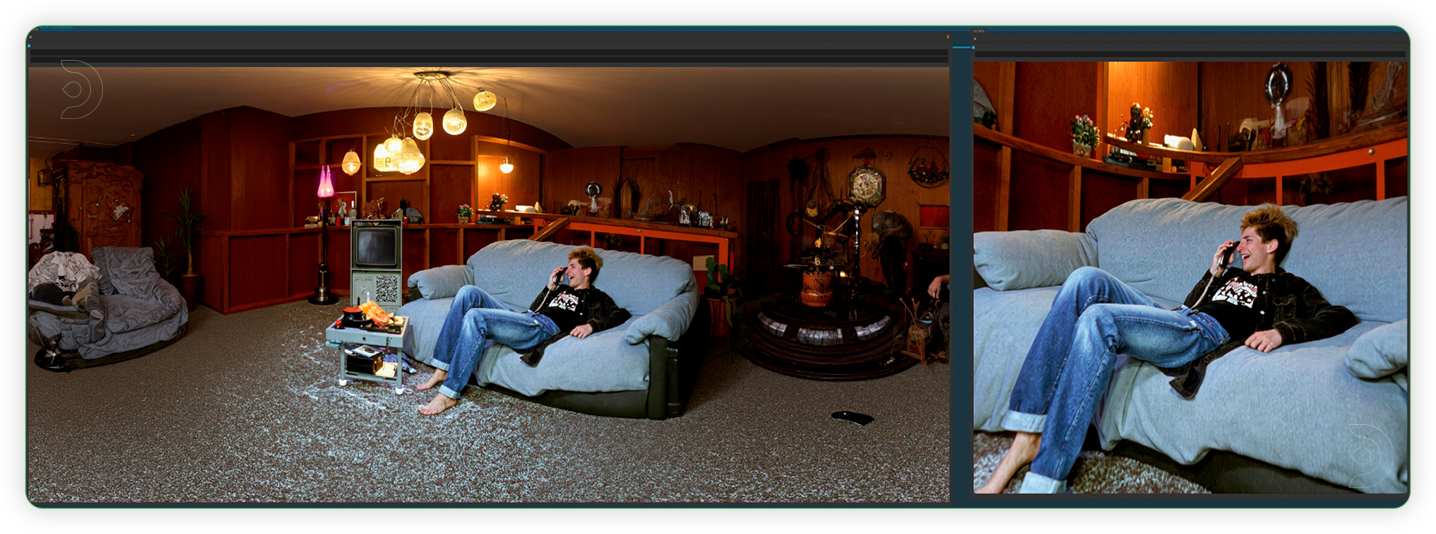 |
Examples
Troubleshooting
Red Nodes: Install missing custom nodes through ComfyUI Manager
Out of Memory: Use smaller expansion factors or switch to Ultra machine
Poor Quality: Check input image resolution and adjust kontext strength
Visible Seams: Lower strength and ensure good prompt description
If you’re having issues with installation or slow hardware, you can try any of these workflows on a more powerful GPU in your browser with ThinkDiffusion.
Member discussion