

Ever wish you could step behind the camera and change the angle of a scene—after you’ve already shot the video? That’s exactly the kind of movie magic ReCamMaster brings to the table.
What is ReCamMaster AI?
ReCamMaster is a cutting-edge AI framework that lets you re-render any video with new, realistic camera movements, as if you had a virtual film crew at your fingertips. Whether you’re a filmmaker wanting to “reshoot” a scene without the hassle, a gamer dreaming of dynamic replays, or a researcher needing multi-view data for AI, ReCamMaster makes it possible to rewrite your video’s cinematography long after the director yelled “cut!”.
Why Camera Control is Important
Features of ReCamMaster
Source: ReCamMaster
ReCamMaster offers a suite of advanced features for camera-controlled video re-rendering:
- Change camera angles, pan, tilt, zoom, or create arc movements in existing videos without reshooting
- Apply to real-world footage thanks to training on a massive multi-camera dataset built in Unreal Engine 5
- Support for applications like video stabilization, super-resolution, and outpainting
- Generate immersive content for virtual reality, gaming, and autonomous driving
- Preserve the original scene's dynamics while creating new perspectives
- Produce smooth, realistic motion across frames
These capabilities make ReCamMaster a powerful tool for filmmakers, content creators, and researchers seeking to enhance or transform video content in post-production.
Limitations of ReCamMaster
While ReCamMaster is powerful for camera-controlled video re-rendering, it does have some limitations:
Its advanced video conditioning method can be a bit demanding on local machines
- Sometimes struggles with generating fine details in complex actions, like hand movements or small, fast-moving objects
- Inherits some weaknesses from the underlying pre-trained text-to-video models
- Camera control is limited to predefined paths, which can feel restrictive when seeking more creative flexibility
How to run ReCamMaster on ComfyUI
Installation guide
Prerequisites
- ComfyUI installed (locally or via ThinkDiffusion)
- Minimum ThinkDiffusion Turbo 24GB machine (Ultra 48GB recommended)
Install Missing Custom Nodes
If you see red nodes in your workflow, it means you're missing some required custom nodes. Follow these steps to install them so your workflow can function properly.
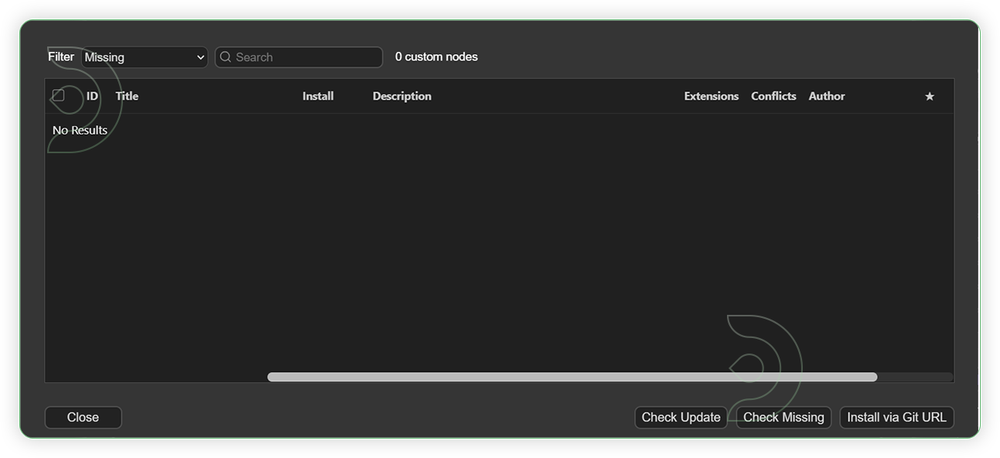
- Go to ComfyUI Manager > Click Install Missing Custom Nodes
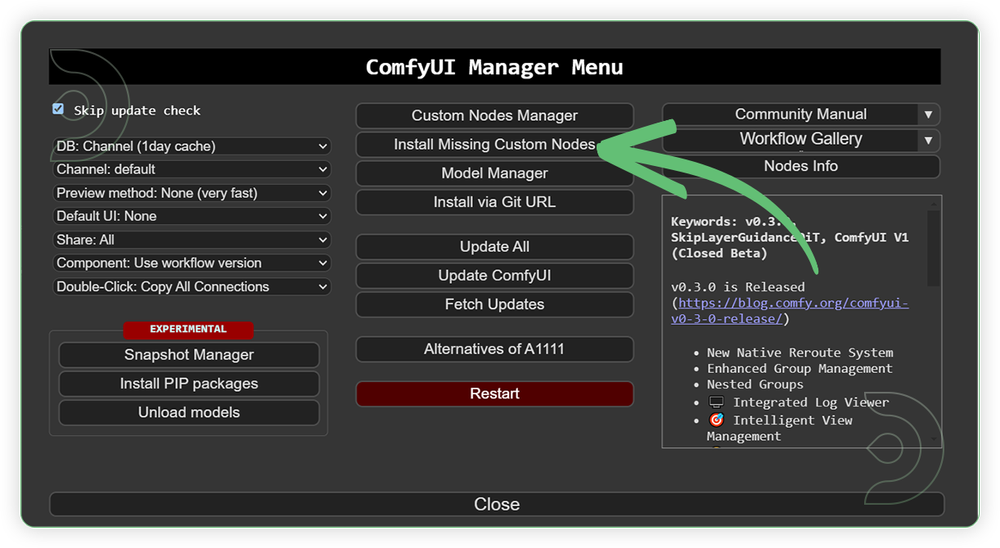
- Check the list below if there's a list of custom nodes that needs to be installed and click the install.
Set up Custom Models
For this guide, you'll need 6 recommended models. 5 models need to be downloaded manually, while 1 model will auto-download.
2. detailz-wan.safetensors
3. wan2.1-1.3b-control-lora-depth-v0.1_comfy.safetensors
4. Wan2_1_VAE_bf16.safetensors
5. umt5-xxl-enc-bf16.safetensors
6. Florence-2-large-ft (auto-download)
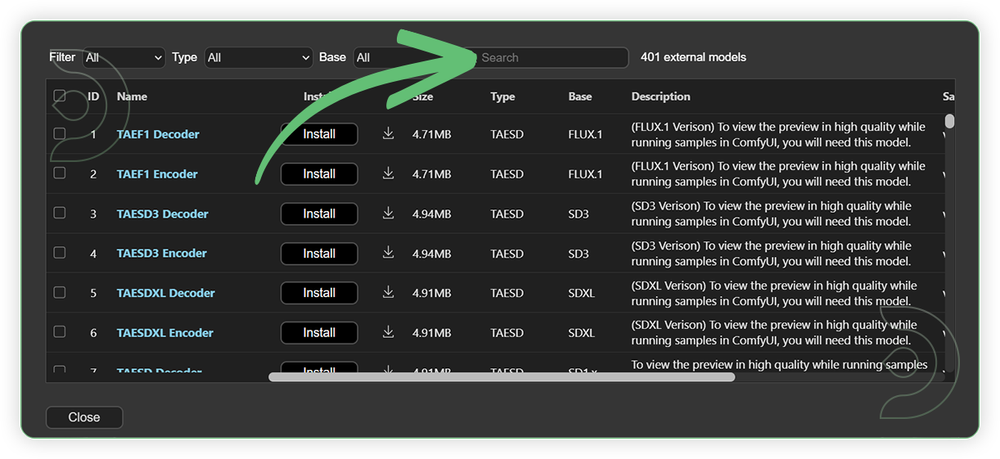
- Go to ComfyUI Manager > Click Model Manager
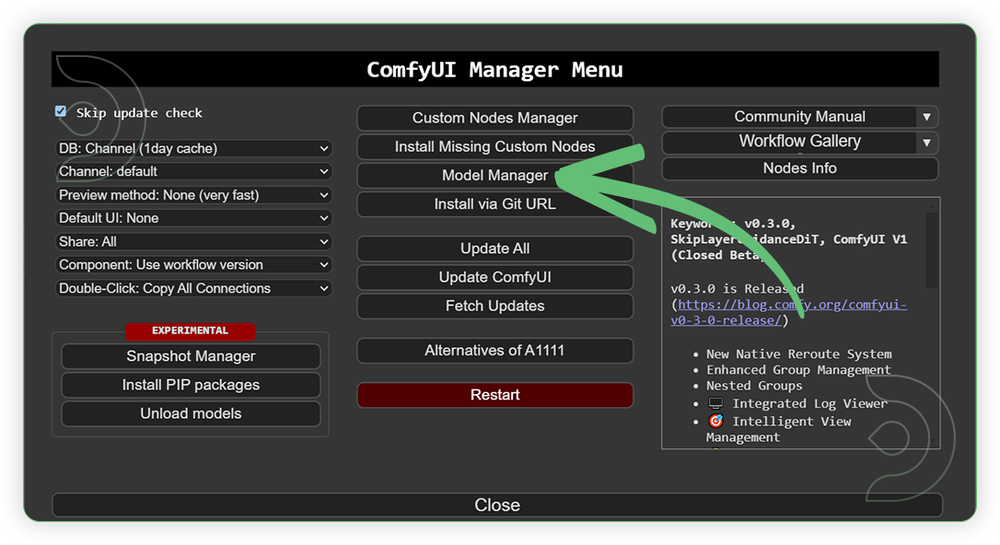
- Search for the models above and when you find the exact model that you're looking for, click install and make sure to press refresh when you are finished.
Model Path Source
Some of my models may not be available in the model manager. Use the model path source instead if you prefer to install the models using model's link address and paste into ThinkDiffusion MyFiles using upload URL.
| Model Name | Model Link Address | ThinkDiffusion Upload Directory |
|---|---|---|
Wan2_1_kwai_recammaster_1_3B_step20000_bf16.safetensors |
.../comfyui/models/diffusion_models/ |
|
| detailz-wan.safetensors | .../comfyui/models/lora/ |
|
| wan2.1-1.3b-control-lora-depth-v0.1_comfy.safetensors | .../comfyui/models/lora/ |
|
| Wan2_1_VAE_bf16.safetensors | .../comfyui/models/vae/ |
|
| umt5-xxl-enc-bf16.safetensors | .../comfyui/models/text_encoders/ |
|
| Florence-2-large-ft |
Auto Download |
Auto Download |
Step-by-step Workflow Guide
This workflow was pretty easy to set up and runs well from the default settings. Here are a few steps where you might want to take extra note.
| Steps | Recommended Nodes |
|---|---|
| 1. Set the Input Load a video. Set the frames (must not exceed 81 frames). Set resolution up to 1280 x 720. |
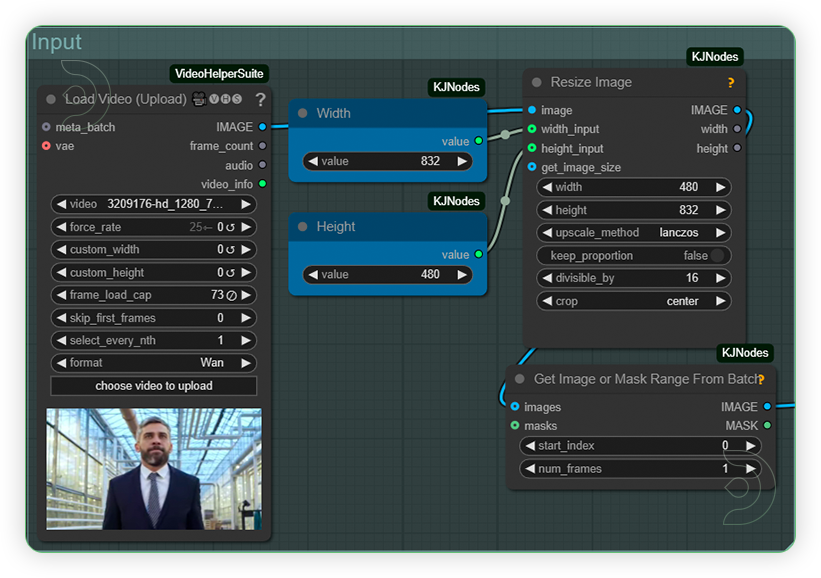 |
| 2. Set the Models Set the models as seen on the image. |
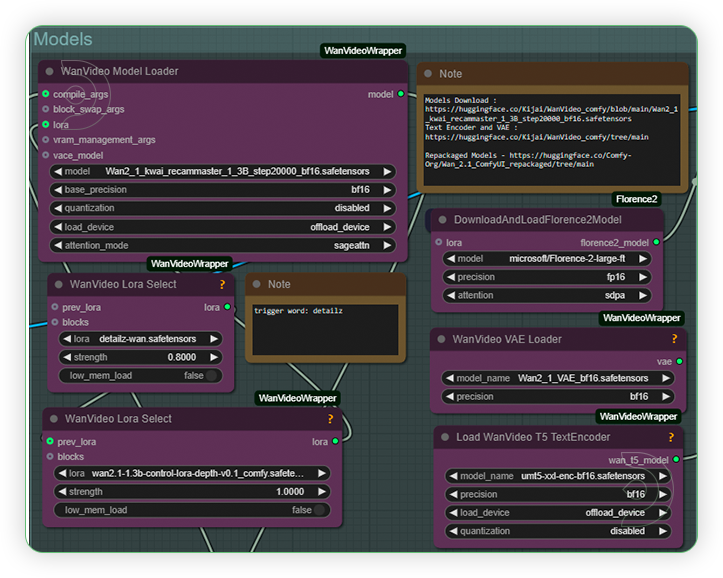 |
| 3. Write the Prompt Let the Florence generate the prompt based from your image. Let it be there the trigger word detailz which help the quality. And you can add additional prompt after the trigger word. |
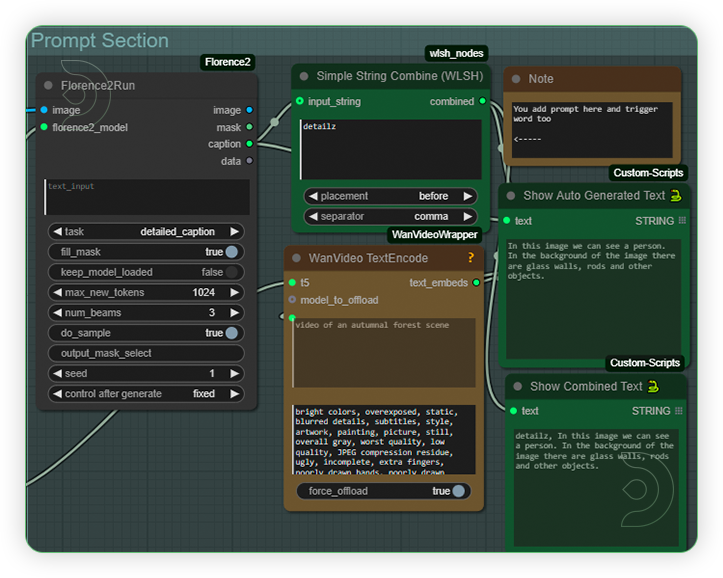 |
| 4. Set the Camera Set your desired camera pose which serve as camera control trajectory. |
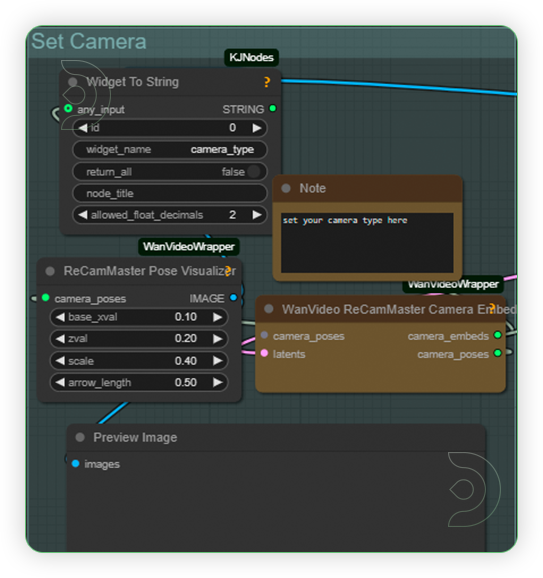 |
| 5. Check the Sampling Check the sampling settings as seen on the image. |
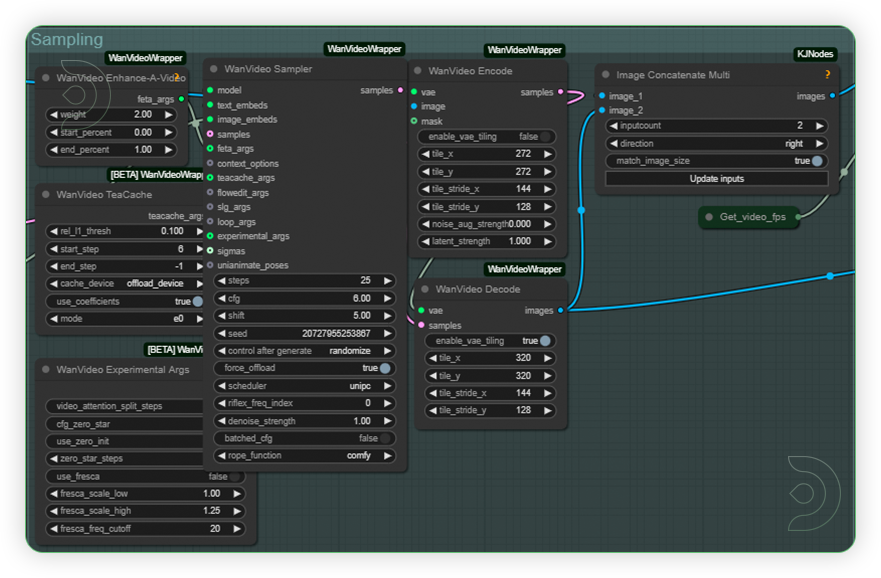 |
| 6. Check Output |
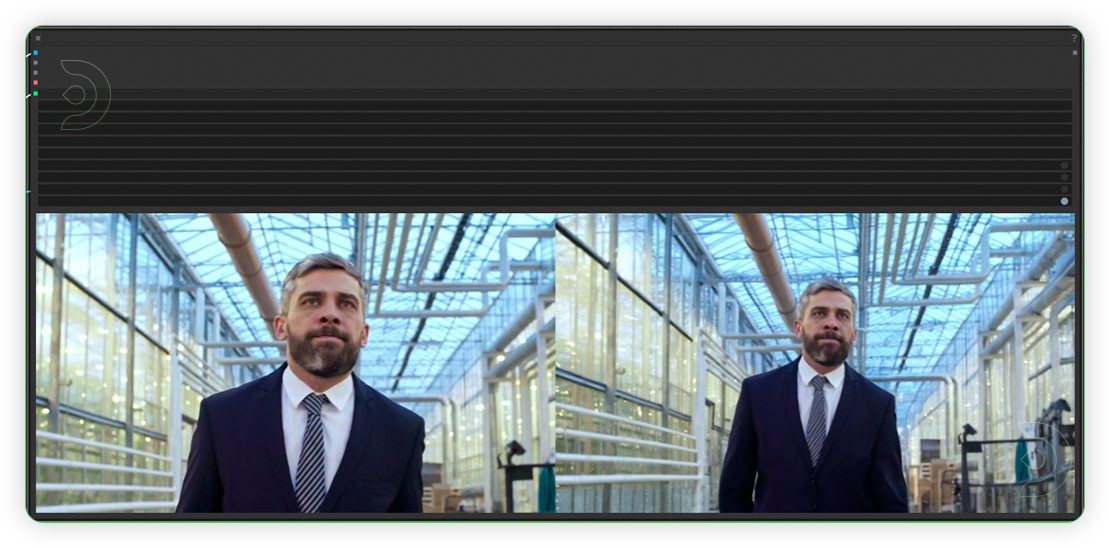 |
Examples
Below are examples showing before and after comparisons using ReCamMaster.
Zoom Out / Zoom In
Pan Right / Pan Left
Tilt Up / Tilt Down
Translate Down / Translate Up
Arc Right / Arc Left
If you’re having issues with installation or slow hardware, you can try any of these workflows on a more powerful GPU in your browser with ThinkDiffusion.
If you enjoy ComfyUI and you want to test out Wan Image2Video, then feel free to check out this Discover why Wan 2.1 is the best AI video model right now.. And have fun out there with your videos!
Member discussion