
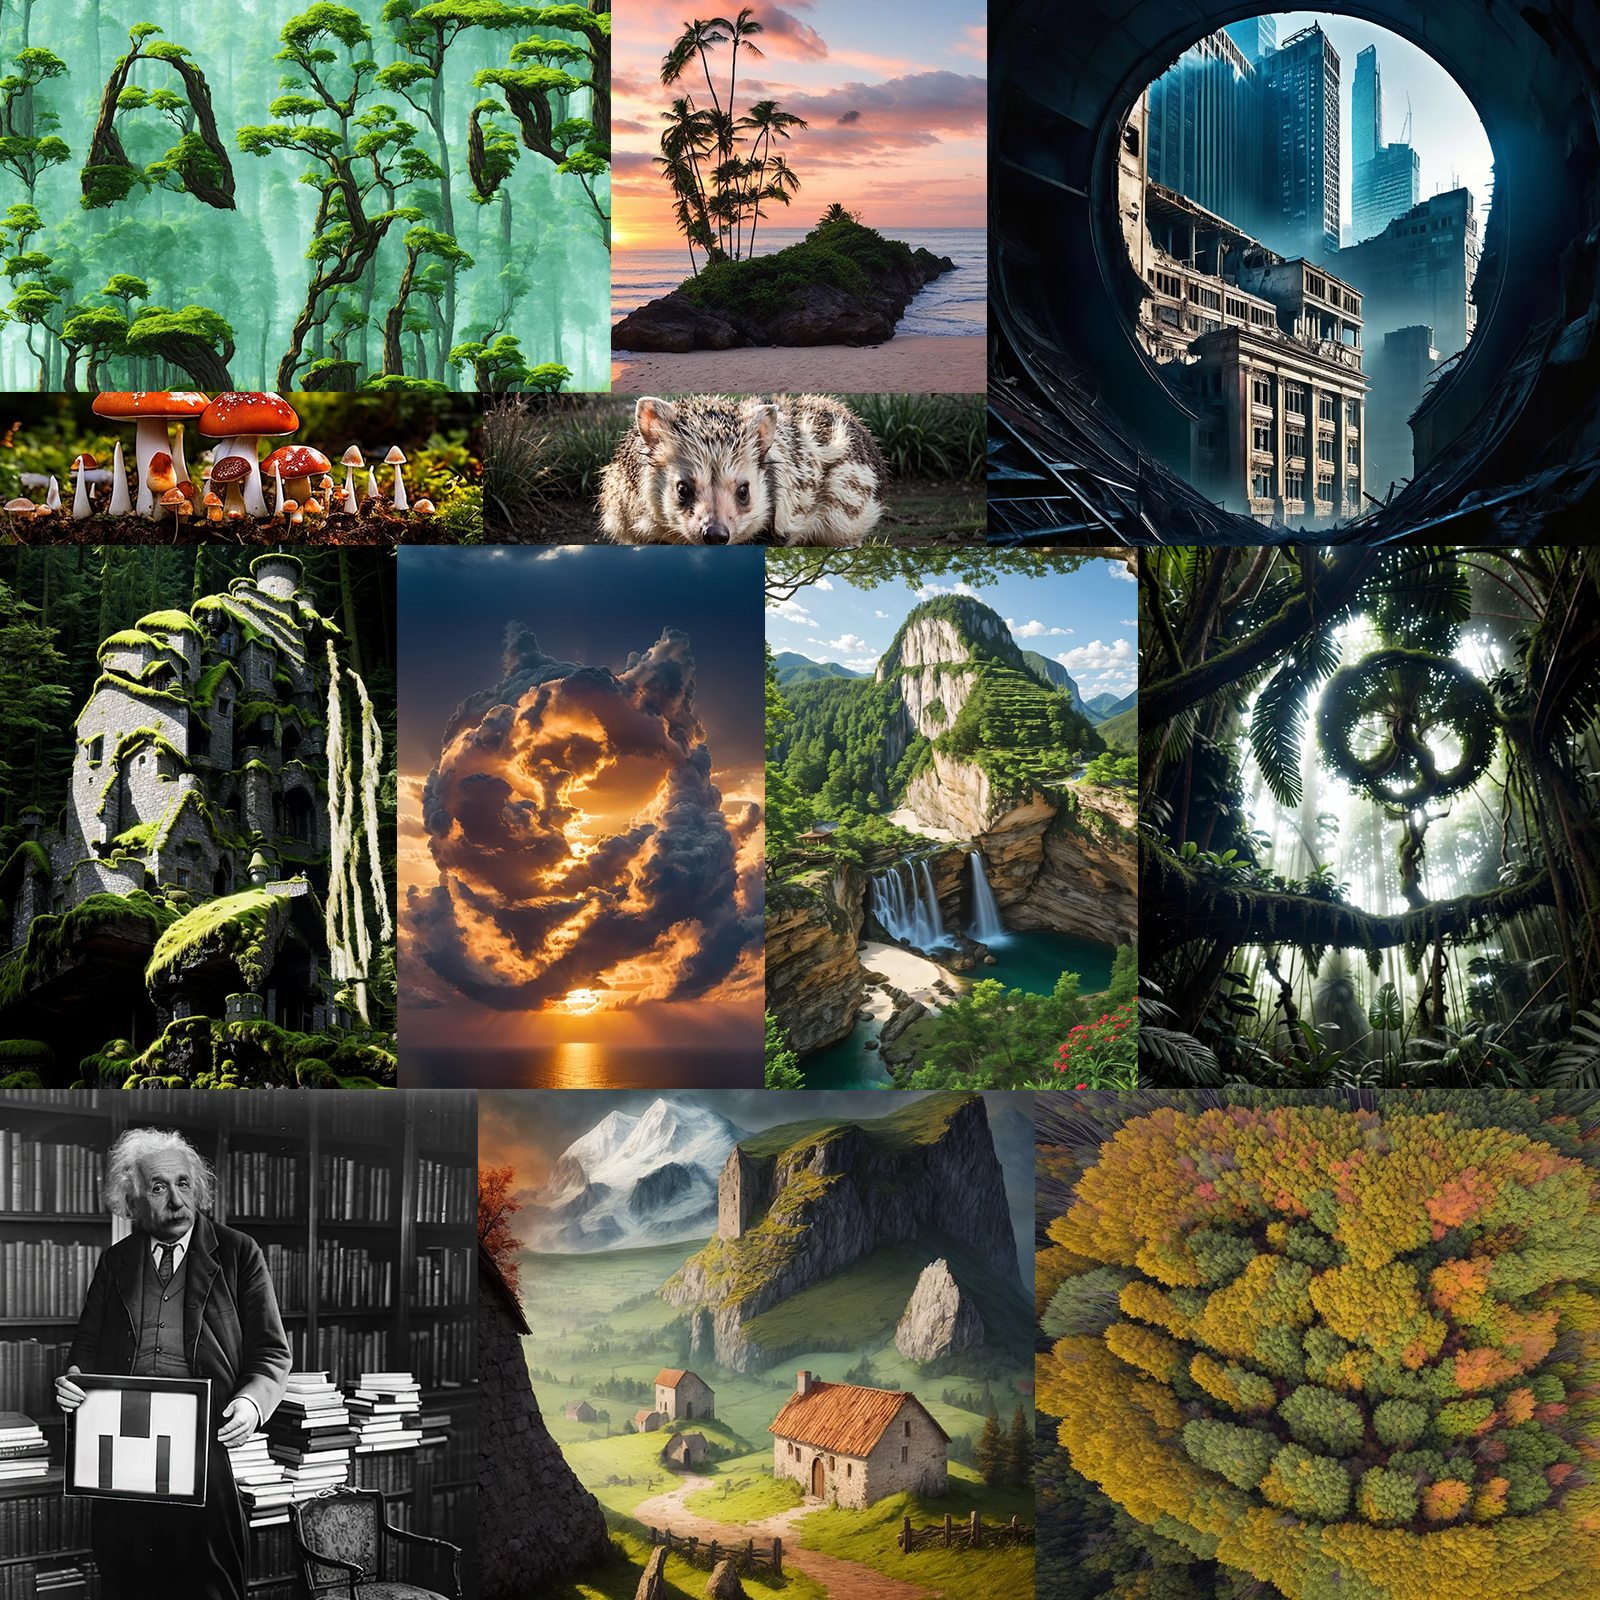
A recent trend of hidden text and images has been taking the interwebs by storm!
Subliminal messages from u/etlaM21, u/paolo_impresso, u/Mountain-Animal5365 and u/hellphish
In this guide we are going to delve in and help you make them too.
Hidden faces
Firstly we're going to look at generating a hidden face into an image. I'm going to use the following image of Jack Sparrow I found:

- (1) For checkpoint model, I'm using dreamshaper_8
But you can use any model of your choice - (2) Positive Prompt:
mountains, red sunset, 4k, ultra detailed, masterpiece - (3) Negative Prompt:
lowres, blurry, low quality - (4) I have set the sampling method to DPM++ 2S a Karras
But again you can choose any sampling method you prefer - (5) Sampling steps - I have set this to 40
I've found that a higher number of sampling steps produces better quality images for this use case - (6) Image size: Your choice, I matched source image, 1600x898
My image of Jack Sparrow is 1600 width x 898 height so I have matched that as shown in the screenshot below - (7) CFG scale can be left as 7
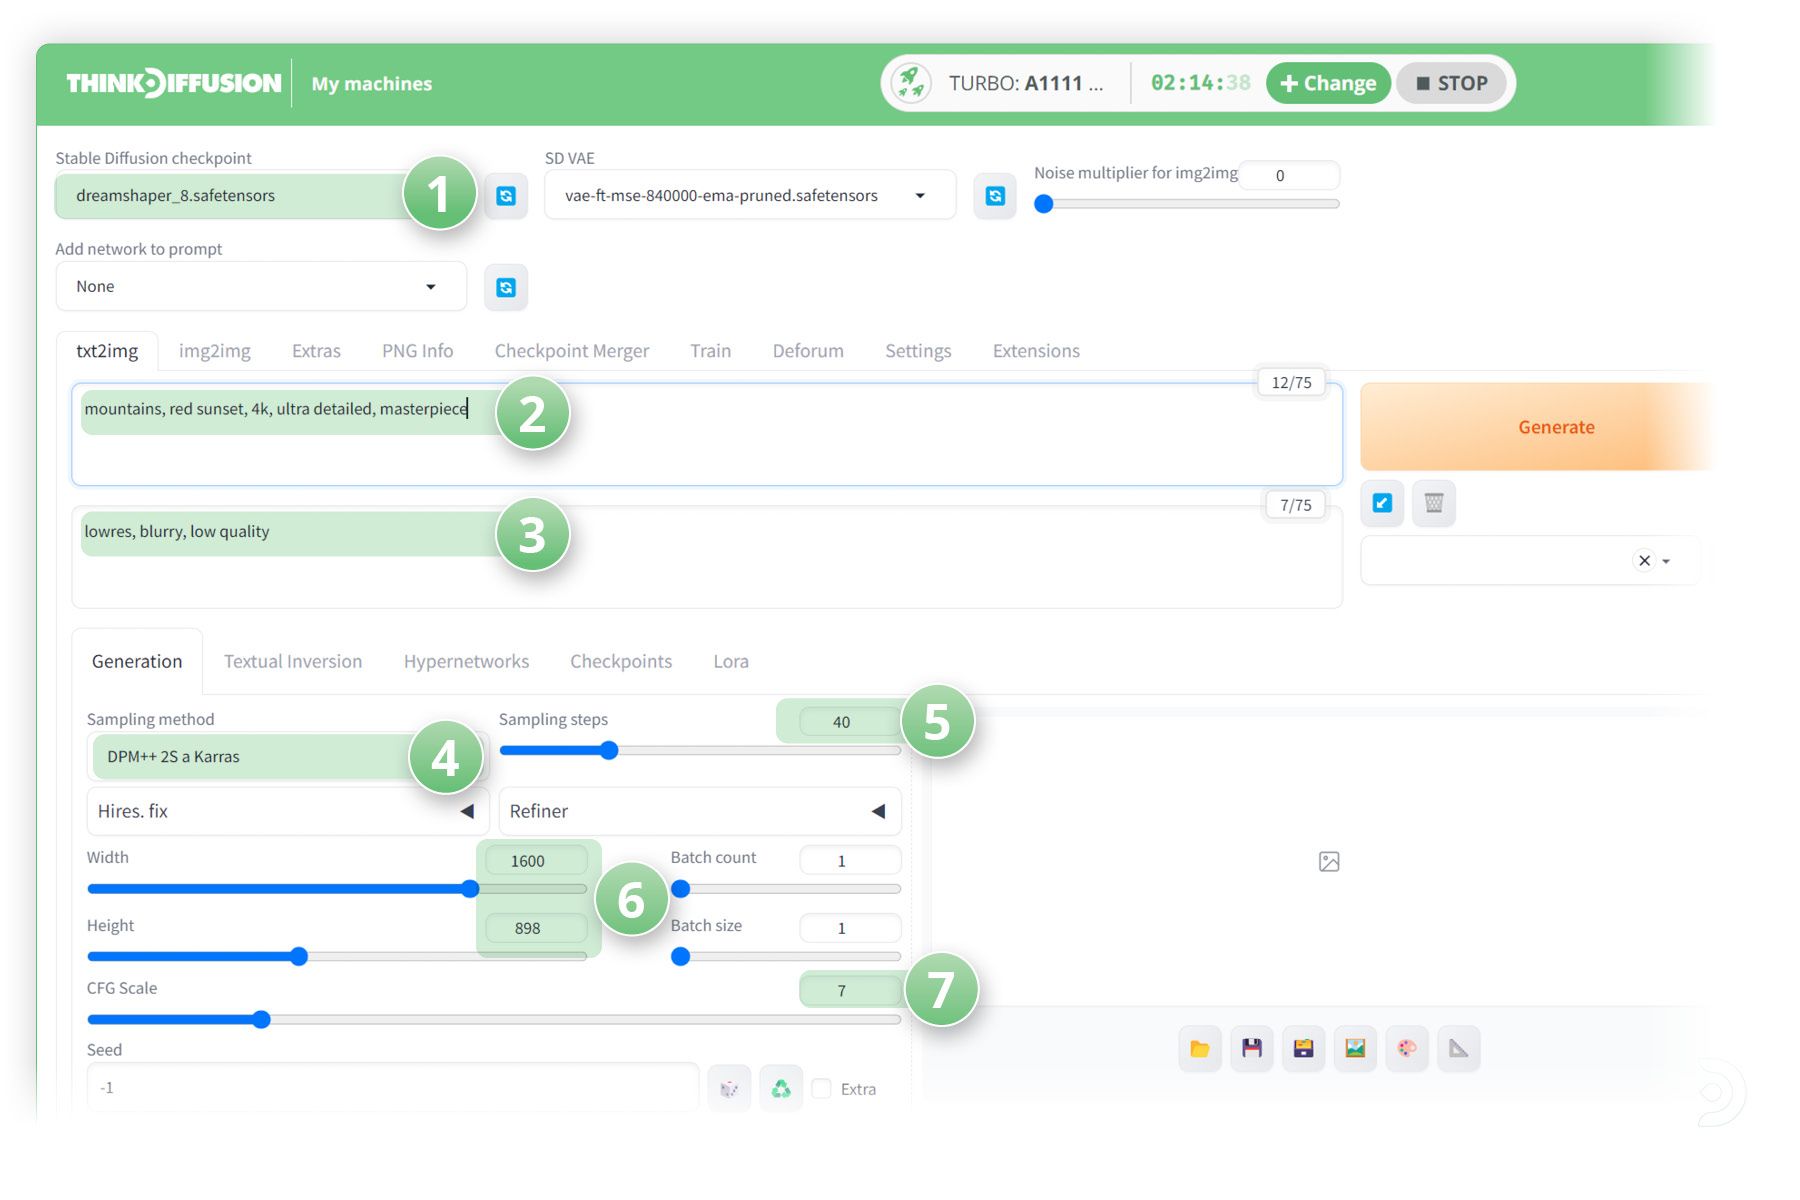
Drop down the ControlNet option and upload your image to here
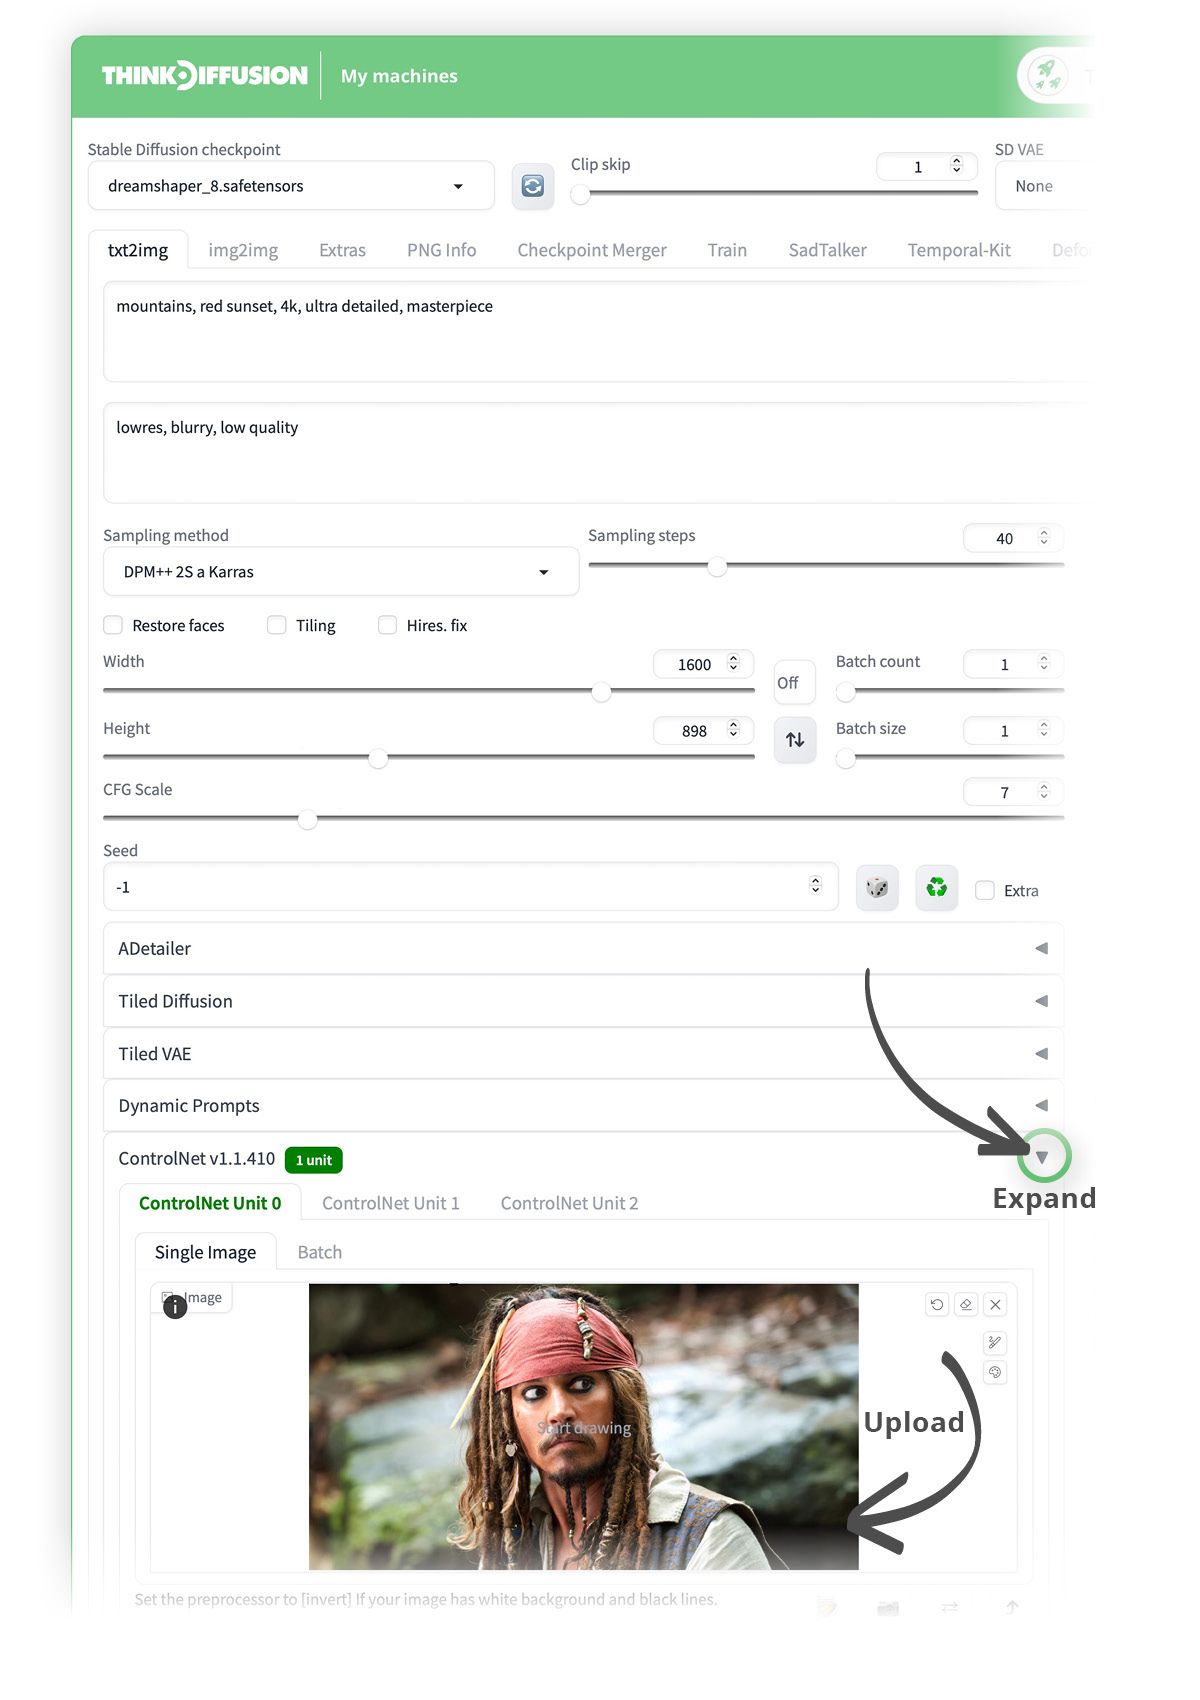
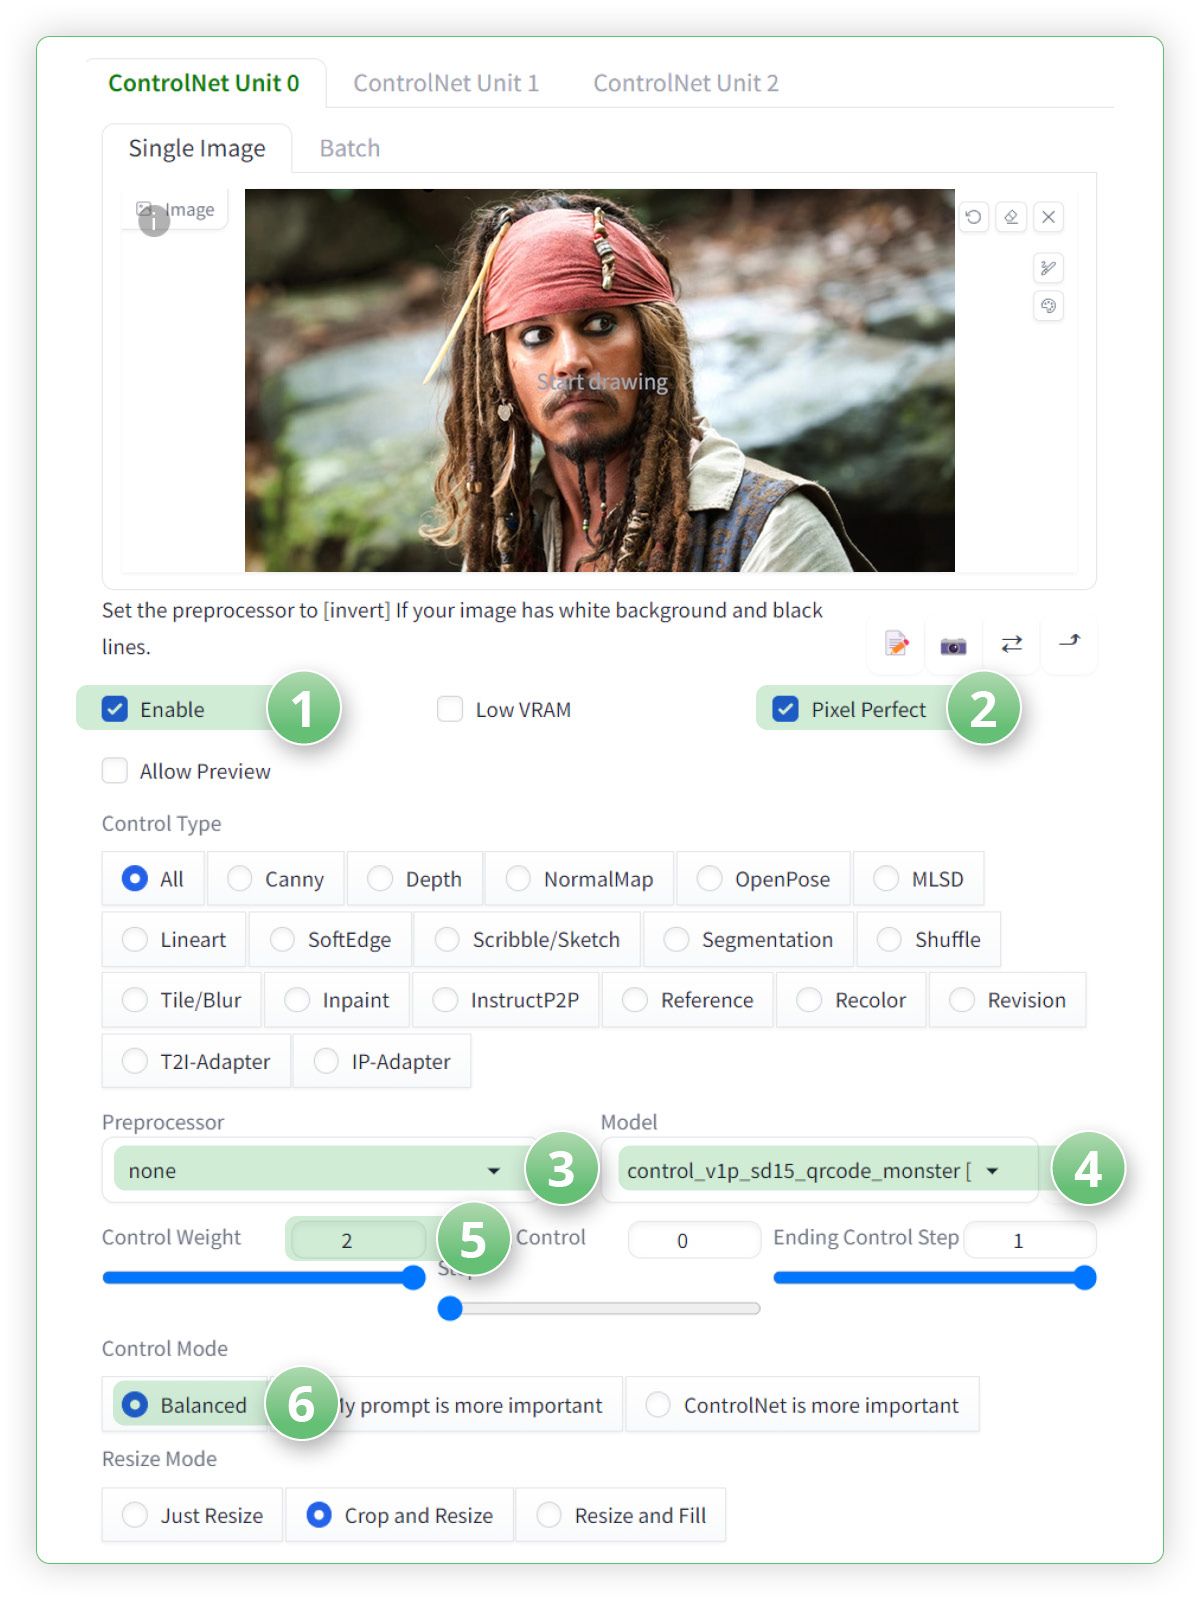
- (1) Ensure that you have clicked the ✅ Enable checkbox
- (2) Select the ✅ Pixel Perfect checkbox
- (3) Leave the ControlNet Preprocessor to None
- (4) Set the ControlNet model to control_v1p_sd15_qrcode_monster.
If you're using Think Diffusion this model is already pre-installed.
If you're running locally then you can download this model from control_v1p_sd15_qrcode_monster.safetensors and place it into the following folder:
stable-diffusion-webui/extensions/sd-webui-controlnet/models - (5) Increase the Control Weight to 2.
Setting a higher number for the control weight means your face will be more visible. If you want a more subtle face that is harder to see, then you can lower this number to around 1.3 to 1.5 to see the difference. - (6) The Control Mode can be left as balanced
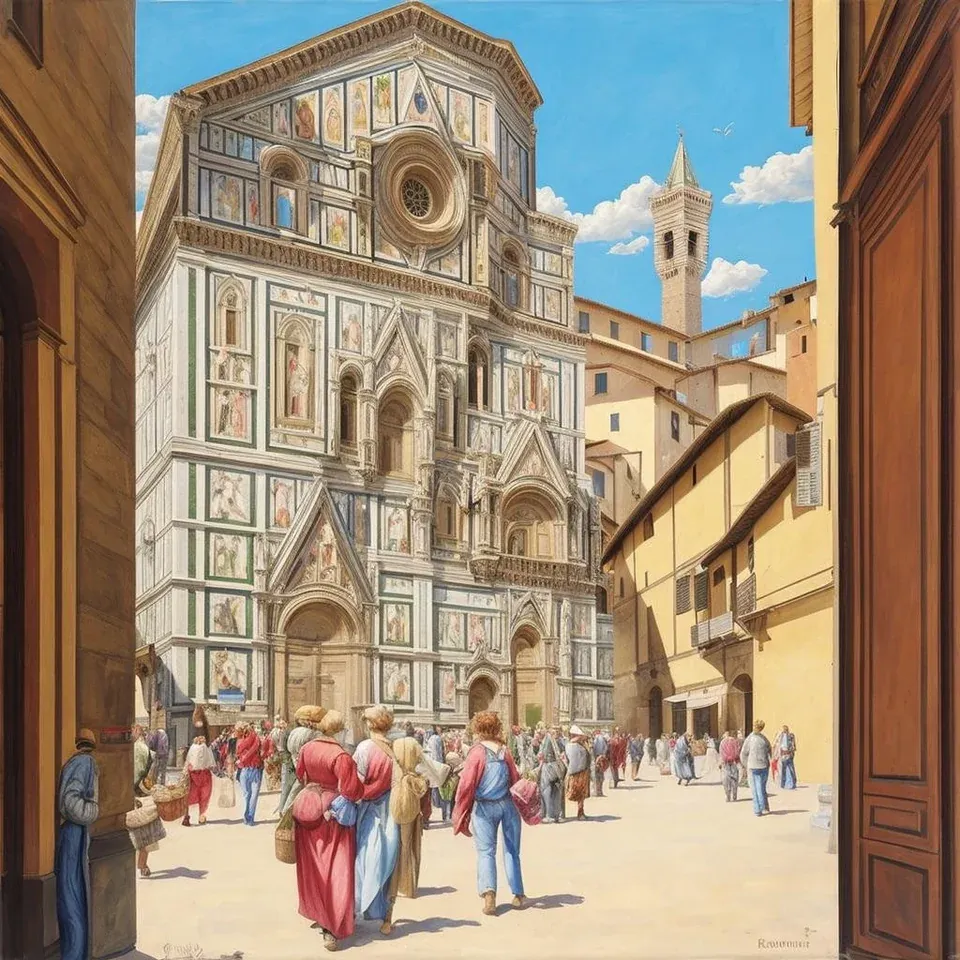
- Hit Generate and we can see that Jack Sparrow is now hidden in our mountain scene!
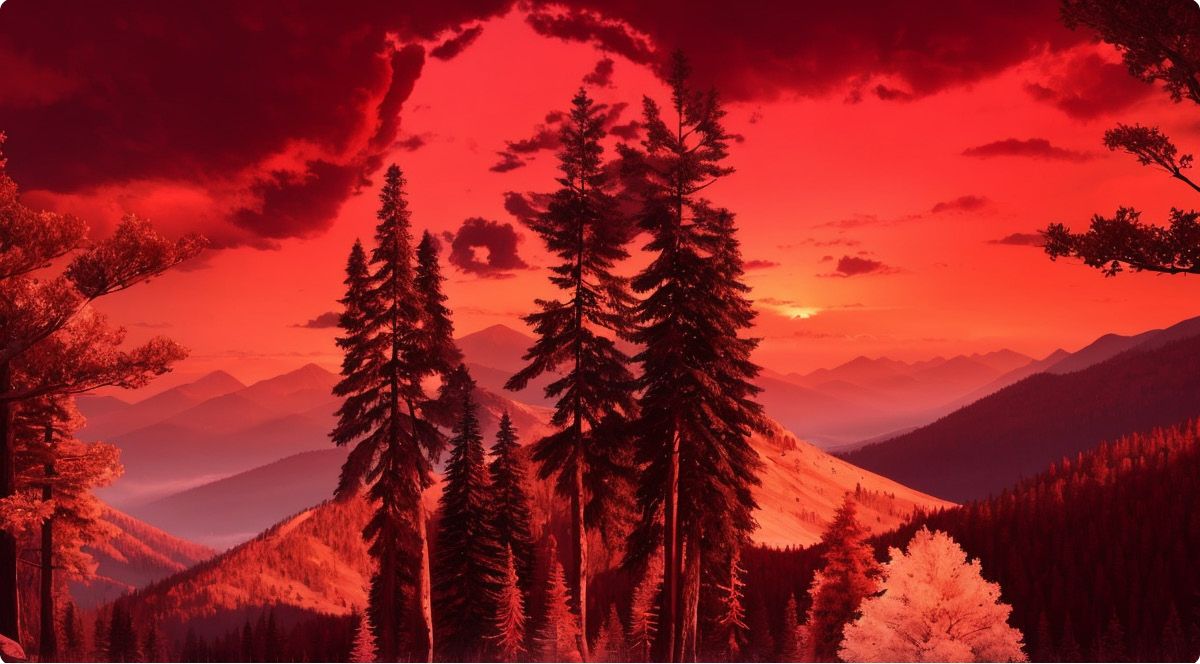
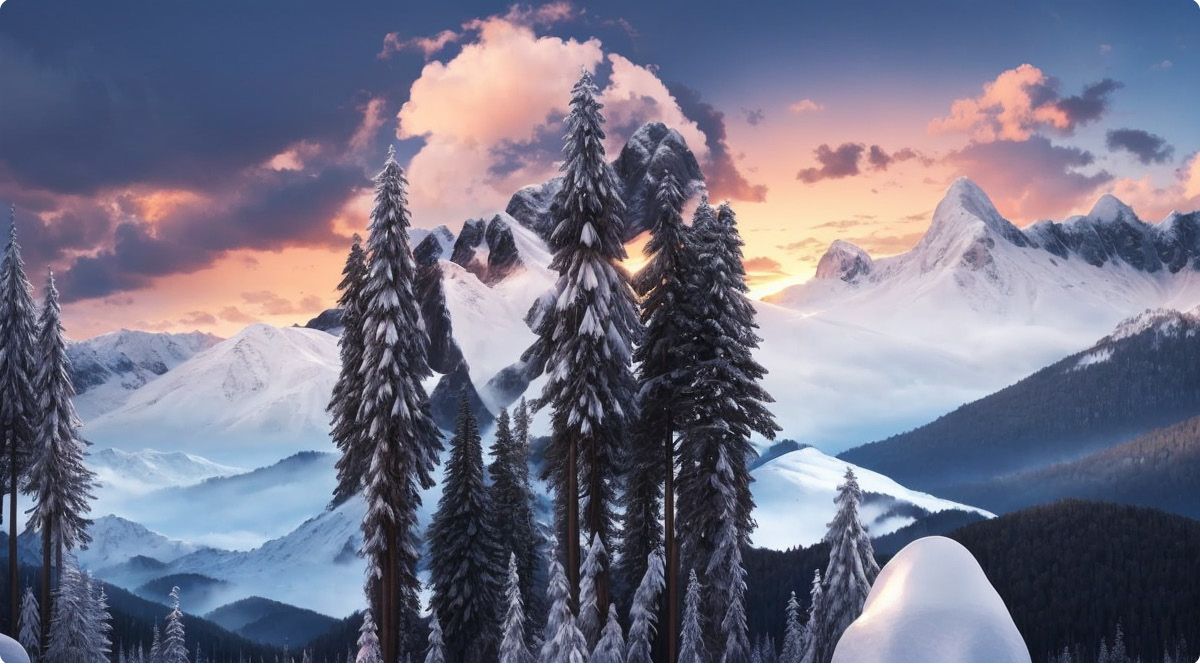
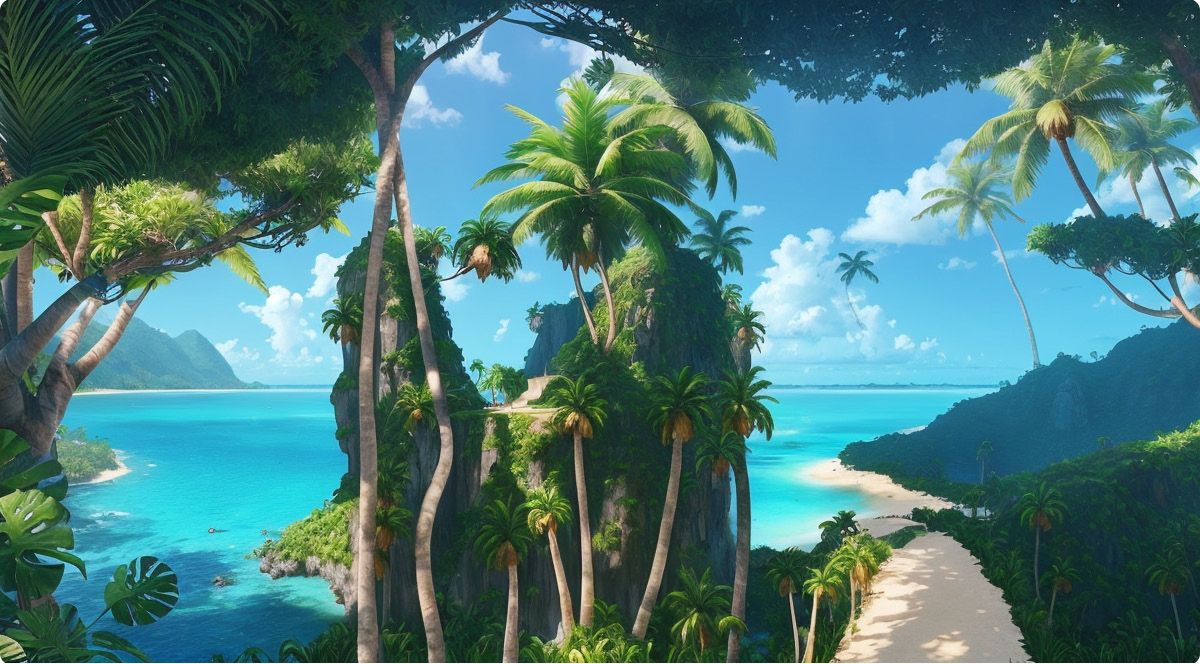
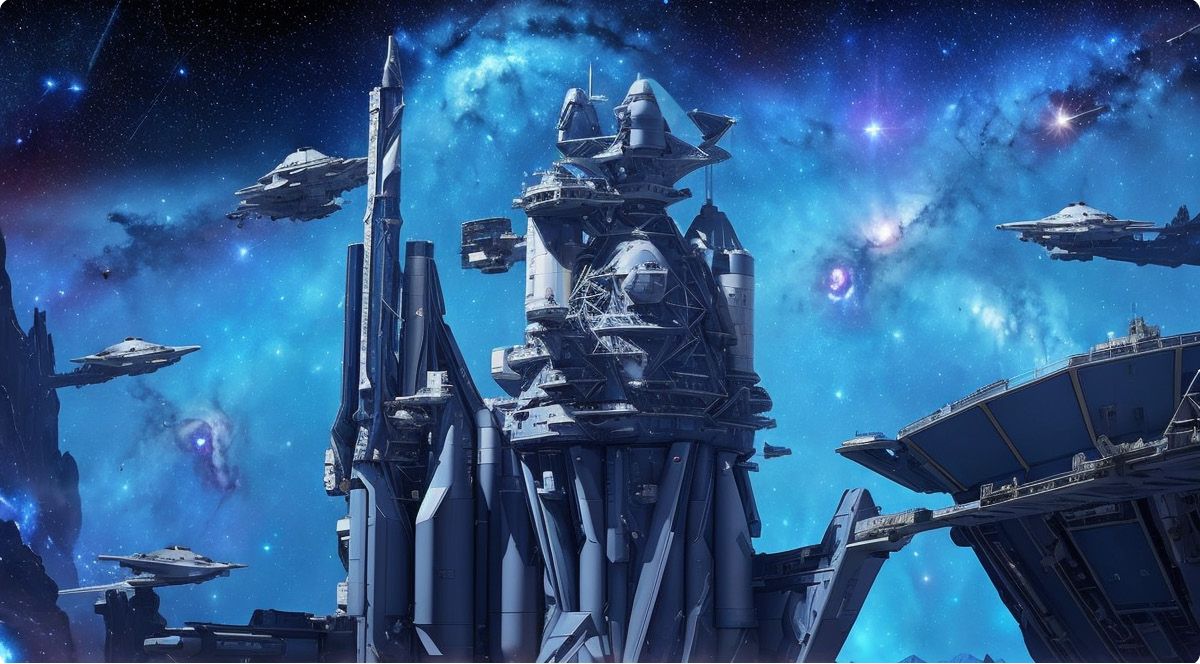
Have fun with your subject, by changing just a few of the prompts, and keeping the settings the same, you can get a huge variety of results.
Your Jack Sparrow overlord
The updated prompts I used are below:
- snowy mountains, beautiful sunrise, trees, 4k, ultra detailed, masterpiece
- Tropical island, beautiful light, palm trees, 4k, ultra detailed, masterpiece
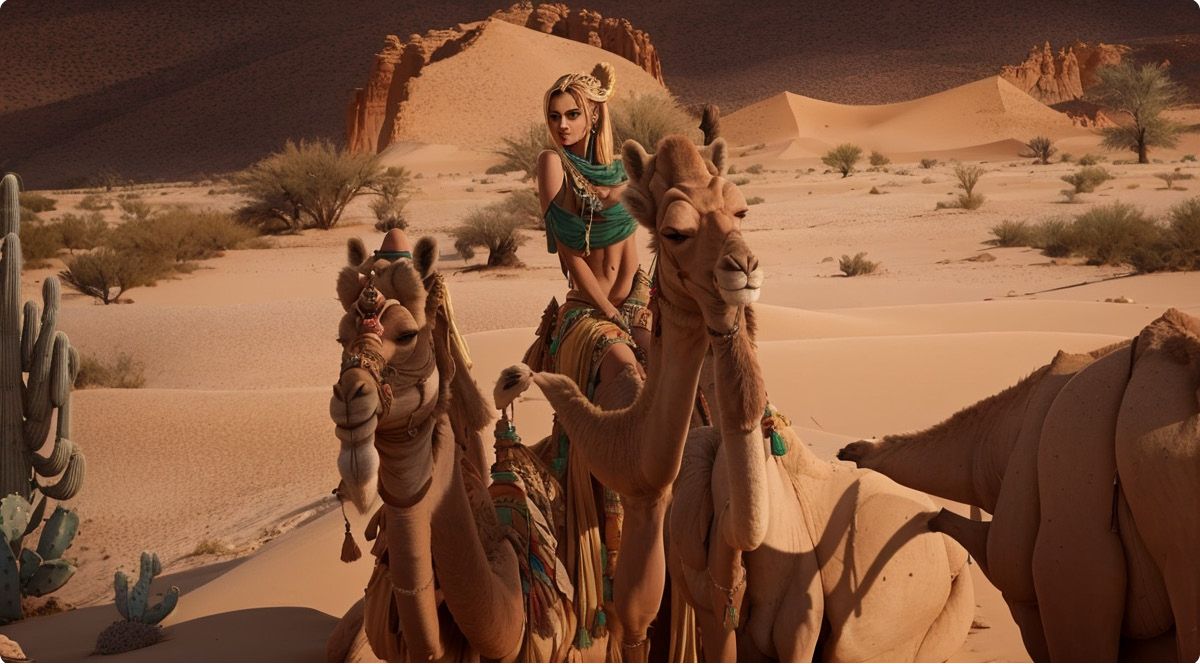
- Sandy desert, beautiful light, camels, cactus, 4k, ultra detailed, masterpiece
- Space station, beautiful light, stars, nebula, 4k, ultra detailed, masterpiece
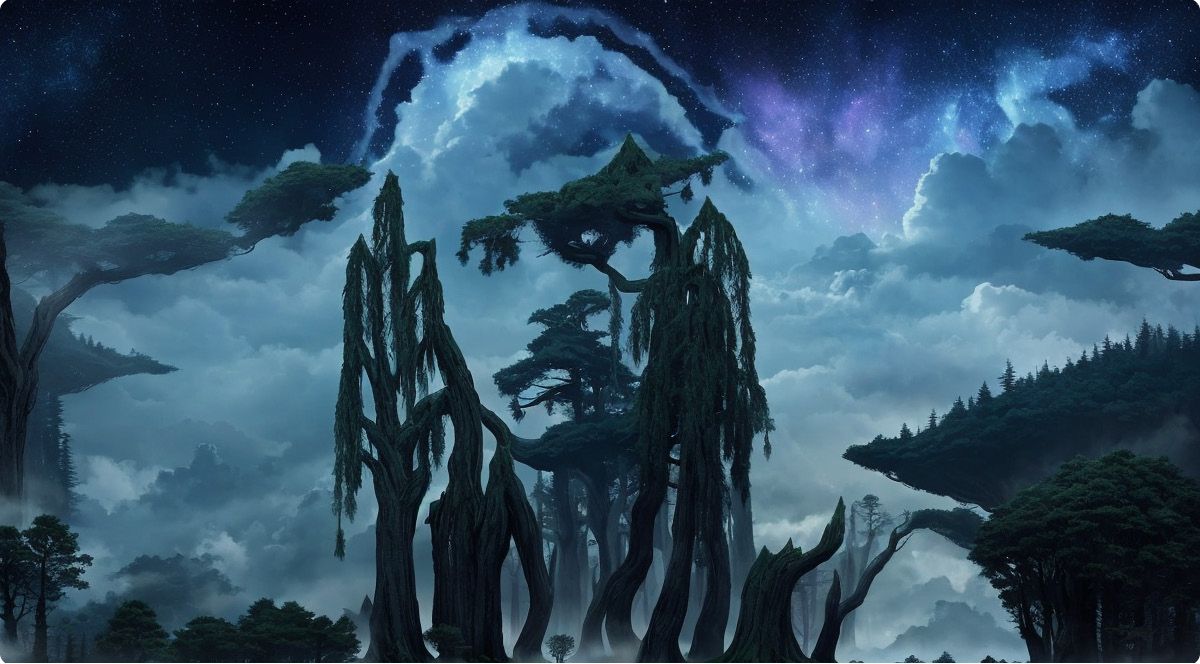
- Fantasy forest, twilight, stars, clouds, 4k, ultra detailed, masterpiece
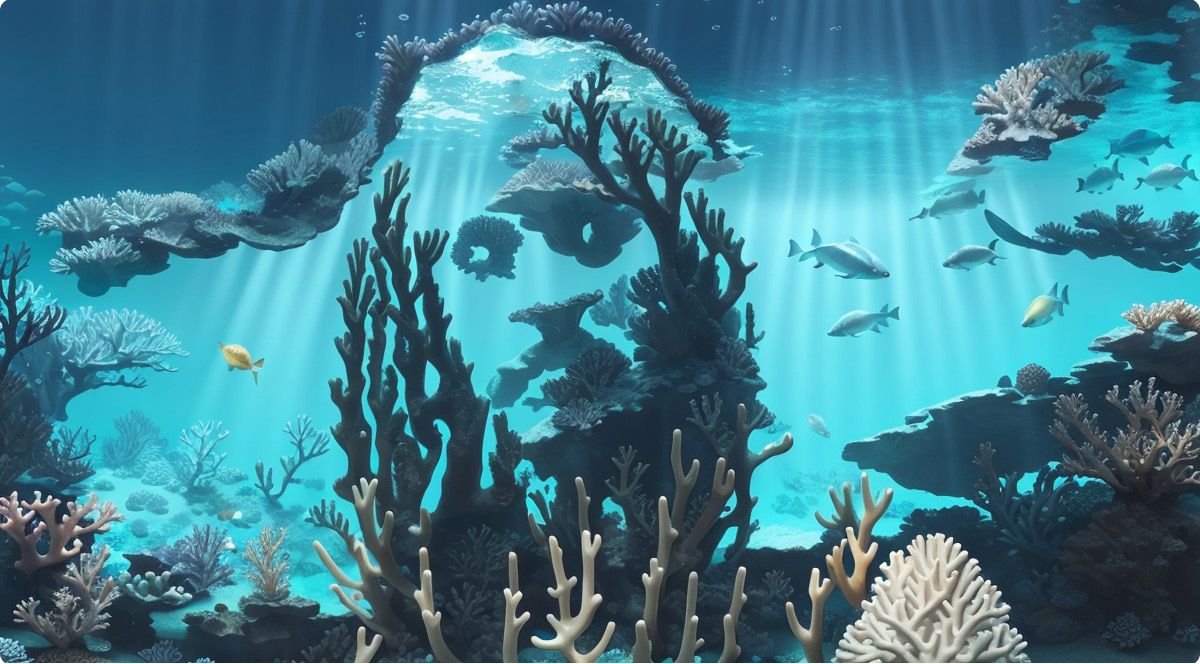
- Underwater ocean, rays of light, fishes, coral, 4k, ultra detailed, masterpiece
Hidden Text - Symbols / Logos
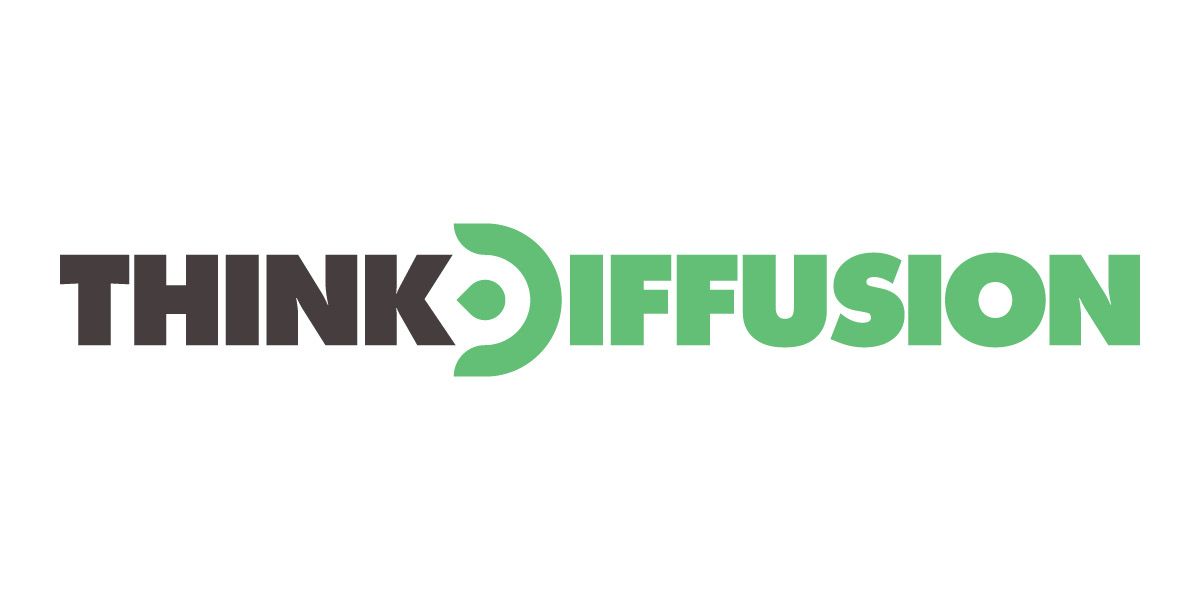
We can now look at creating hidden symbols, which is pretty much the same workflow as creating faces. I'm going to use the ThinkDiffusion logo.
Use the same settings as previously and we only need to change our positive prompt and the resolution
- (1) Positive Prompt:
a mansion, trees, 4k, ultra detailed, masterpiece - (2) Match the resolution of your input image (mask). For this one, I set the width to 2048 and the height to 512
Exactly like with the hidden faces workflow above, drop down the ControlNet option and upload your image.
Below are the exact same settings as above - so if you have them entered already, feel free to skip!
- (1) Ensure that you have clicked the ✅ Enable checkbox
- (2) Select the ✅ Pixel Perfect checkbox
- (3) Leave the ControlNet Preprocessor to None
- (4) Set the ControlNet model to control_v1p_sd15_qrcode_monster.
- (5) Increase the Control Weight to 2.
Setting a higher number for the control weight means your face will be more visible. If you want a more subtle face that is harder to see, then you can lower this number to around 1.3 to 1.5 to see the difference. - (6) The Control Mode can be left as balanced
- Hit Generate!
What happens if we invert the logo?
Simply replacing the original image and hitting generate gets us this:
And just like before, simply adjusting the prompts while leaving the settings exactly the same can produce some really cool results!
I actually just copied the same Jack Sparrow prompts from above out of laziness, but you get the idea!
WIth dark text
WIth light text
Hidden Text - Any lettering
Now let's do another hidden text, where we create the lettering in paint.net, which shows us we can hide any text that we want to! Here's the text I am using:

Use the same settings as previously and we only need to change our positive prompt, the resolution and the checkpoint model
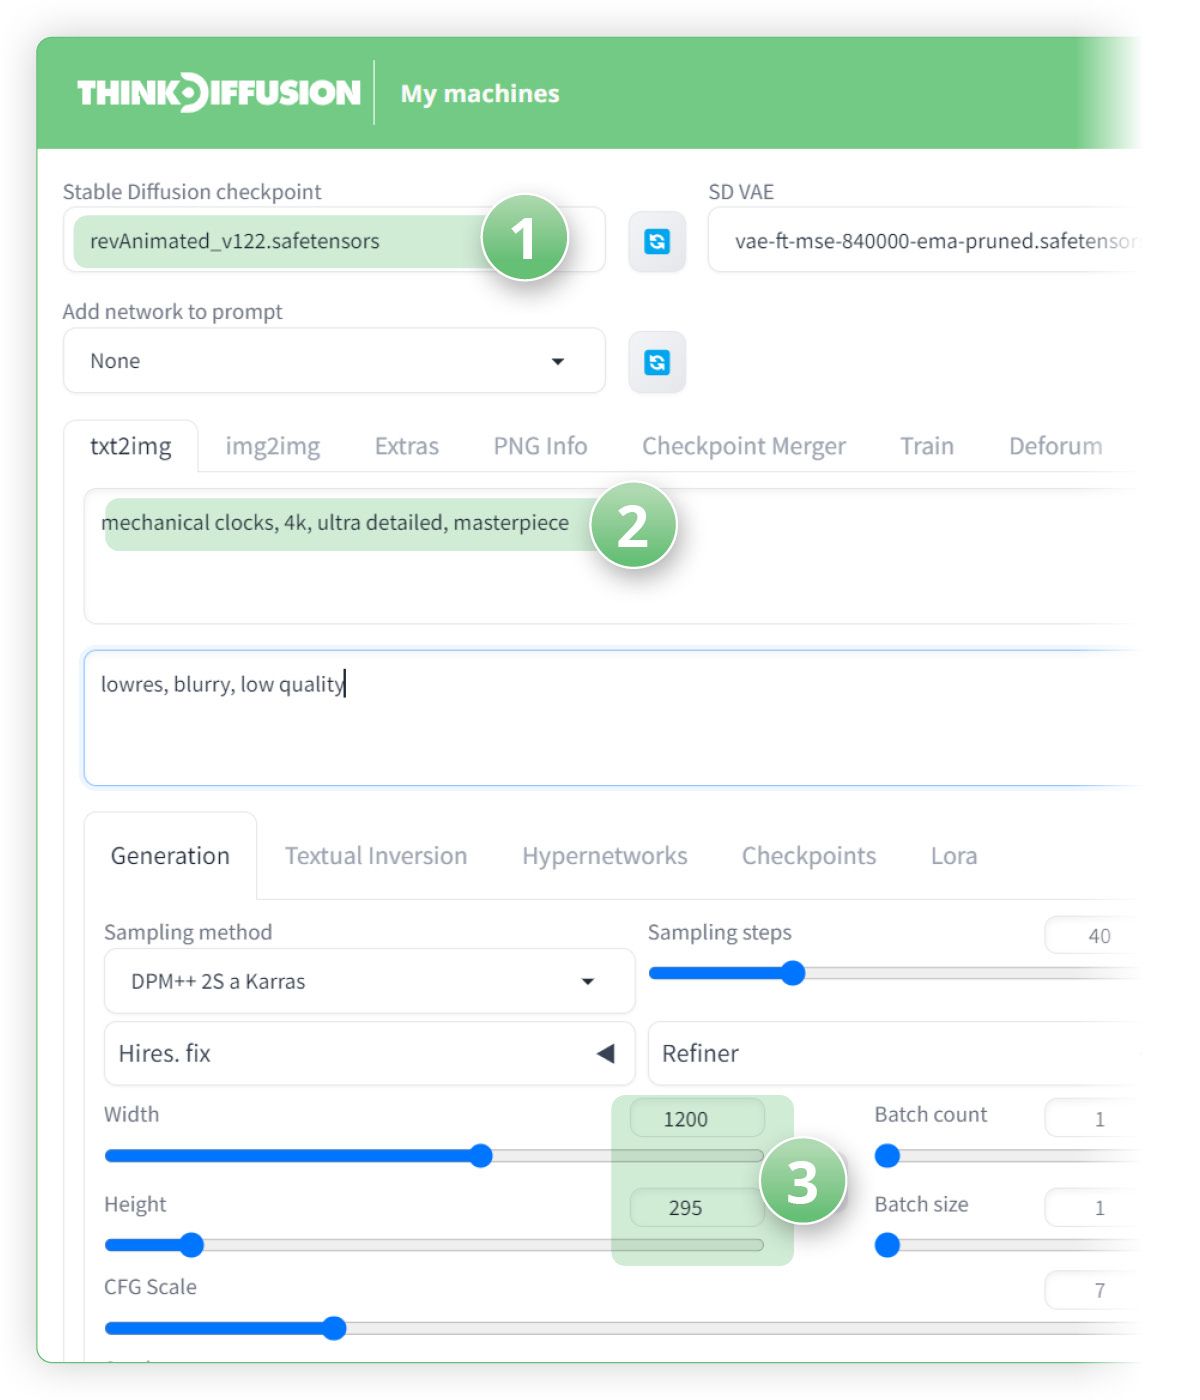
- Set the checkpoint to be revAnimated_V122
But as always, feel free to choose any model. - Positive Prompt:
mechanical clocks, 4k, ultra detailed, masterpiece - Match the resolution of your input image.
For this one, I set the width to 1200 and the height to 295
Exactly like with the hidden faces workflow above, drop down the ControlNet option and upload your image.
Below are the very similar settings as above - but with adjustments to the Preprocessor and Control weight.
- (1) Ensure that you have clicked the ✅ Enable checkbox
- (2) Select the ✅ Pixel Perfect checkbox
- (3) ControlNet Preprocessor to Invert (from white bg & black line).
This is important as we are using black text on a white background, so by using this pre-processor it will change the background to black and the text to white, which will help when we generate the image - (4) Set the ControlNet model to control_v1p_sd15_qrcode_monster.
- (5) Increase the Control Weight to 1.2
As we are going to try and make the text a little more subtle. - (6) The Control Mode can be left as balanced
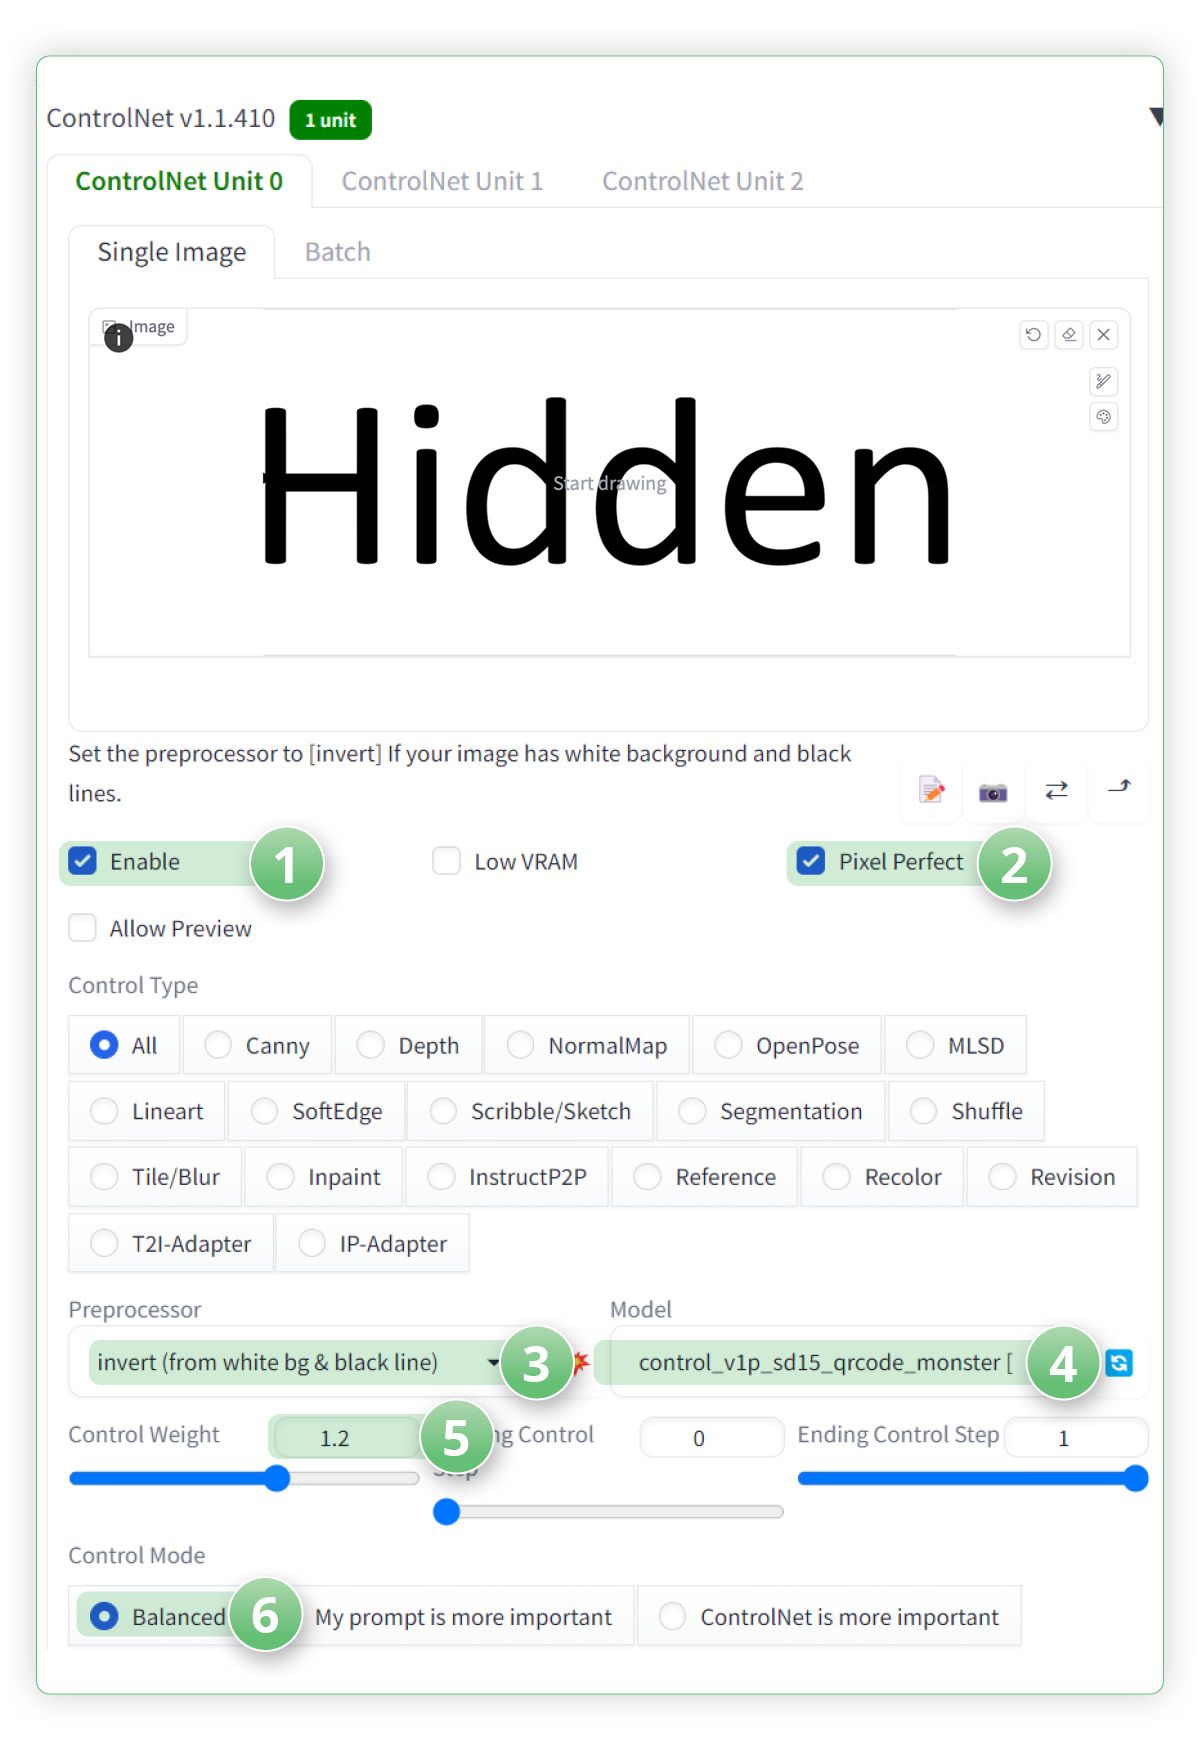
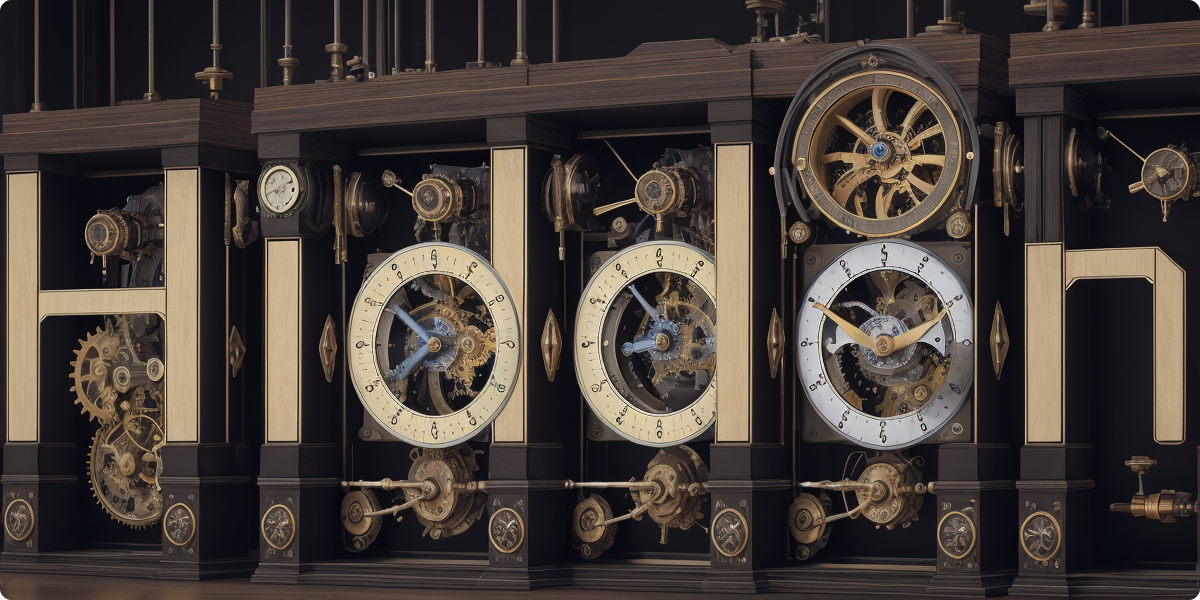
Hit Generate! If you can't see the text then try squinting!
And that's it - People, symbols, text, anything your heart desires can be hidden within any scene... that your heart desires. Thank you A.I!
Any of our workflows including the above can run on a local version of SD but if you’re having issues with installation or slow hardware, you can try any of these workflows on a more powerful GPU in your browser with ThinkDiffusion.
If you’d like a way to make some quick but amazing animations with your art hidden art, check out my post using AnimatedDiff here.
Most importantly, y'all have fun out there making your subliminal visuals, for whatever it is you're doing...

Member discussion