

This tutorial offers a comprehensive walkthrough for training LoRA on the Flux1-dev model using Kohya's updated interface. Flux LoRA training with Kohya helps to fine-tune lightweight LoRA models for Flux-based tasks.
Verified to work on ThinkDiffusion Build: Sep 6, 2024
Why do we specify the build date? This specified ThinkDiffusion build of Kohya has the required features and settings required by this guide.
Recommended Machine Size: ULTRA
While this workflow works on Turbo, the improvement in the time it takes to train on ULTRA is more cost effective than running on TURBO.
This guide can also be applied to your local install as well!
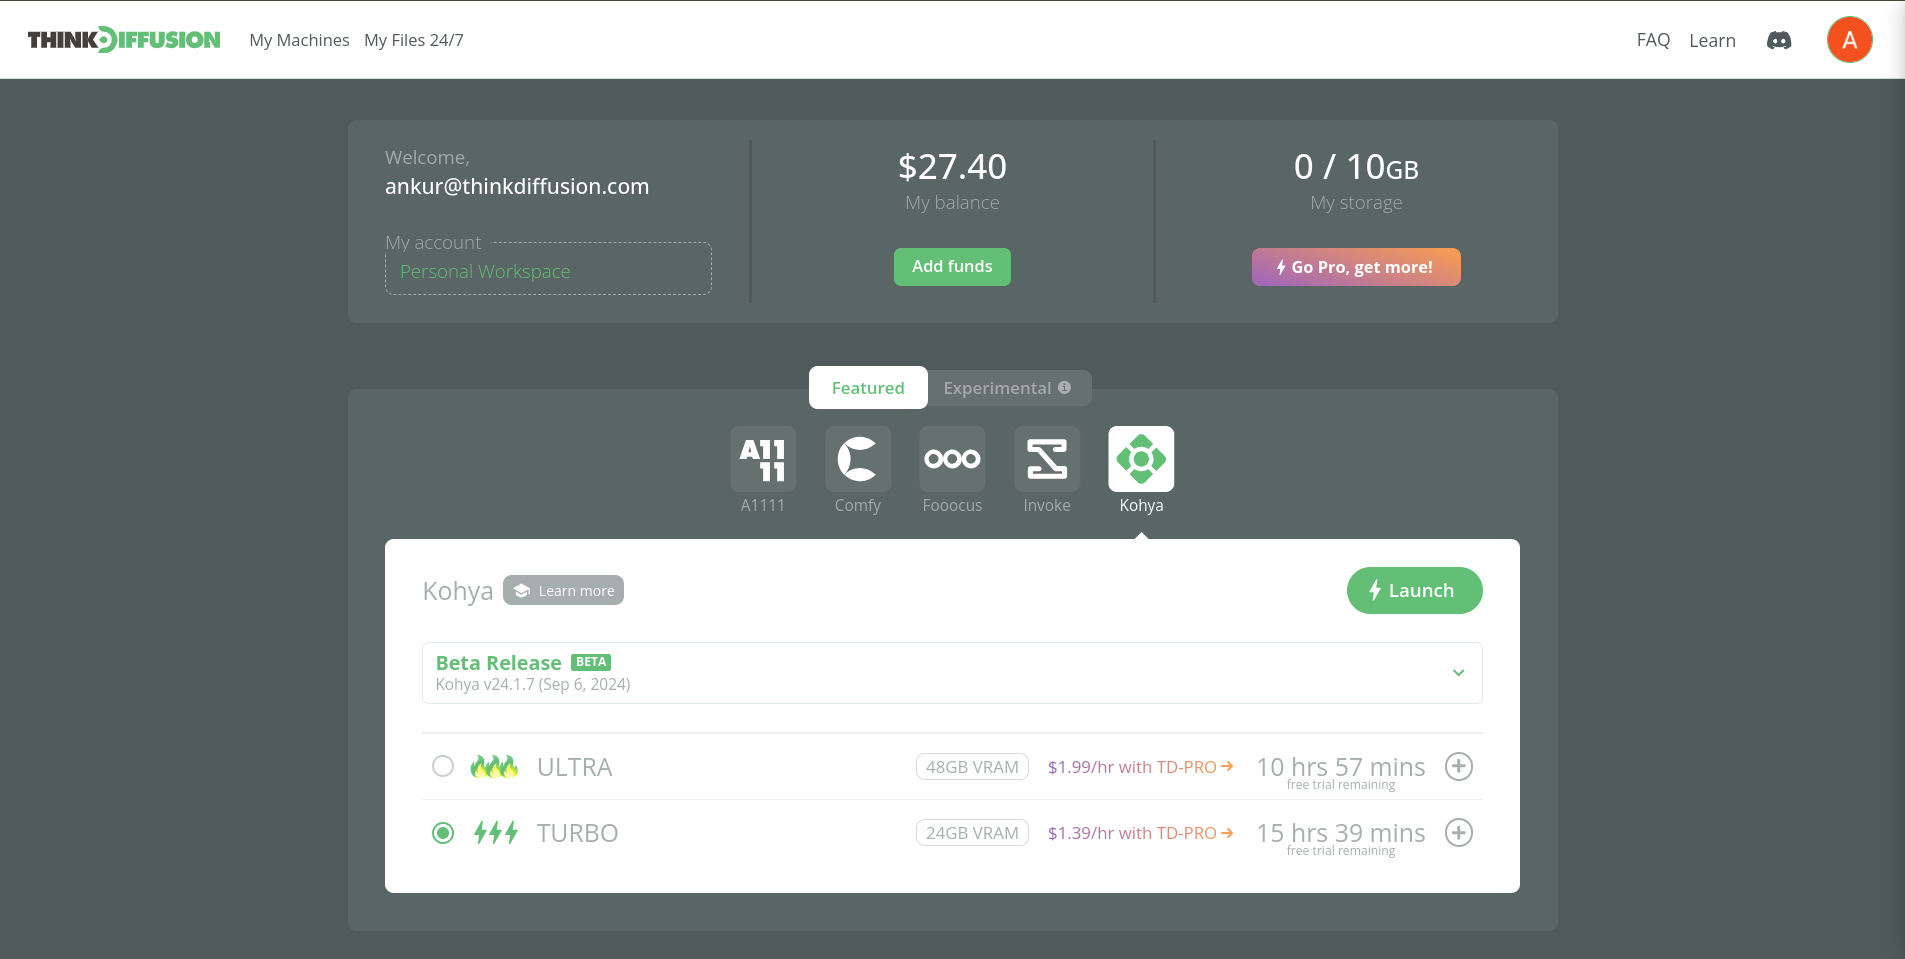
Image preparation
This is probably the most important part of LoRA training on Kohya. It can not be emphasized enough that the quality of your images and your captioning will dramatically affect the quality of your LoRA.
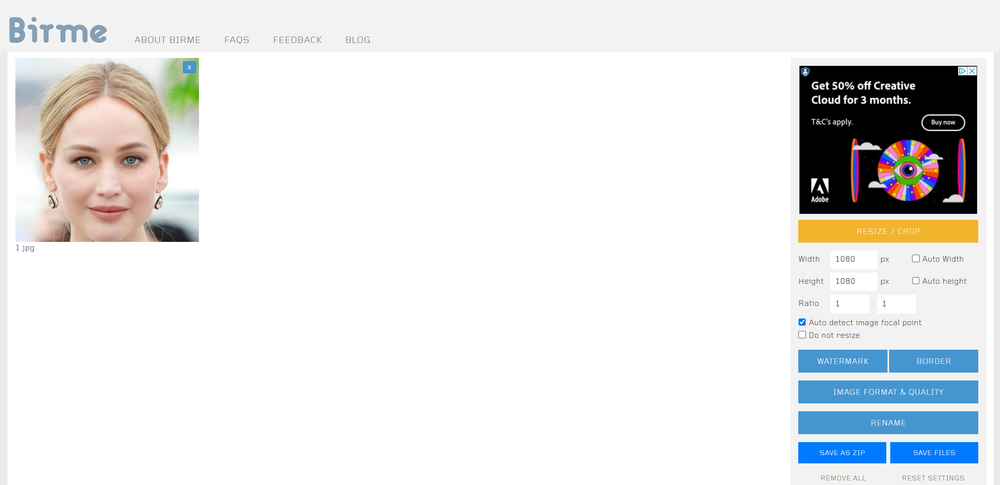
In this example I am going to train a LoRA on Jennifer Lawrence, the American actress. I will be training an Flux LoRA so the first thing I did was gather 23 images of Jennifer Lawrence and manually cropped the images to 1080 x 1080. I used the following free software to crop the images.
We now need to caption each image so we can tell Stable Diffusion what is represented in the image so that it can easily re-create it. We will be using Blip Captioning to caption our images.
Download resources
To follow along this tutorial, download all the resources here:

Download the Kohya workflow and safetensors
Download the starting images for LoRA training
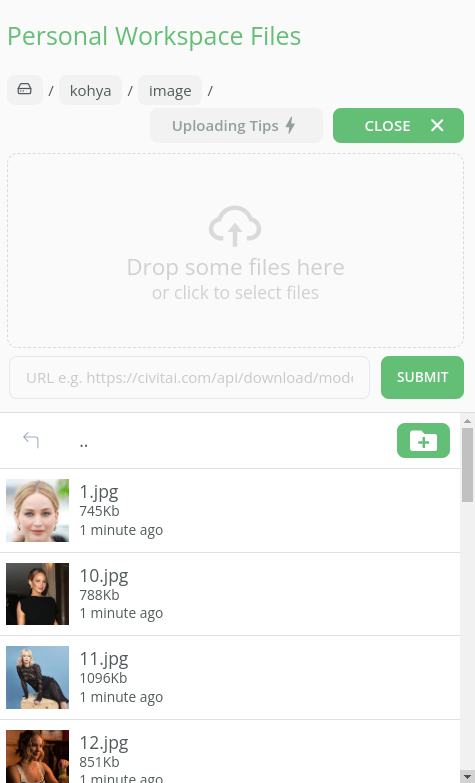
Uploading your Images
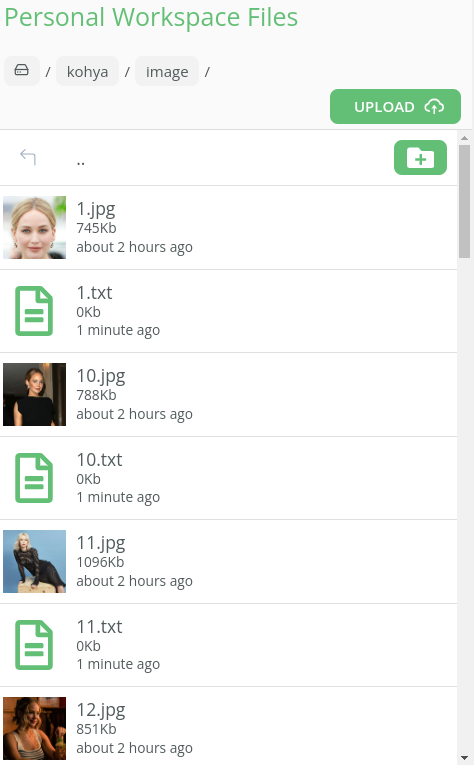
We are now ready to upload our images into Kohya. To do this we need to upload them into our kohya/image folder.
Blip Captioning
There are several steps involved for blip captioning:
- Ensure that all images you want to caption are stored in a dedicated folder. For instance, if the images are stored in the
/kohya/imagefolder.
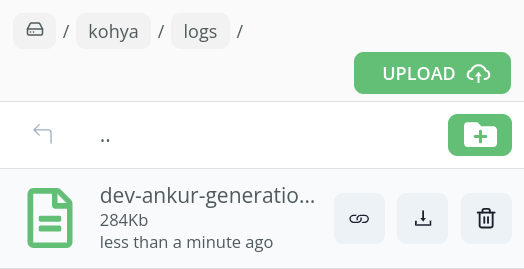
Note: you can use another folder or subfolder, but make sure you copy the full path in the next step. - Copy the full path to this folder by simply clicking on 🔗 icon as you hover over the folder line item.
- What is copied should be the full path. For example,
/home/ubuntu/user_data/kohya/image)
- What is copied should be the full path. For example,
- In Kohya, navigate to the
Utilities > Captioning > Blip Captioningtab. - Paste the copied path into the Kohya's
Image folder to caption tab (containing the images to caption)field. - Provide the prefix to be used to BLIP caption the images. For example - “Jennifer”
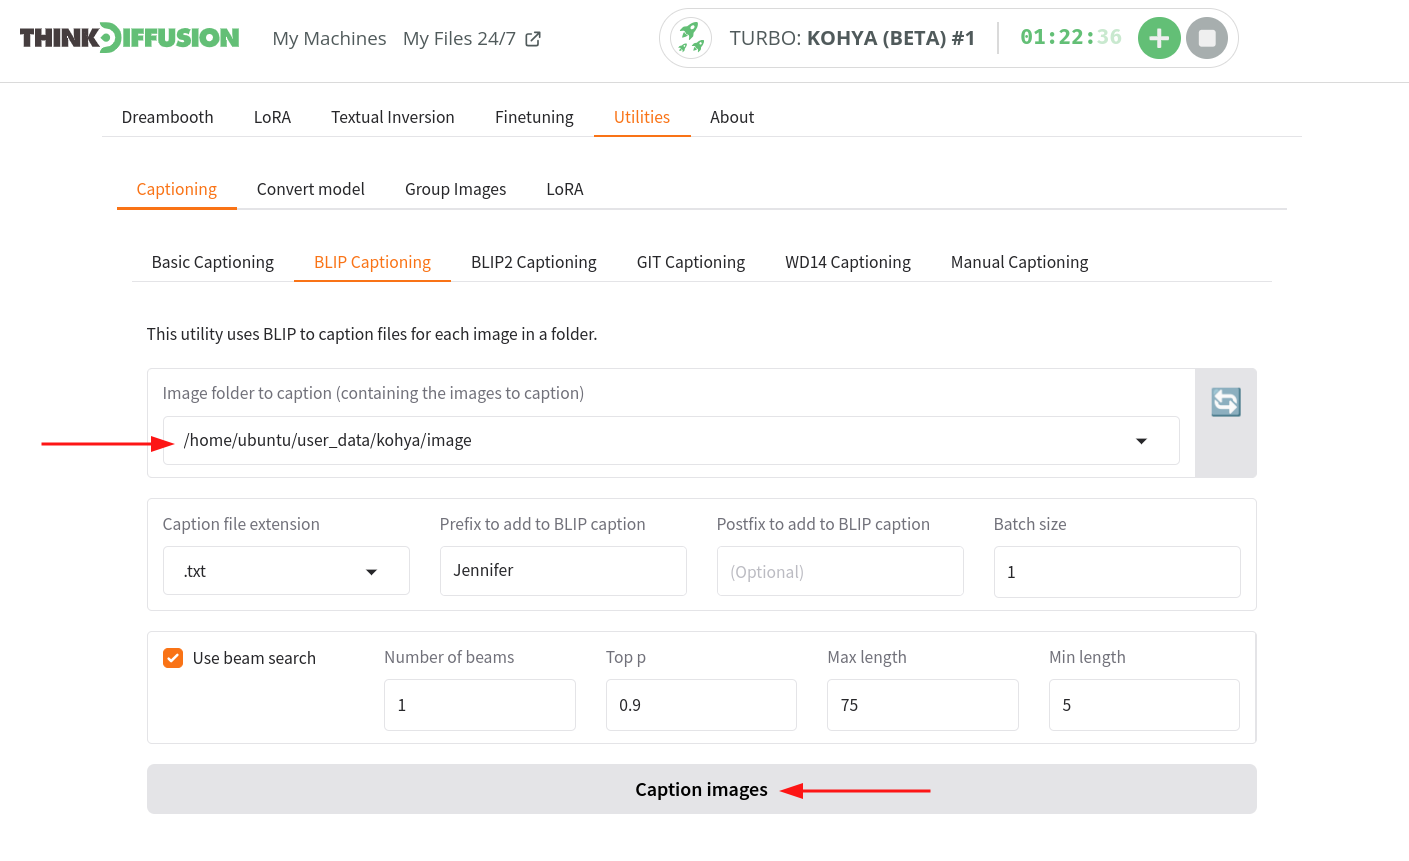
- Click on Caption Images to caption the images & keep an eye on the logs file as it will be the key to track the progress of the generation.
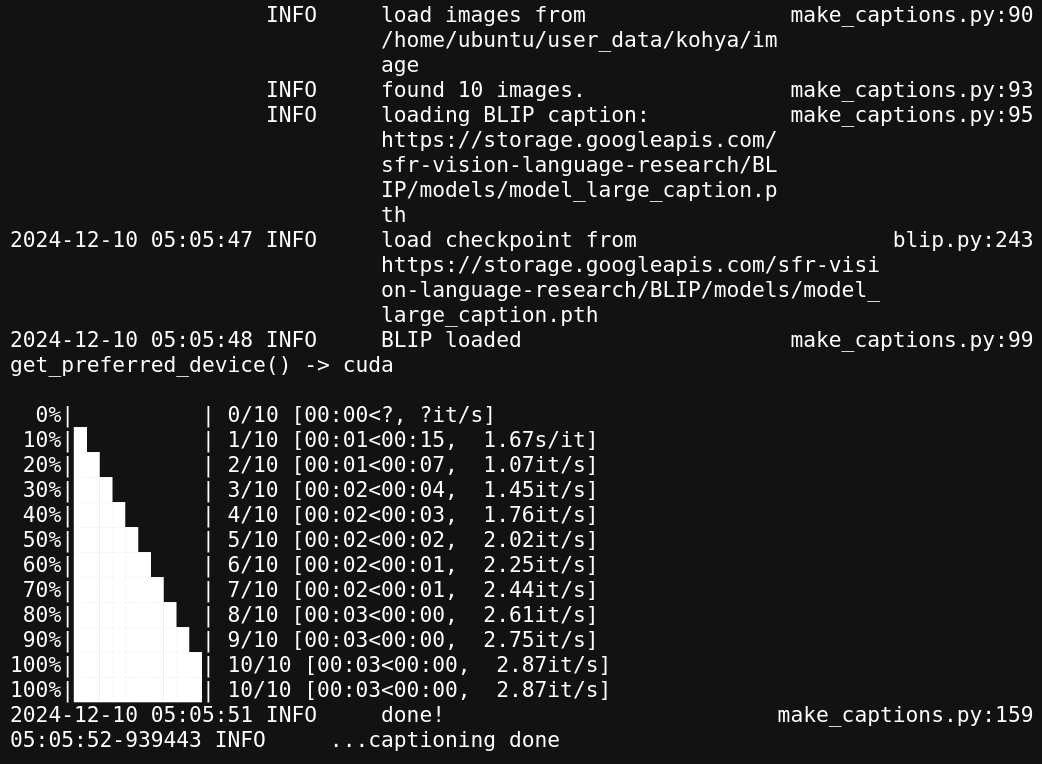
- Once the captioning process is completed, a log message such as captioning done will appear in the system logs. At this point, the captions for your images are ready.
Dataset preparation
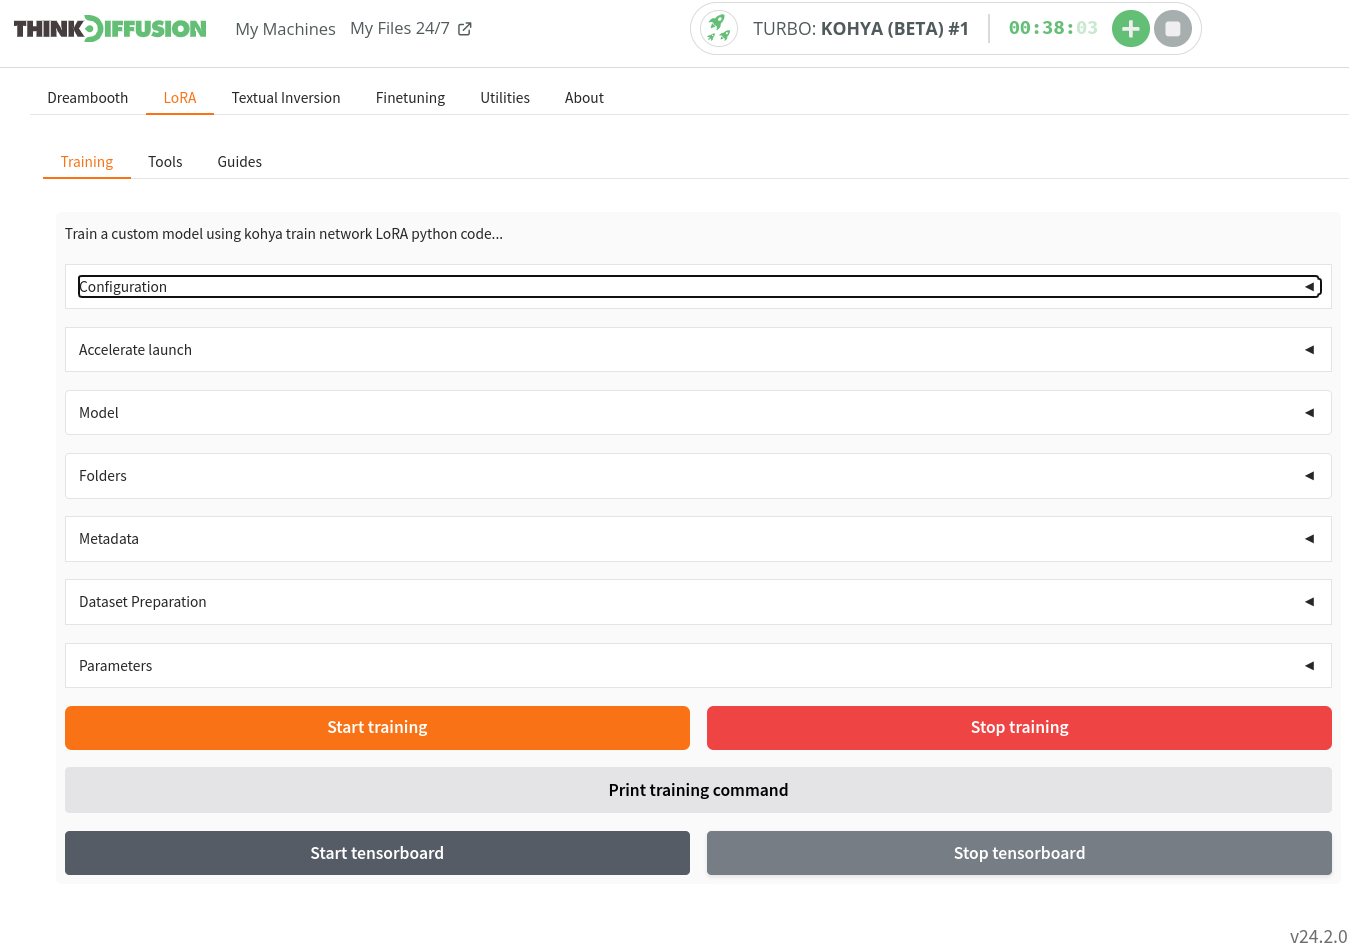
After completing BLIP captioning, navigate to the LoRA -> Training tab. Scroll down and expand the Dataset Preparation to start organizing your data.
- Under
Dreambooth/LoRA Folder preparationtab enter- Instance prompt:
Jenn - Class prompt:
Woman - Training Images (directory containing the training images):
/home/ubuntu/user_data/kohya/image - Repeats: Try starting with 5. Adjust with subsequent training if needed -use lower numbers (1-5) if you have many images and larger numbers 5+ if you have few images.
- Destination directory (Output folder):
/home/ubuntu/user_data/kohya/output
- Instance prompt:
- Click on
Prepare training data& it will copy all the data to the specifics folder in output directory you specified (i.e./kohya/output). - After preparing the data, simply click on
Copy info to respective fields.
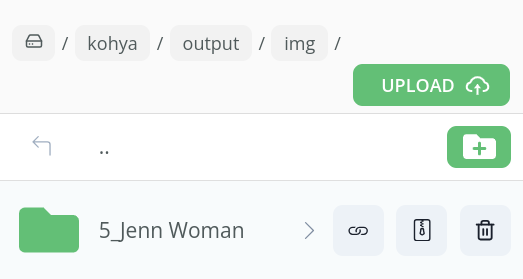
If you check in the /kohya/output/img folder, you should now see a new sub folder called 5_Jenn Woman. This essentially wraps the 5 repeats with your instance prompt of Jenn with the class prompt of Woman.
Load/Save Config file
These configuration files for Kohya are crucial to ensure successful training of your LoRA with Flux and to avoid potential Out Of Memory issues.
- 24 GB vRAM:
- Requires at least 24 GB of vRAM.
- Atleast 10 input images are required.
- Training completes in under 40 minutes using this configuration file.
- Images are trained at a resolution of 512 x 512.
- Output quality will be low.
Config file for 24gb vRam
- 48 GB vRAM:
- Requires at least 48 GB of vRAM.
- Atleast 20 input images are required.
- Images are trained at a resolution of 1024 x 1024.
- Training duration is approximately 1 hour and 45 minutes.
- Produces high-quality output.
Config file for 48gb vRam
- After uploading the desired configuration file in your file manager, scroll up to
Configurationsection.- Load/Save Config file: paste the link of your config file.
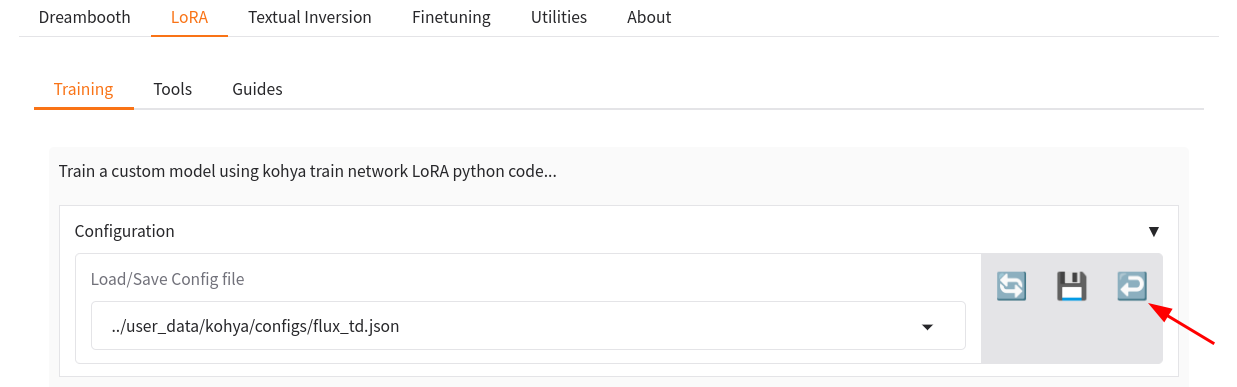
- After pasting the path simply click on the ↩️. It will load the config.
Start Training
You can now click Start Training to begin the process of training a LoRA
Checking your progress
- Please note that there is no indicator bar on the front end of Kohya (yet), so you have to go to the logs folder to check the *.txt file.
- Click on that text file, which will open in a new browser, to see the progress. You can simply hit refresh on your browser (F5 on a PC) to keep refreshing this.
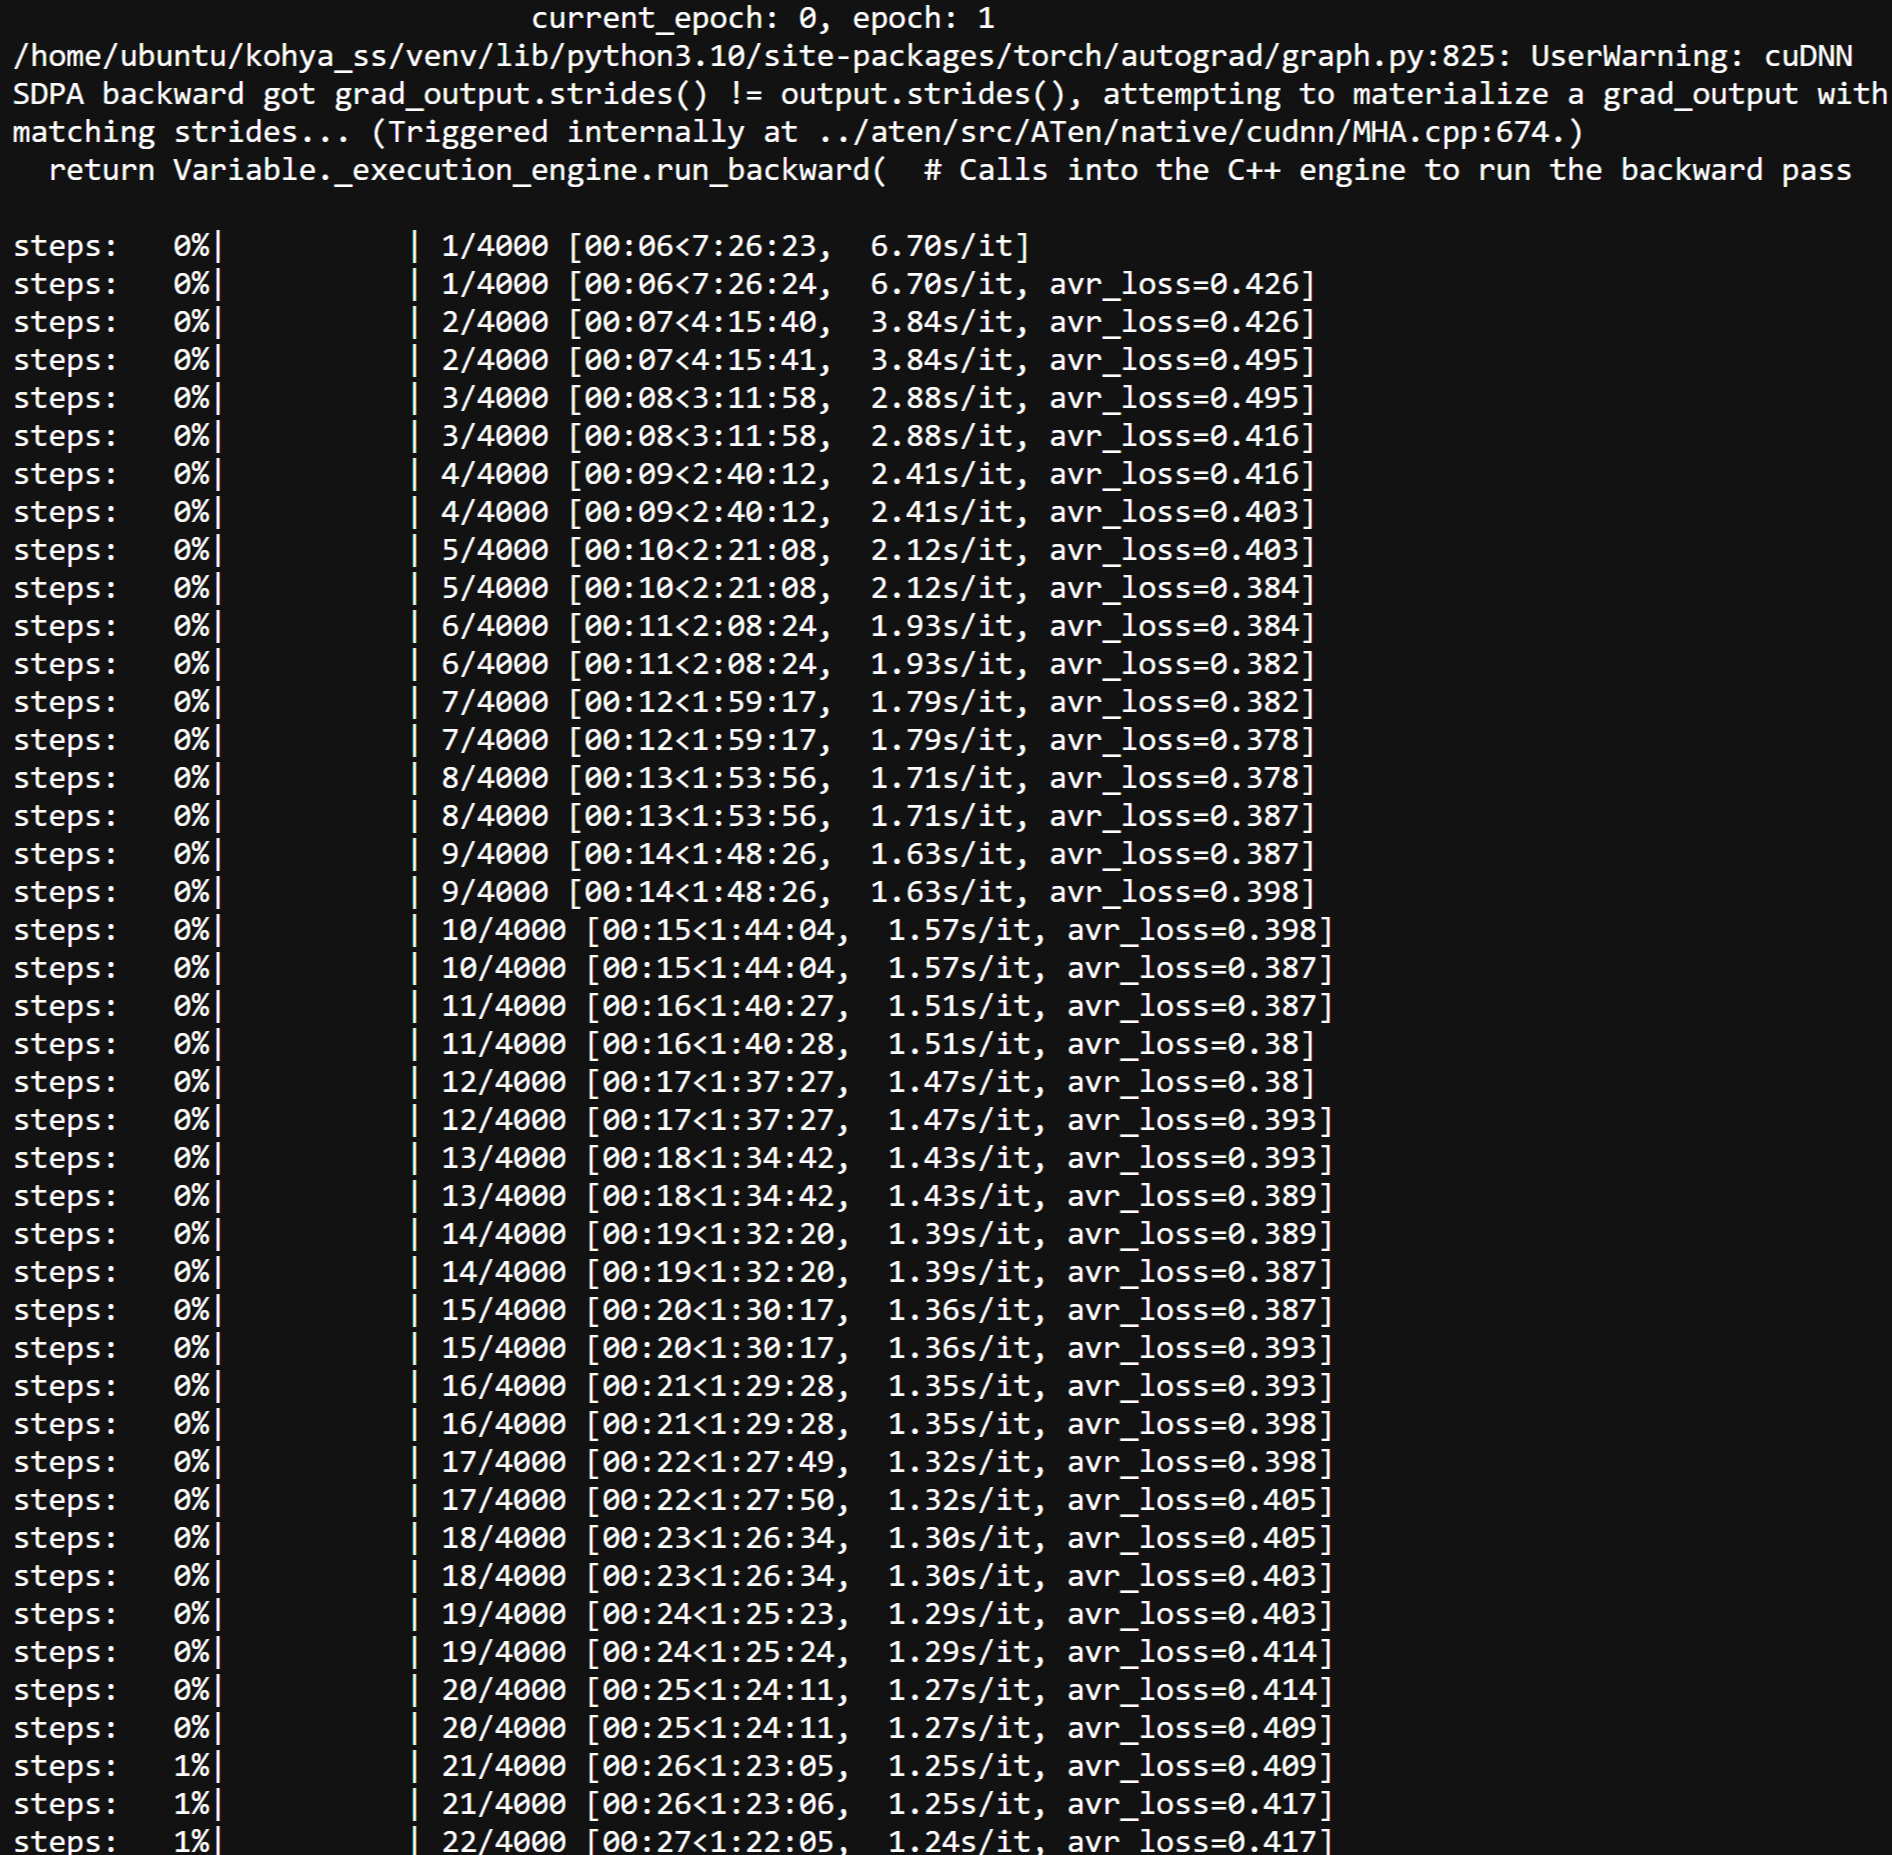
As you can see below, our training has started:-
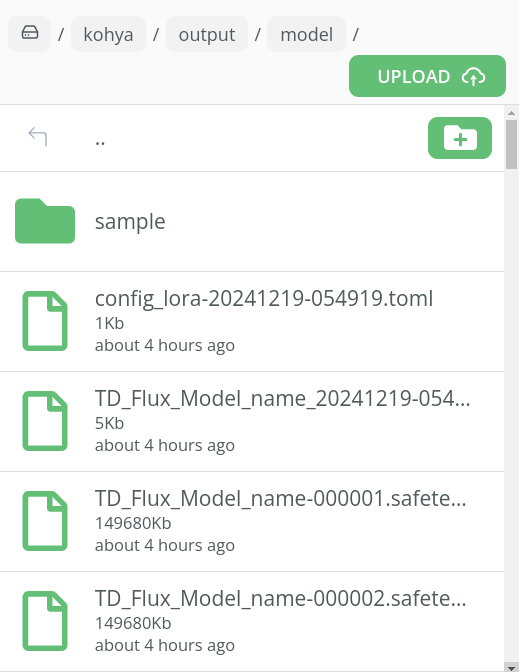
Once the training has completed you will be able to see your .safetensors files in the following folder:-
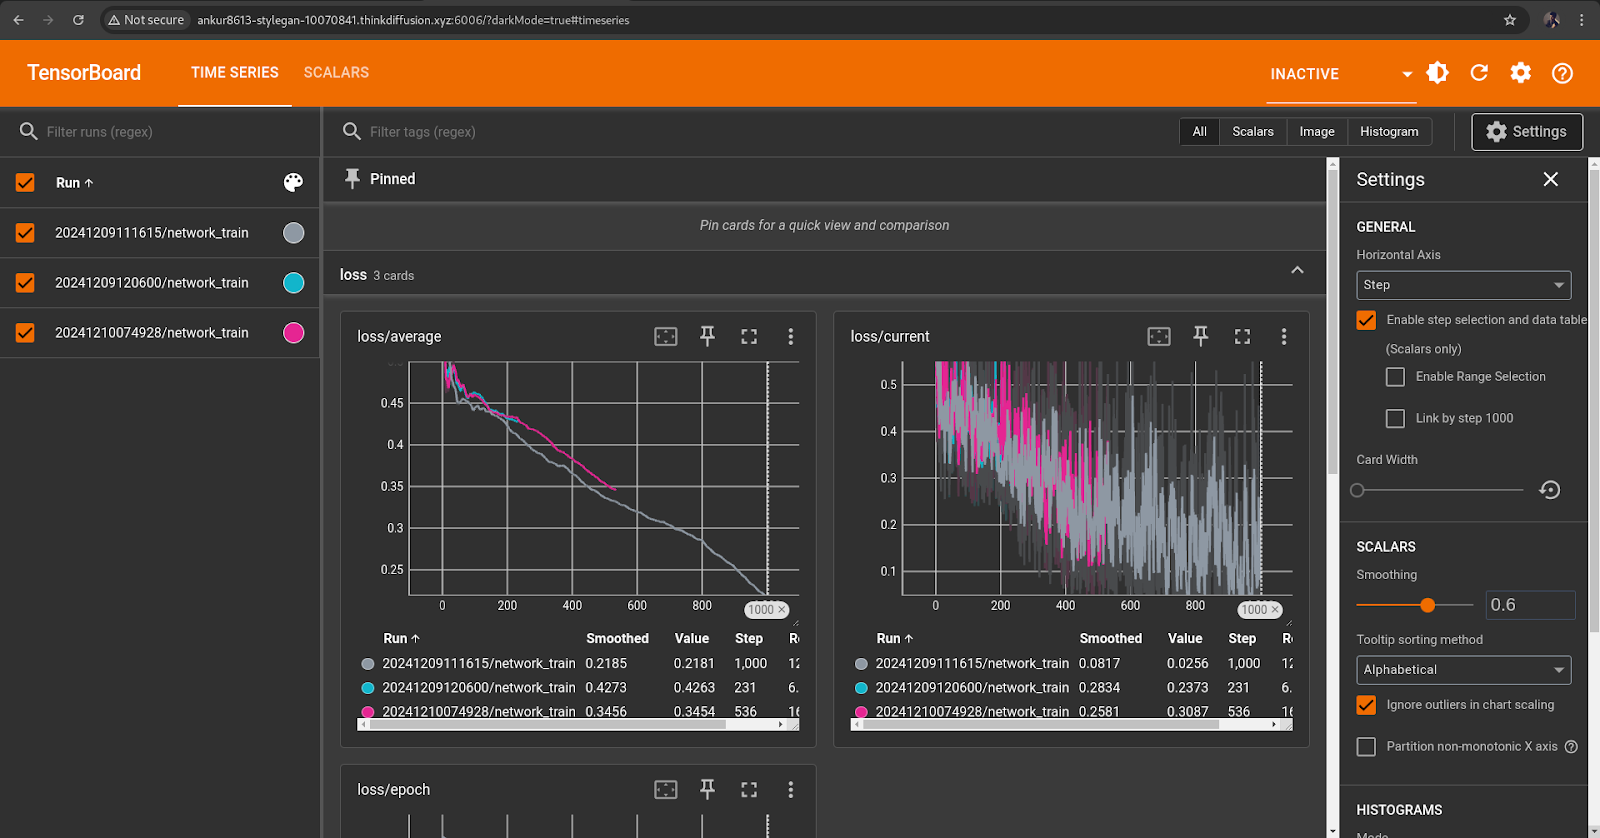
Tensorboard
TensorBoard is a visualization tool provided by TensorFlow that allows you to monitor and understand the training process of machine learning models. It provides insights into the model's performance, data flow, and optimization processes through interactive and visually rich dashboards.
- Scroll at the bottom and click on Start Tensorboard. (Make sure you have folders created in the
/kohya/output/logsfolder, otherwise Tesnorboard won't start). - After starting TensorBoard, click on the TensorBoard icon to open the interface and visualize your logs.

Trying out your new LoRA in ComfyUI
- Firstly, we need to download our newly created LoRA's. The first is 20% of the training, the second is 40% of the training etc...
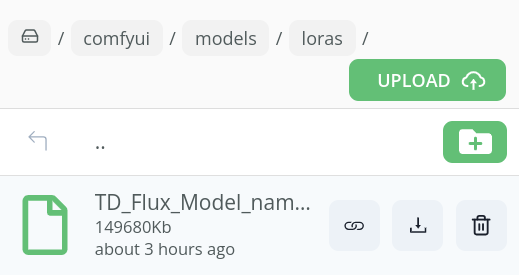
- We then need to launch an ComfyUI machine and upload our LoRA's into the
../user_data/comfyui/models/Lorafolder
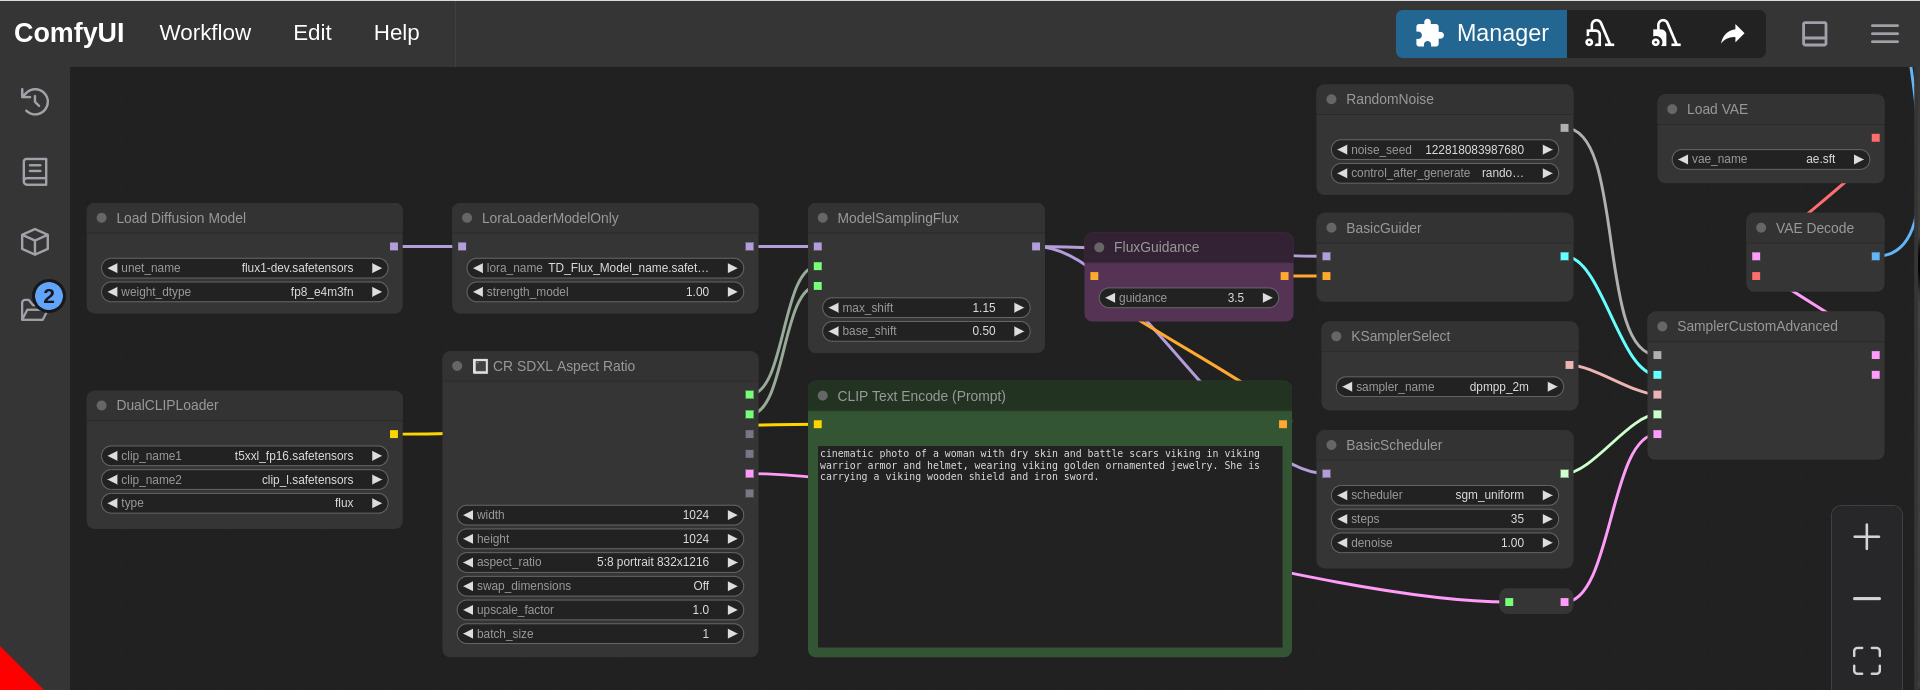
To test the things out, head over to the ComfyUI, and drop the basic flux-lora workflow & enter the following values:-
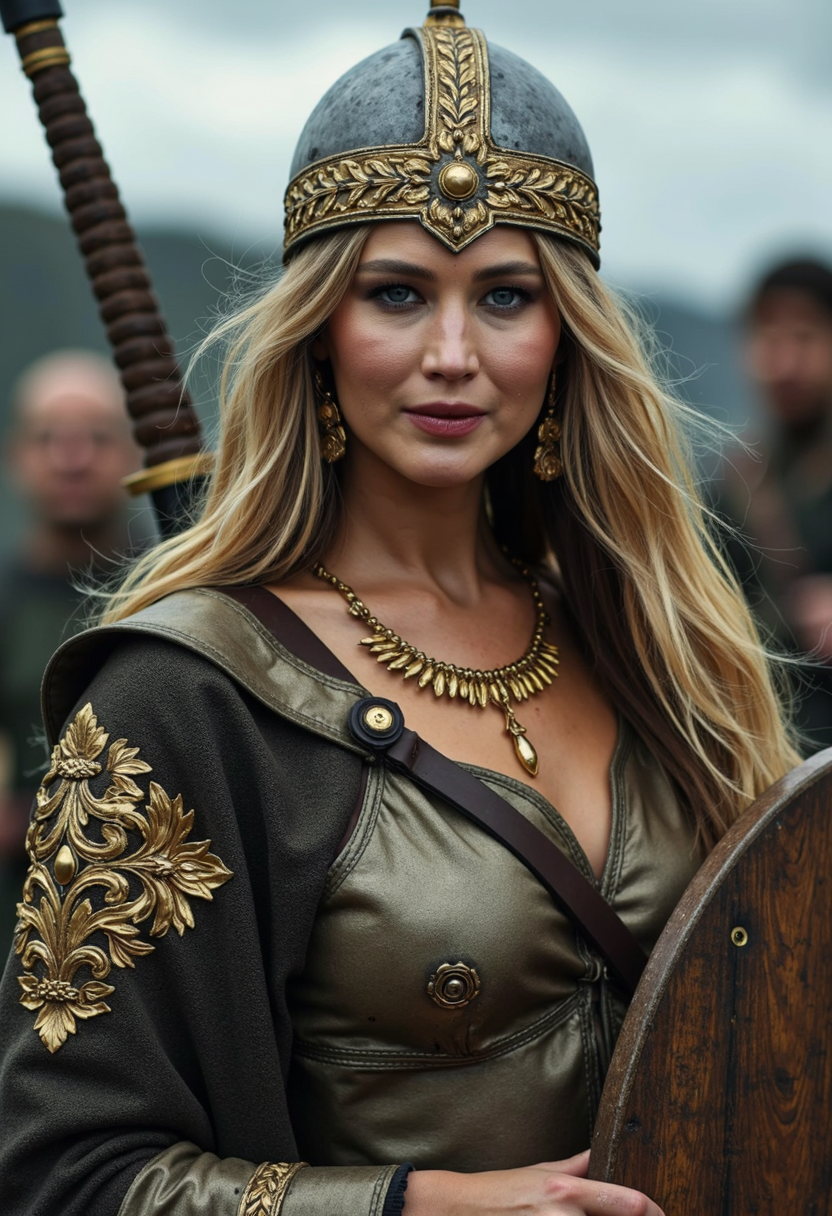
- Positive prompt: cinematic photo of a woman with dry skin and battle scars viking in viking warrior armor and helmet, wearing viking golden ornamented jewelry. She is carrying a viking wooden shield and iron sword.
- VAE: ae.sft
- Diffusion model: flux1-dev
- To activate LoRA, simply upload your LoRA in comfyui/models/loras folder
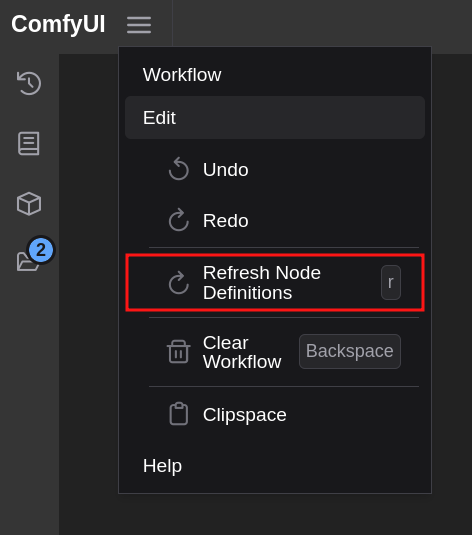
- Head over to the main screen and and click on Edit & select Refresh Node Definitions.
- Select your desired LoRA model in LoraLoderModelOnly node.
- Simply hit Queue.
We can see our LoRA being applied to the generated image, note that we did not mention Jennifer Lawrence in our prompt:-
Glossary
There are a lot of fields and settings that we have simply entered values for above without trying to explain what they do. You could really go into depth to try and explain each one, so for the purposes of this tutorial, I merely provided some initial values to get you up and running. To fully understand LoRA training with Kohya, would take much more extensive research and trial and error. However, let's try and get a little into the technicalities here for those who are brave enough to deep dive in!
- (1) Train Batch Size: As we are using ThinkDiffusion we can set the batch size to 2, but if you are on a lower end GPU, then you should leave this as 1. The batch size determines how many images the model processes simultaneously. The higher the batch size the faster the training will be but it will be more demanding on your GPU. Please note that you can sometimes have an out of memory error when setting the batch size to 2. If you encounter this, you should lower the batch size to 1
- (2) Epochs: You can experiment with this figure but as a rule the higher the number of Epochs, the more chance of overtraining the model. Epoch's represent a cycle of training. We selected 20 Epochs in our settings, so this will result in 2 safetensors files at the end of the training. The 1st will be 50% of the training, the 2nd will be 100% of the training. You can experiment which LoRA turned out the best.
- (3) Steps: This number is not selected directly but comes as a result of some of your settings. Steps are calculated by the number of images x the number of repeats x the number of Epoch's For example, in this tutorial we had 23 images, 5 repeats and 5 epochs, resulting in 575 steps. I usually try to end up at around 2k - 3k steps when training a LoRA.
- (4) Save every n Epoch's: This is useful to see if you are undertraining or overtraining your LoRA. If we are running 5 Epoch's and we save every 1 Epoch then a LoRA will be created at the end of each Epoch. In essence, we will have 5 LoRA's that are created at the end of each Epoch cycle
- (5) Caption Extension: Use the '.txt' extension for your captions. This is necessary as Kohya now requires captioned images to avoid warnings.
- (6) Mixed Precision: Set your training precision to 'bf16'. bf16 precision is more demanding on your Vram, and it can speed up machine learning algorithms.
- (7) Save Precision: Use 'bf16' for saving model checkpoints, with the same considerations as for Mixed Precision mentioned above.
- (8) Learning Rate: Set to between 0.0001 and 0.0003 - Typically, the higher the learning rate, the sooner you will finish training the LoRA
- (9) Enable Buckets: Keep this option checked, especially if your images vary in size. This is a very useful feature in Kohya that means we can have different resolutions of images and there is no need to crop them. Essentially Kohya will drop your images into separate buckets of the same sizes. (However, you do not know how Kohya will crop the images, so I prefer to crop my images manually as mentioned in the guide)
- (10) Network Rank: This parameter influences the AI's expressiveness. A higher value allows for more creativity. This can typically be set between 16 to 256 as a rule of thumb. The higher the network rank, the bigger the file size of the LoRA will be. However, a larger network rank will also help the LoRA retain more details to improve the quality of the images
- (11) Network Alpha: Set Network Alpha to approximately half of the Network Rank value. This parameter acts as a creativity regulator.
- (12) Repeats: This is essentially the number of times each image in your dataset is cycled over. Increasing the number of repeats will increase the number of steps and therefore the overall training time.
Let's get training!
Any of our workflows including the above can run on a local version of SD but if you’re having issues with installation or slow hardware, you can try any of these workflows on a more powerful GPU in your browser with ThinkDiffusion.
Member discussion