
Sometimes a single image can say more than a thousand words-but what if it could actually tell a story, move, and even express emotion? In a world where digital content is everywhere, the idea of breathing life into a still photo feels like something out of a sci-fi movie. Imagine your favorite snapshot suddenly breaking into a smile, mouthing a message, or even singing a tune. If you’ve ever wondered what it would be like to see your memories in motion, you’re in for a treat-because the next wave of AI-powered storytelling is about to turn your images into living, moving stories.
FantasyTalking Architecture Overview
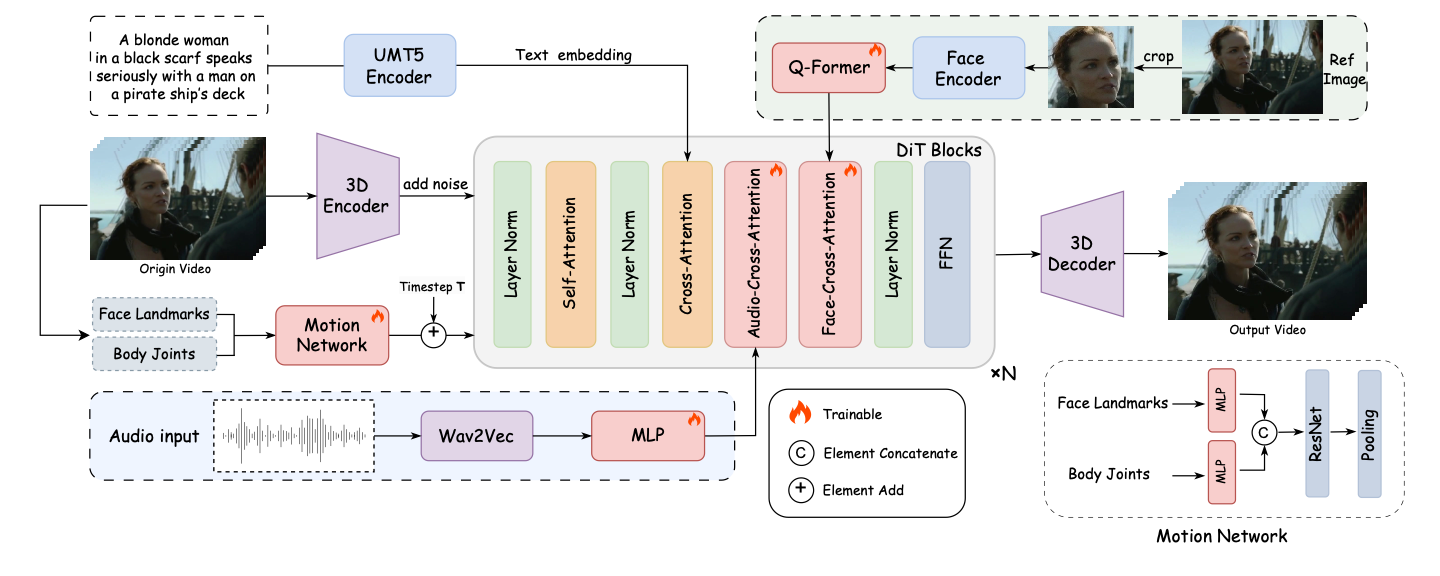
FantasyTalking maintains the subject's identity with remarkable accuracy in the generated video. Built on the Wan2.1 video diffusion transformer model, it transforms a single photo into a realistic talking portrait through two main steps:
- It synchronizes audio with lip movements, facial expressions, and body motions to create natural animations
- A dedicated motion network controls the intensity of facial and body movements, allowing for customizable expressiveness
What is Fantasy Talking? Key Features
FantasyTalking is a state-of-the-art AI model that transforms a single static image into a highly realistic, expressive talking portrait video, complete with synchronized lip movements, facial expressions, and even full-body or half-body motions-all driven by an audio track and optional text prompts.
Key features include:
- Support for various avatar styles
- Controllable motion intensity
- Robust identity preservation
- Animation of faces, body gestures, and dynamic backgrounds
FantasyTalking vs LatentSync: What Makes the Difference
FantasyTalking doesn't just synchronize lips—it animates the entire face, body, and background. Through simple prompts, you can control the expressiveness and energy of your avatar. It excels at preserving subject identity while providing flexibility to create dynamic, emotionally rich talking portraits beyond basic lip synchronization.
How to Run FantasyTalking in ComfyUI
Installation guide
Verified to work on ThinkDiffusion Build: May 17, 2025
ComfyUI v0.3.34 with wan2.1_i2v_720p_14B_fp8_e4m3fn, fantasytalking_fp16 and facebook/wav2vec2-base-960h model support.
Note: We specify the build date because ComfyUI and custom node versions updated after this date may change the behavior or outputs of the workflow.
Custom Nodes
If there are red nodes in the workflow, it means that the workflow lacks the certain required nodes. Install the custom nodes in order for the workflow to work.
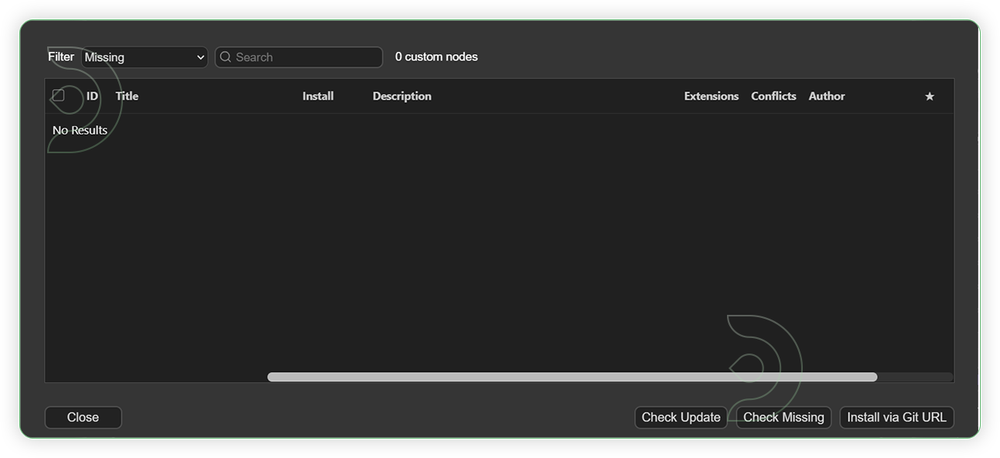
- Go to ComfyUI Manager > Click Install Missing Custom Nodes
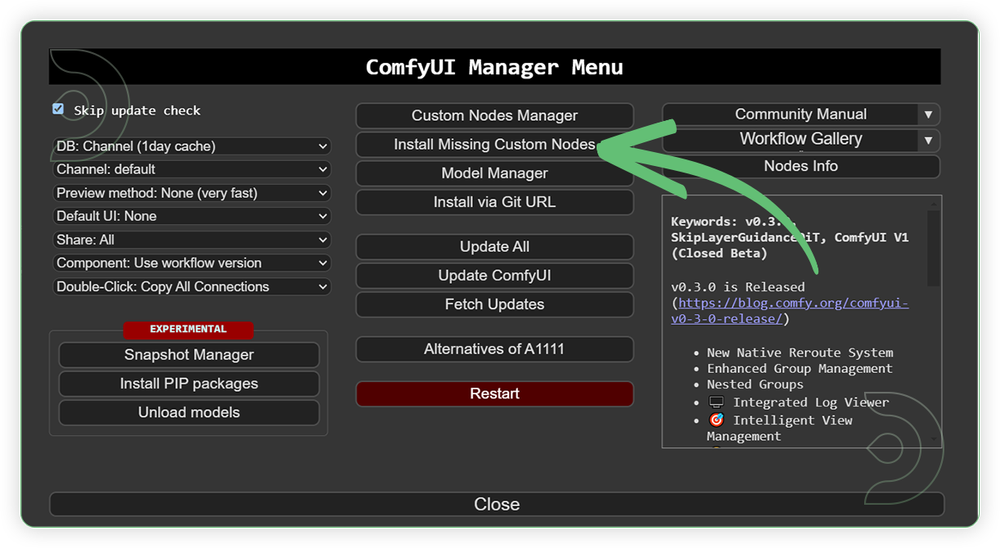
- Check the list below if there's a list of custom nodes that needs to be installed and click the install.
Models
For this guide you'll need to download these 6 recommended models. 5 models needs to be manually and 1 model is auto-download.
2. wan_2_1_VAE_fp32.safetensors
3. fantasytalking_fp16.safetensors
4. umt5-xxl-enc-bf16.safetensors
5. clip_vision_h.safetensors
6. facebook/wav2vec2-base-960h
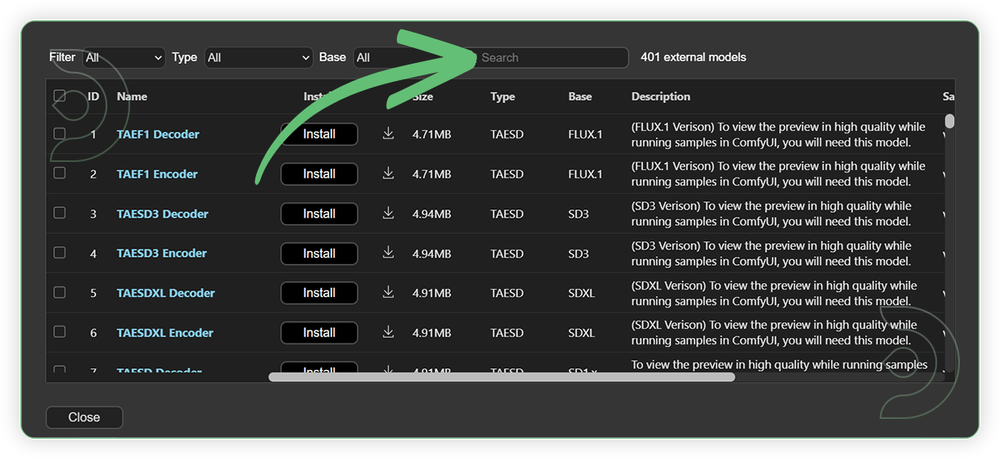
- Go to ComfyUI Manager > Click Model Manager
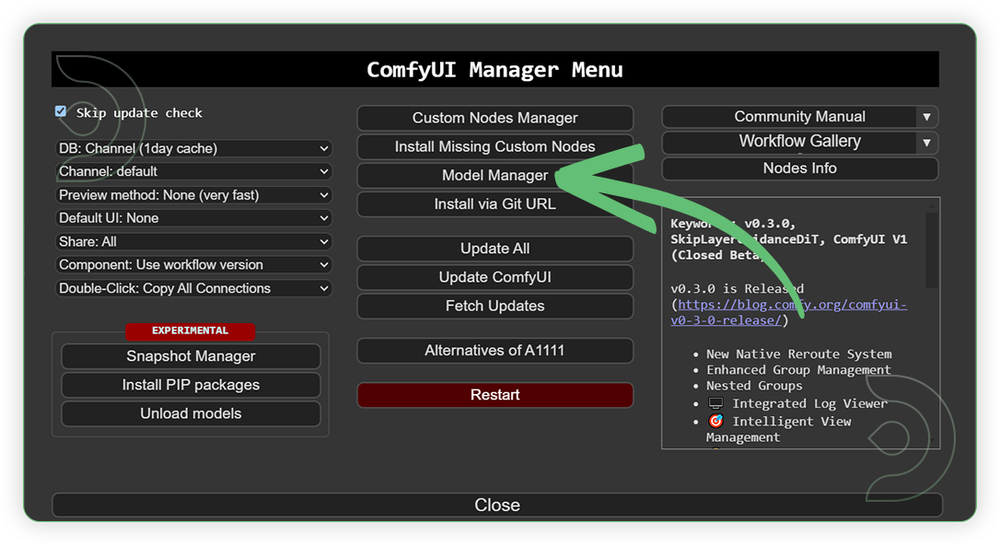
- Search for the models above and when you find the exact model that you're looking for, click install, and make sure to press refresh when you are finished.
Optional Model Path Source
Some of these models may not be available in the model manager.
You could also use the model path source instead: by pasting the model's link address into ThinkDiffusion MyFiles using upload URL.
| Model Name | Model Link Address | ThinkDiffusion Upload Directory |
|---|---|---|
wan2.1_i2v_720p_14B_fp8_e4m3fn.safetensors |
.../comfyui/models/diffusion_models/ |
|
| wan_2_1_VAE_fp32.safetensors | .../comfyui/models/vae/ |
|
| fantasytalking_fp16.safetensors | .../comfyui/models/diffusion_models/ |
|
| umt5-xxl-enc-bf16.safetensors | .../comfyui/models/text_encoders/ |
|
| clip_vision_h.safetensors | .../comfyui/models/clip_vision/ |
|
| facebook/wav2vec2-base-960h |
Auto Download |
Auto Download |
Step-by-step Workflow Guide
This workflow was pretty easy to set up and runs well from the default settings. Here are a few steps where you might want to take extra note.
| Steps | Recommended Nodes |
|---|---|
| 1. Set the Input You can set frames up to 10 sec video (max 250 frames). The higher frames the longer generation time will be process. Input an audio up to 30 sec only. Use an input image with face. Any face angle would suffice. |
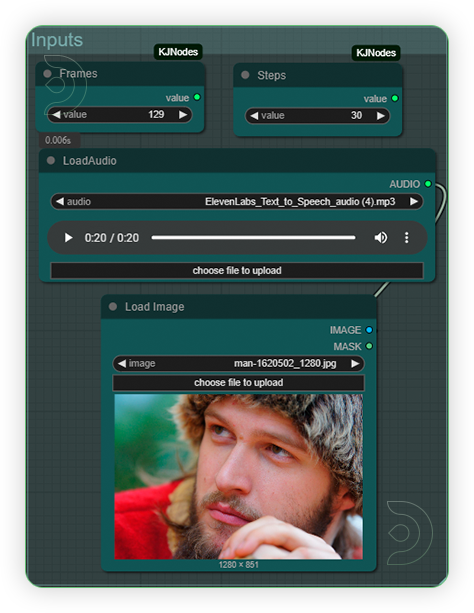 |
| 2. Set the Models Set the models as shown in the reference images |
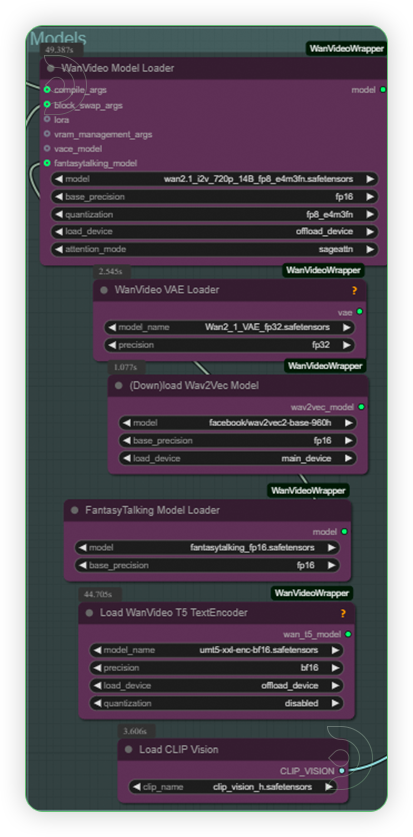 |
| 3. Write Prompt Describe both the image and the desired action.Take note that animating action needs a higher CFG and exact unquantized model. |
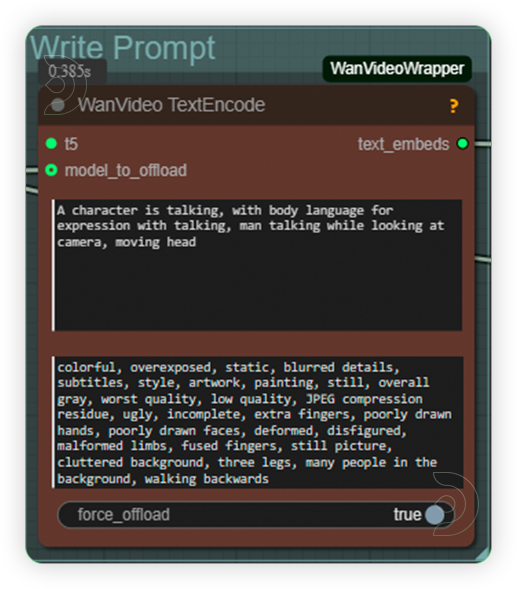 |
| 4. Check Sampling Check the sampling settings on the image. For more dynamic body movements,set the CFG to higher than 10 but it may appear an artifacts. Higher CFG and using unquantized model works best only in 60GB VRAM. |
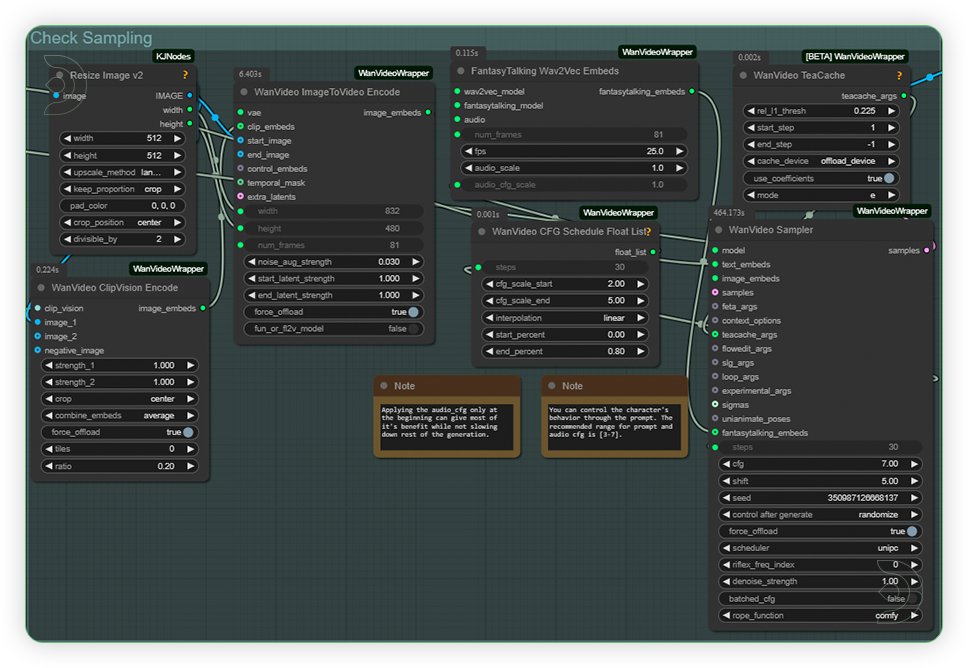 |
| 5. Check Output |
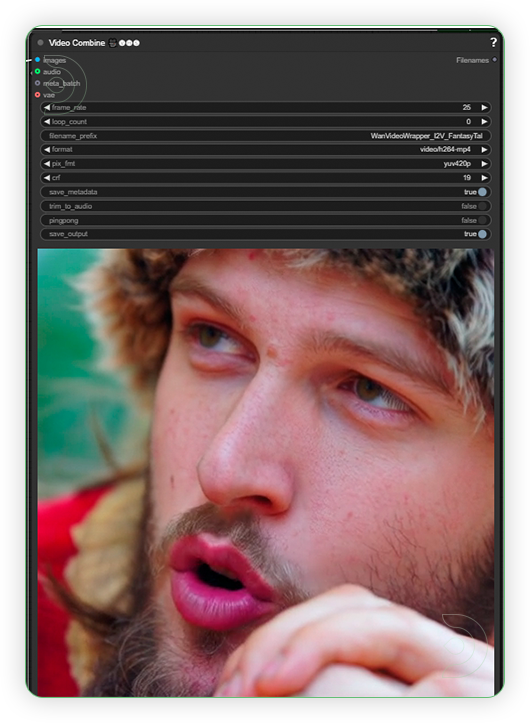 |
Examples
If you’re having issues with installation or slow hardware, you can try any of these workflows on a more powerful GPU in your browser with ThinkDiffusion.
Stay tuned for our upcoming Text-to-Speech workflow tutorial!
Member discussion