
Outpaint Your Videos with Wan2.1 VACE!
Ever wished you could magically expand your videos to reveal what’s just out of frame - like adding more scenery, characters, or even special effects?
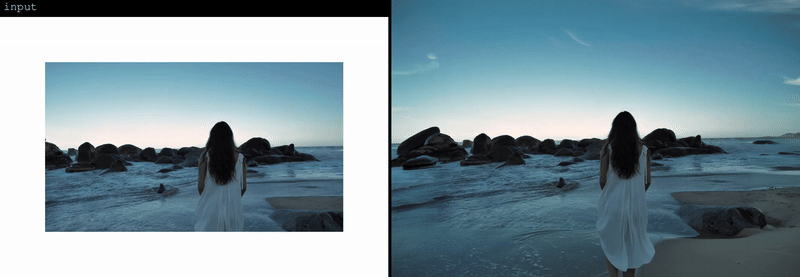
This cutting-edge AI model lets you effortlessly extend the edges of your videos, filling in new, seamless content that matches your original footage. Whether you’re a filmmaker, content creator, or just someone who loves to play with video magic, Wan VACE video outpainting invites you to break free from the limits of the frame and explore endless creative possibilities.
What is VACE Video Outpainting?
Wan VACE video outpainting lets you expand your videos beyond their original edges, adding new, realistic content around the edges of each frame. Imagine you have a video that’s cropped too tightly—maybe you want to see more of the background or add extra scenery. This process keeps everything smooth and natural, so your expanded video feels just like the real thing. In short, Wan VACE video outpainting makes your videos bigger and more immersive, with no complicated editing required.
Ready to see what’s beyond the edge? Let’s dive in!
How to Run Wan2.1 VACE Video Outpainting
Installation guide
Verified to work on ThinkDiffusion Build: June 3, 2025
ComfyUI v0.3.39 with the use Wan 14B T2V and 14B VACE model
Note: We specify the build date because ComfyUI and custom node versions updated after this date may change the behavior or outputs of the workflow.
Custom Nodes
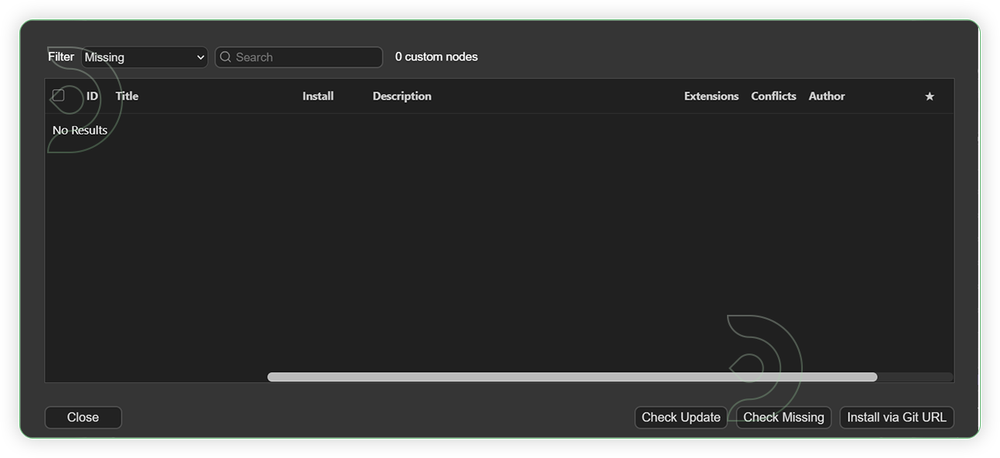
If there are red nodes in the workflow, it means that the workflow lacks the certain required nodes. Install the custom nodes in order for the workflow to work.
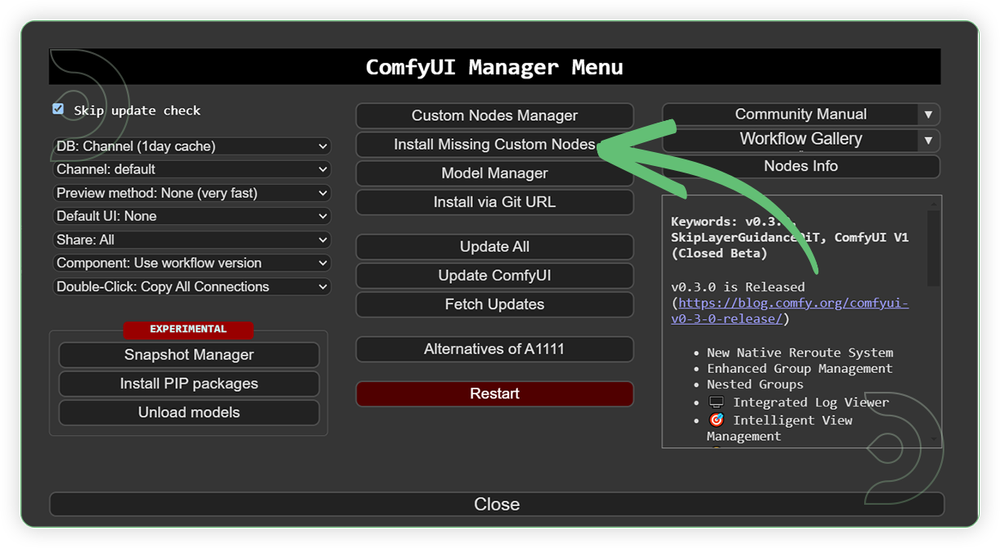
- Go to the ComfyUI Manager > Click Install Missing Custom Nodes
- Check the list below if there's a list of custom nodes that needs to be installed and click the install.
Models
For this guide you'll need to download these 4 recommended models.
2. Wan2_1-VACE_module_14B_fp8_e4m3fn.safetensors
3. Wan2_1_VAE_bf16.safetensors
4. umt5-xxl-enc-bf16.safetensors
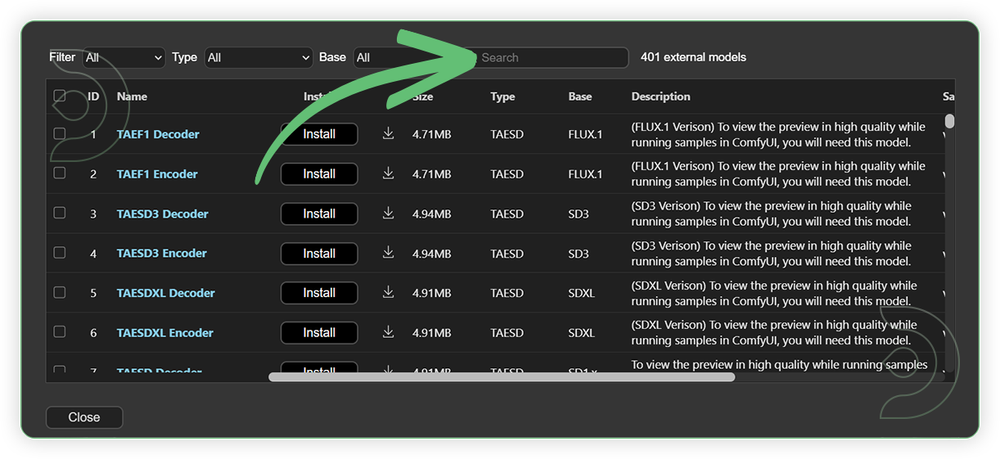
- Go to ComfyUI Manager > Click Model Manager
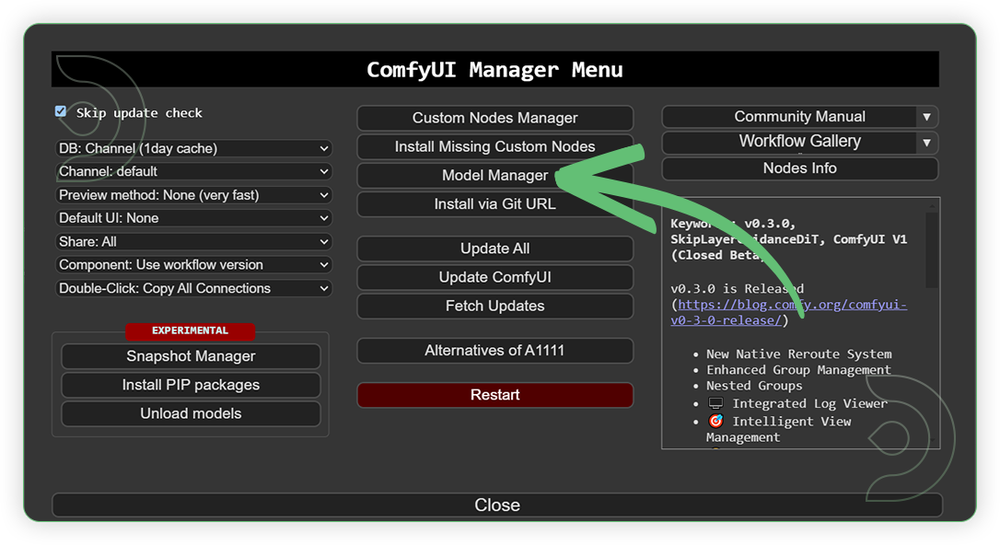
- Search for the models above and when you find the exact model that you're looking for, click install, and make sure to press refresh when you are finished.
Optional Model Path Source
Some of these models may not be available in the model manager.
You could also use the model path source instead: by pasting the model's link address into ThinkDiffusion MyFiles using upload URL.
| Model Name | Model Link Address | ThinkDiffusion Upload Directory |
|---|---|---|
wan2.1_t2v_14B_fp8_e4m3fn.safetensors |
.../comfyui/models/diffusion_models/ |
|
| Wan2_1-VACE_module_14B_fp8_e4m3fn.safetensors | .../comfyui/models/diffusion_models/ |
|
| Wan2_1_VAE_bf16.safetensors | .../comfyui/models/vae/ |
|
| umt5-xxl-enc-bf16.safetensors | .../comfyui/models/text_encoders/ |
Step-by-step Workflow Guide
This workflow was pretty easy to set up and runs well from the default settings. Here are a few steps where you might want to take extra note.
| Steps | Recommended Nodes |
|---|---|
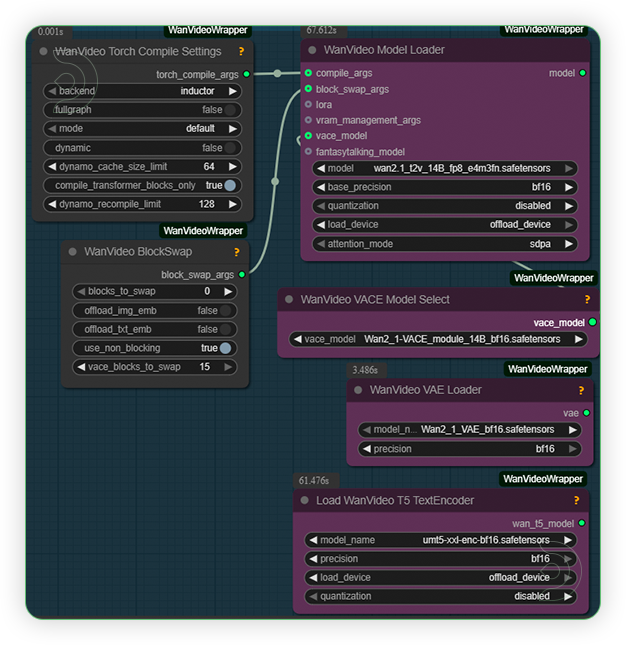
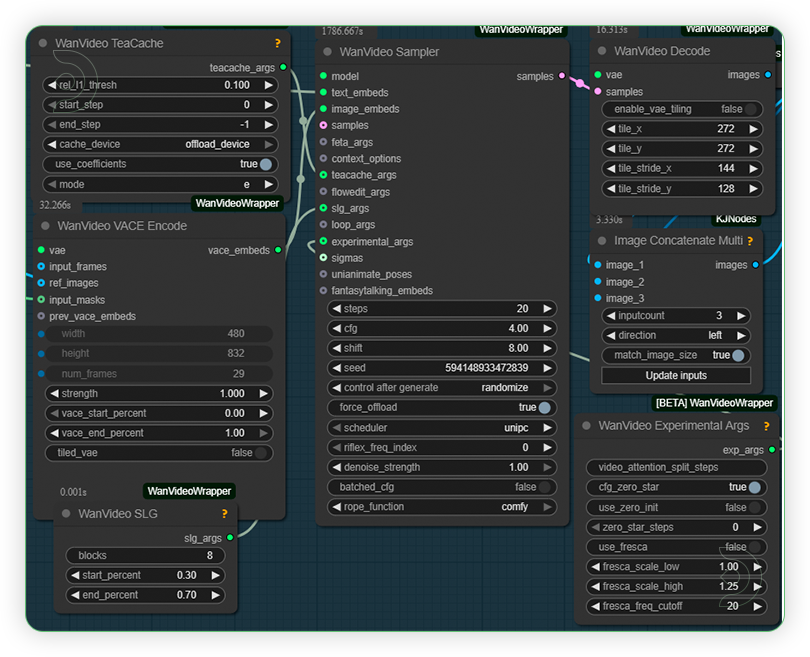
| 1. Set the Models Set the models as seen on the image. 14B base model must be paired with 14B VACE model only |
 |
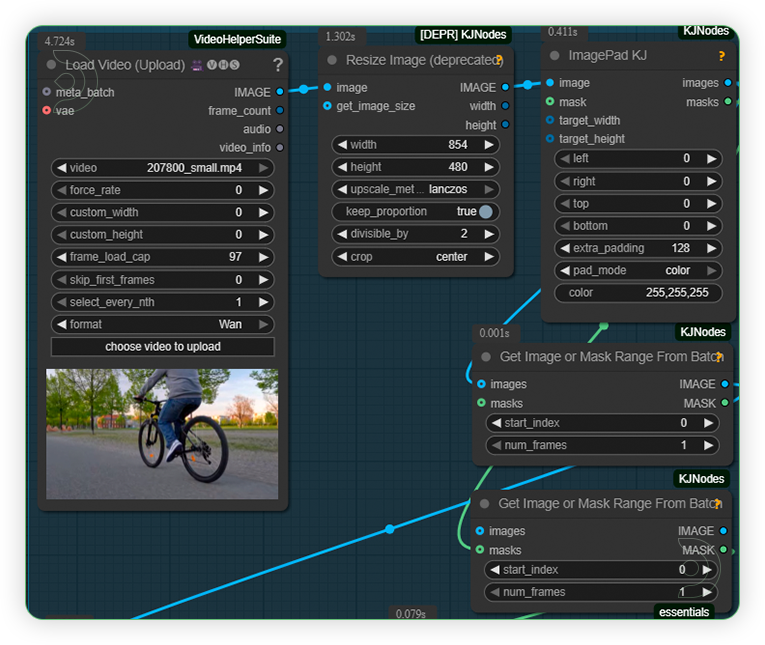
| 2. Load a Video Load the video with resolution under 1024. If you want 1:1, resize settings must be 512x512. If you want a 16:9, resize settings must set to 854x480 and enable keep proportion and crop center. Frames should under 100 |
 |
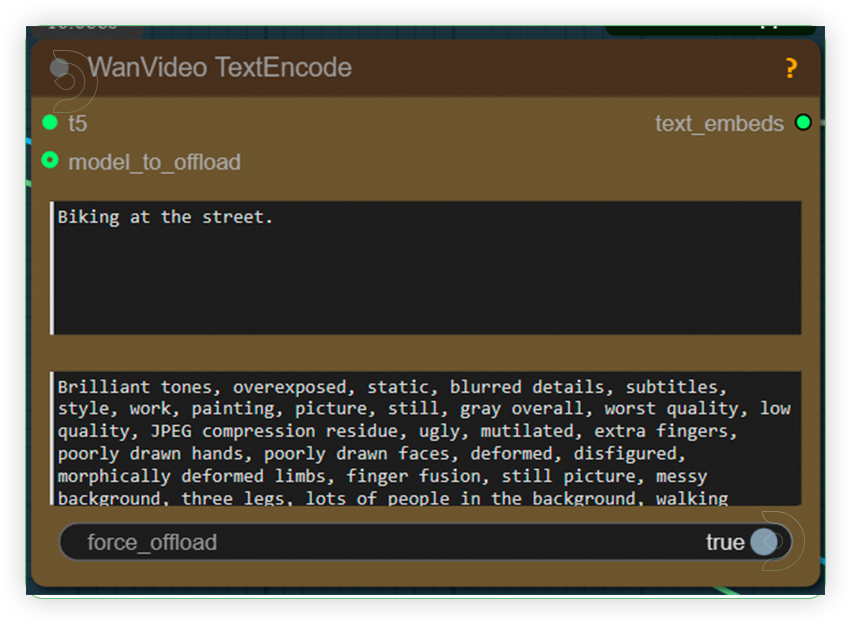
| 3. Write a Prompt Write a simple prompt of what is shown in the image. |
 |
| 4. Check the Sampling Check the settings and set it based on the image. |
 |
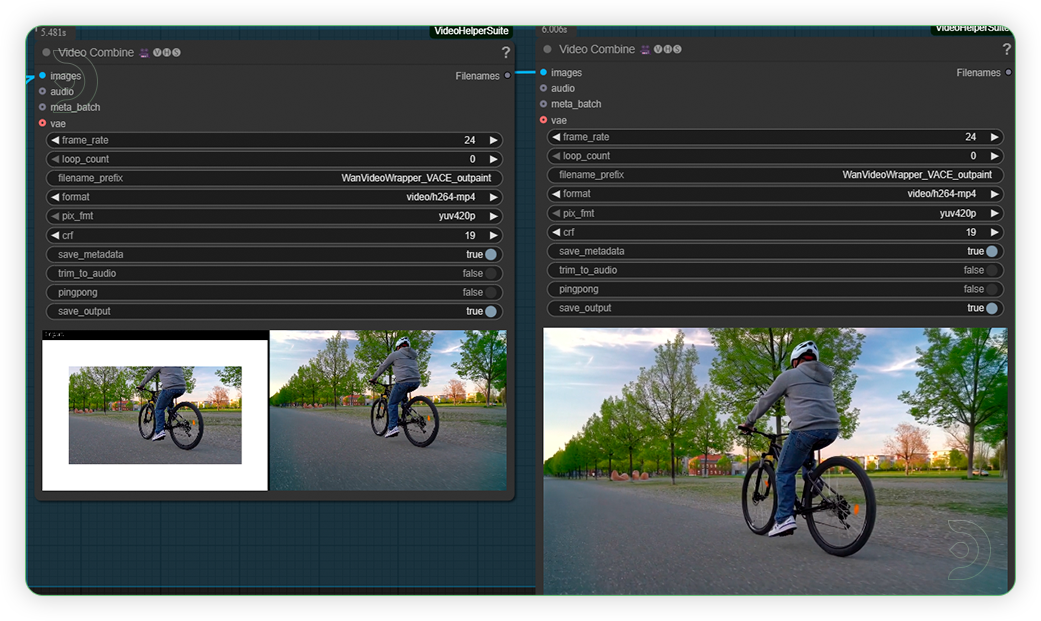
| 5. Check the Generated Output |
 |
Examples
If you’re having issues with installation or slow hardware, you can try any of these workflows on a more powerful GPU in your browser with ThinkDiffusion.
Stay tuned for our upcoming Wan workflow tutorial that uses VACE!
Member discussion