
Today we're going to deep dive into Deforum, together with ControlNet to create some awesome looking animations using an existing source video!
What I love about this workflow combination is that ControlNet and OpenPose together reign in the art so that they're not changing drastically frame by frame, and avoids that trademark flicker that Stable Diffusion animations sometimes can be associated with. Let's get started!
Setting up
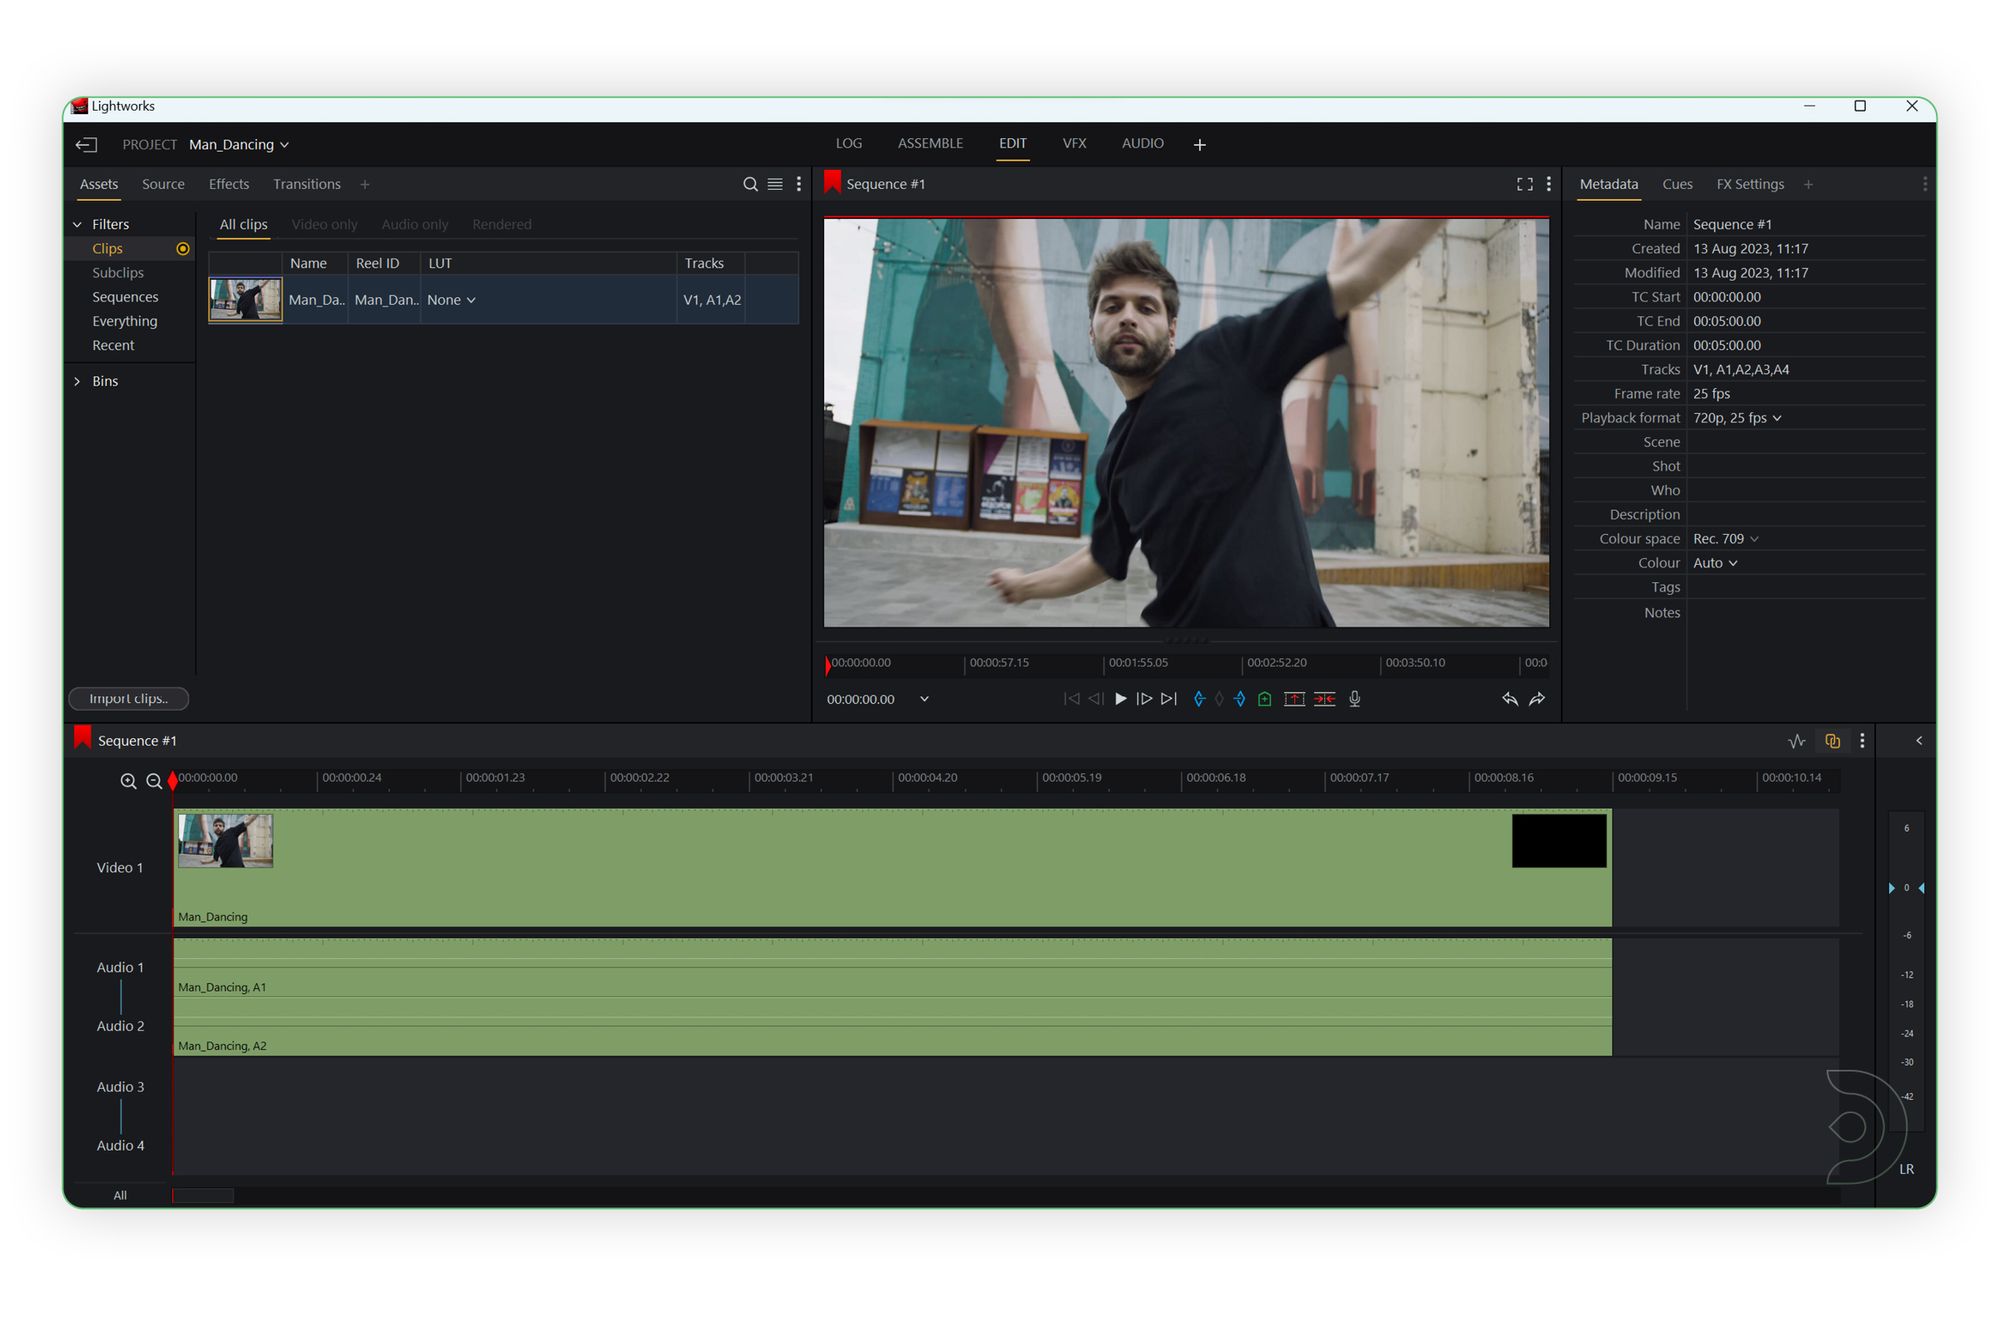
The first thing we'll do is extract the first frame of our video. I personally use lightworks as the video editing tool but you can use any video editing software to do this. No disrespect to our Adobe overlords.
We can extract the first frame by importing our video file and then drag it onto the sequence timeline and extract your image
Before we start generating there are is a known issue with some extensions causing ControlNet to not work within Deforum. To solve this, go to the Extensions tab and disable the following extensions:
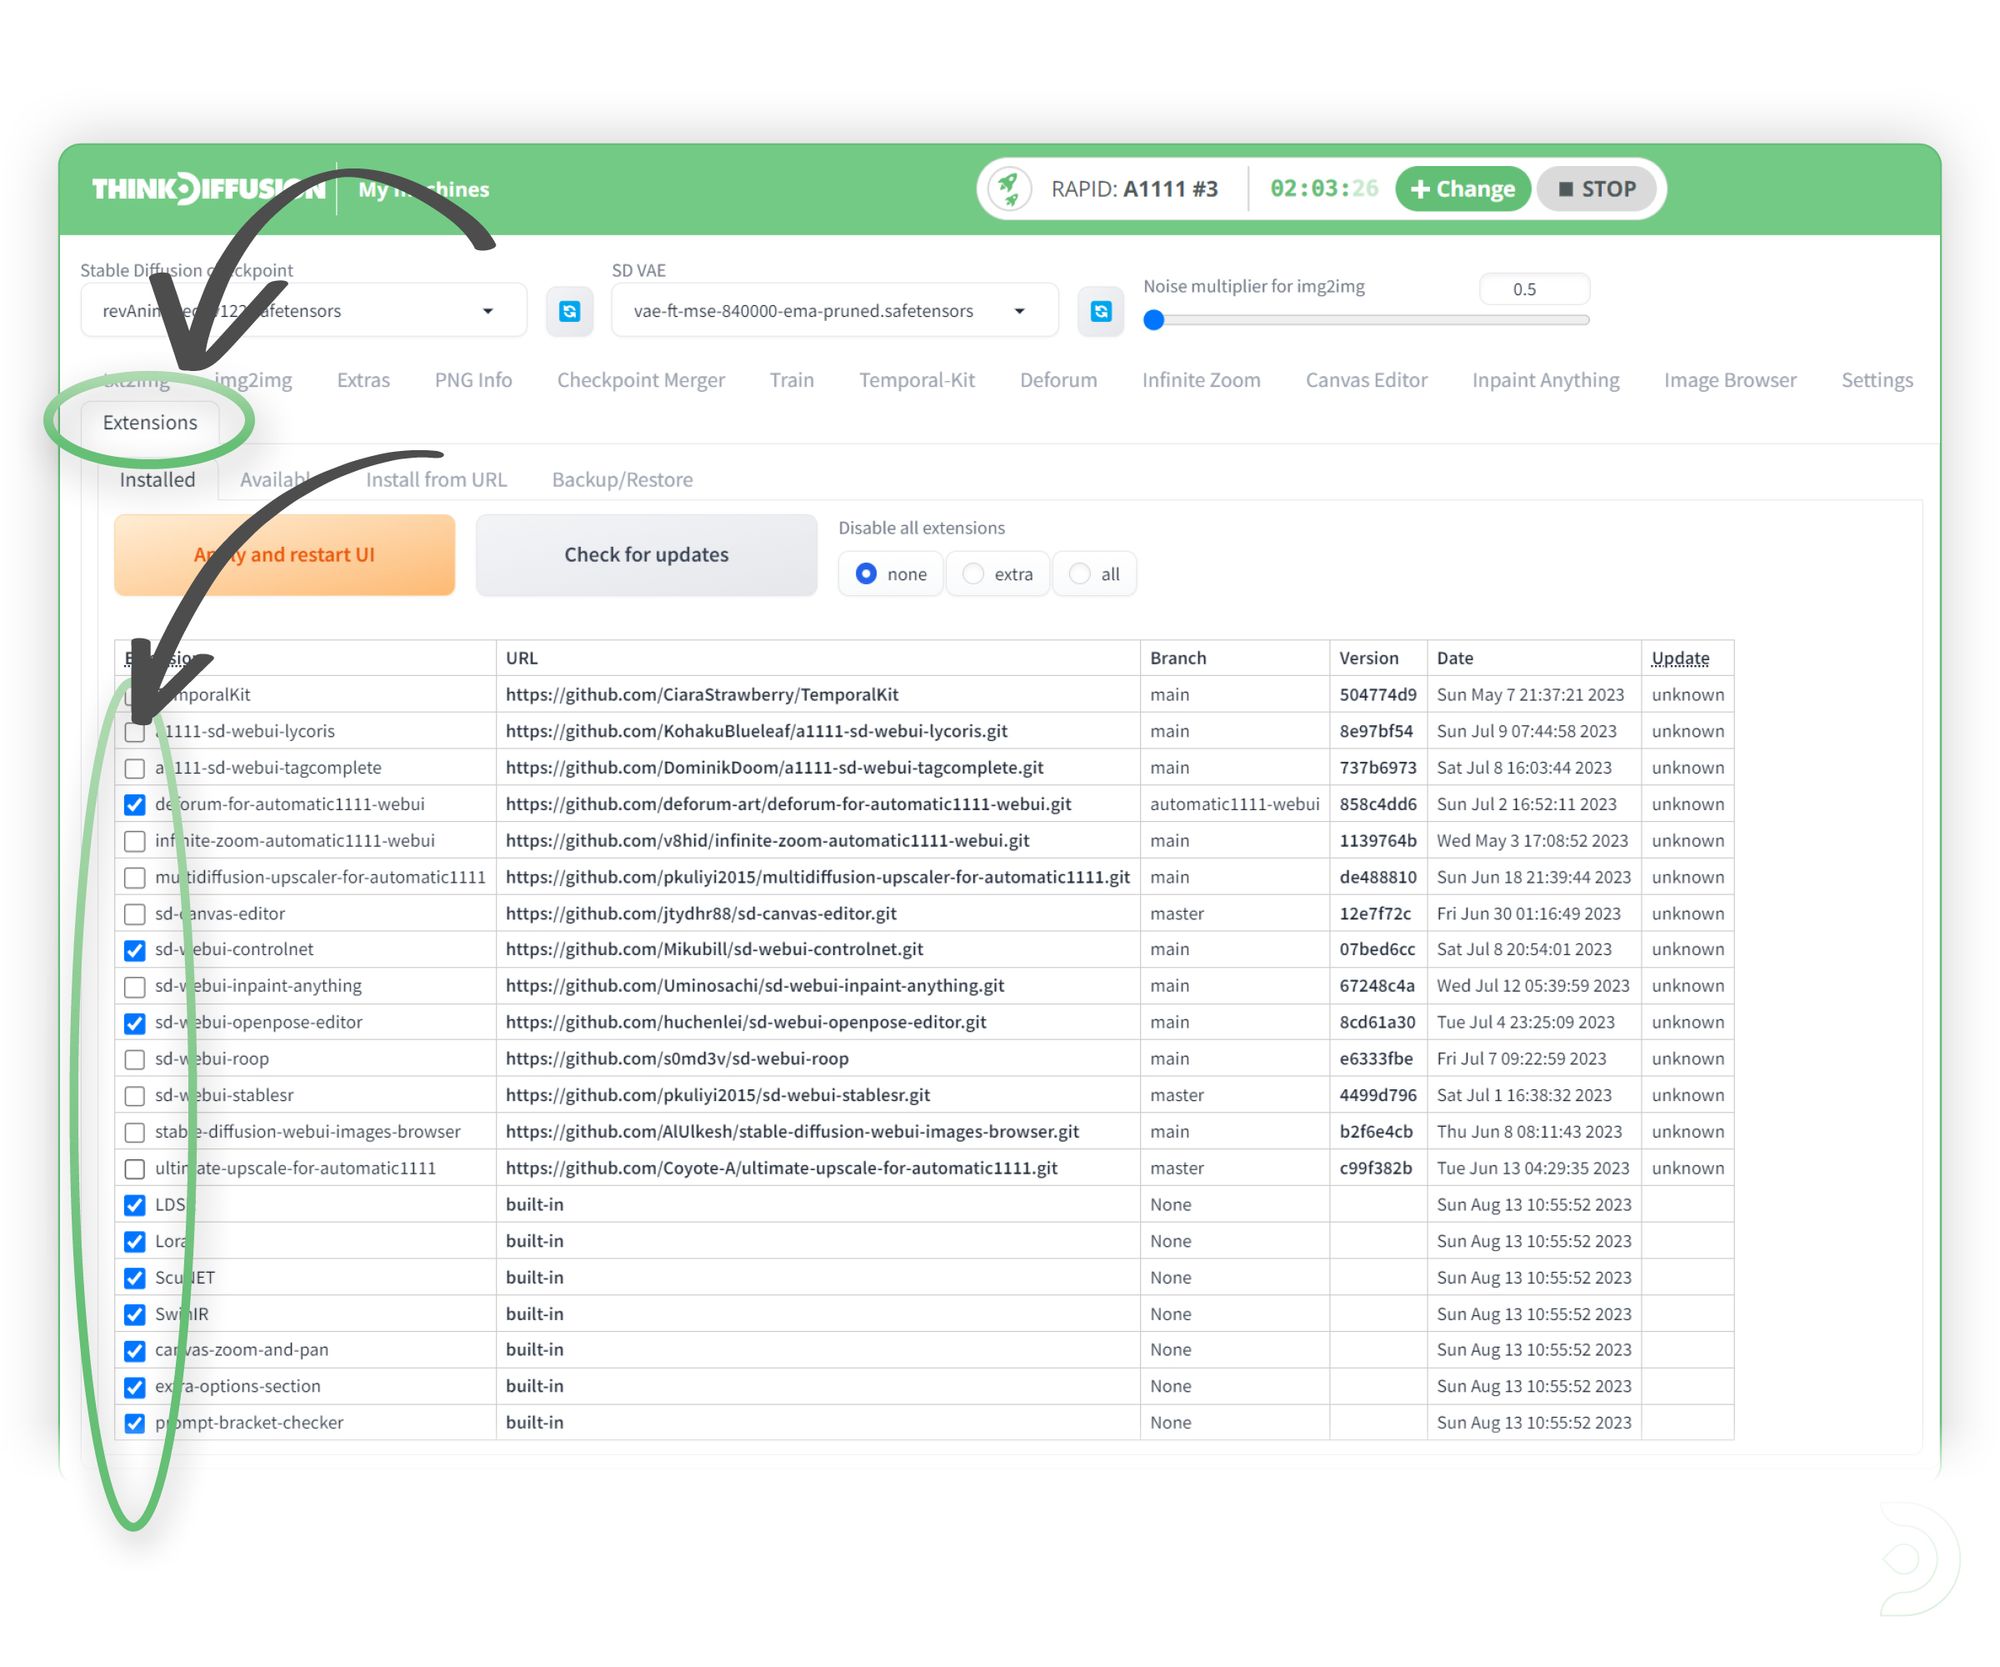
You will then need to click Apply and restart UI.
While you're fishing around those end tabs, go to:
1. Settings Tab
2. Stable Diffusion menu item on left
3. Set the Noise Multiplier for Img2Img to 0.0 (This used to be 0.5 but you will get better results setting this to 0.0)
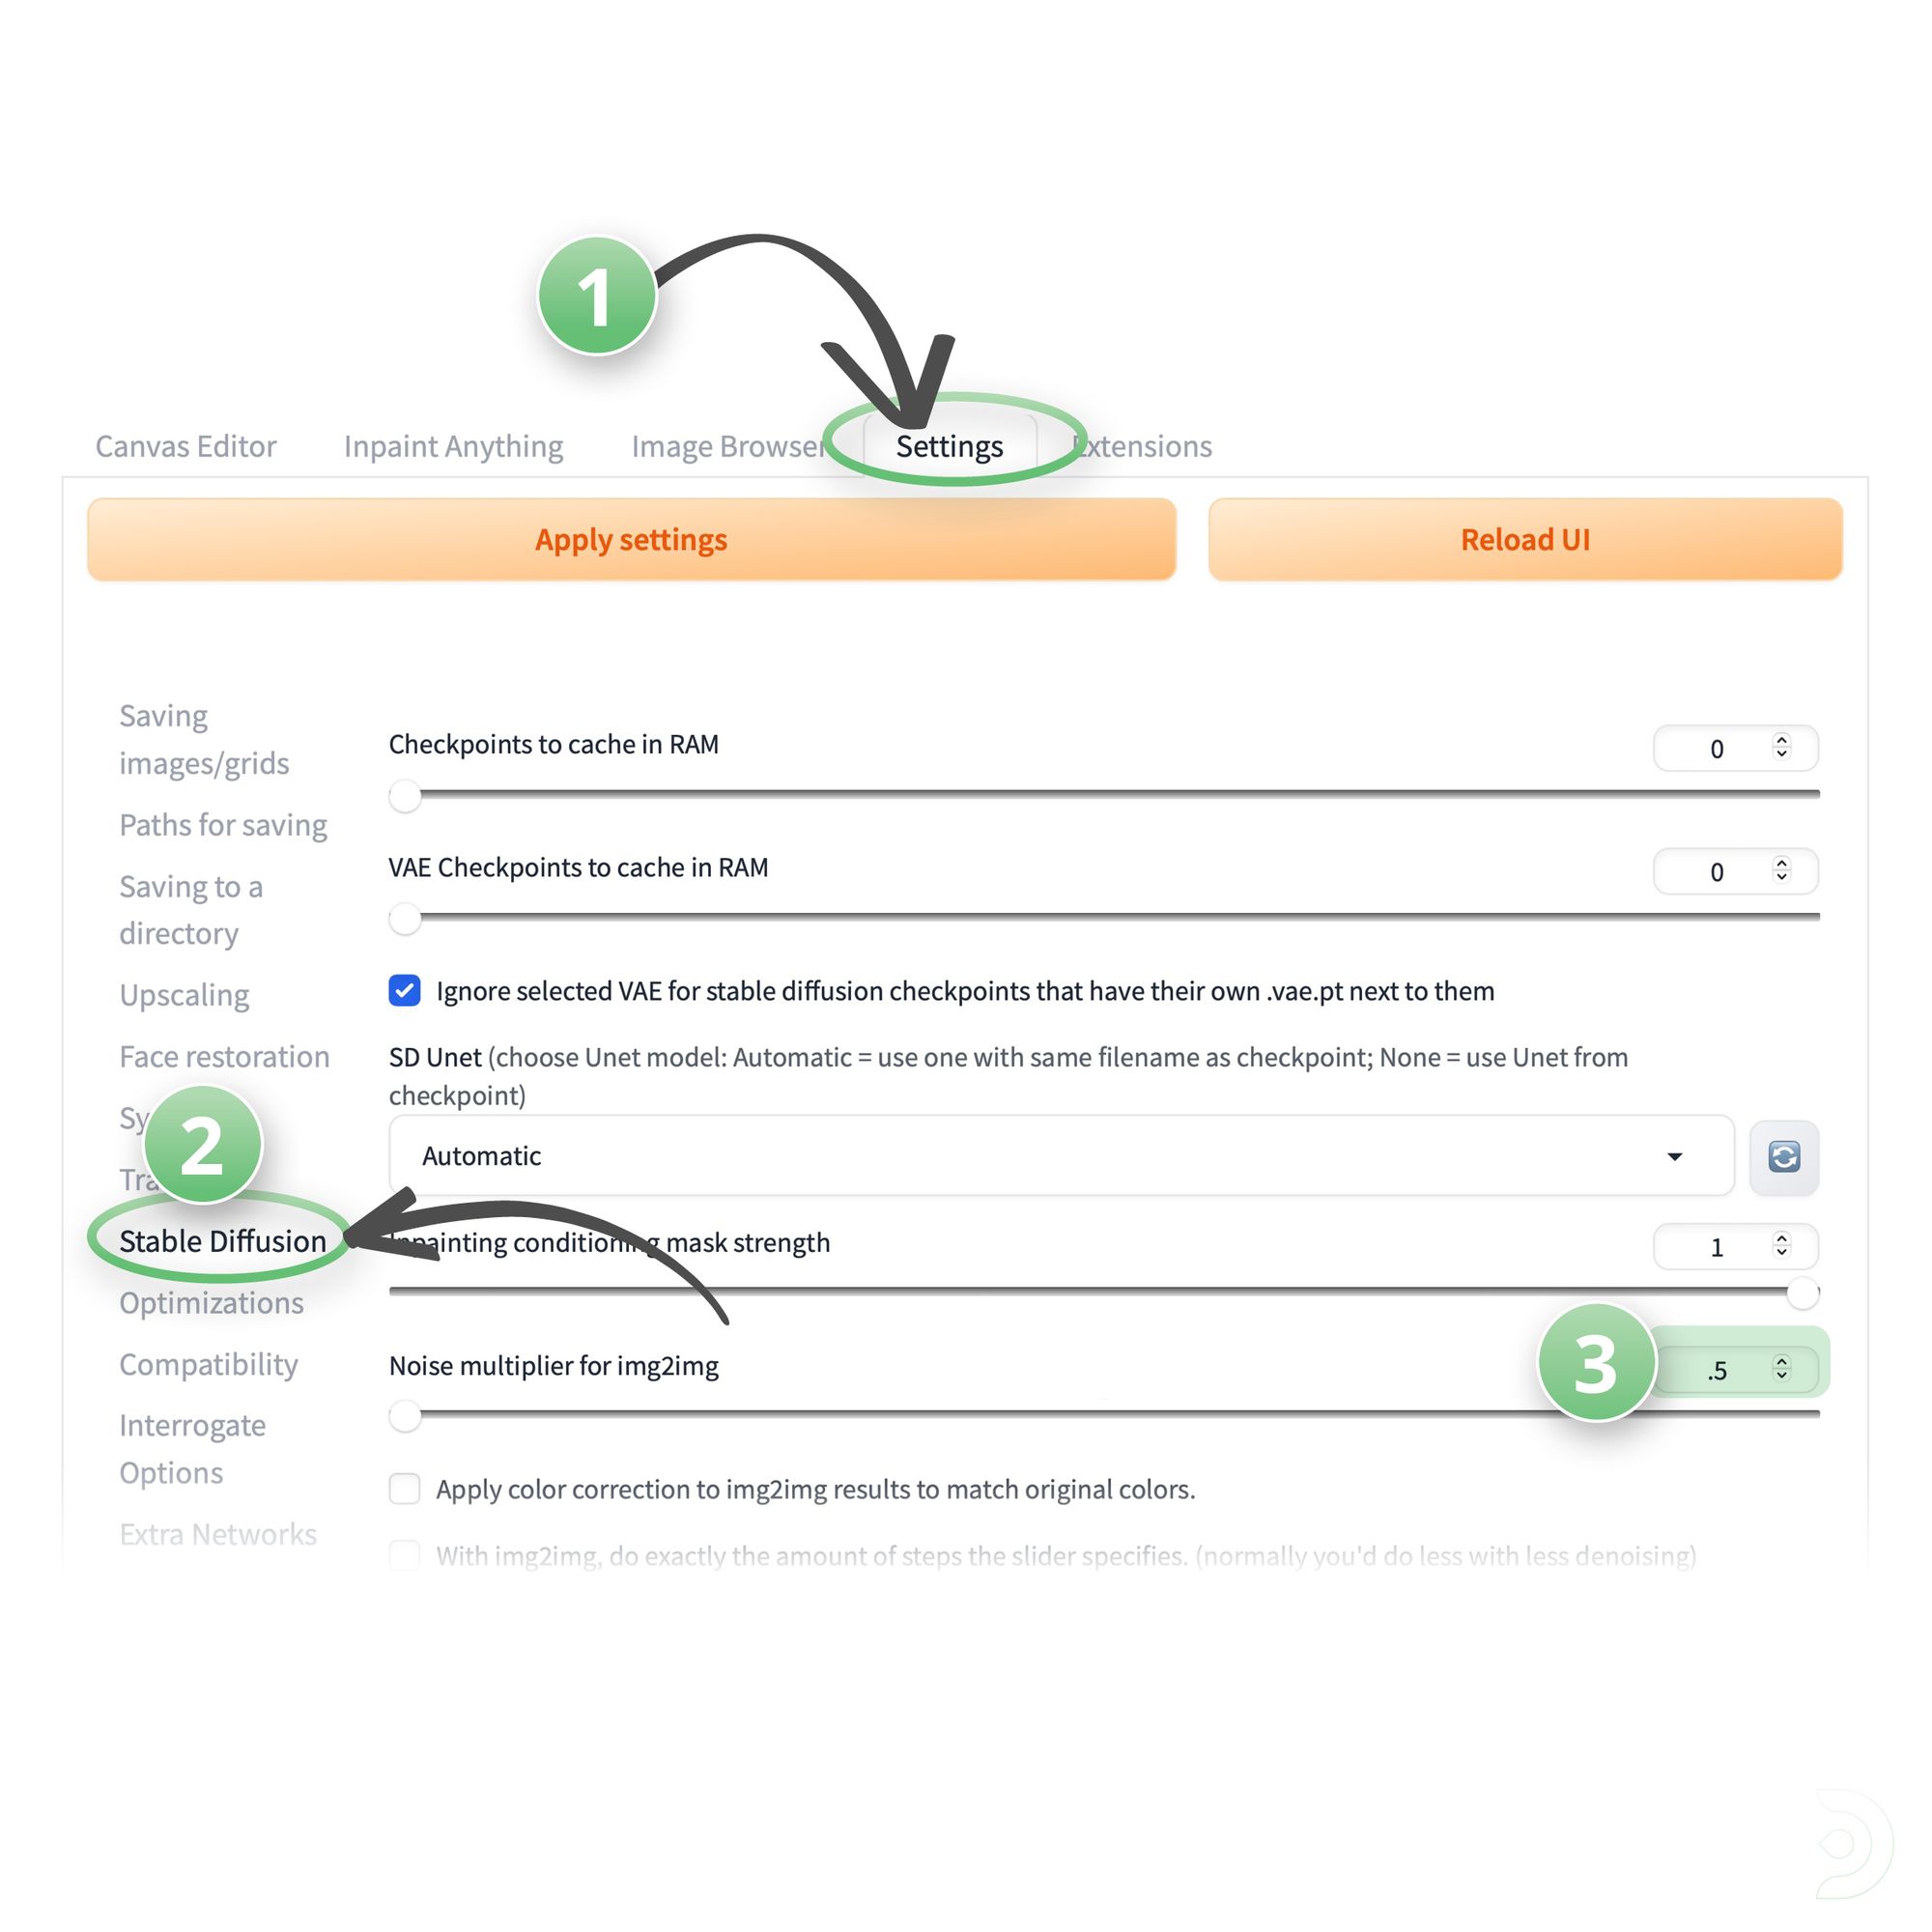
Again, you'll then need to click Apply Settings and Reload UI.
💡Protip: If during this tutorial you see your UI looking different than these screenshots, make sure that your config file is up to date. It may not be because you've customized your settings at an earlier date. Click here for a tutorial that includes more info on refreshing to the latest default settings.
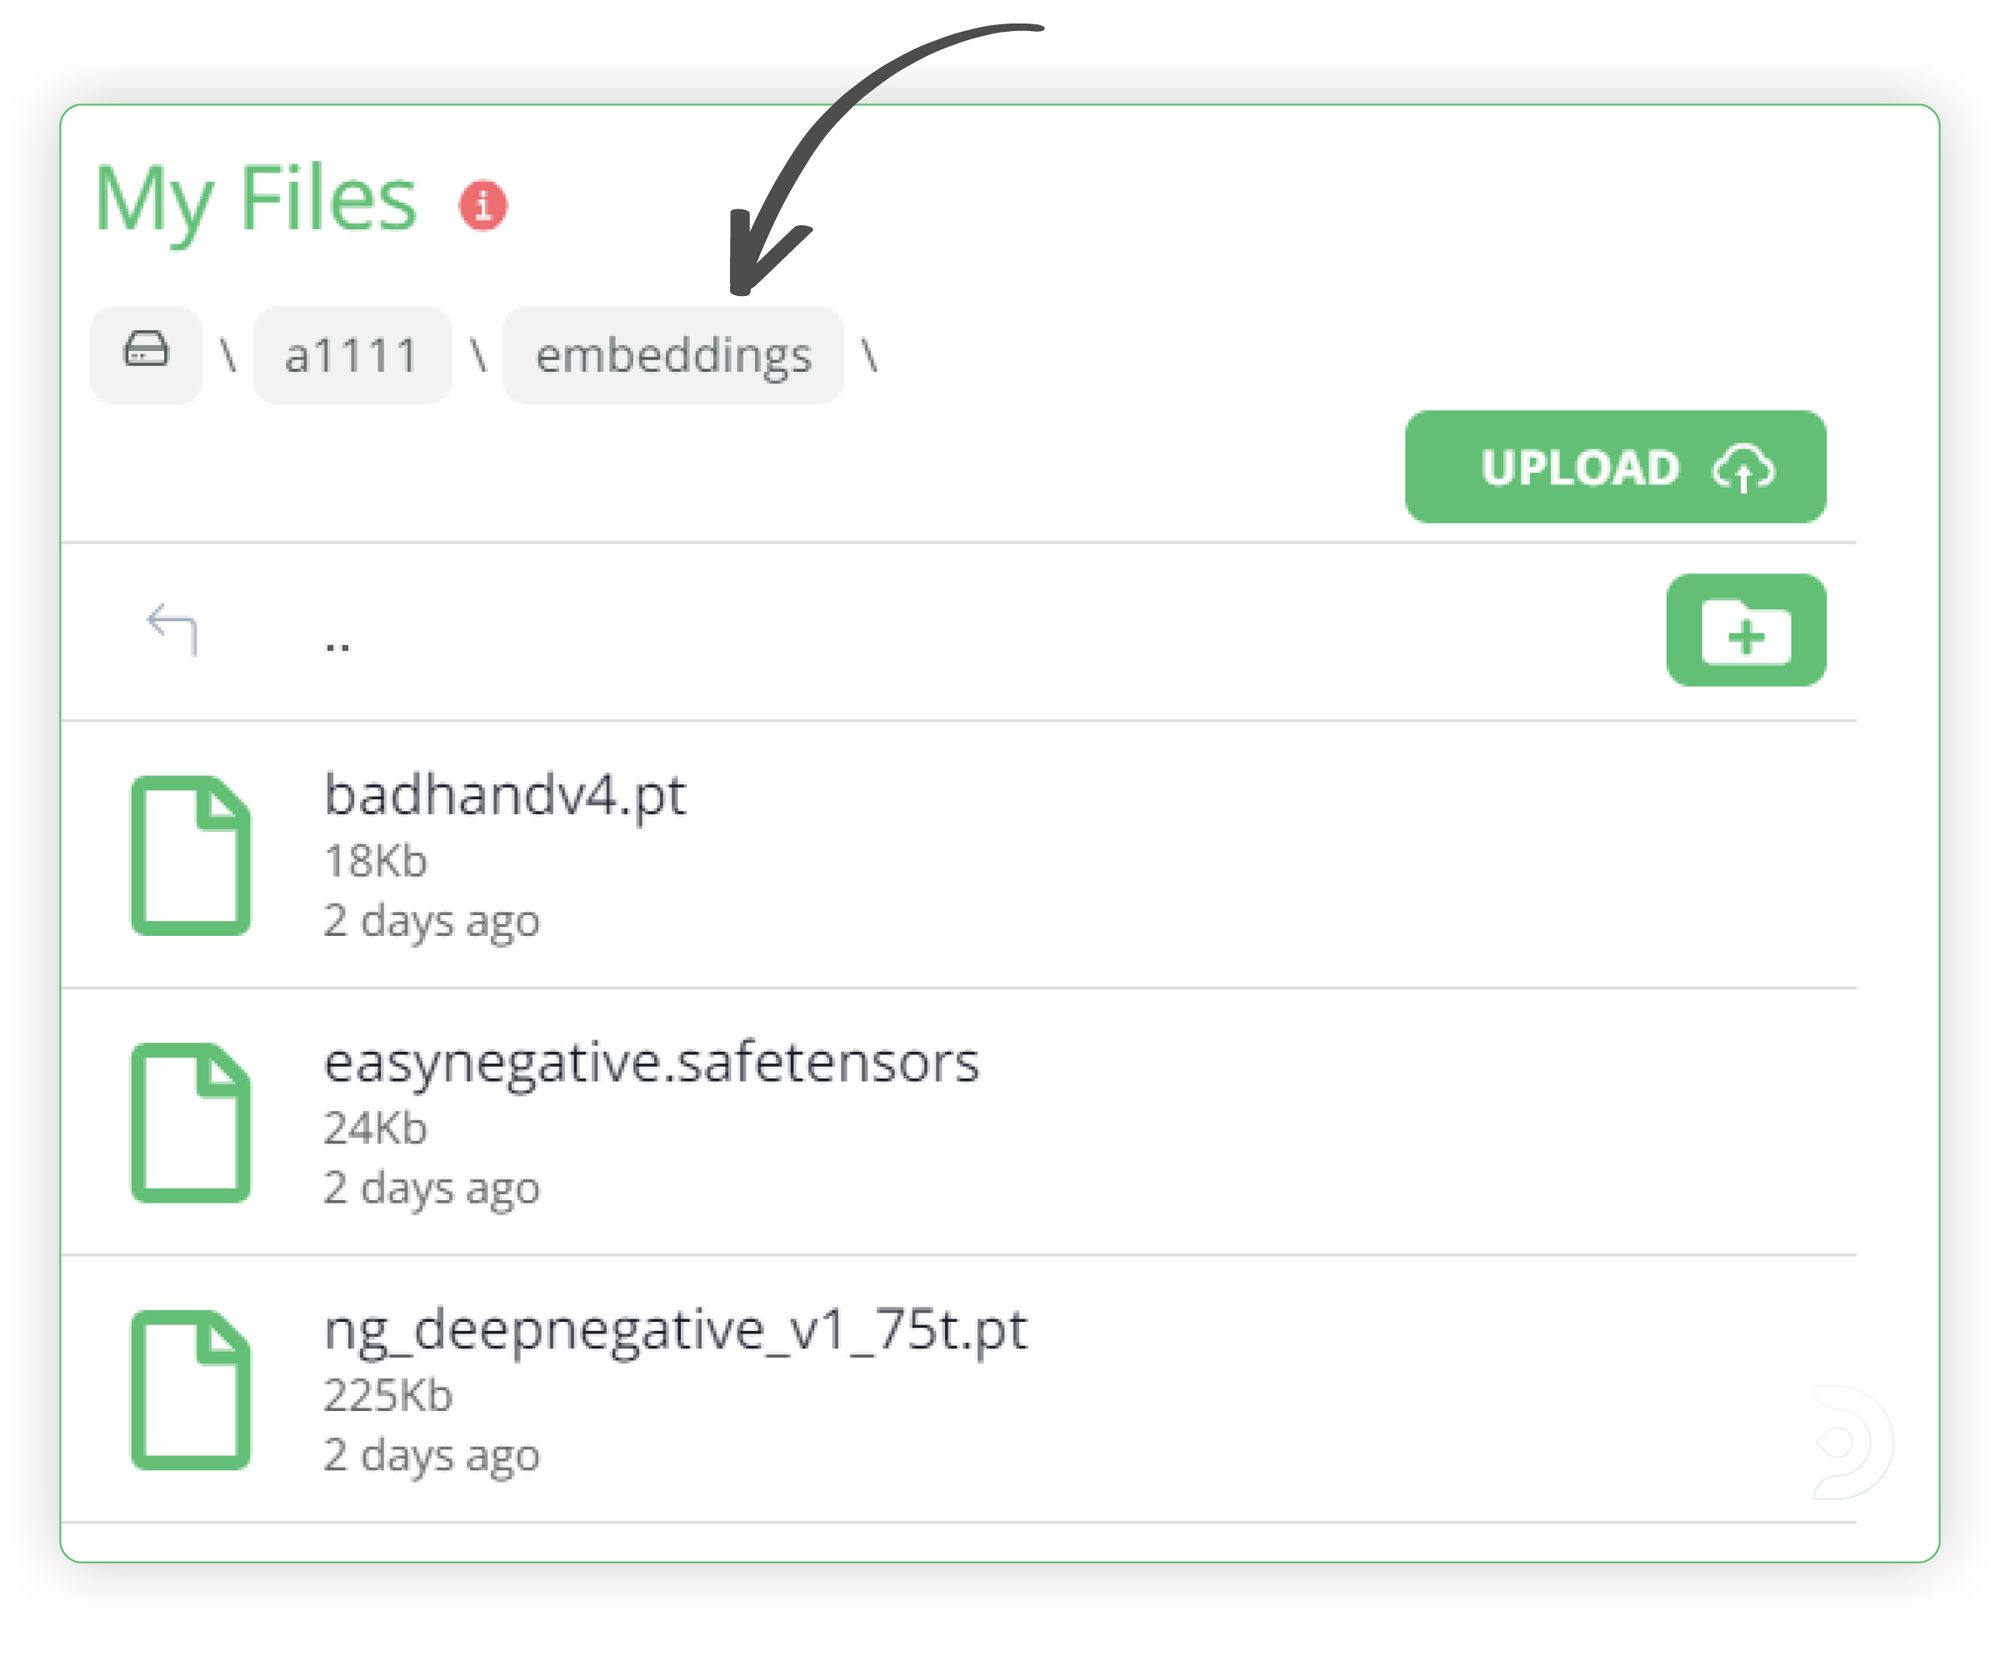
We're nearly ready to start generating some images but we want to use some embeddings and LORA's with our generation so feel free to download the following and upload them to ThinkDiffusion:
Embeddings
- BadHandsV4 -
https://civitai.com/models/16993 - EasyNegative -
https://civitai.com/models/7808?modelVersionId=9208 - These should be uploaded to the a1111\embeddings folder
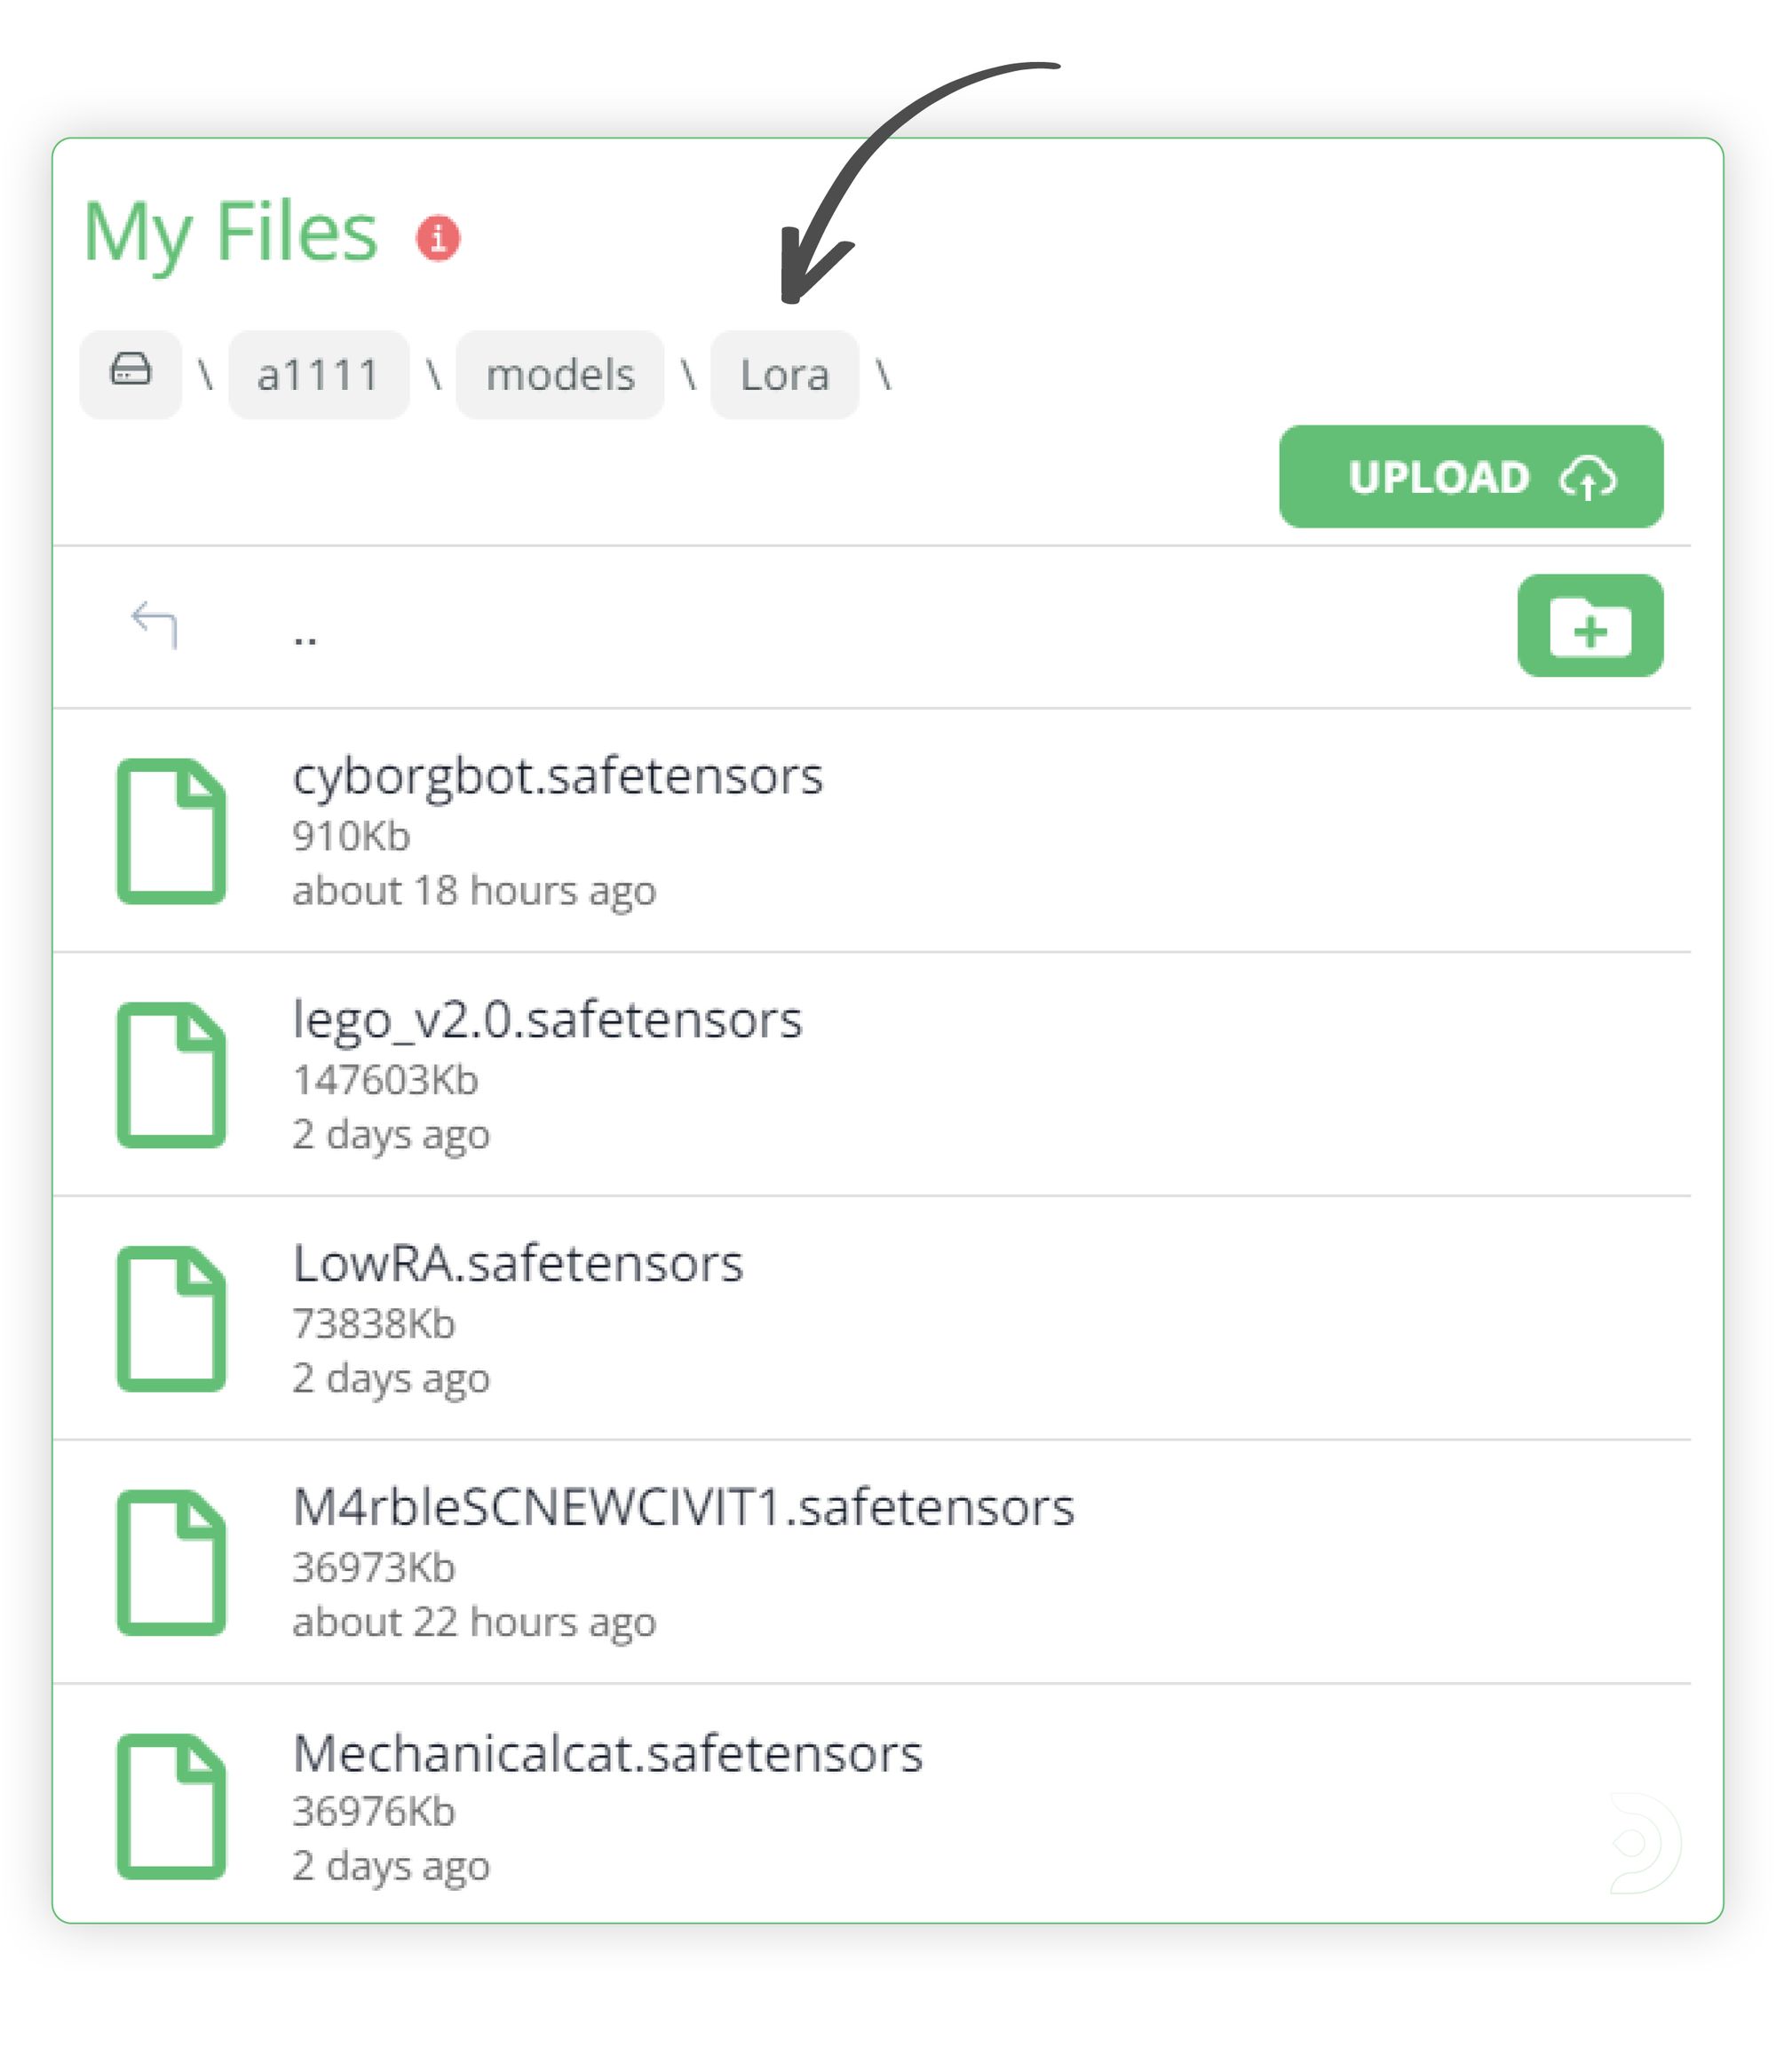
LORA
- Marble - https://civitai.com/models/70538
- This should be added to the a1111\models\Lora folder
Img2Img
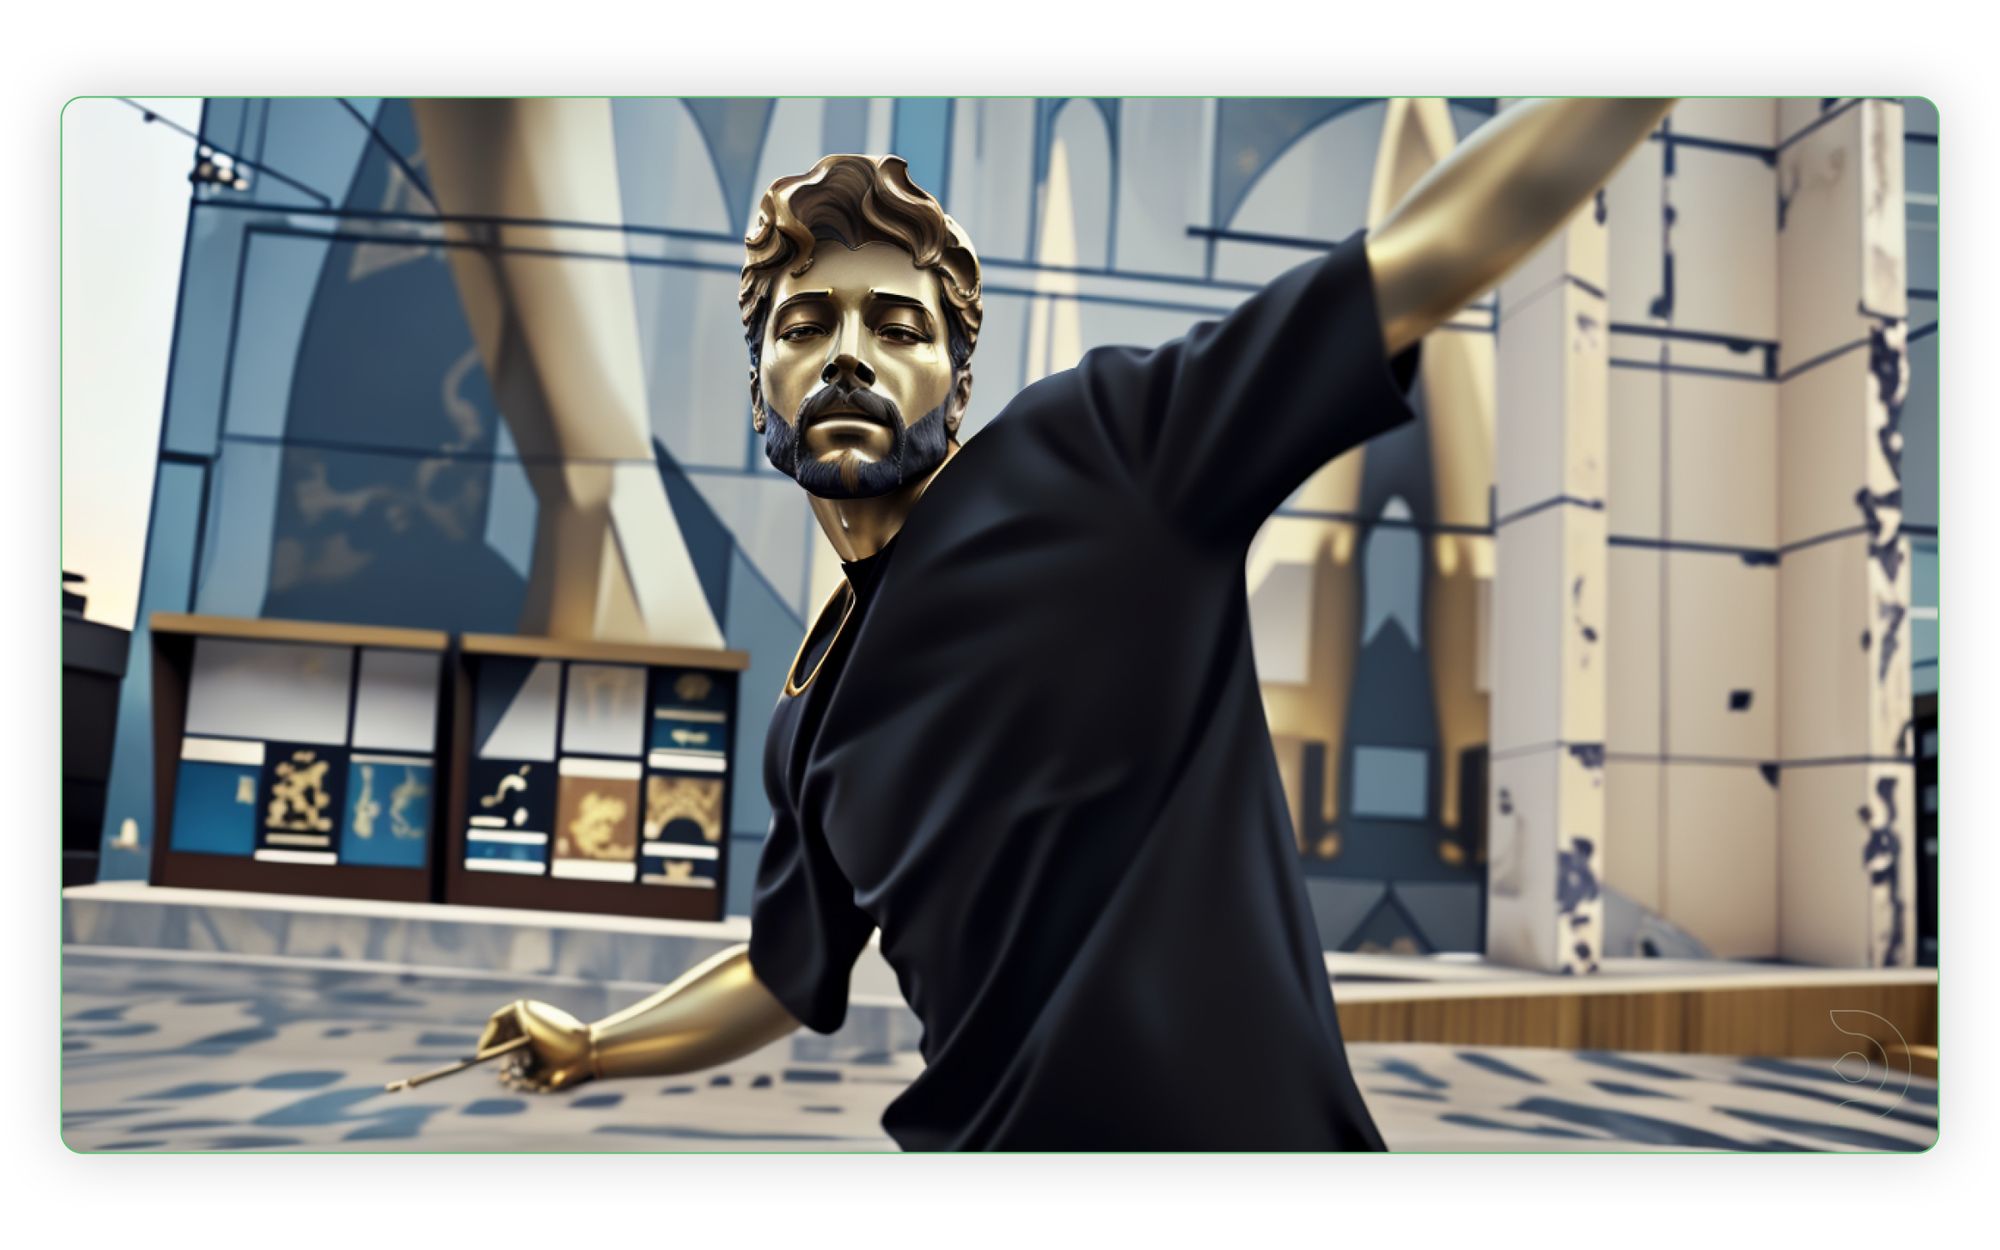
We then want to upload our image (the extracted first image from the video) to the image to image tab so we can 'test' what the start of the video is going to look like. This is a lot quicker than starting off deforum videos and waiting ages for it to generate only to find out it's not exactly what you want.
- (1) Select revAnimated as the Stable Diffusion Checkpoint model
- (2) Enter the following positive prompt:
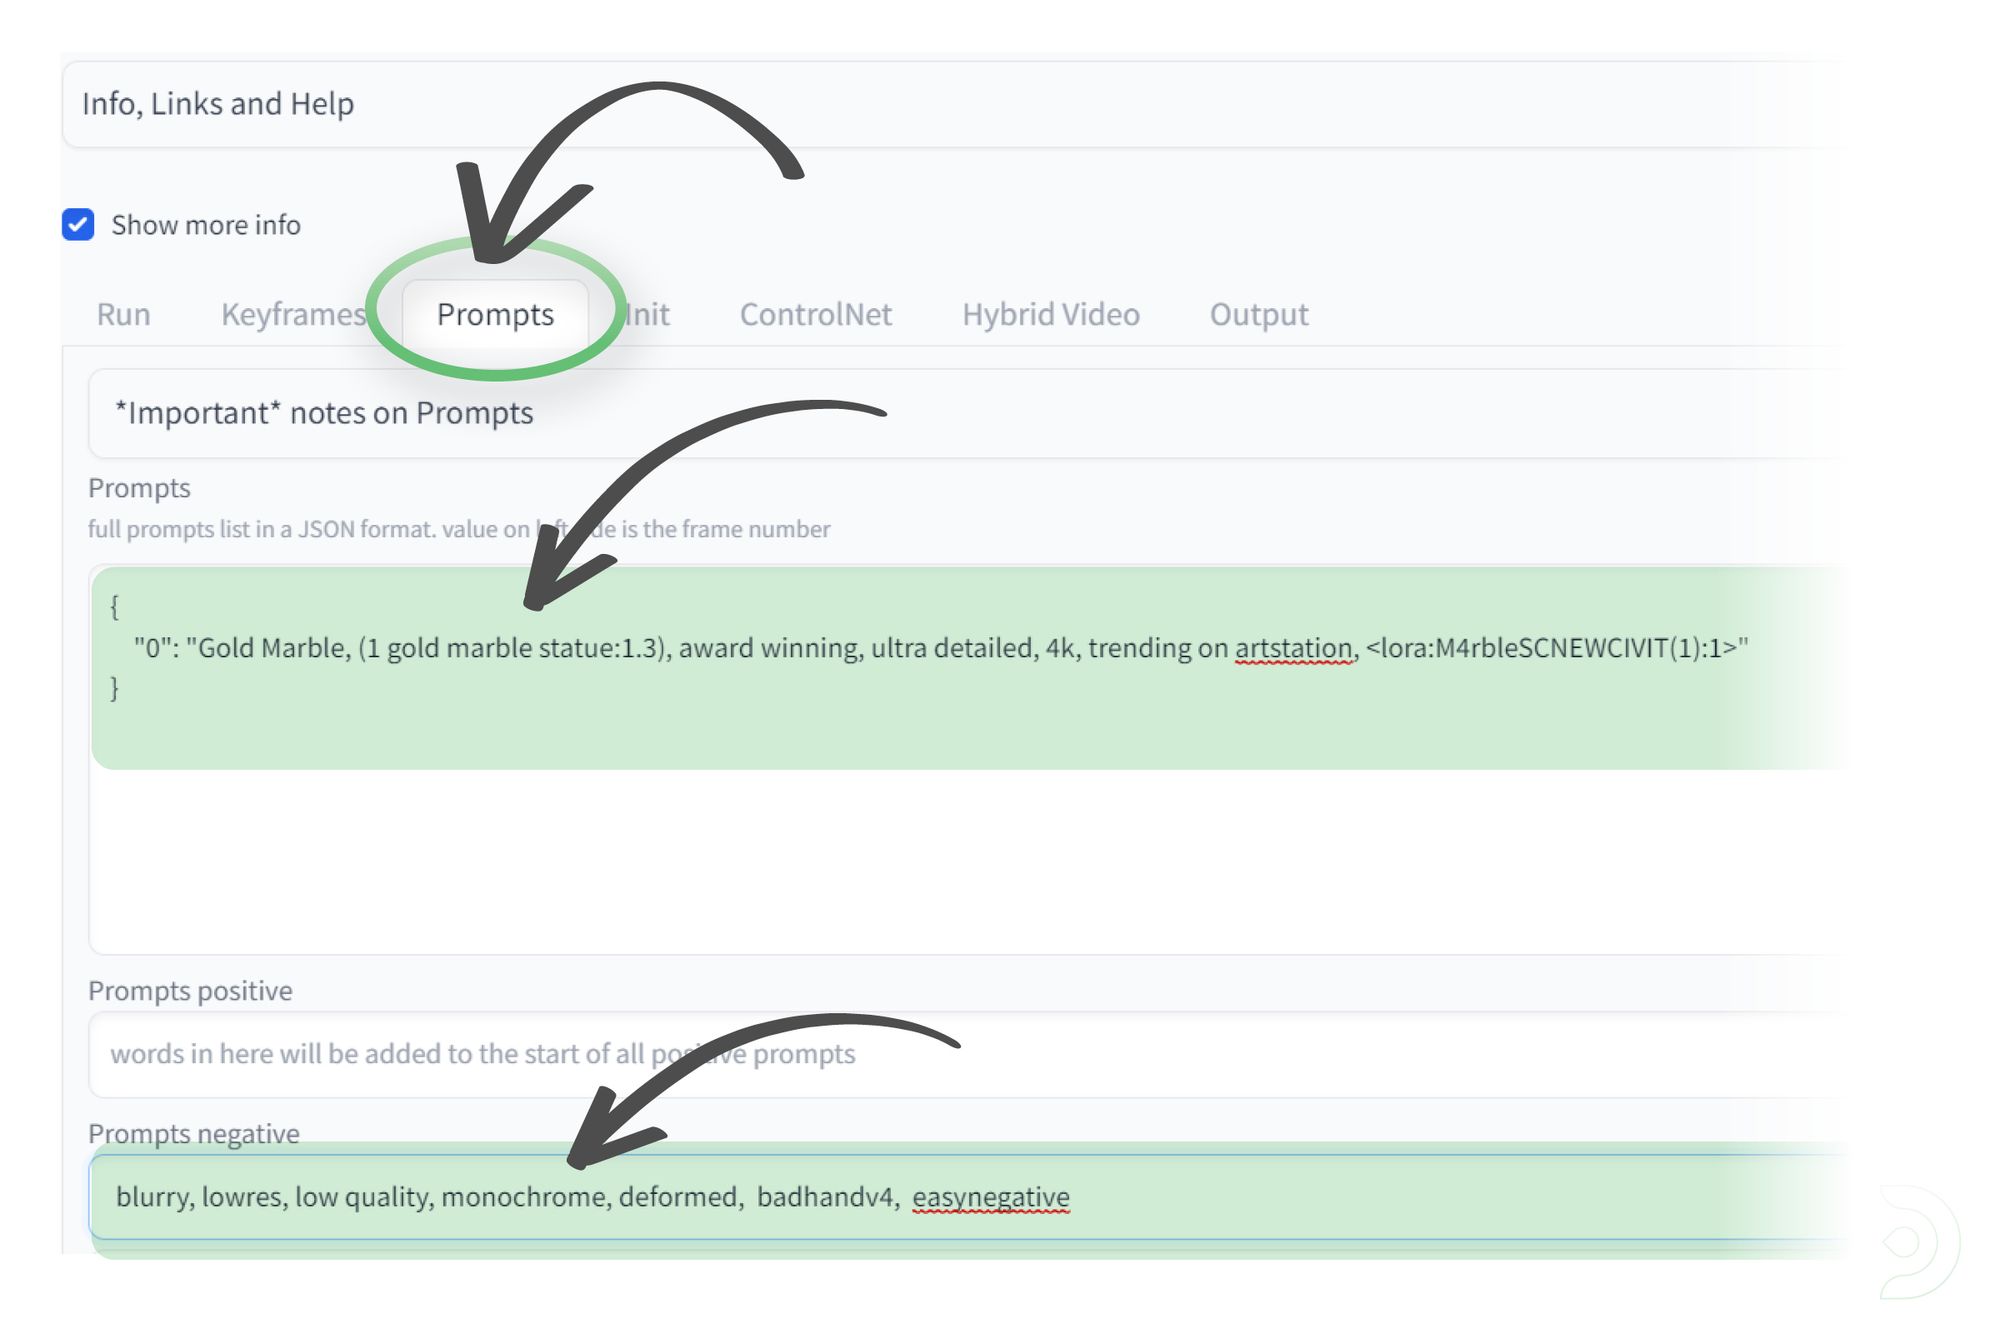
Gold Marble, (1 gold marble statue:1.3), award winning, ultra detailed, 4k, trending on artstation, <lora:M4rbleSCNEWCIVIT:1(1)>" - (3) Enter the following negative prompts:
blurry, lowres, low quality, monochrome, deformed, badhandv4, easynegative - (4 Upload your extracted image from your video

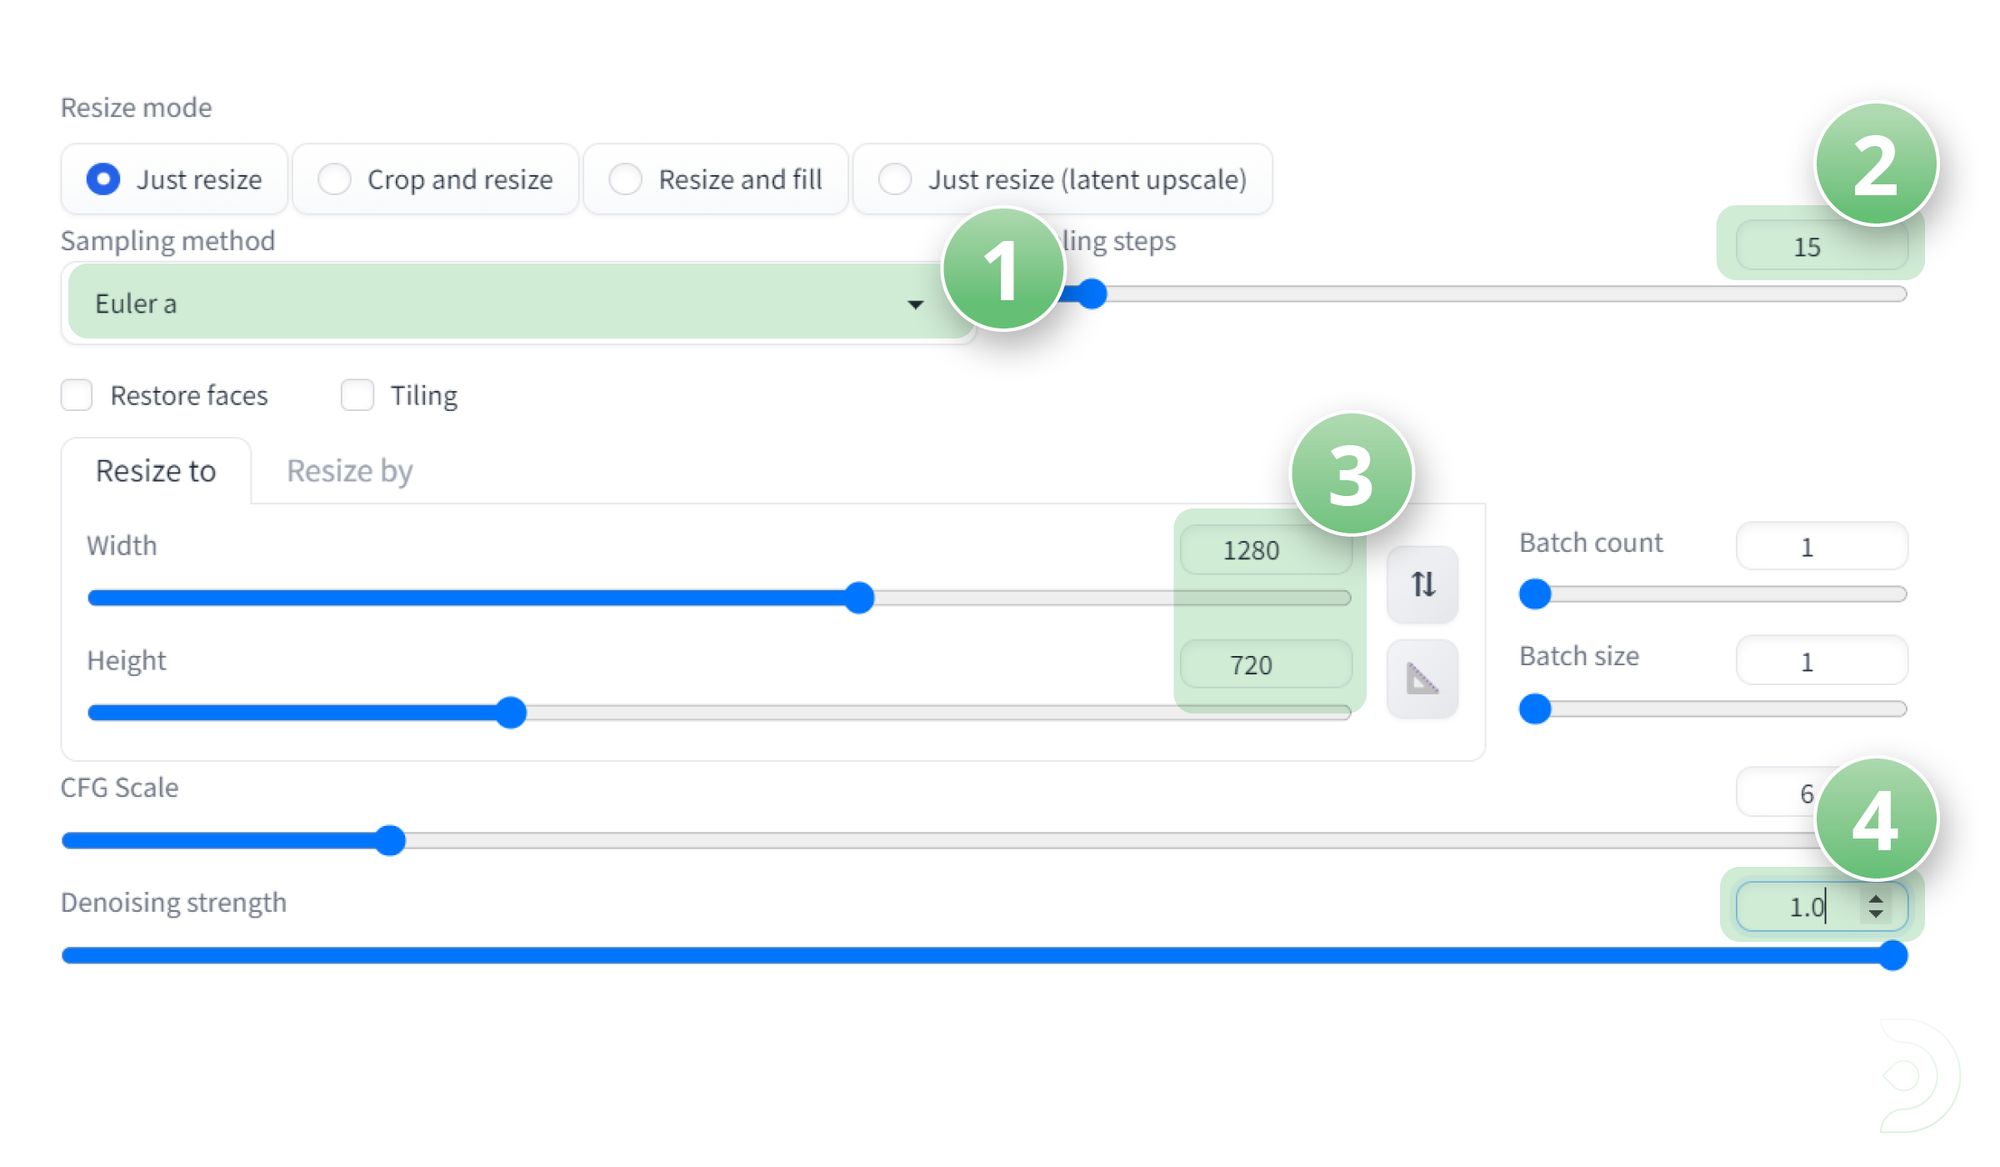
- (1) Set the sampling method to Euler a
- (2) Set the Sampling steps to 15
- (3) Set the Width and Height to match our the aspect ratio of our video resolution, which in this case is Width 1280 x Height 720
- (4) Set the denoising strength to 1.0
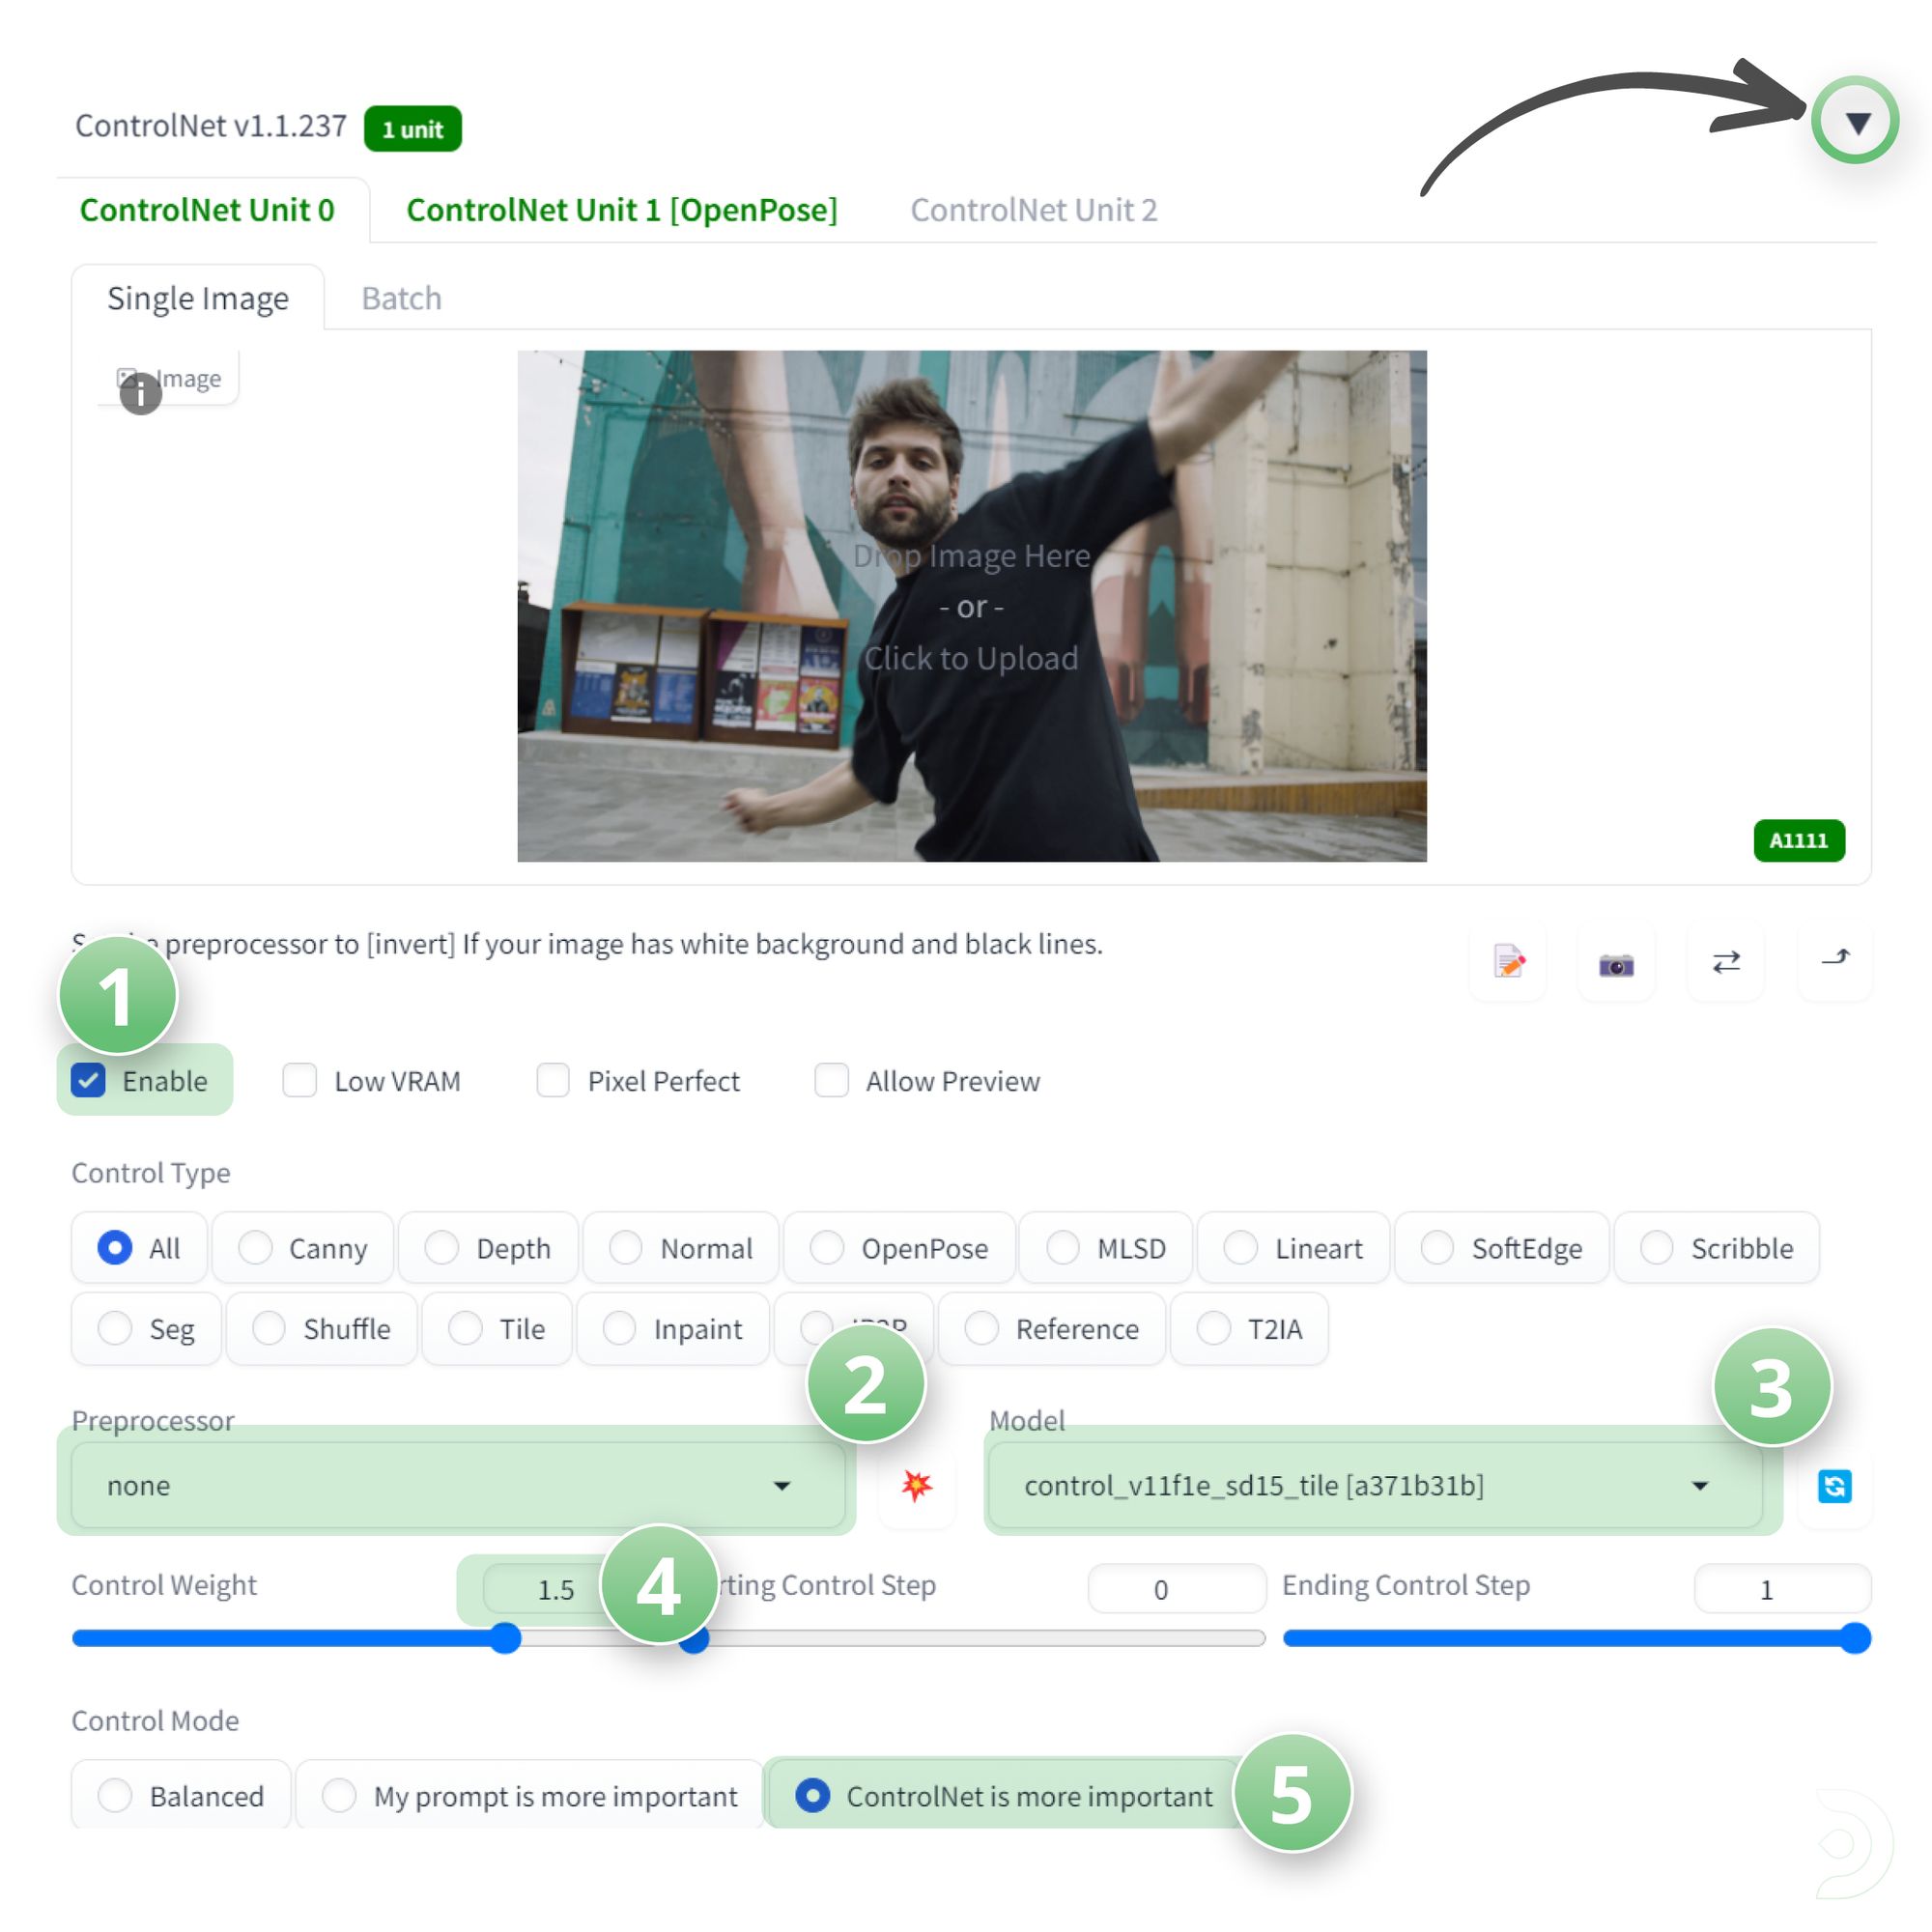
We then need to click the ControlNet dropdown 🔽
- (1) Click ✅ Enable
- (2) Set the Preprocessor to None
- (3) Set the Model to control_v11f1e_sd15_tile
- (4) Set the control weight to 1.5
- (5) Select ControlNet is more important
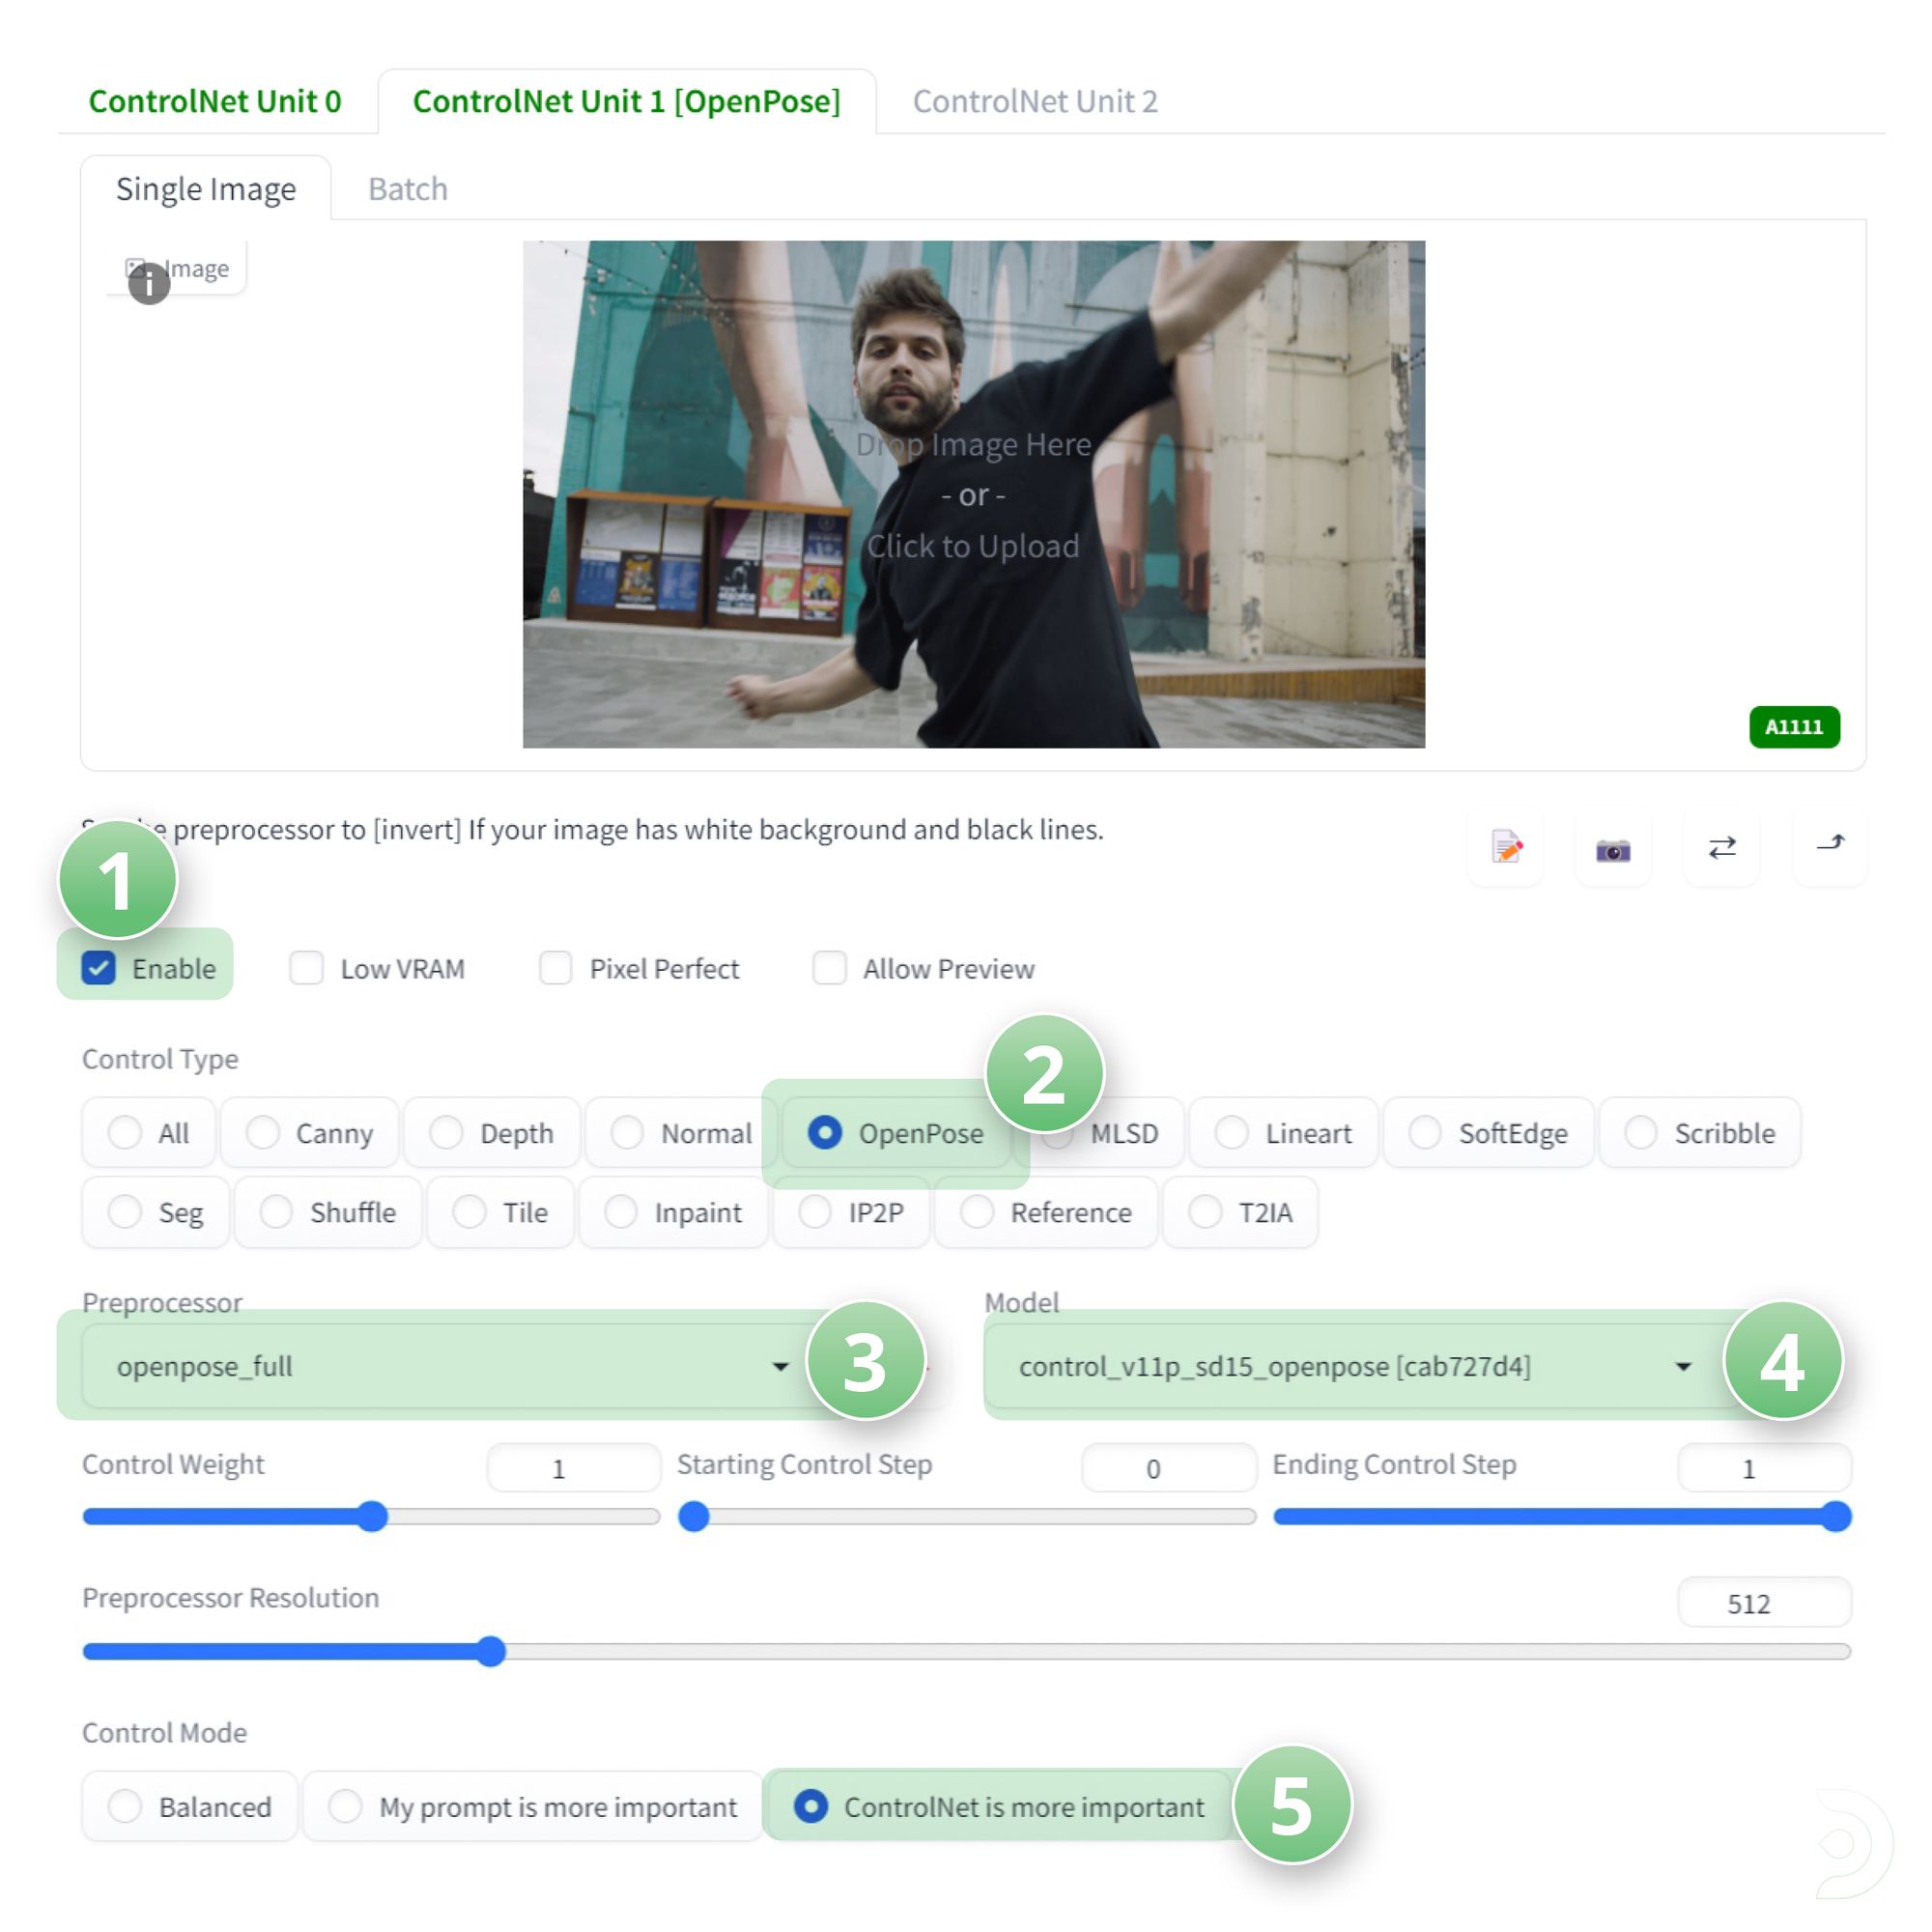
We then need to click into the ControlNet Unit 1 Tab
- (1) Click ✅ Enable
- (2) Select the ControlType to OpenPose
- (3) Select the Preprocessor to openpose_full
- (4) Select the Model to control_v11p_sd15_openpose
- (5) Set the Control Mode to ControlNet is more important
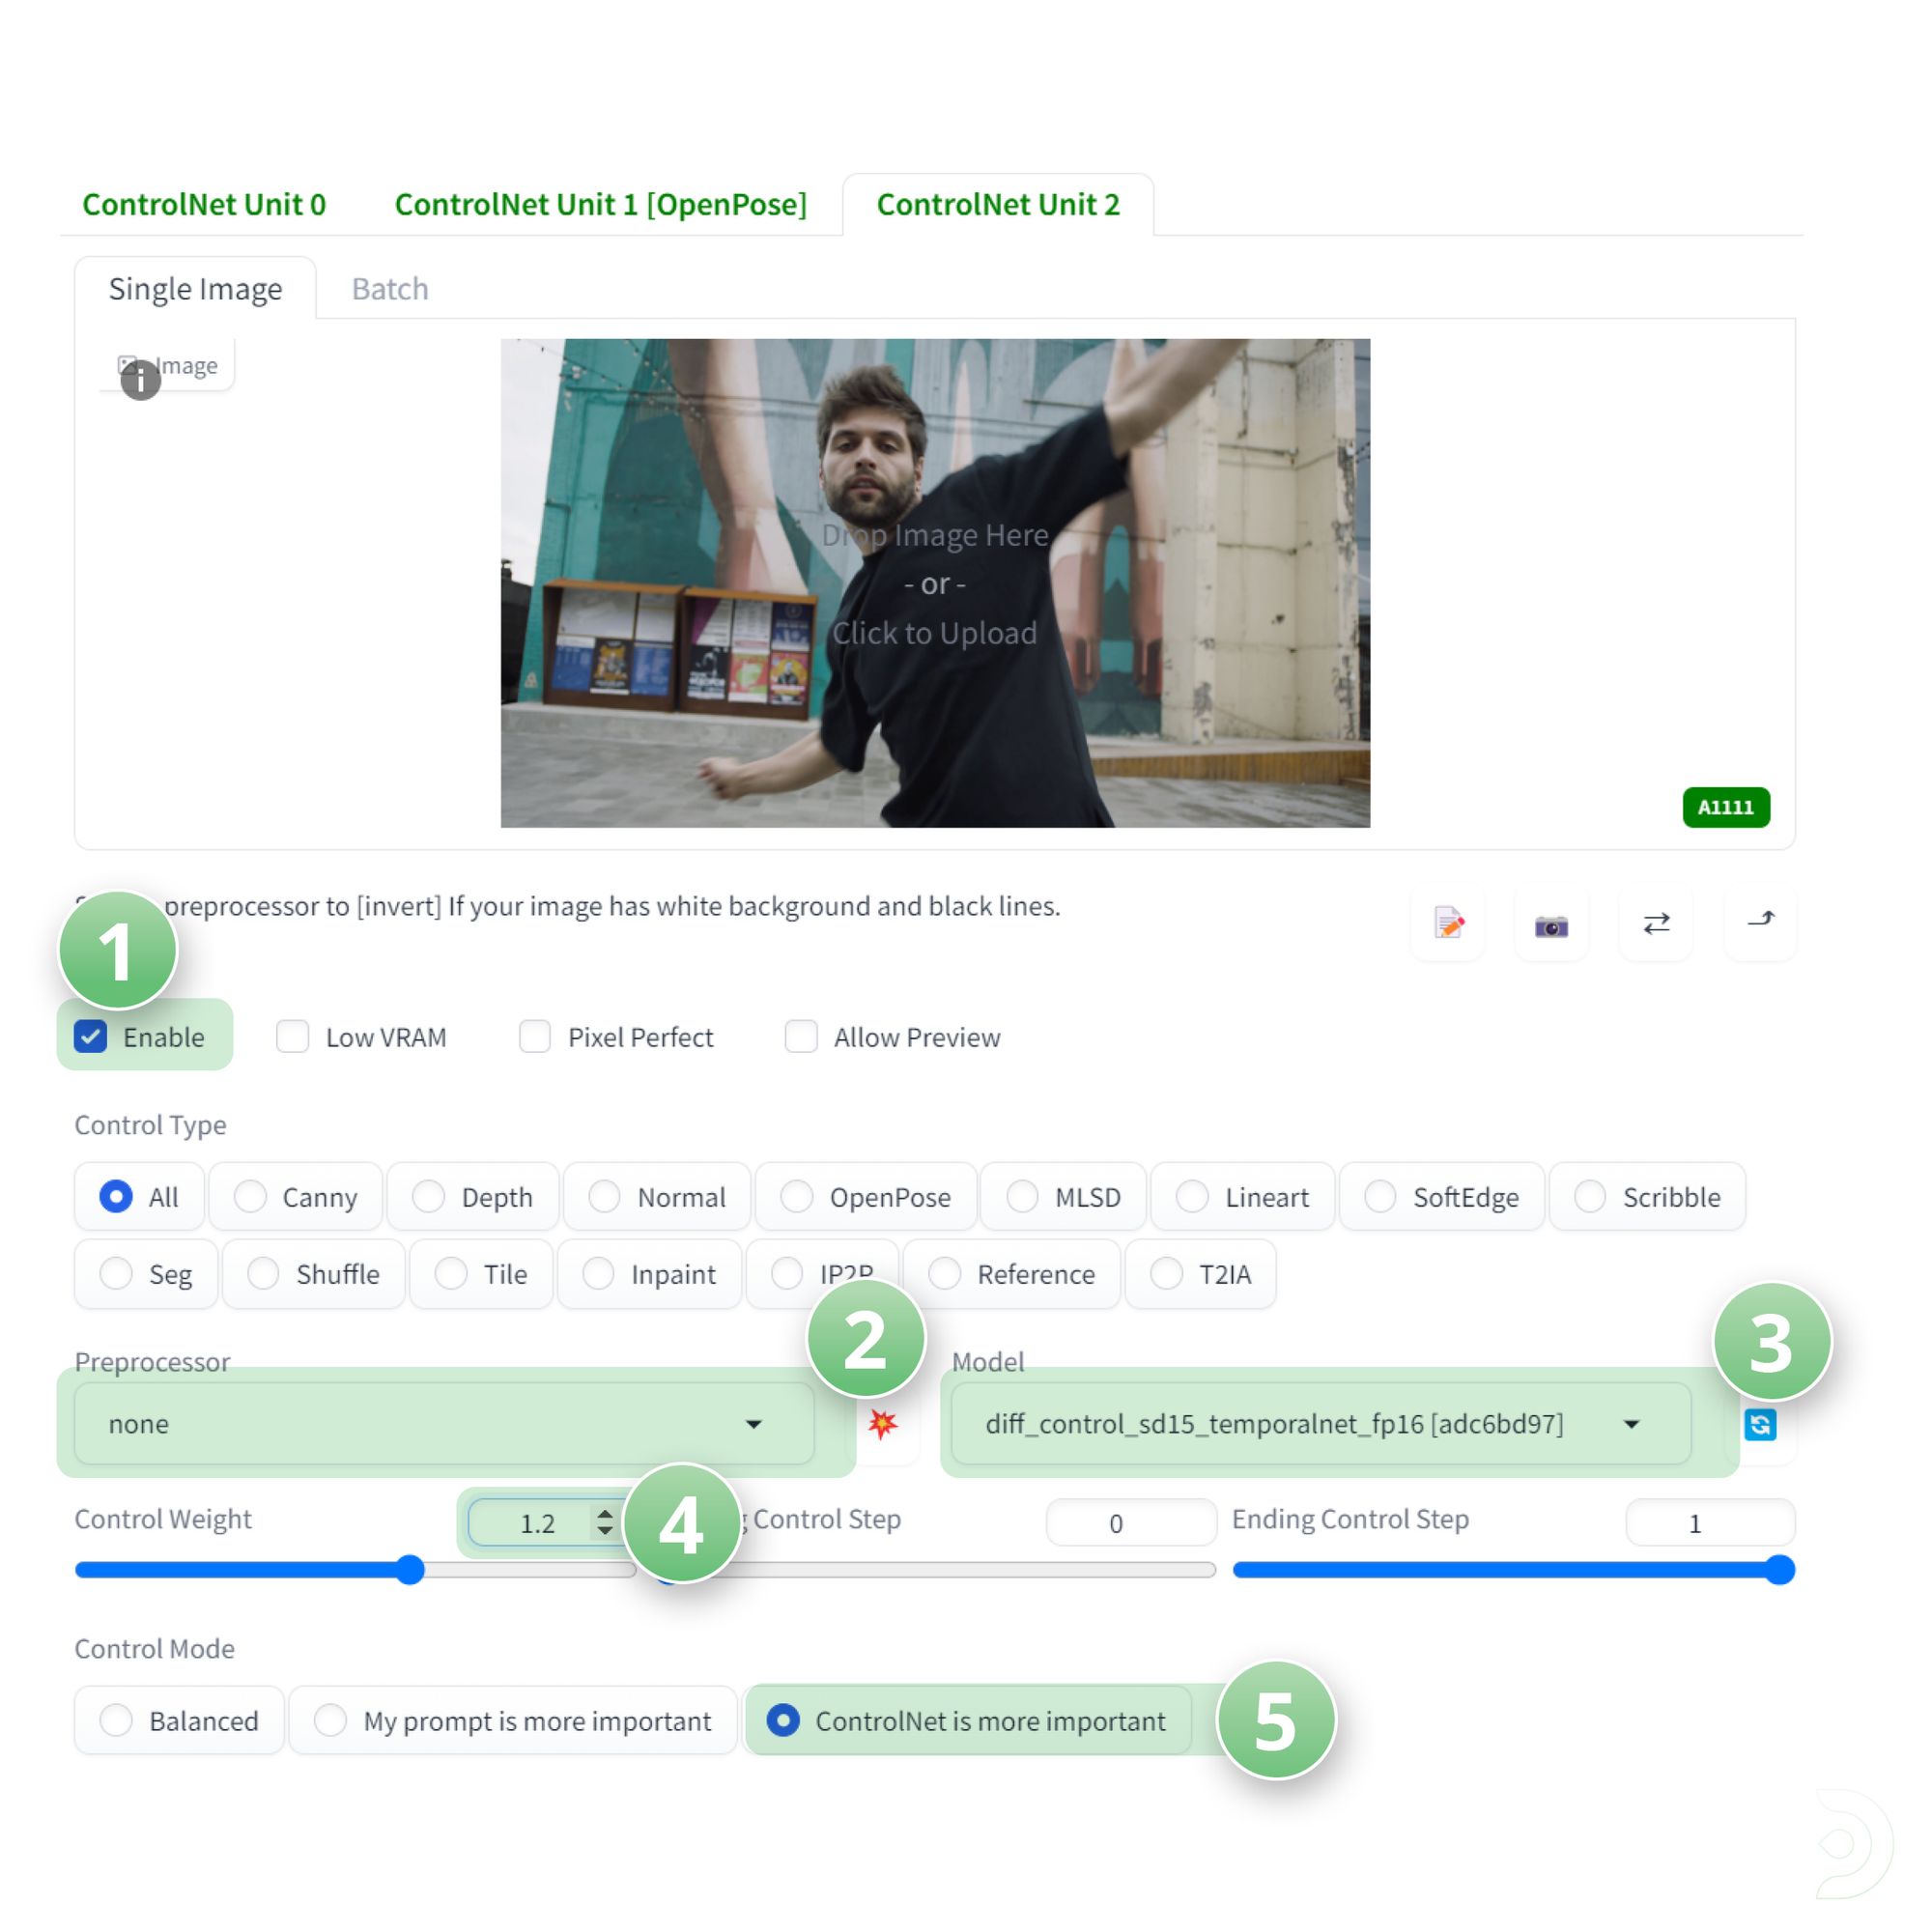
We can then click into the ControlNet Unit 2 Tab
- (1) Click ✅ Enable
- (2) Set the Preprocessor to None
- (3) Set the Model to diff_control_sd15_temporalnet
- (4) Set the Control Weigth to 1.2
- (5) Set the Control Mode to ControlNet is more important
Hit Generate to see our outputted image.
Please note this is where you can tweak the various prompts, settings etc... to get an idea of the starting image that you want to use in your video.
This is the first image that was generated and I'm pretty happy with it!
Now, we can move over to the Deforum Tab
Deforum Tab
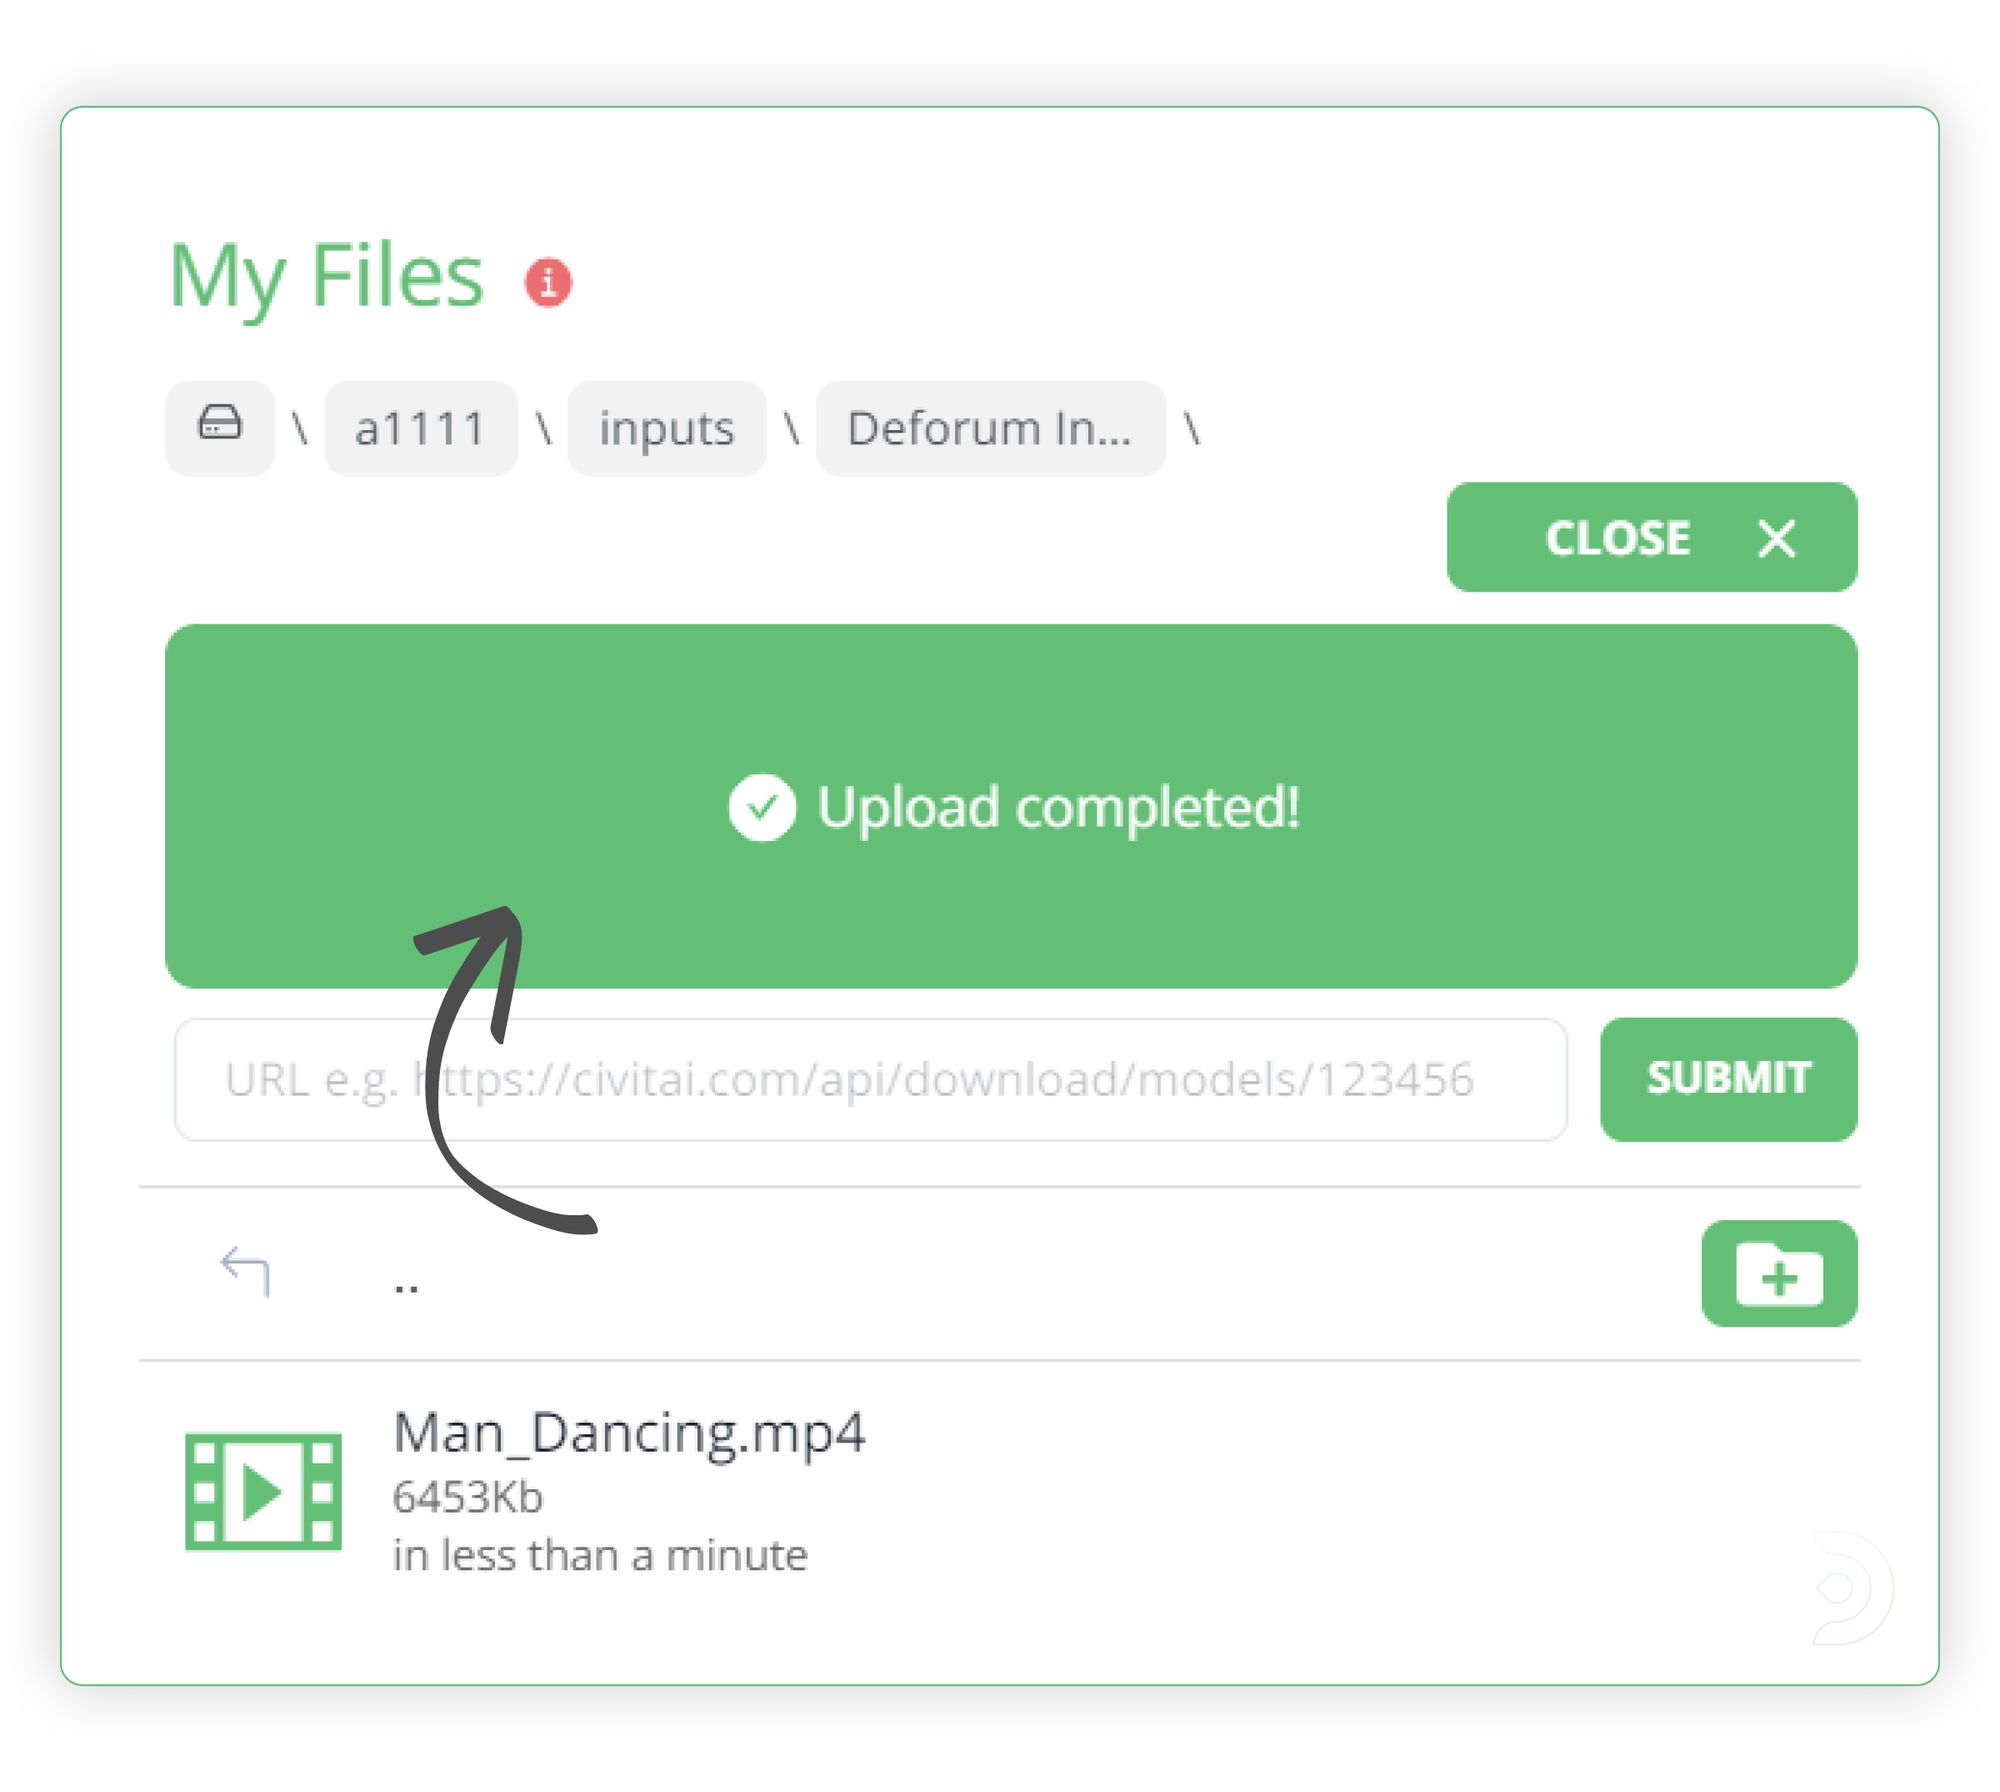
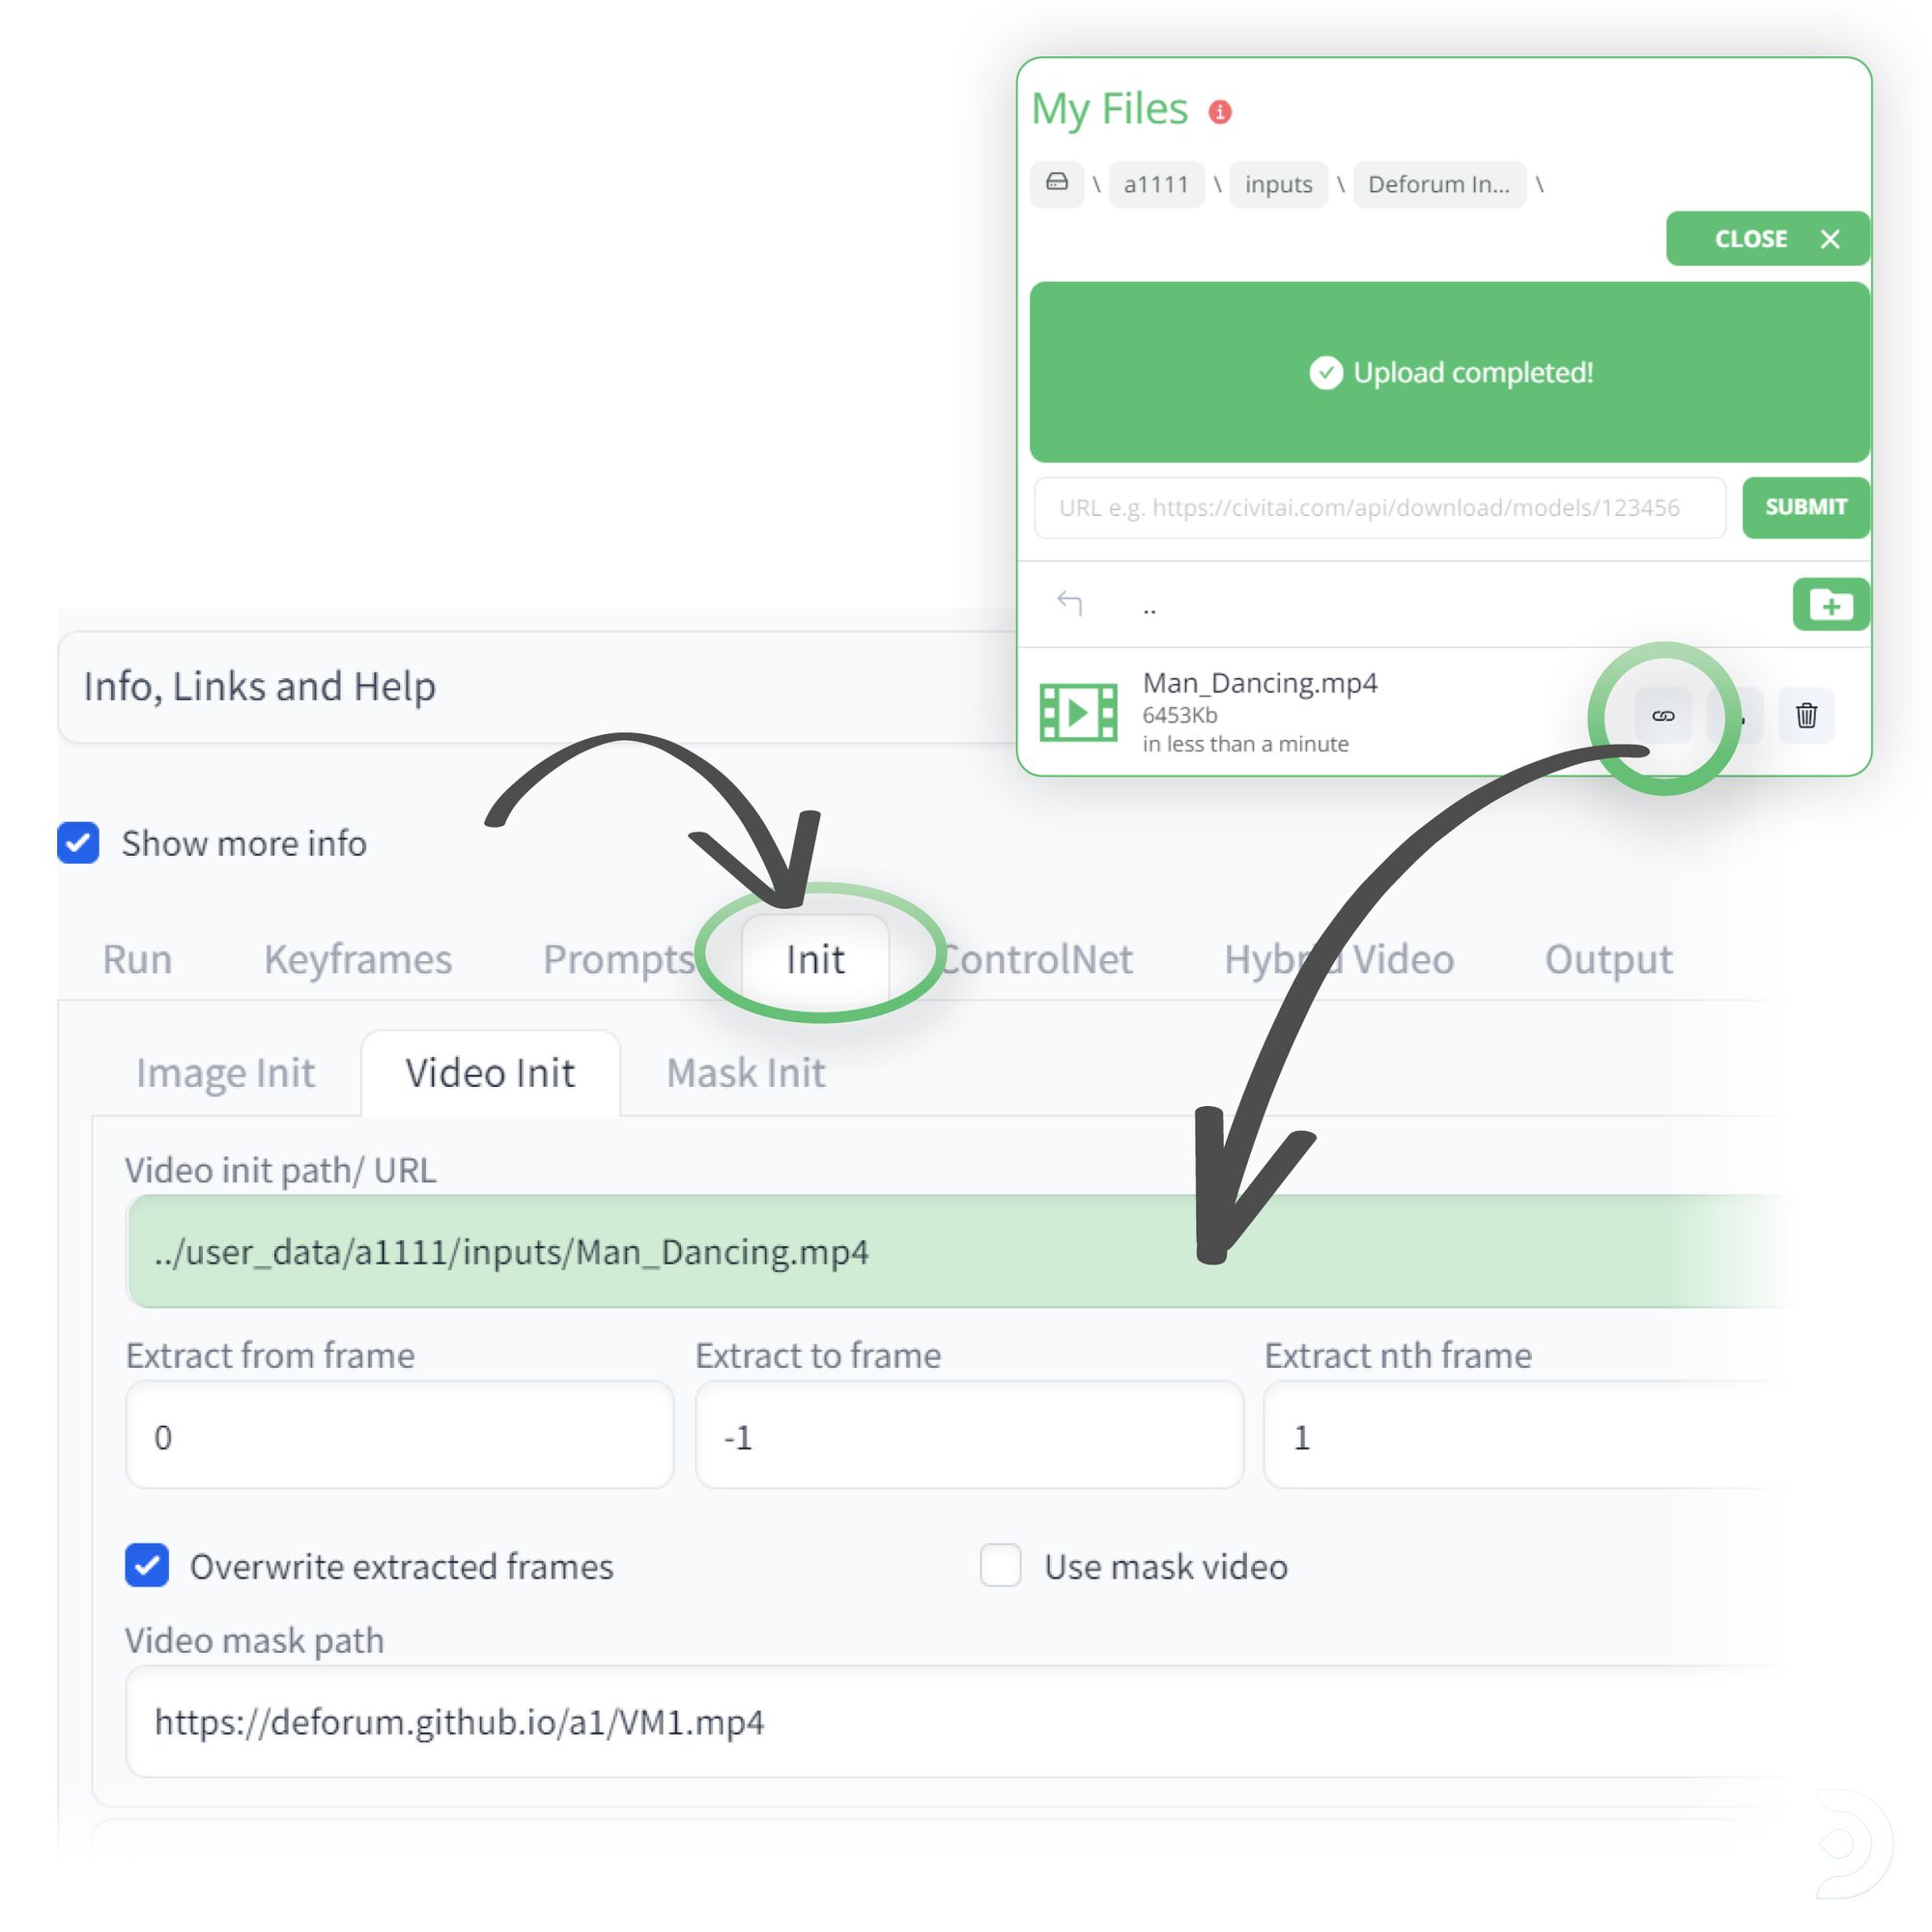
We can now upload the following video of a man dancing to the input folder within ThinkDiffusion.
💡Protip: Uploading files within ThinkDiffusion is super simple, and you can do it through Drag & Drop and URL
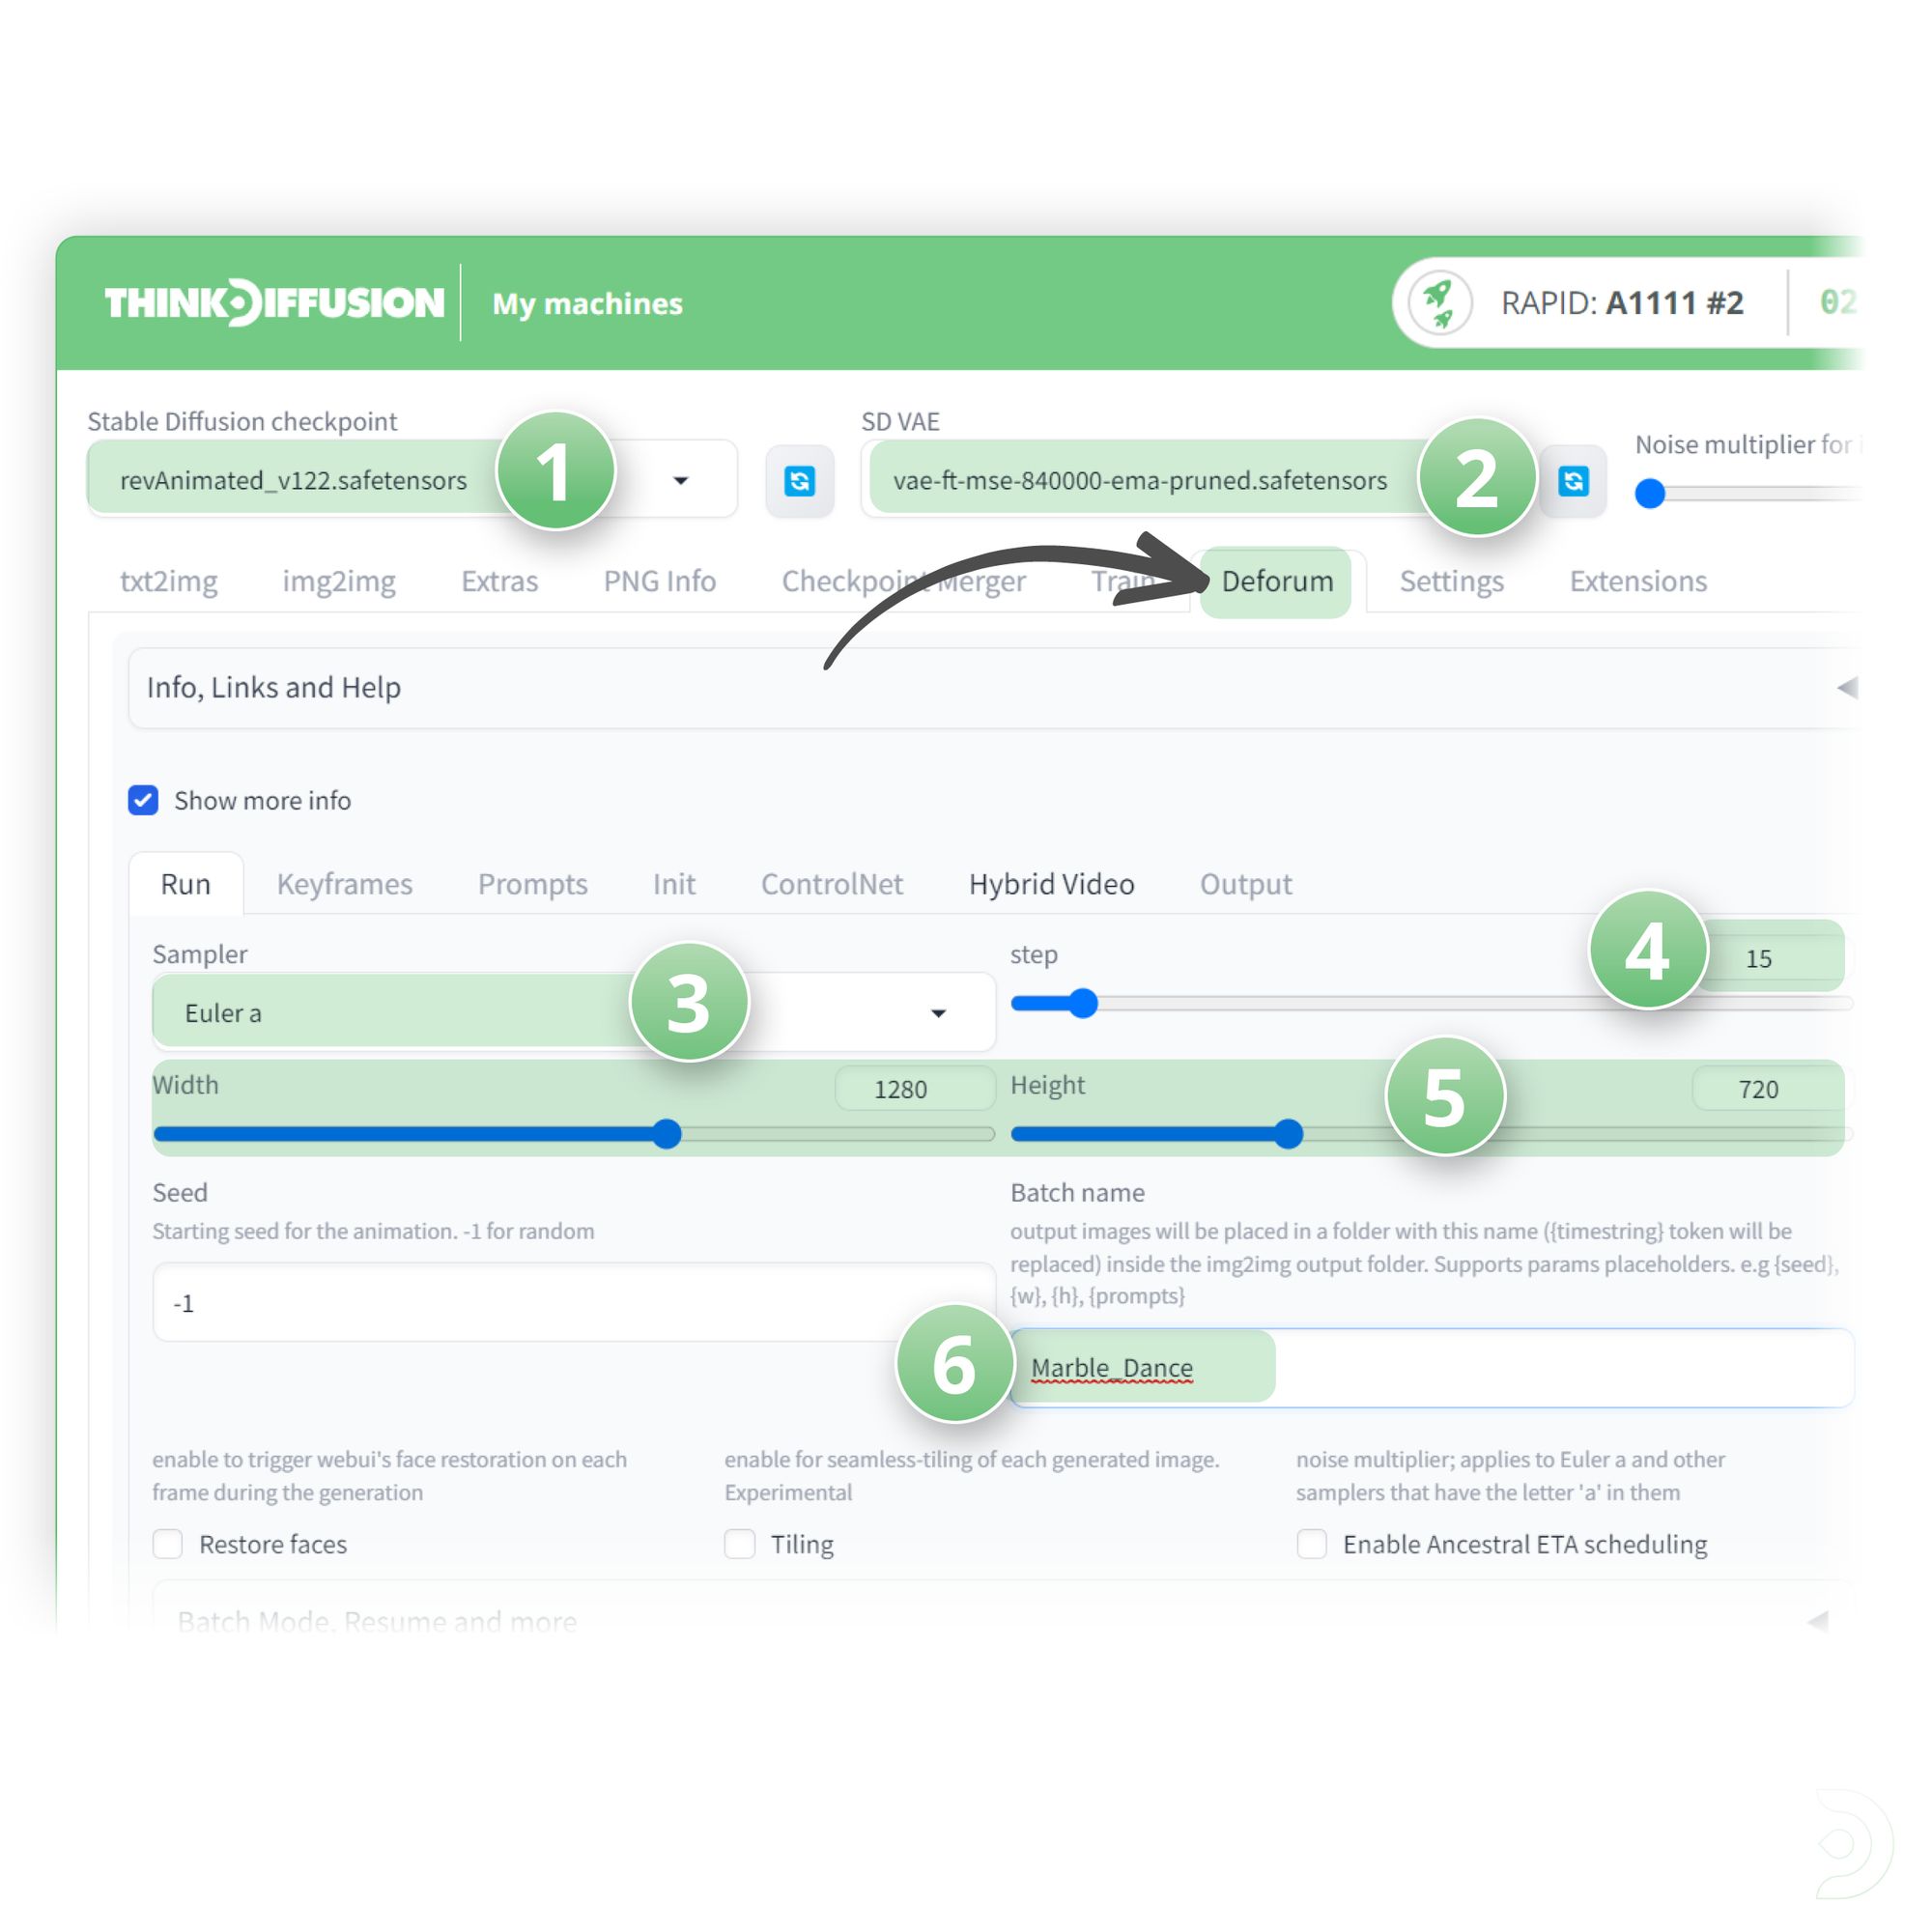
We can then head over to the Deforum tab and on the run tab we can select:
- (1) RevAnimated as the stable diffusion checkpoint
- (2) Vae-ft-mse-840000-ema-pruned as the SD VAE setting
- (3) Euler a as the Sampler
- (4) Set the number of steps to 15
- (5) Set the resolution of 1280 Width x 720 Height to match the resolution of our input video
- (6) Enter a name for your Batch Name
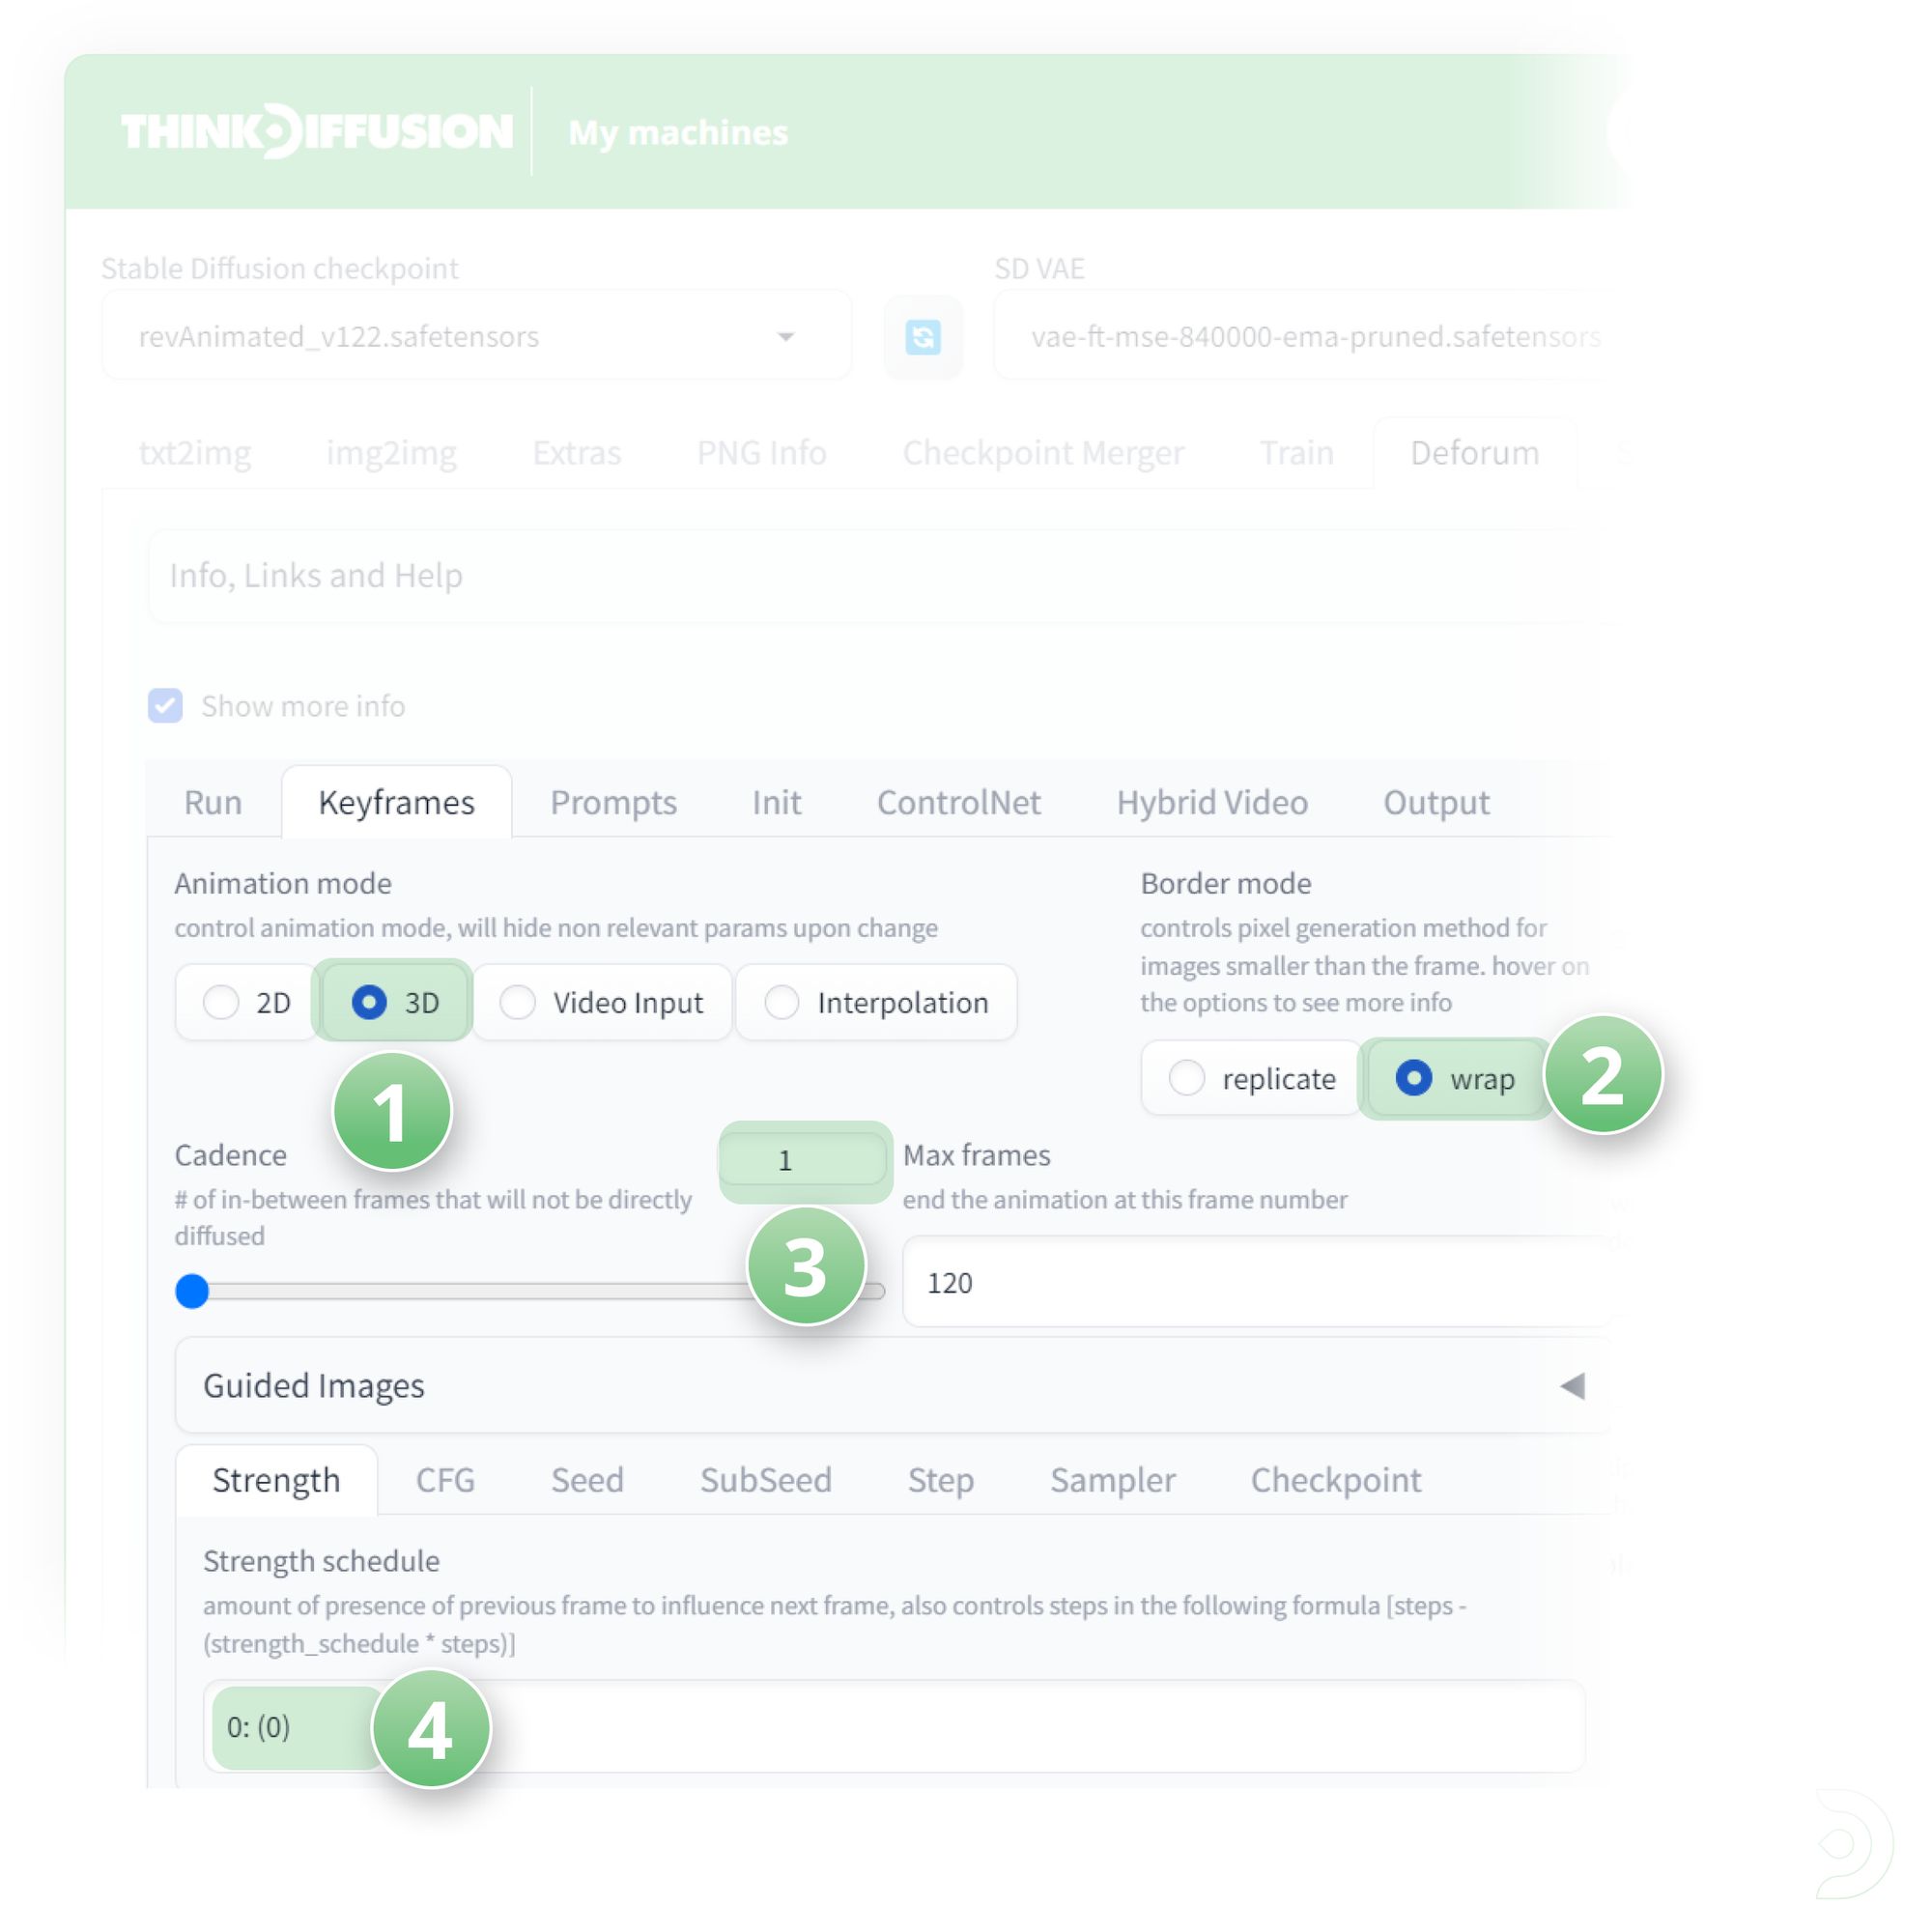
On the Keyframes tab:
- (1) Set the Animation mode to 3D
- (2) Set the Border mode to wrap
- (3) Set the Cadence to 1
Protip 💡: For videos with quicker movement you should use a Cadence of 1 and for videos with less movement you should set the Cadence to 2 - (4) Change the Strength schedule to 0:(0)
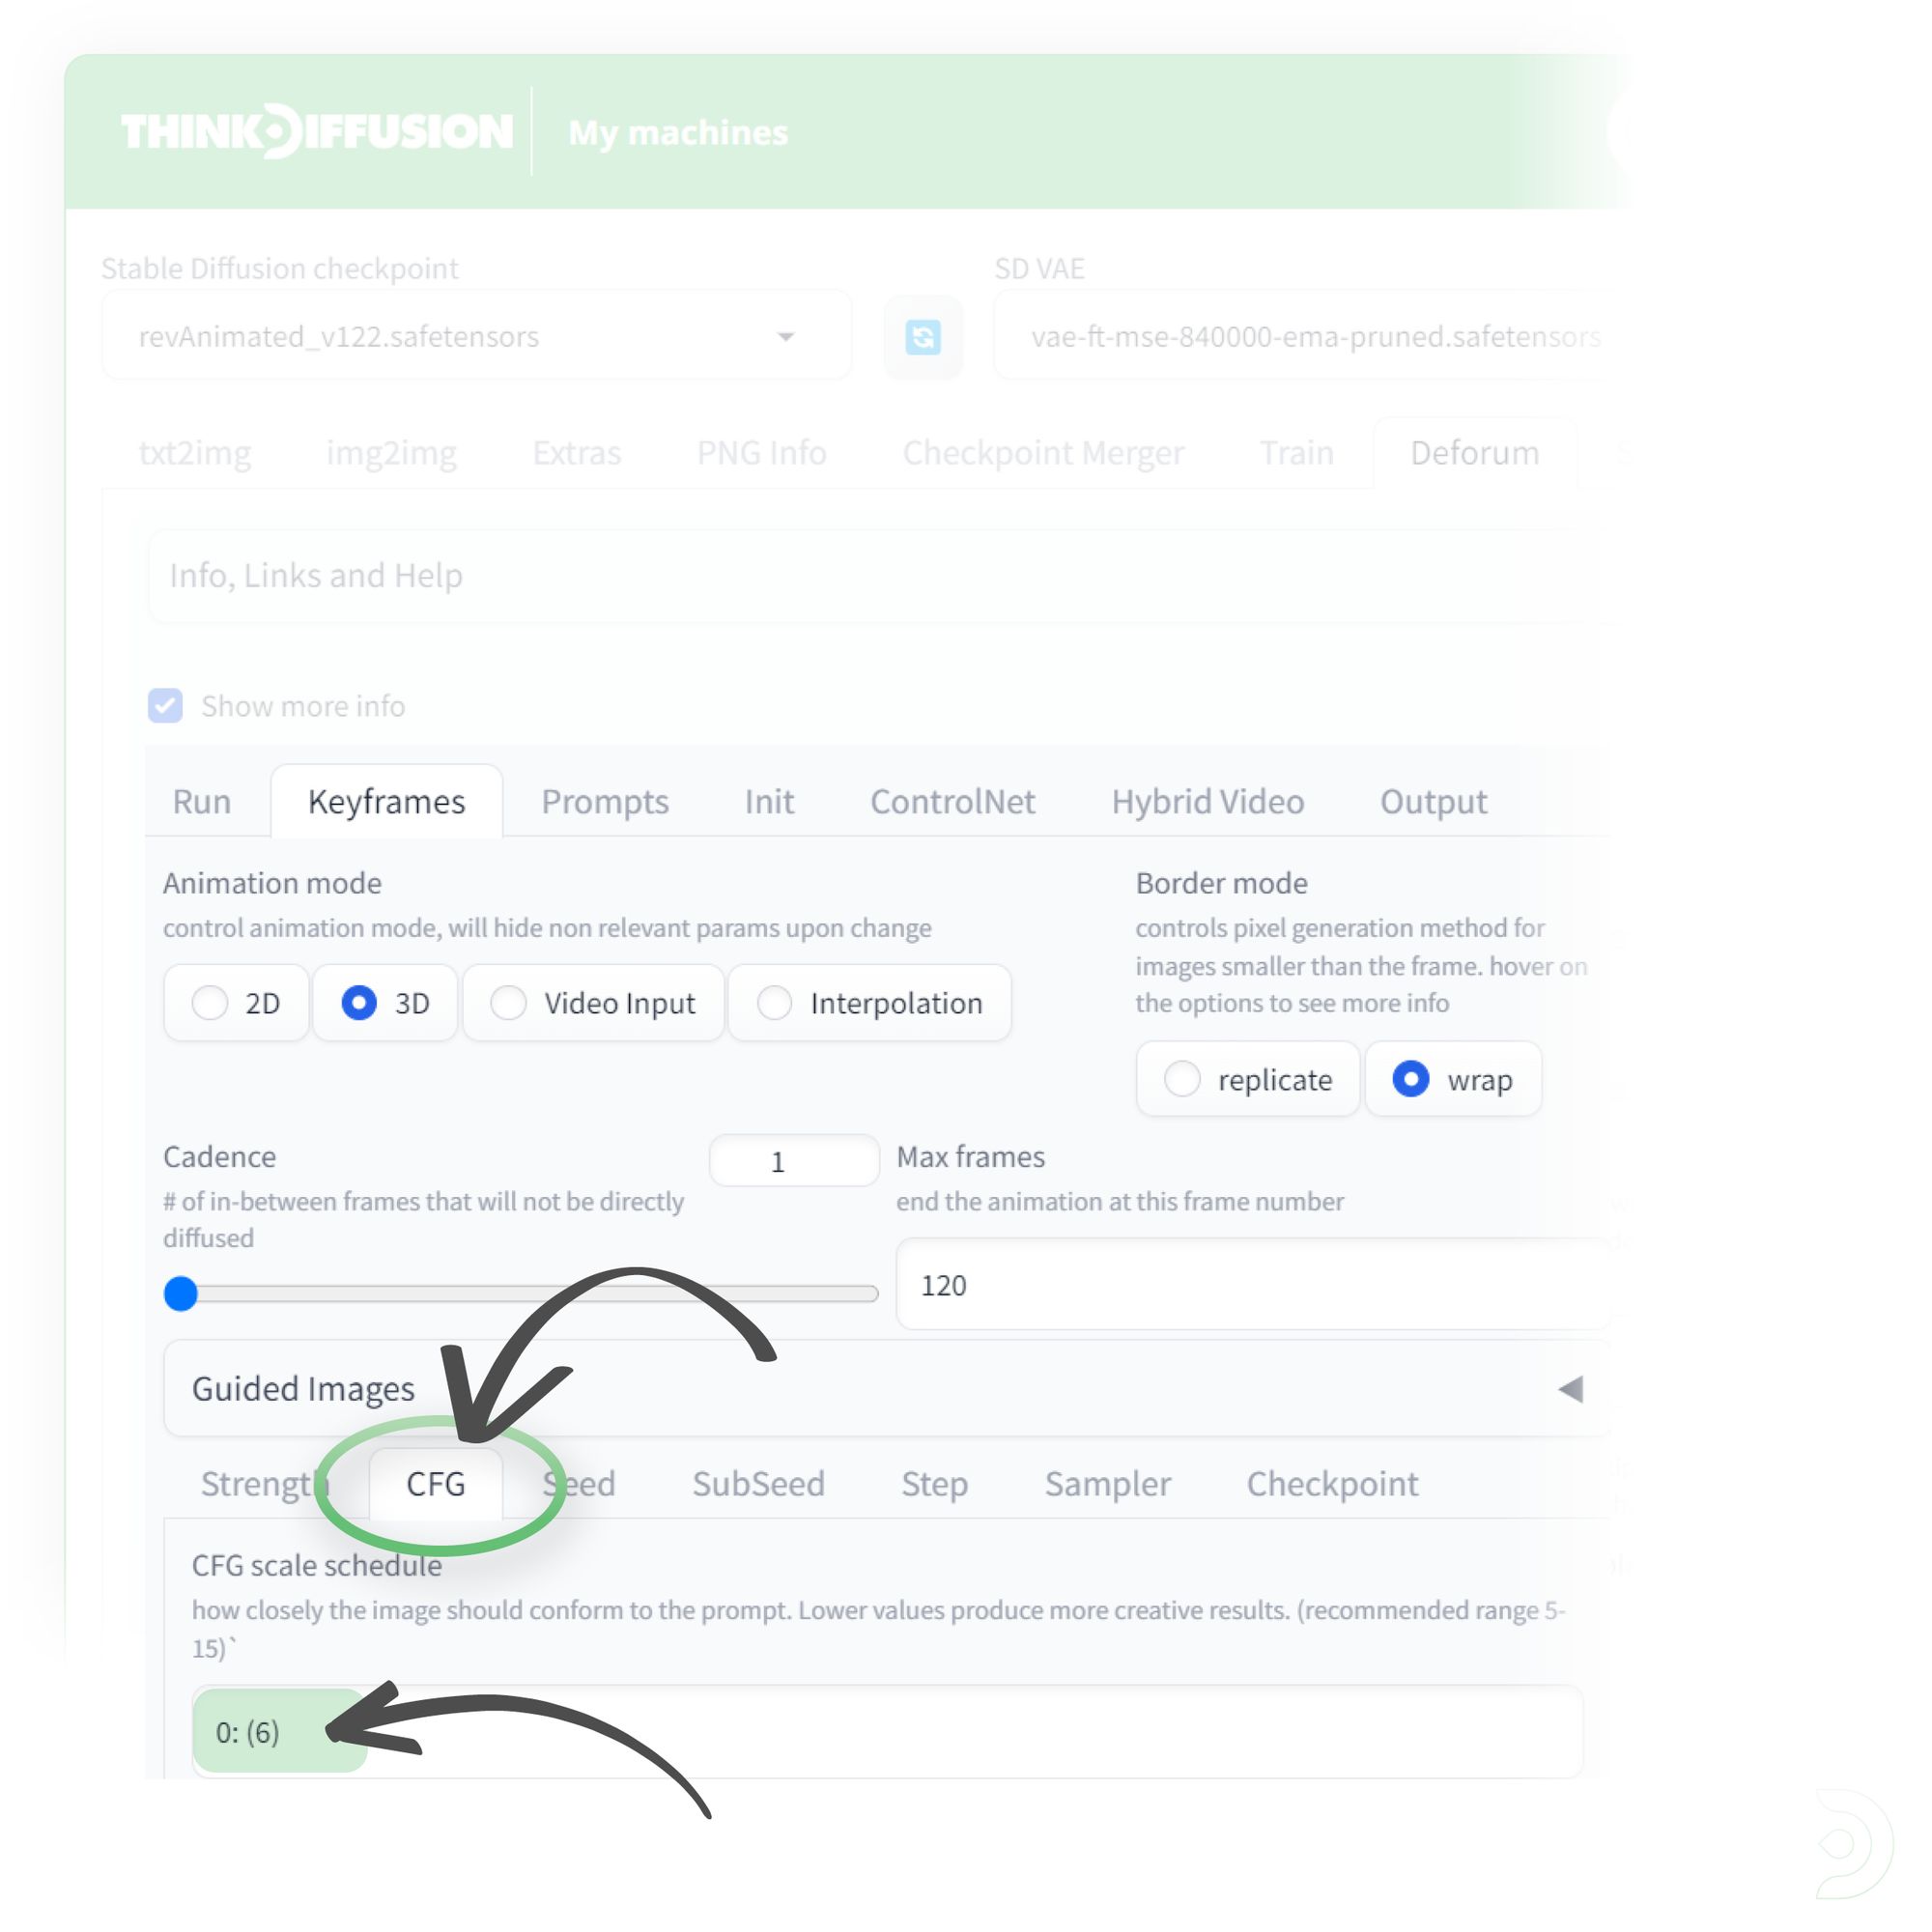
Within the CFG tab:
- change the CFG scale schedule to 0:(6)
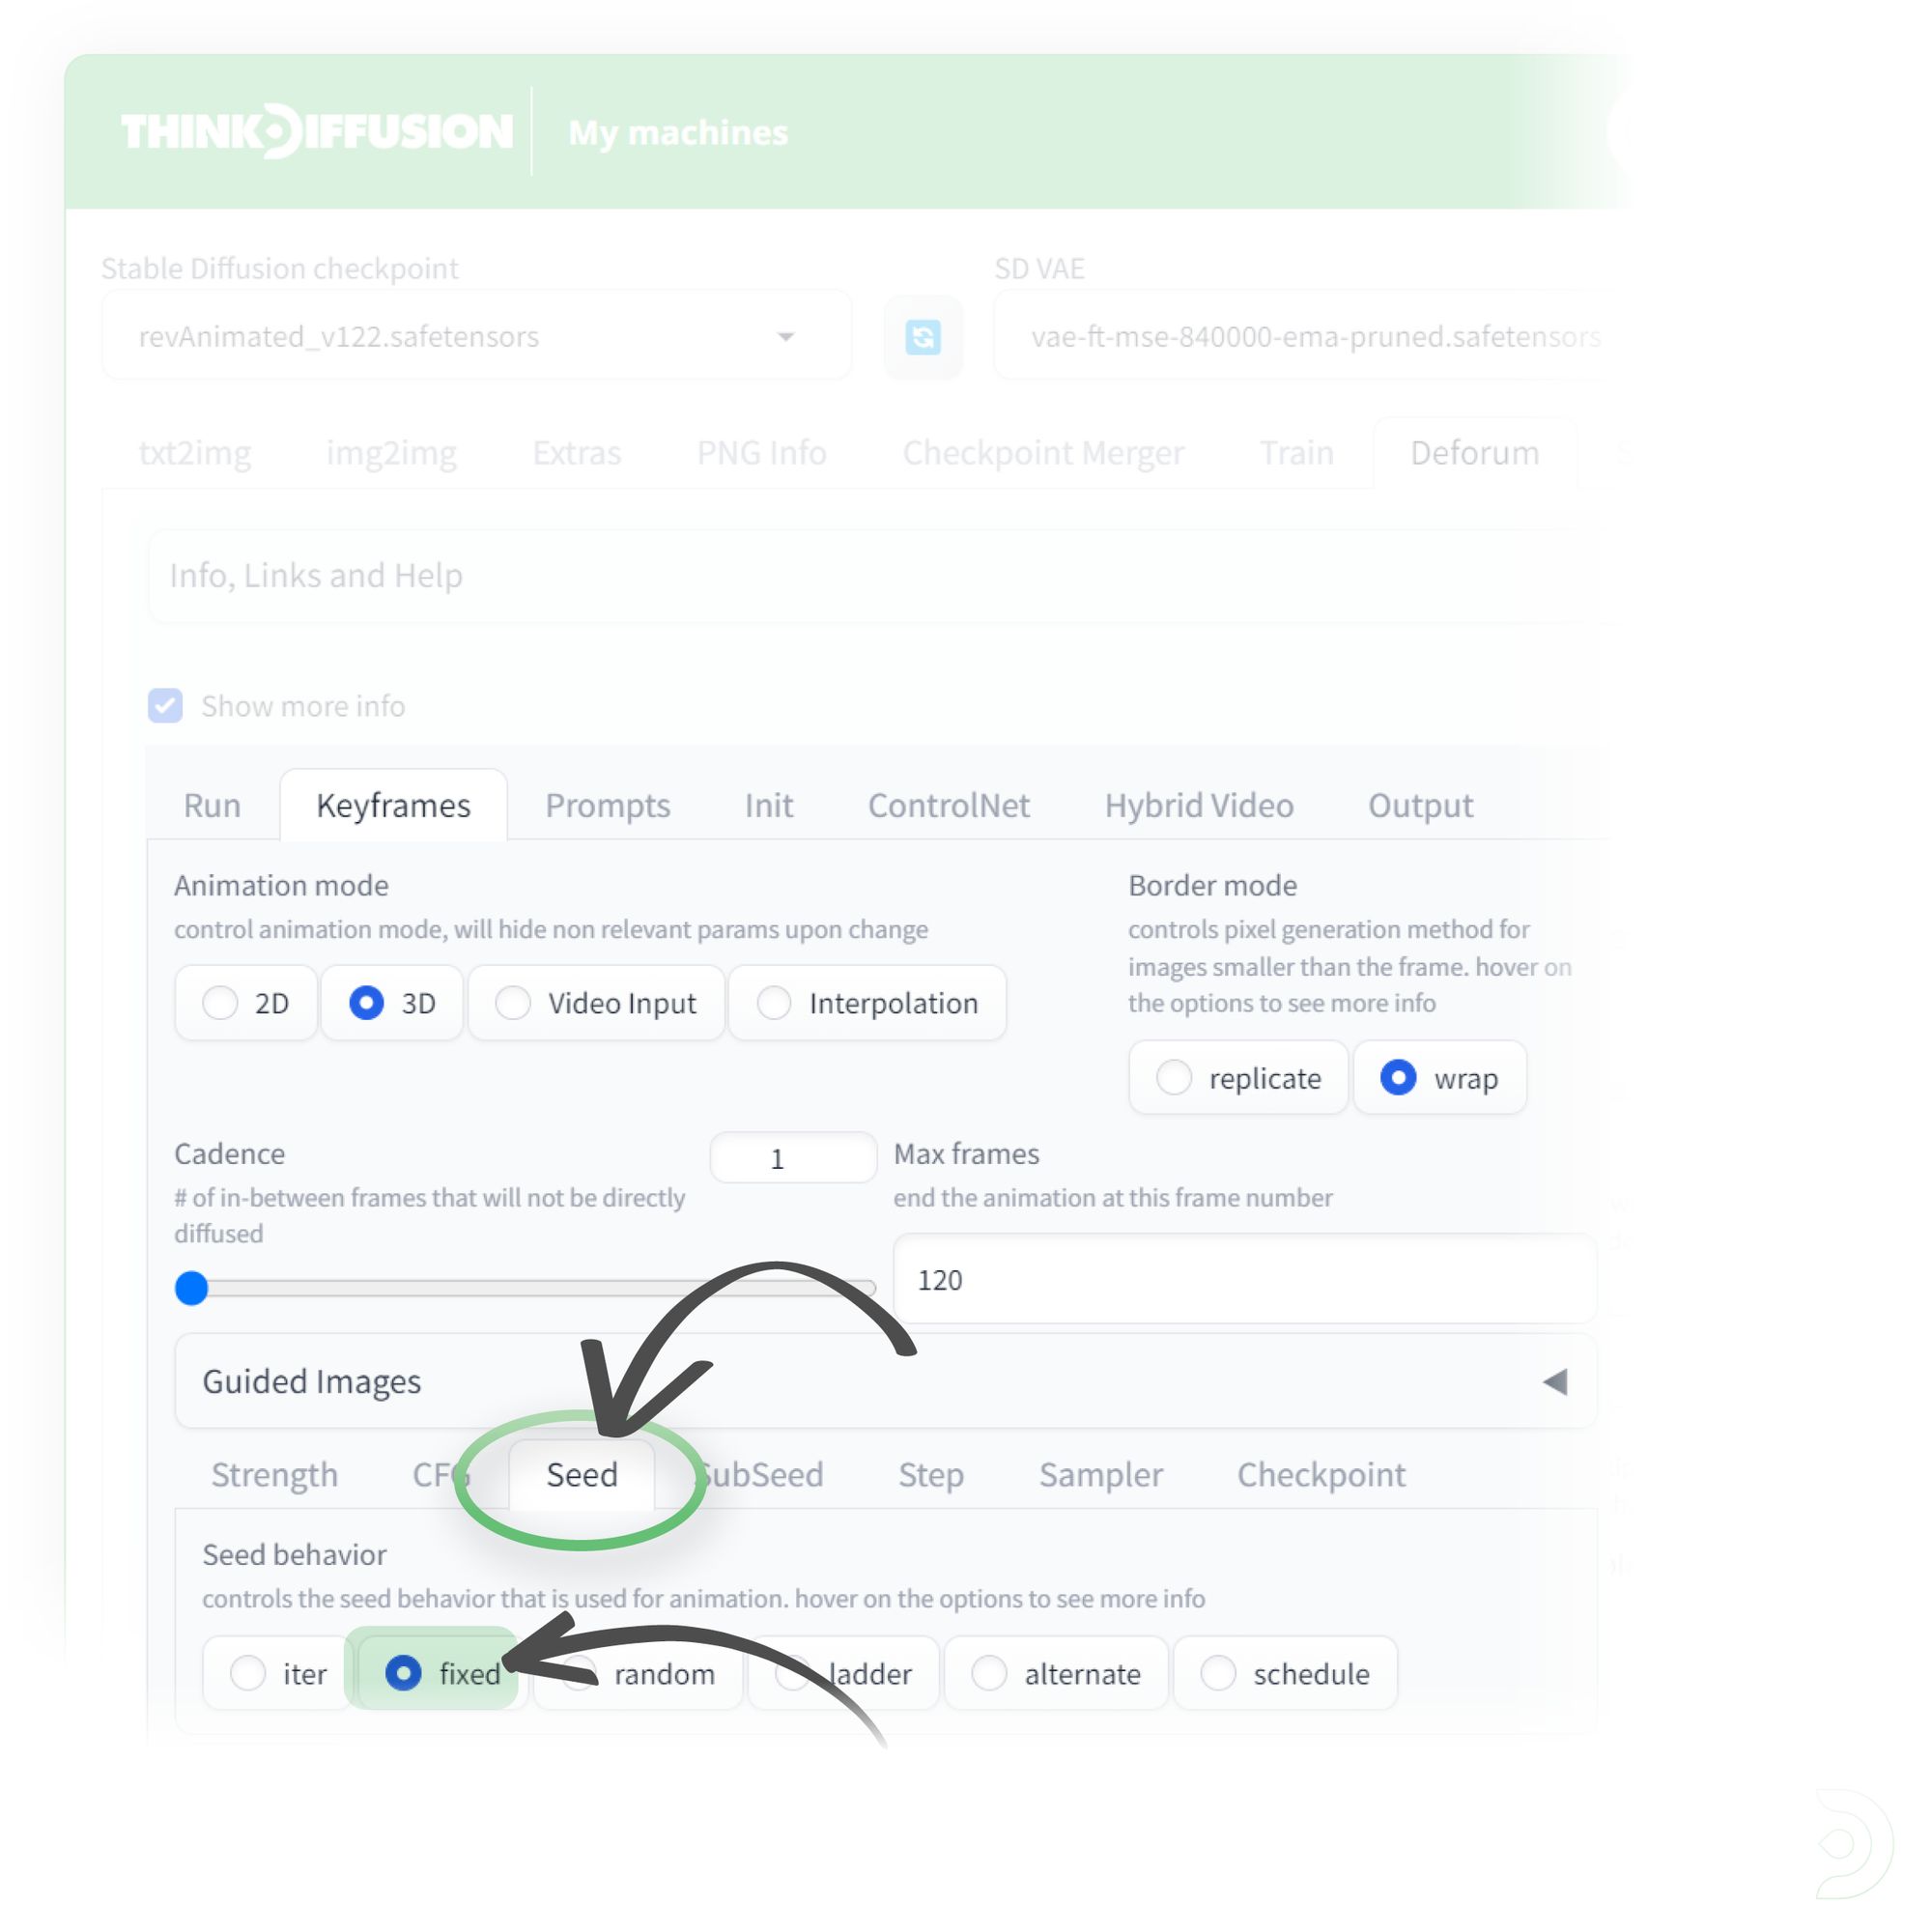
Within the Seed tab:
- Change the seed behaviour to fixed to help with consistency
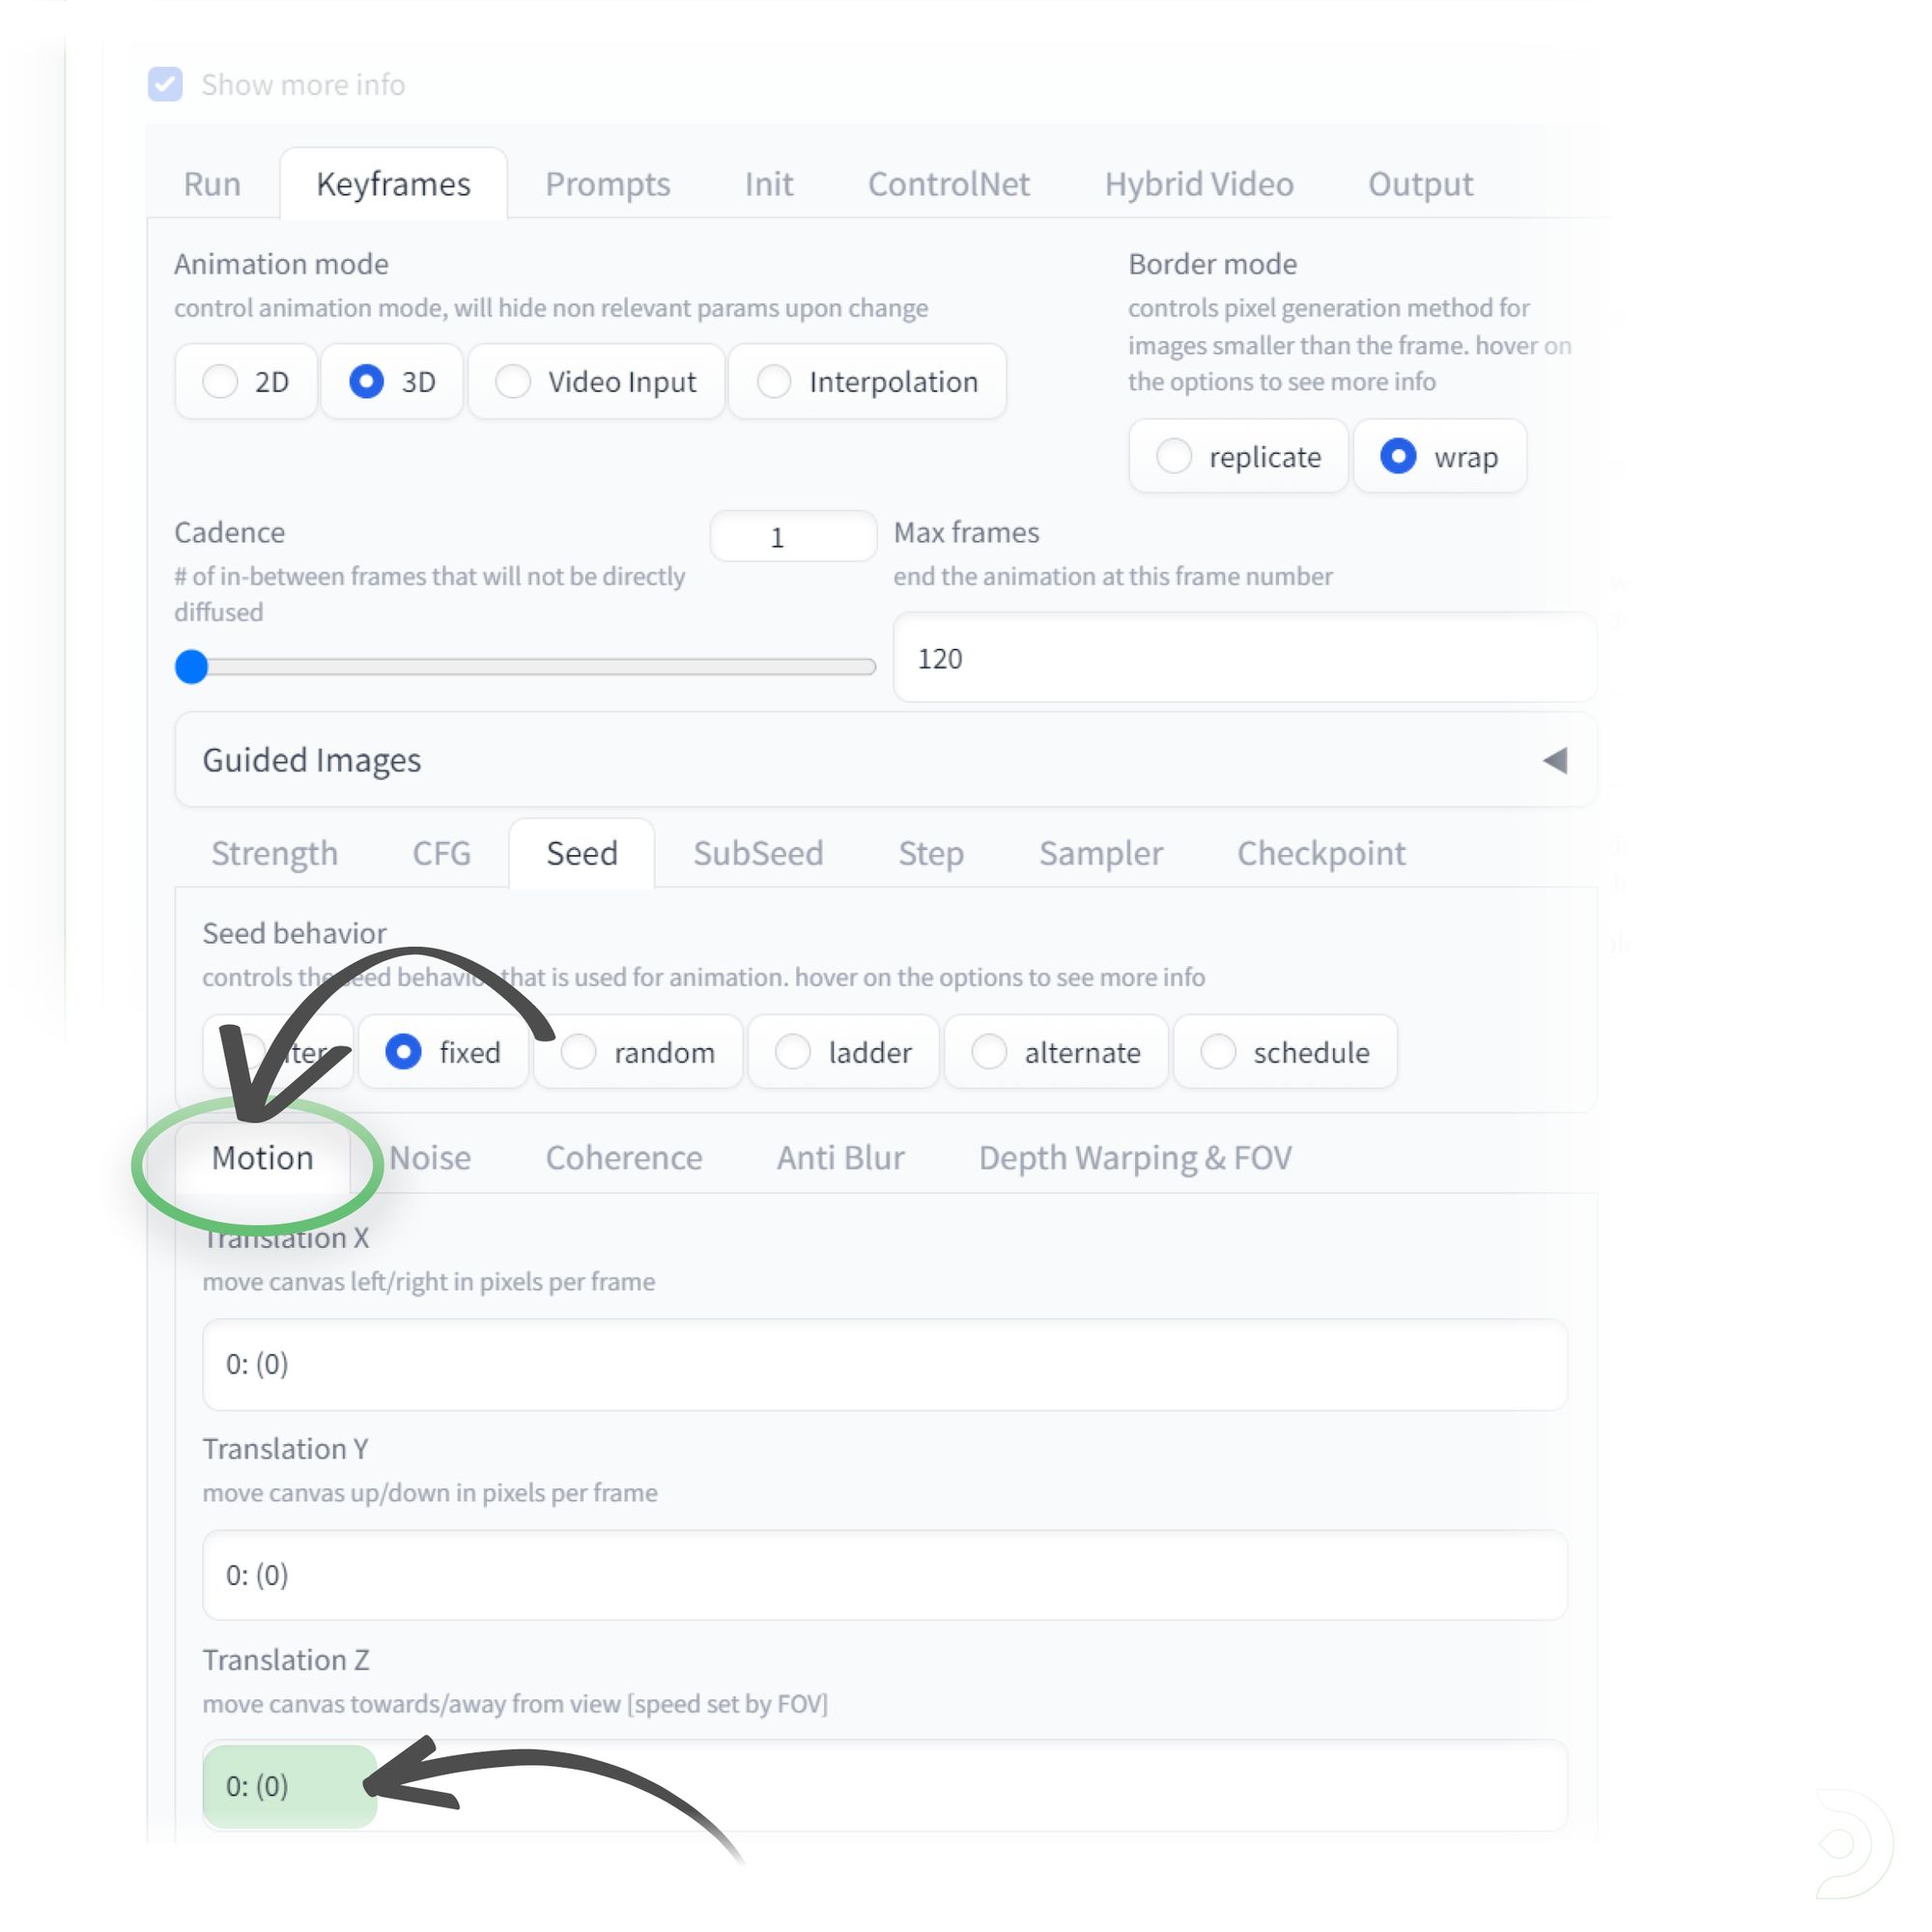
Within the Motion tab:
- Set the Translation Z to 0: (0)
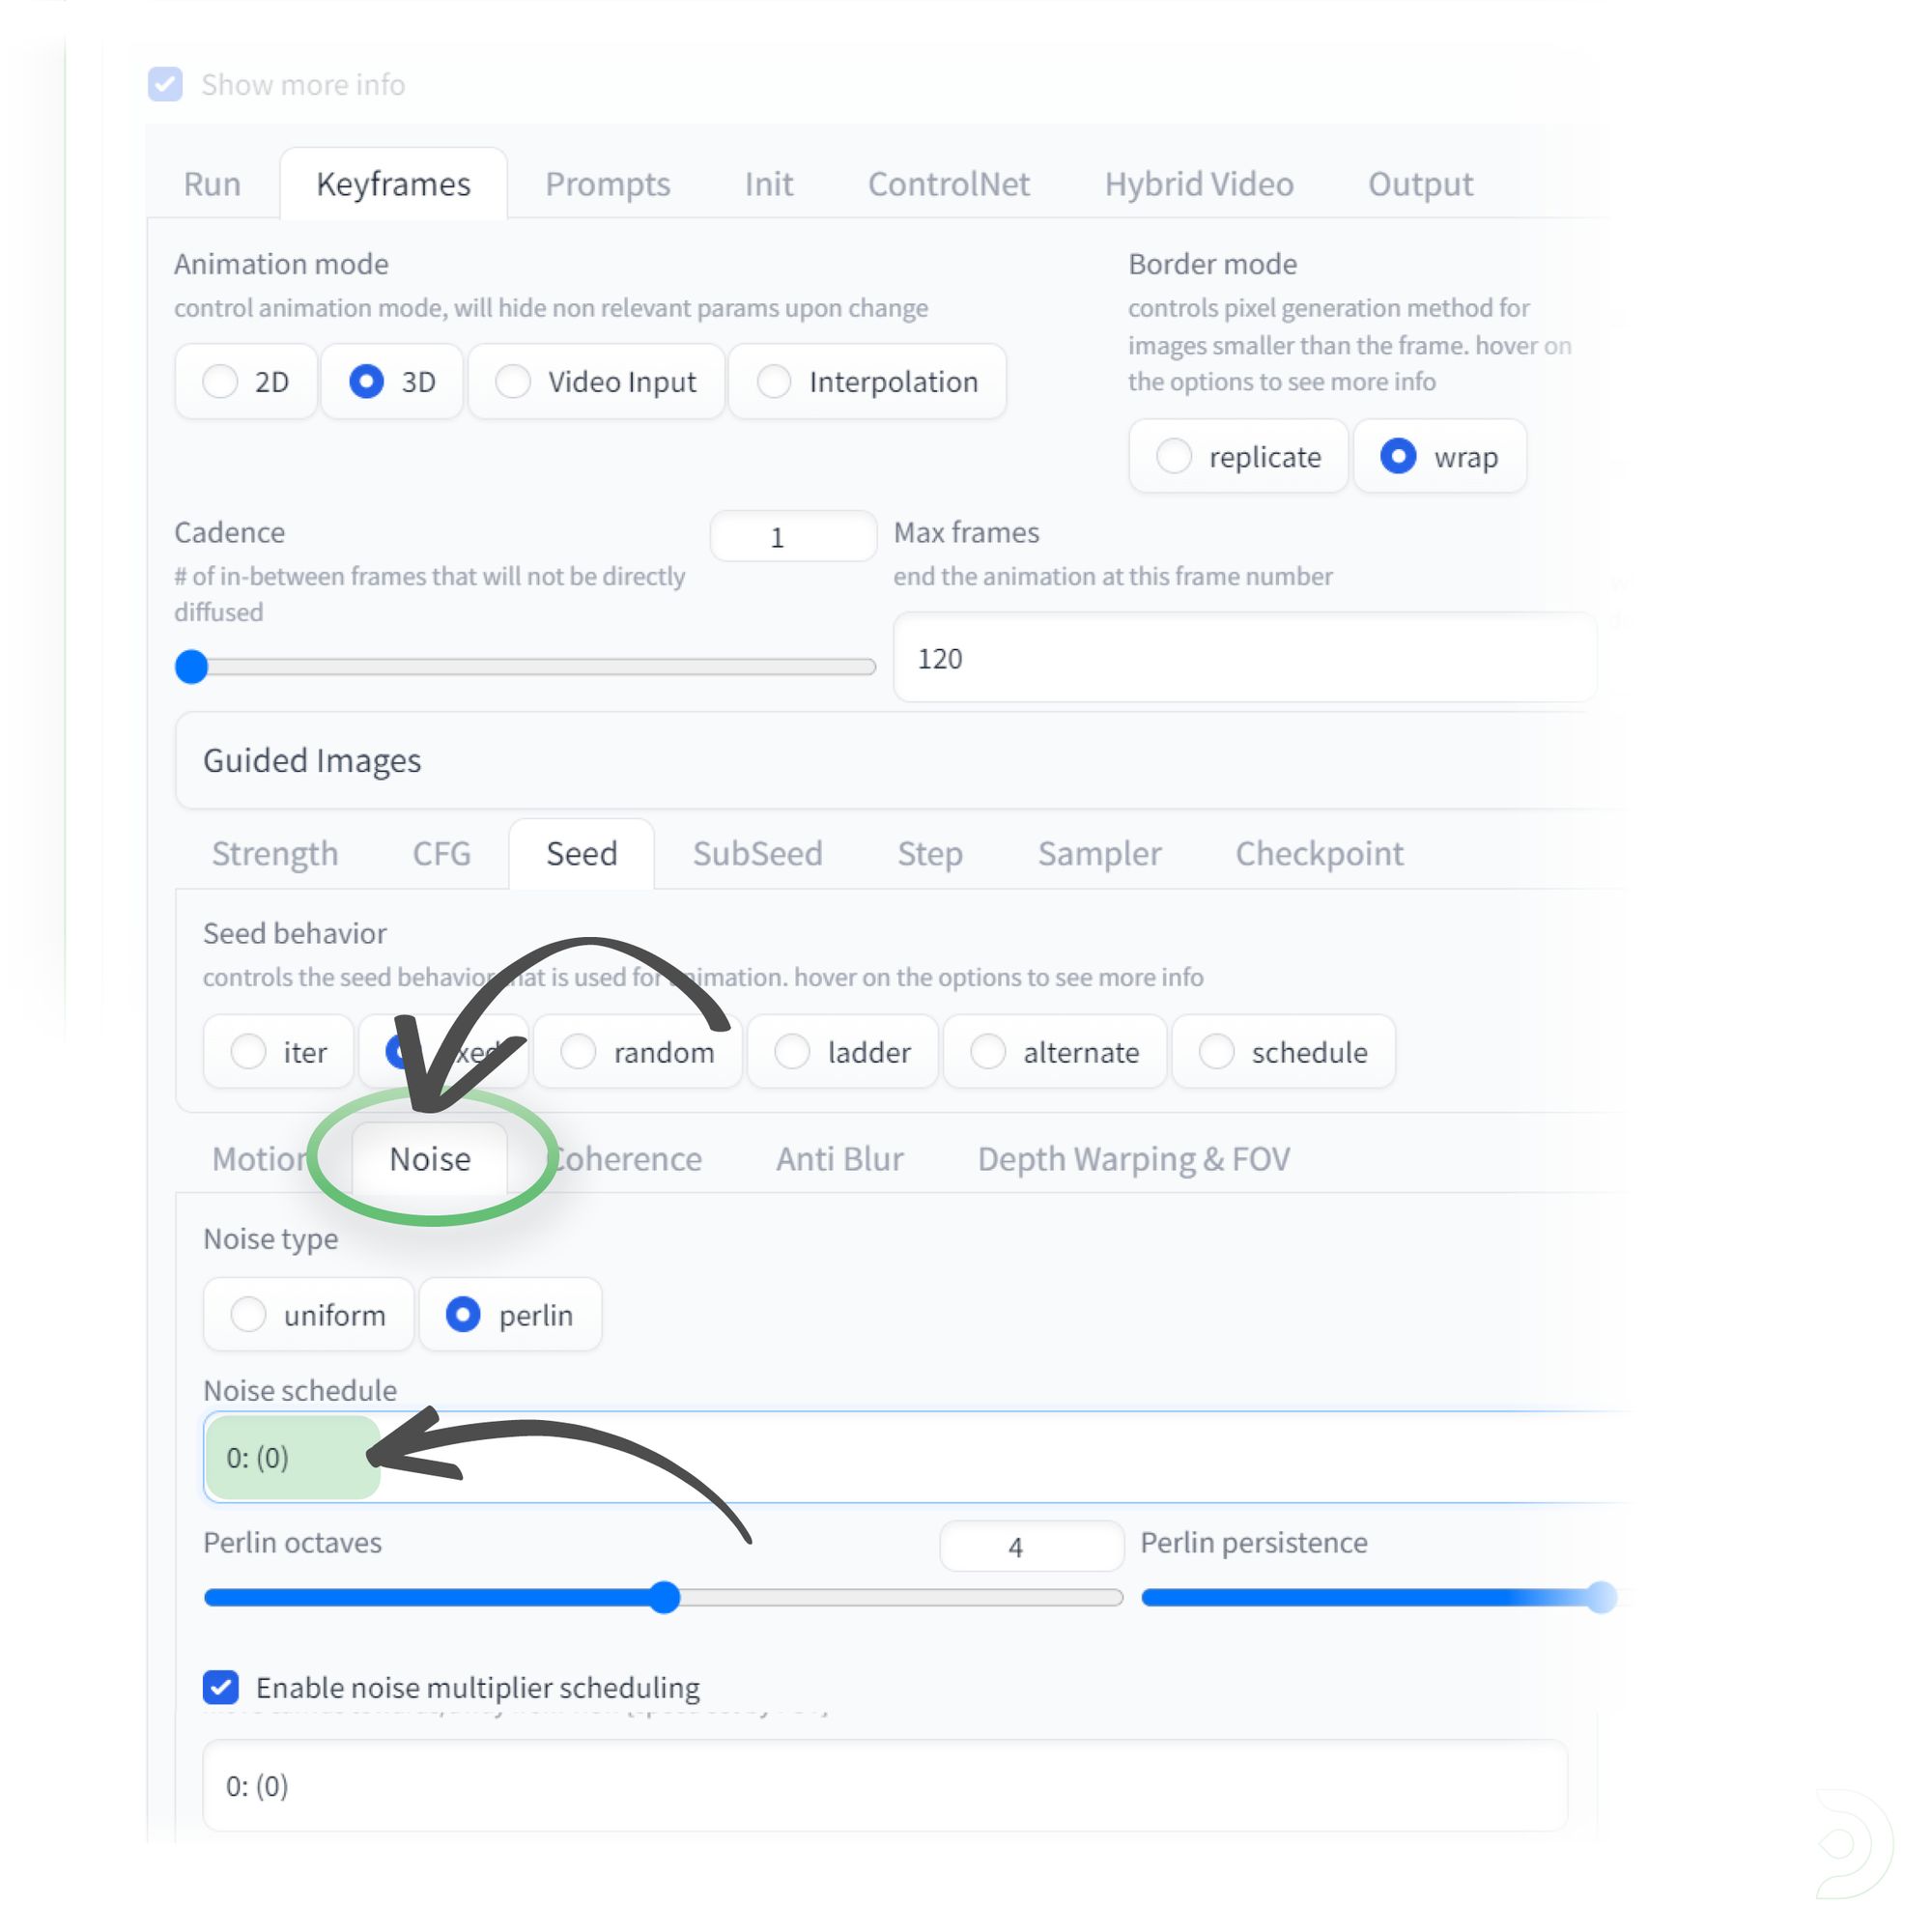
Within the Noise tab
- set the Noise schedule to 0: (0)
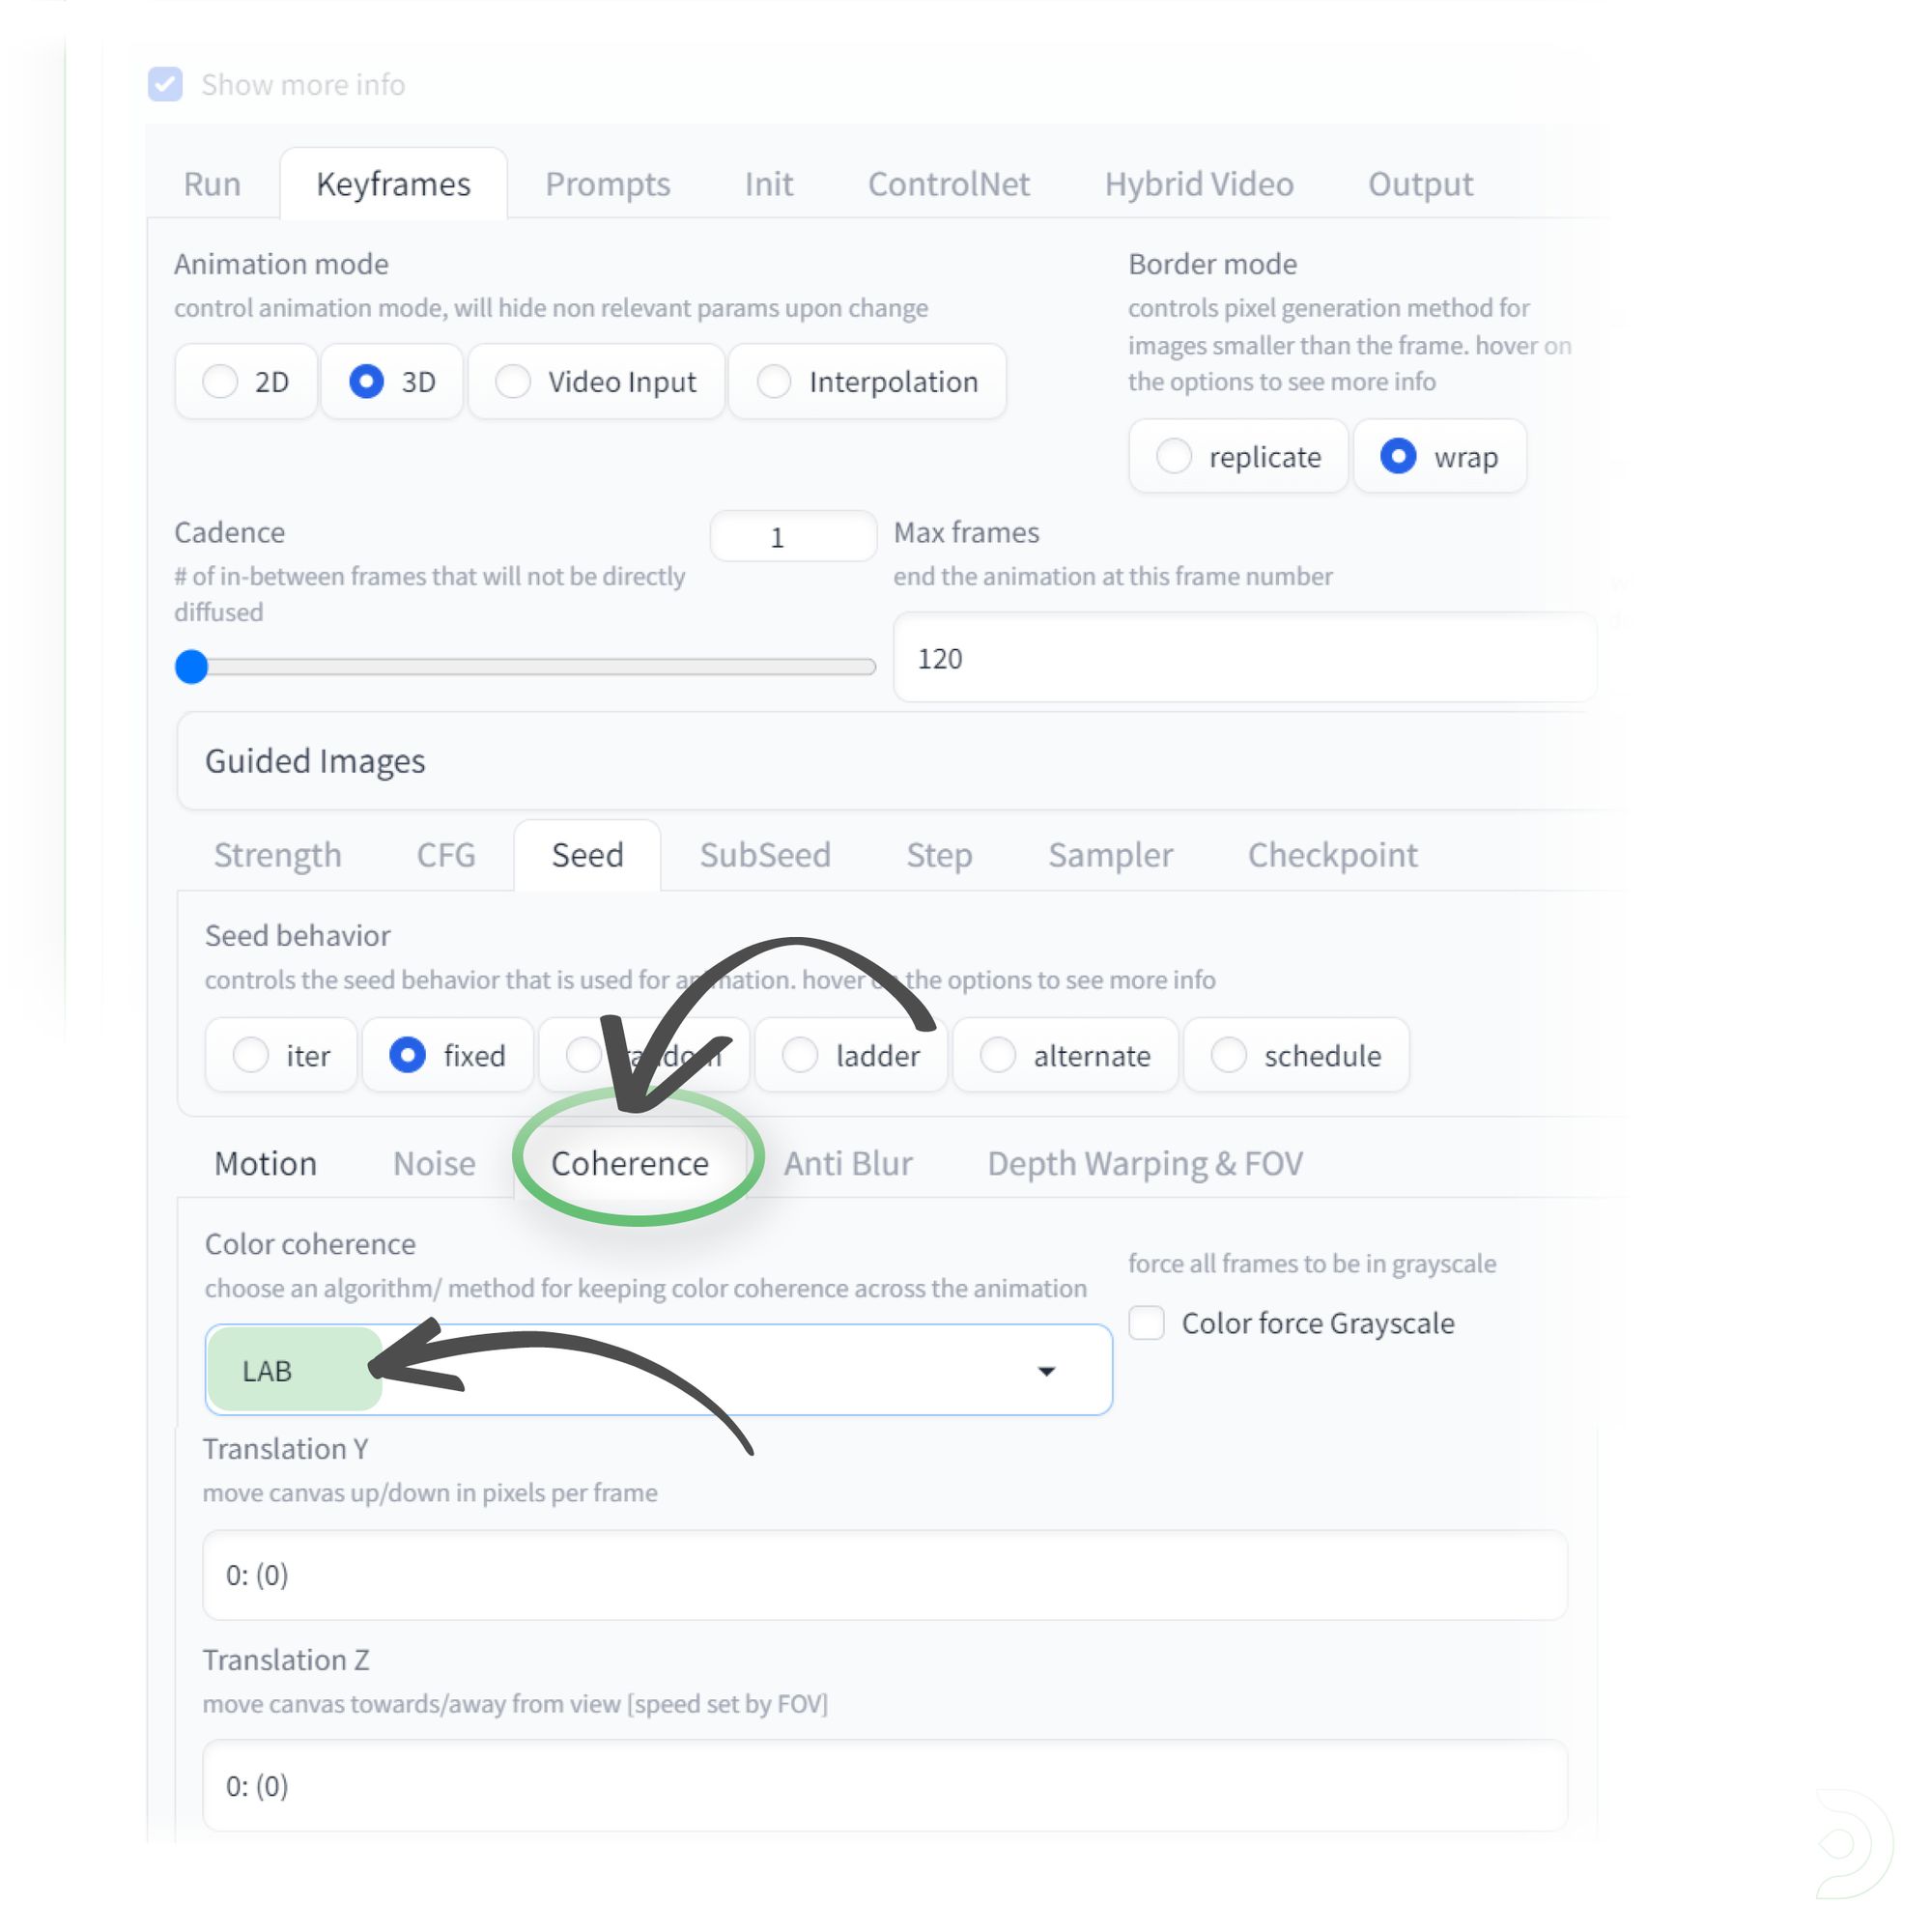
Within the Coherence tab:
- Set the Color coherence to LAB. This will allow the colours to be brought in from our prompt
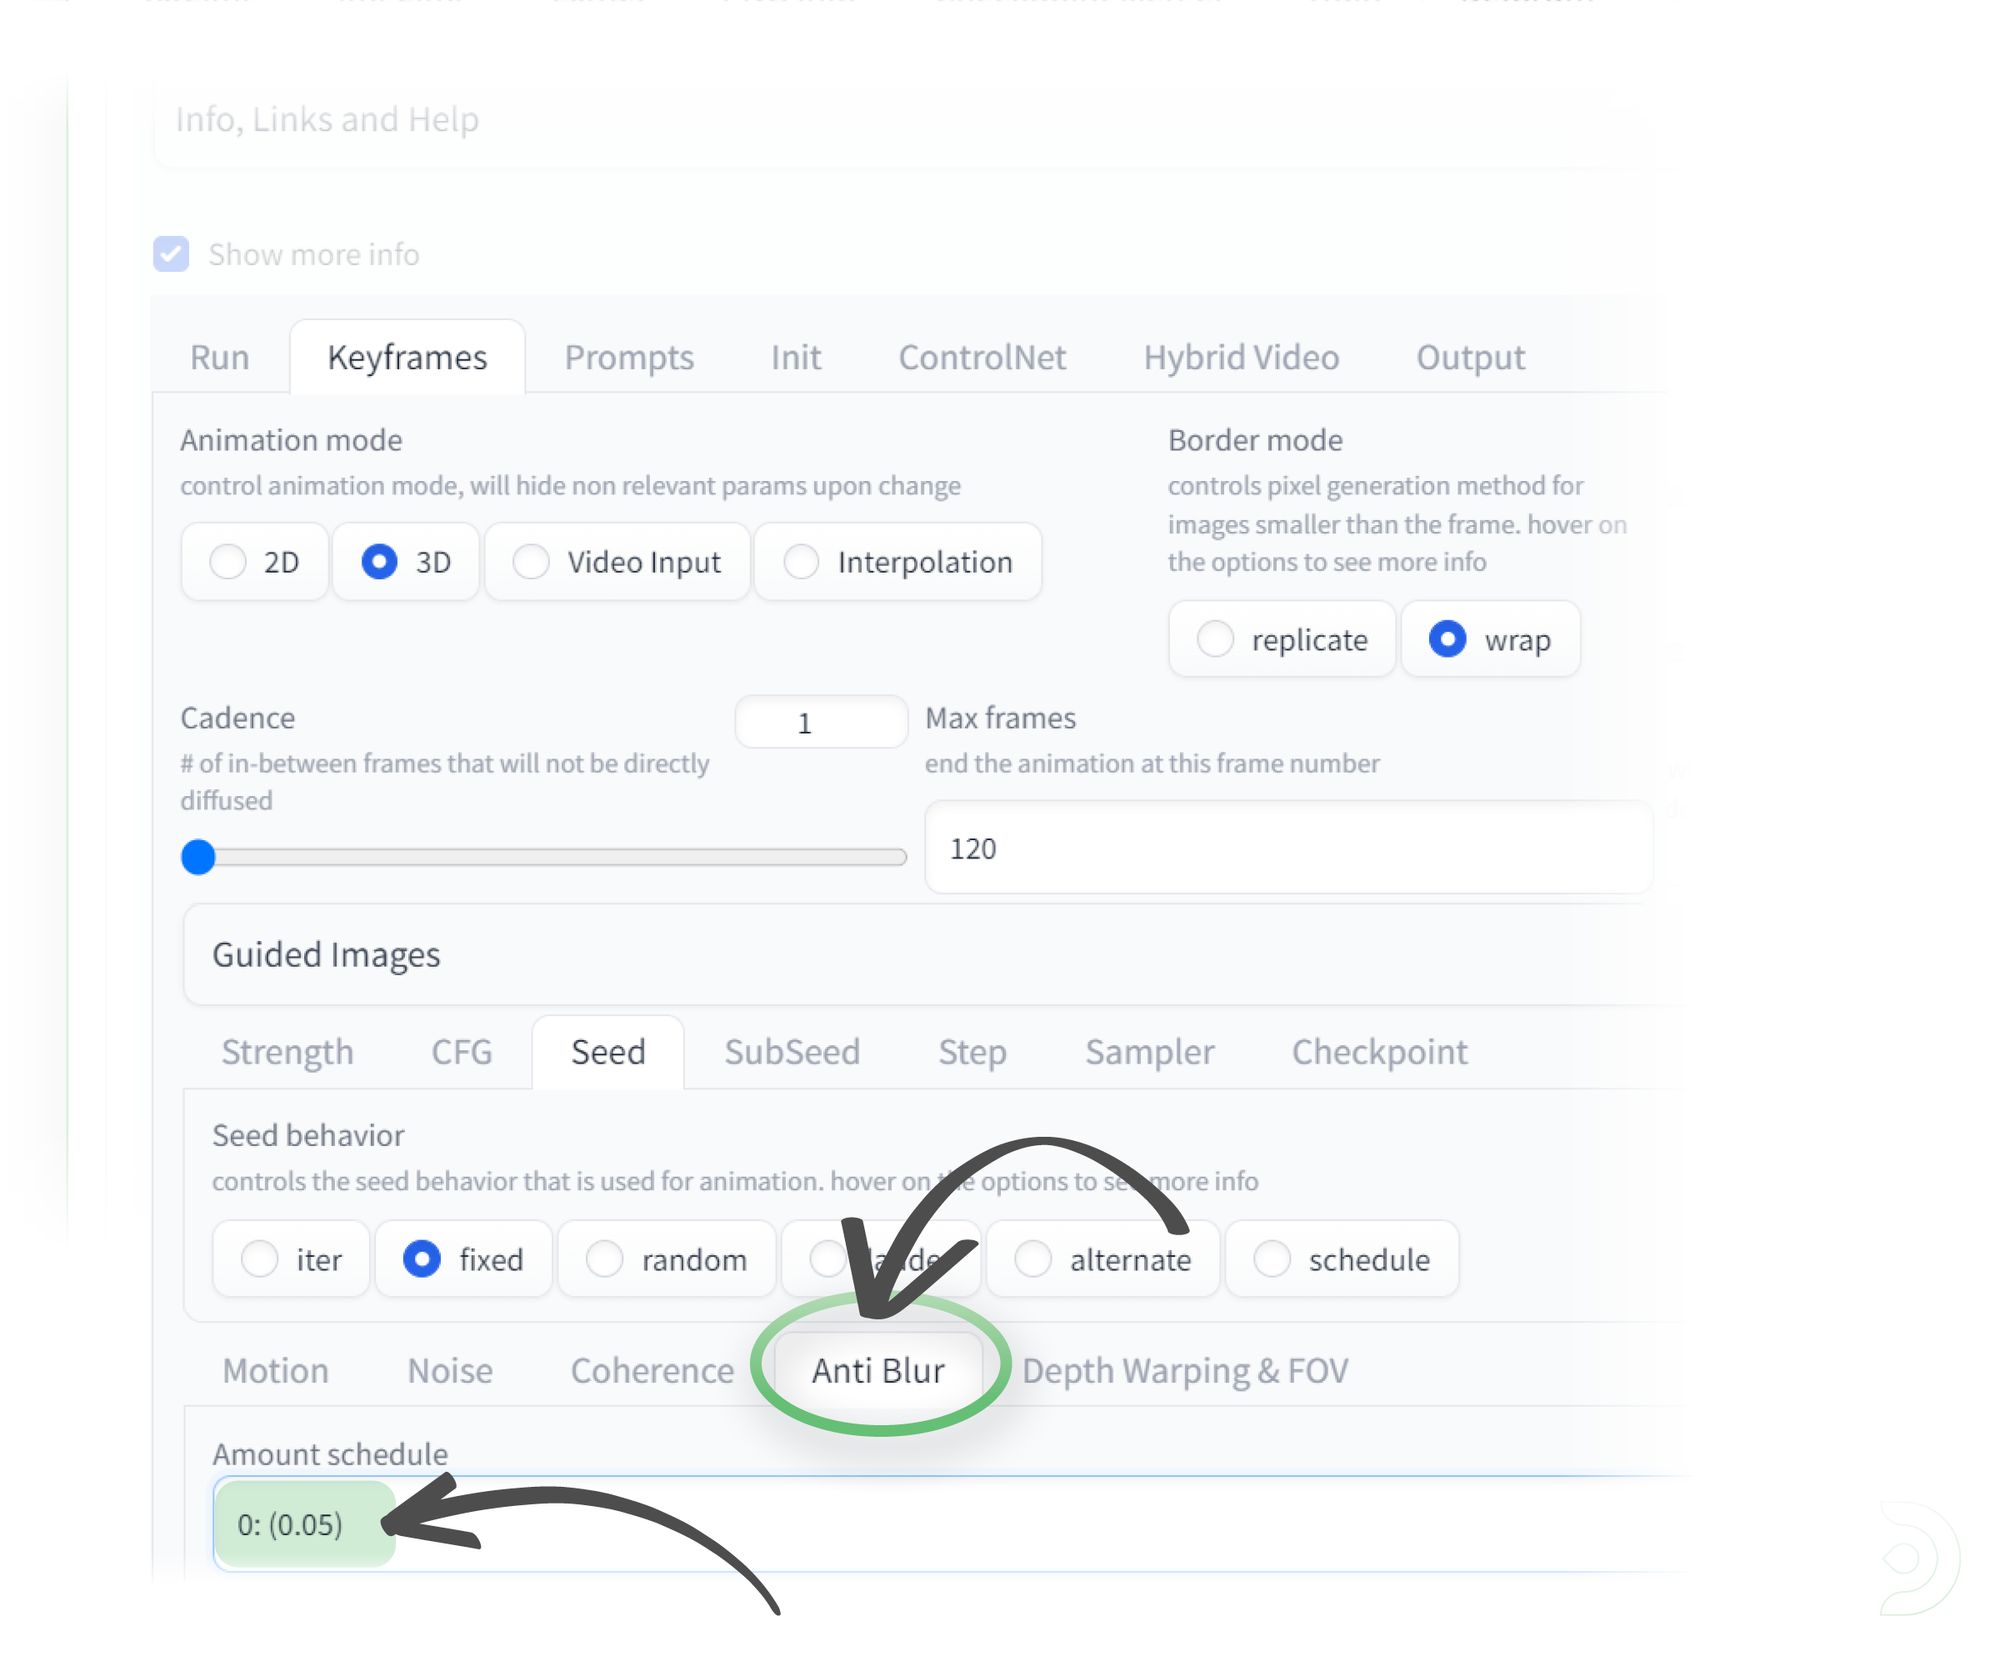
In the Anti Blur tab:
- Set the Amount schedule to 0:(0.05)
We can now copy our prompts from our Img2Img prompts that we used earlier into the Prompts tab.
Please note that you have to have it in the format as shown below to ensure it is valid json.
Negative prompts can be added below in the Prompts negative text box
We can now copy the link from where we uploaded our input video to and paste it into the Init > Video Init path
ControlNet Tab
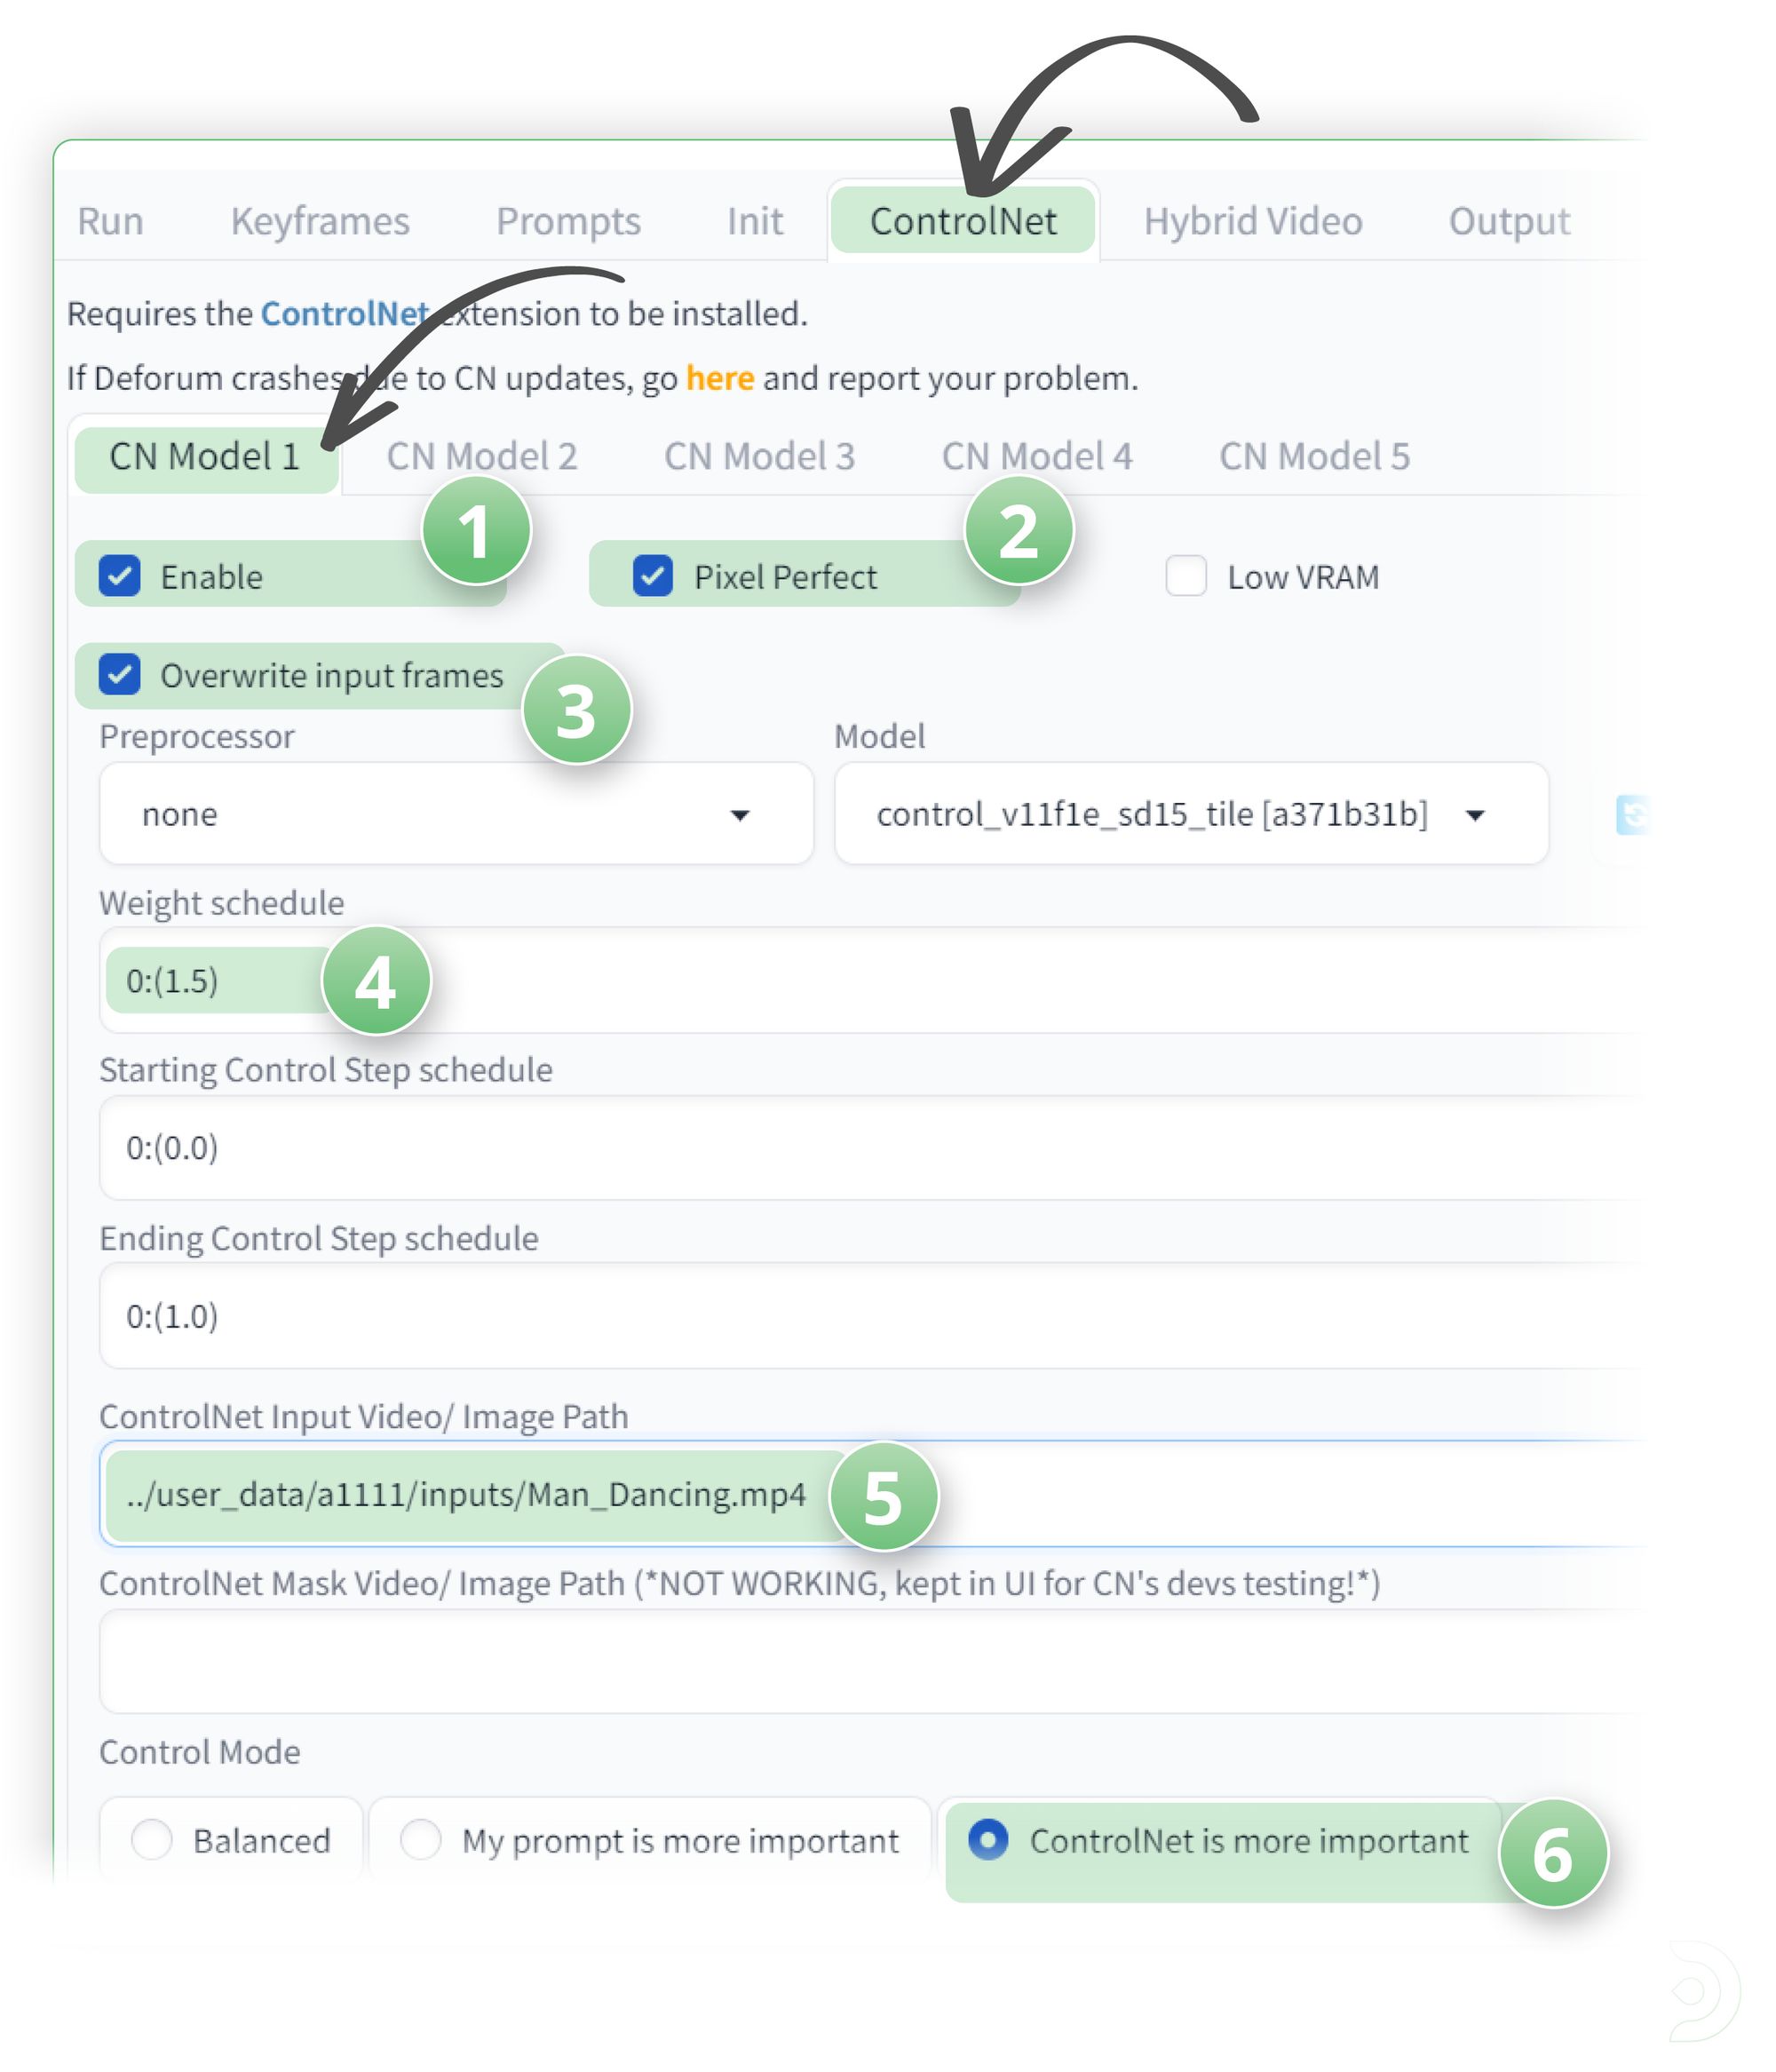
In the ControlNet tab:
- (1) Click ✅ Enable
- (2) Click ✅ Pixel Perfect
- (3) Click ✅ Overwrite input frames
- (4) Set the weight schedule to 0:(1.5)
- (5) Paste the link of your input video
- (6) Select ControlNet is more important
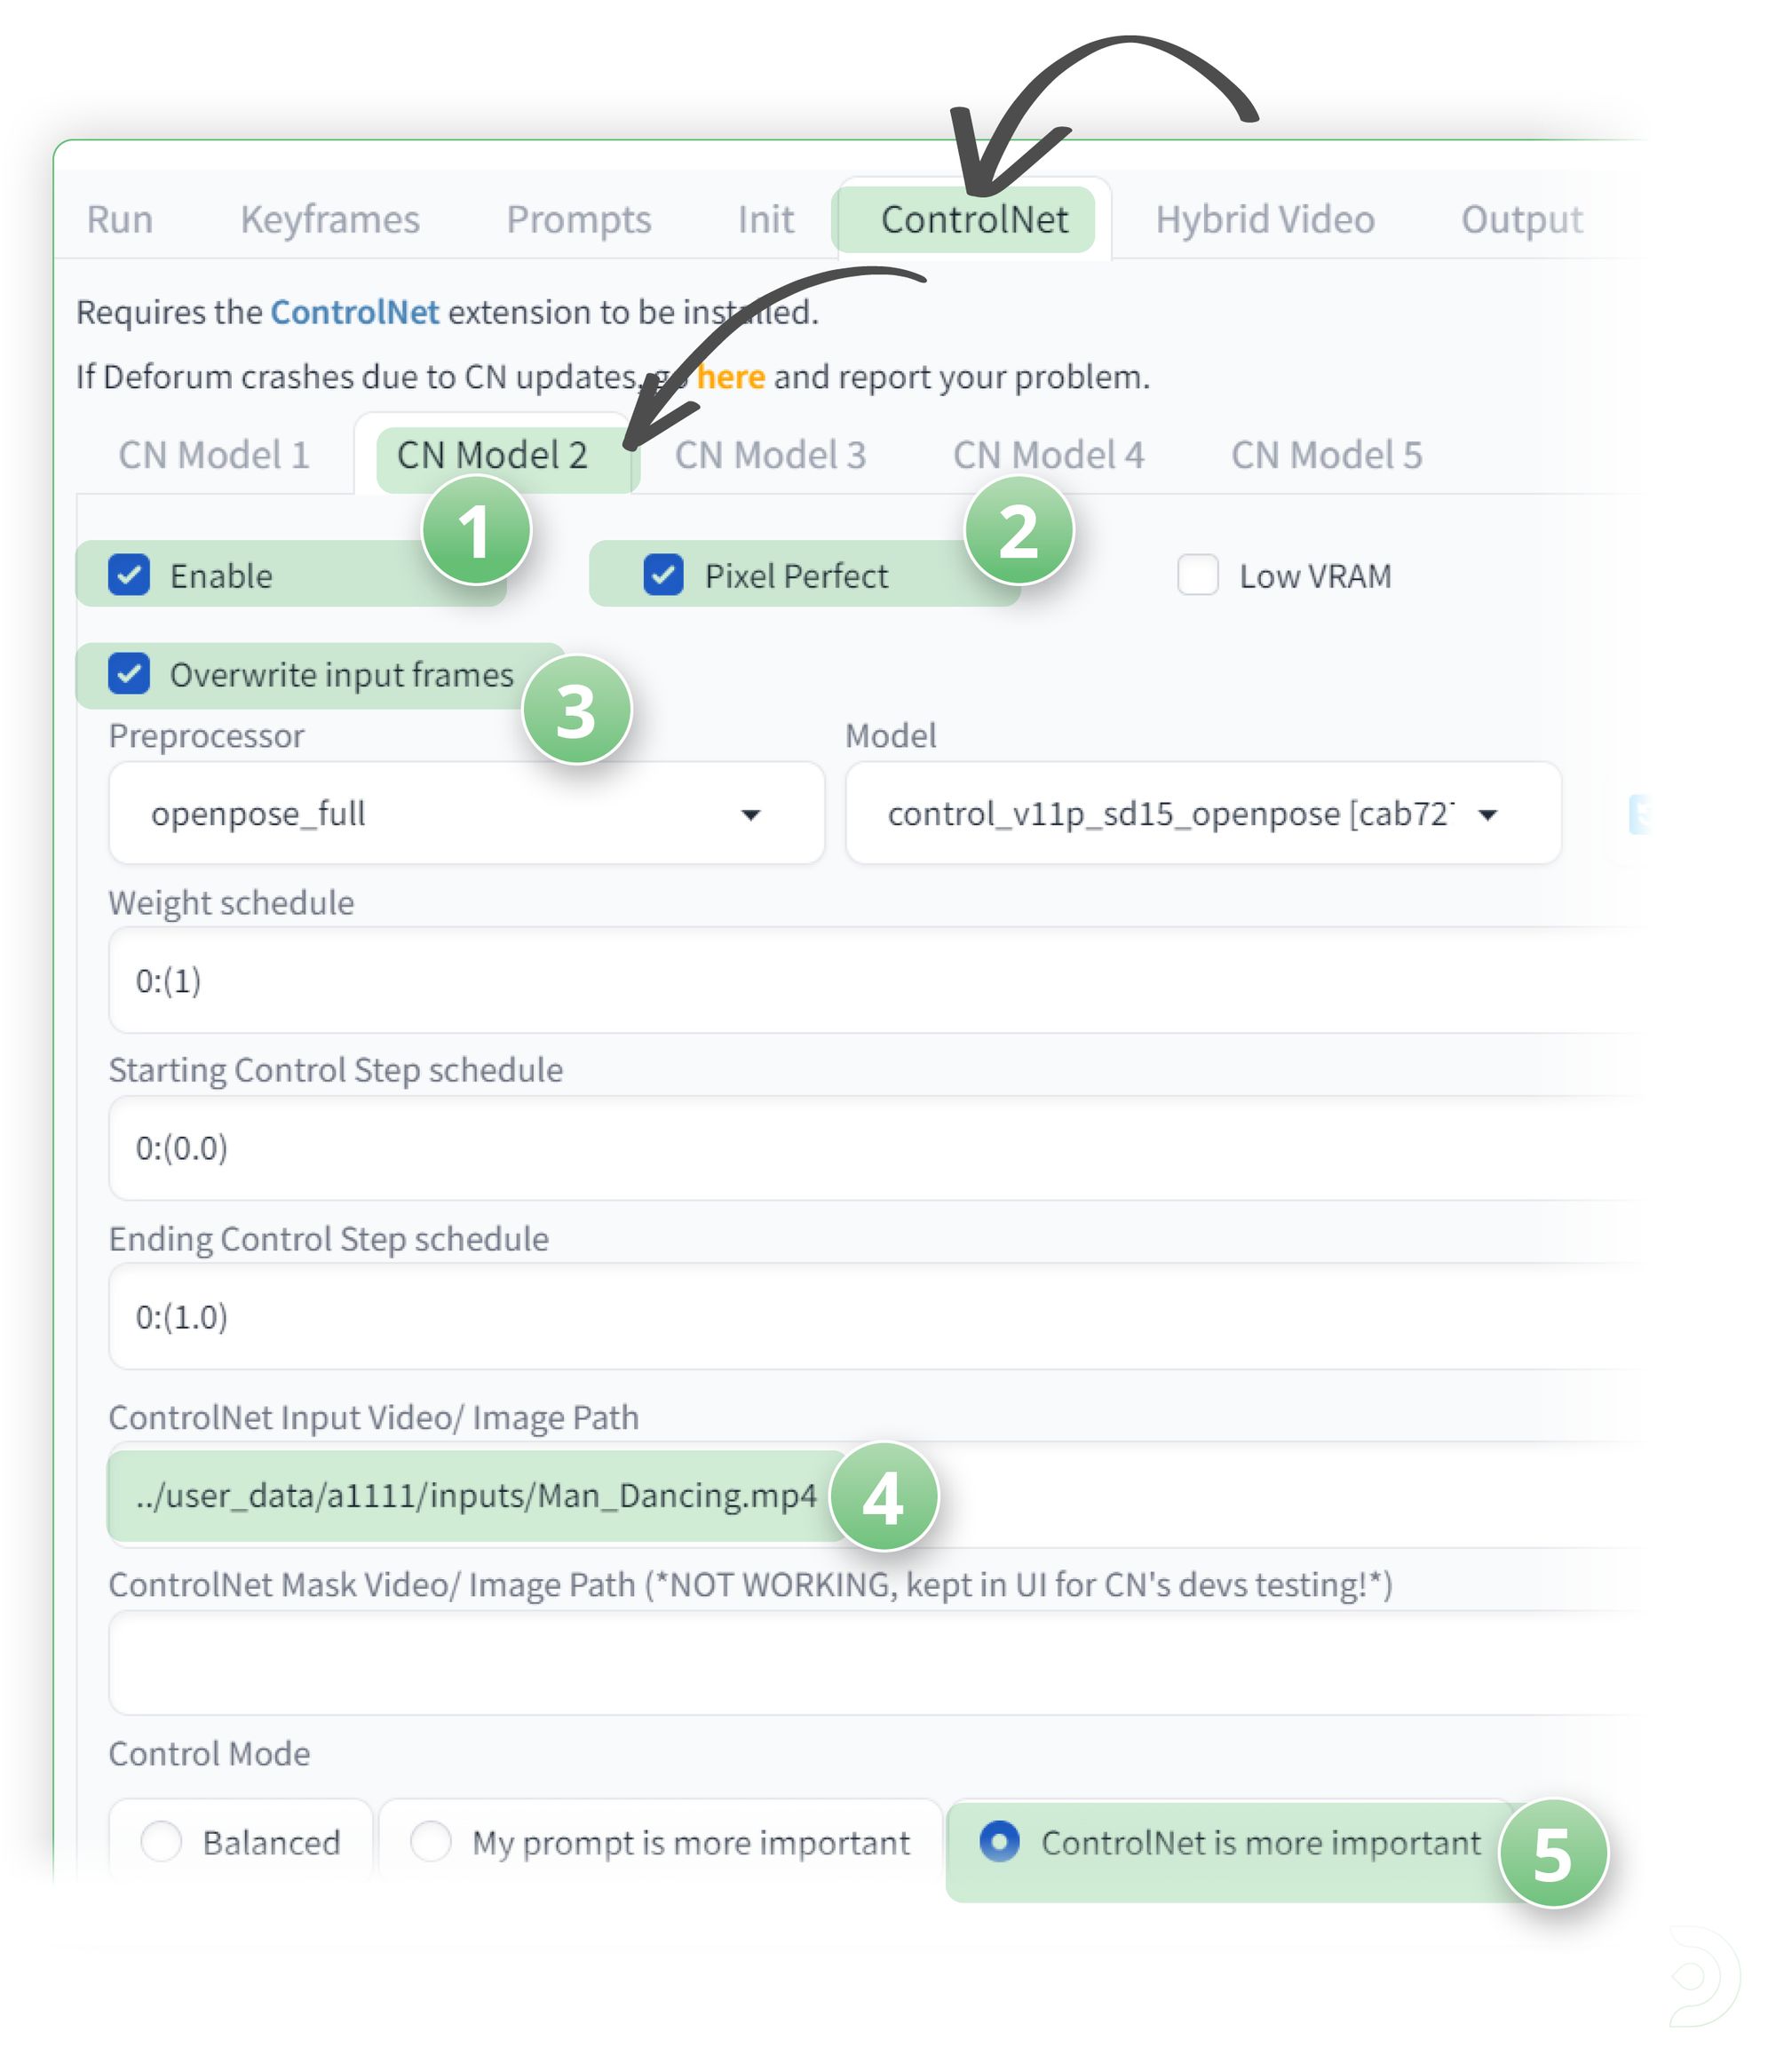
Go into the CN Model 2 and:
- (1) Click ✅ Enable
- (2) Click ✅ Pixel Perfect
- (3) Click ✅ Overwrite input frames
- (4) Paste the link of your input video
- (5) Select ControlNet is more important
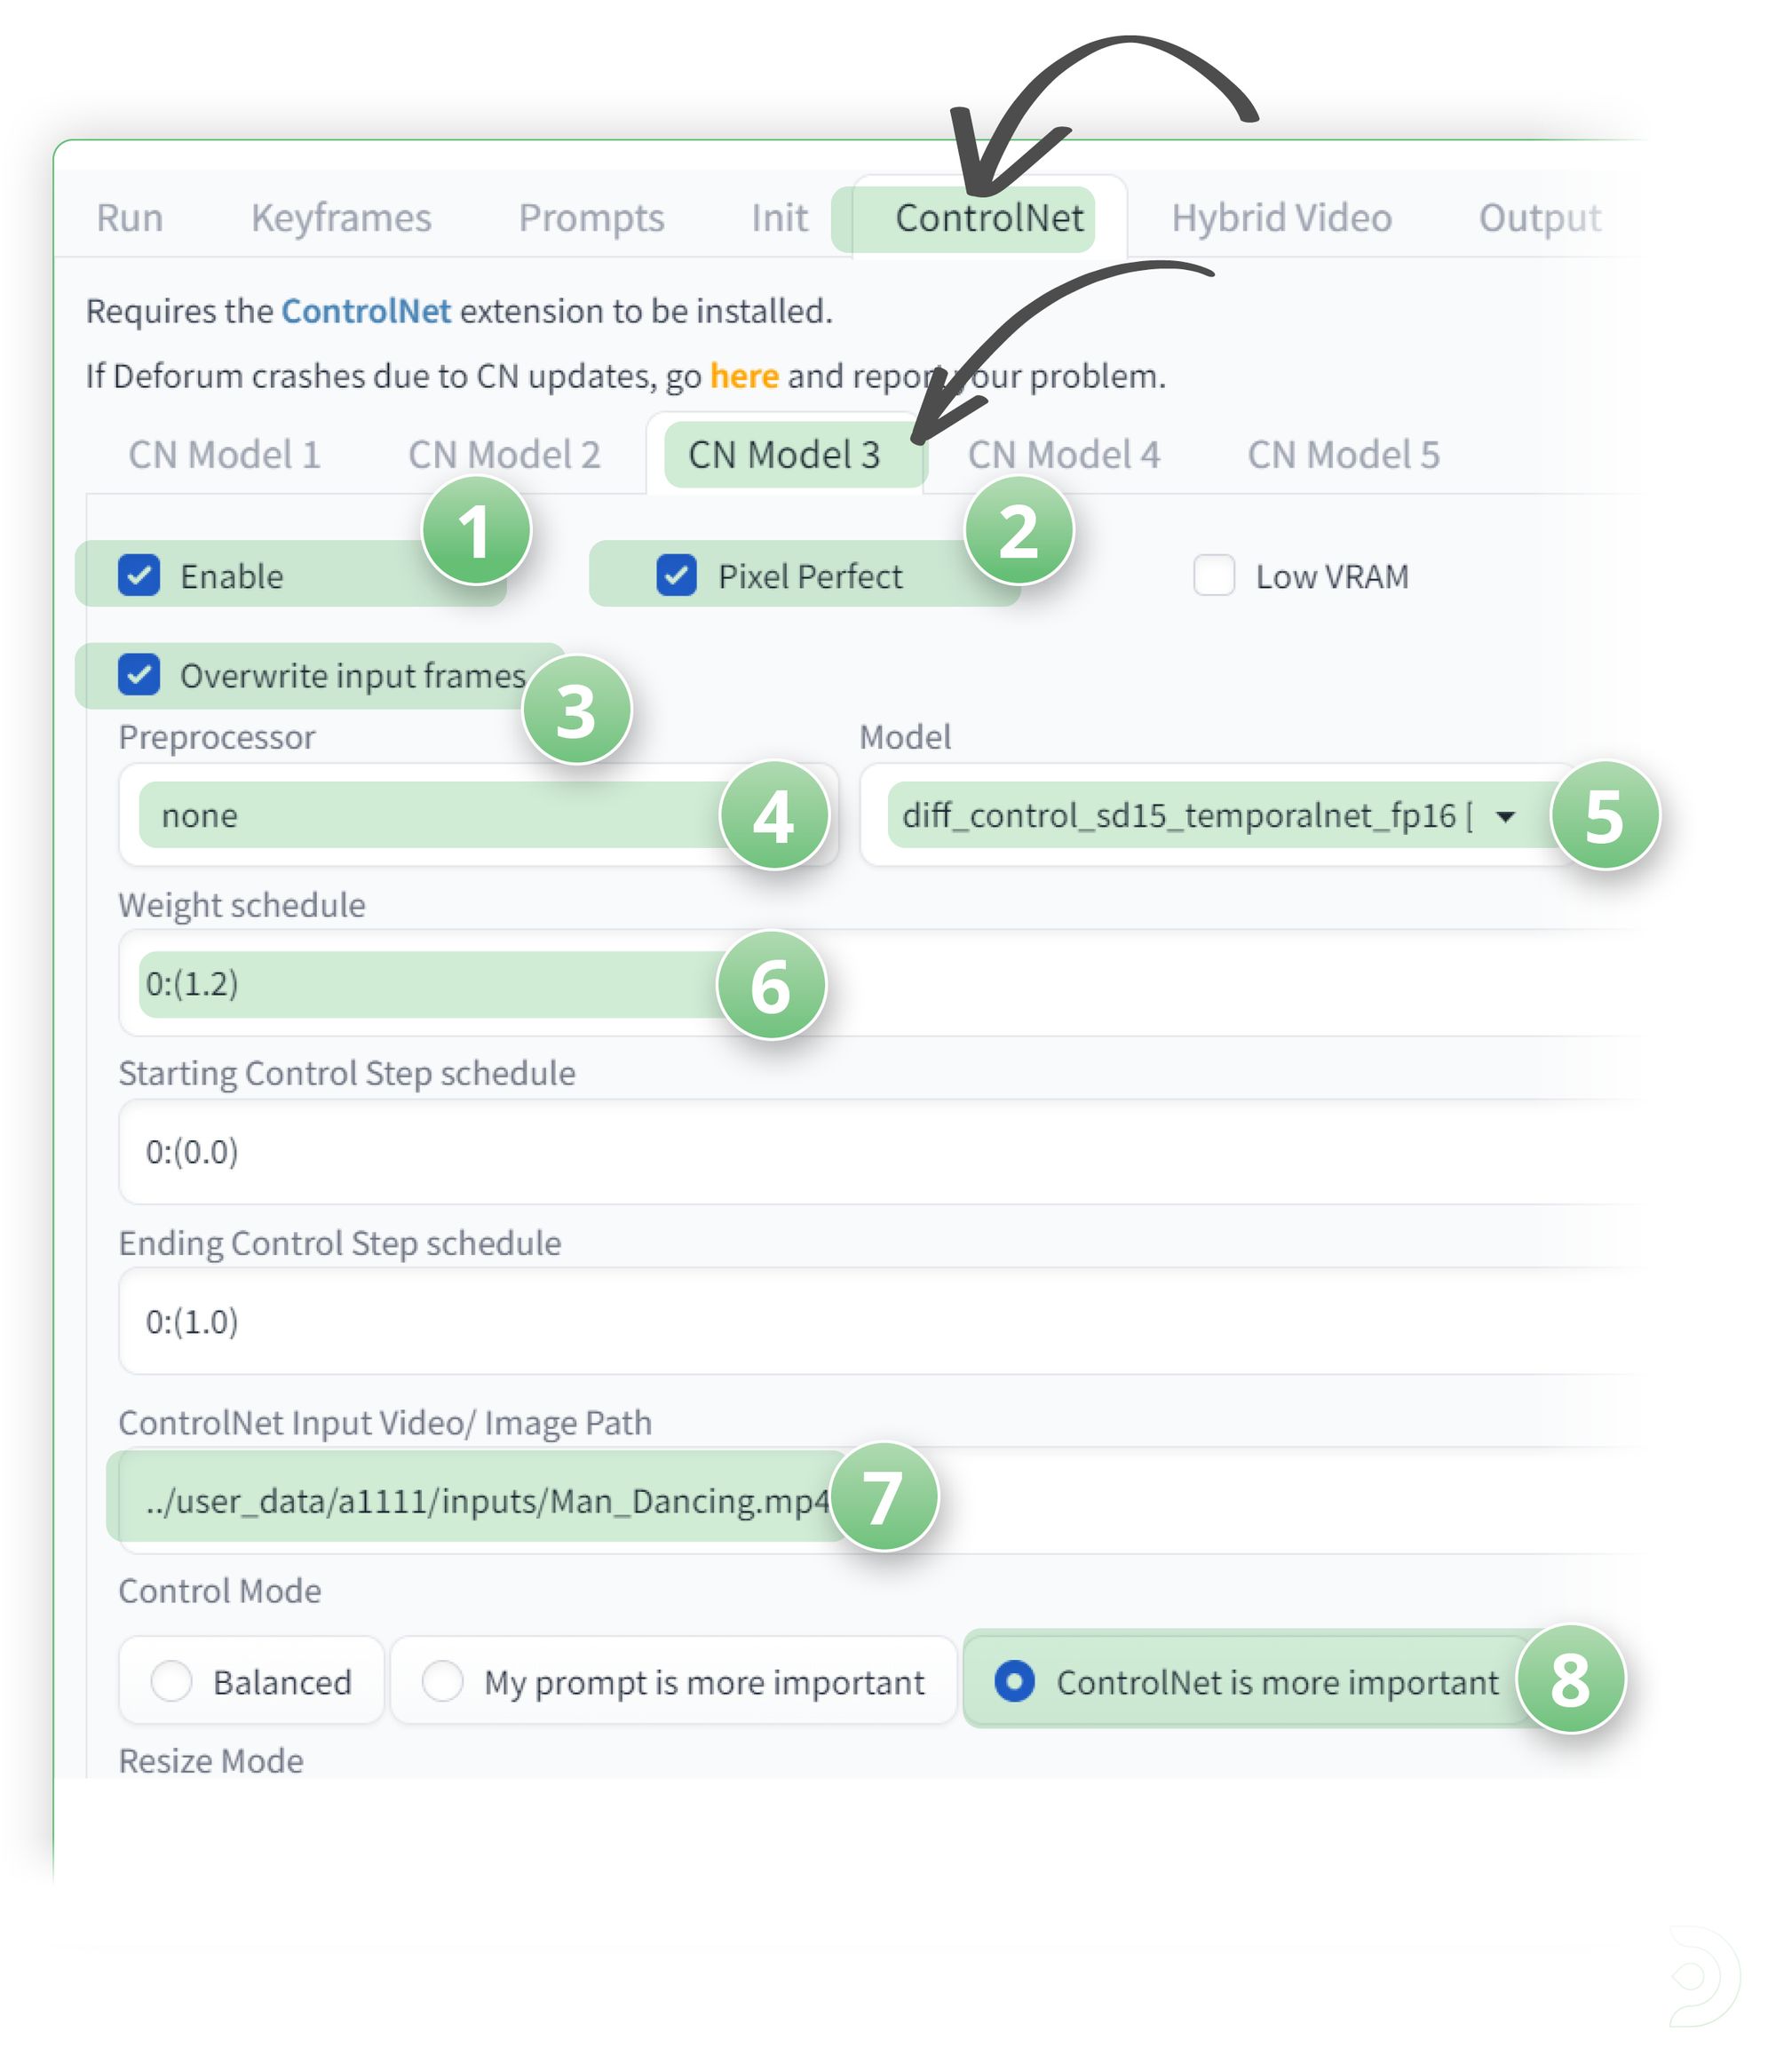
In the CN Model 3 tab:
- (1) Click ✅ Enable
- (2) Click ✅ Pixel Perfect
- (3) Click ✅ Overwrite input frames
- (4) Set the Preprocessor to none
- (5) Set the model to diff_control_sd15_temporalnet
- (6) Set the Weight schedule to 0:(1.2)
- (7) Copy the input video path to the ControlNet Input Video text box
- (8) Select ControlNet is more important
Hybrid Video Tab
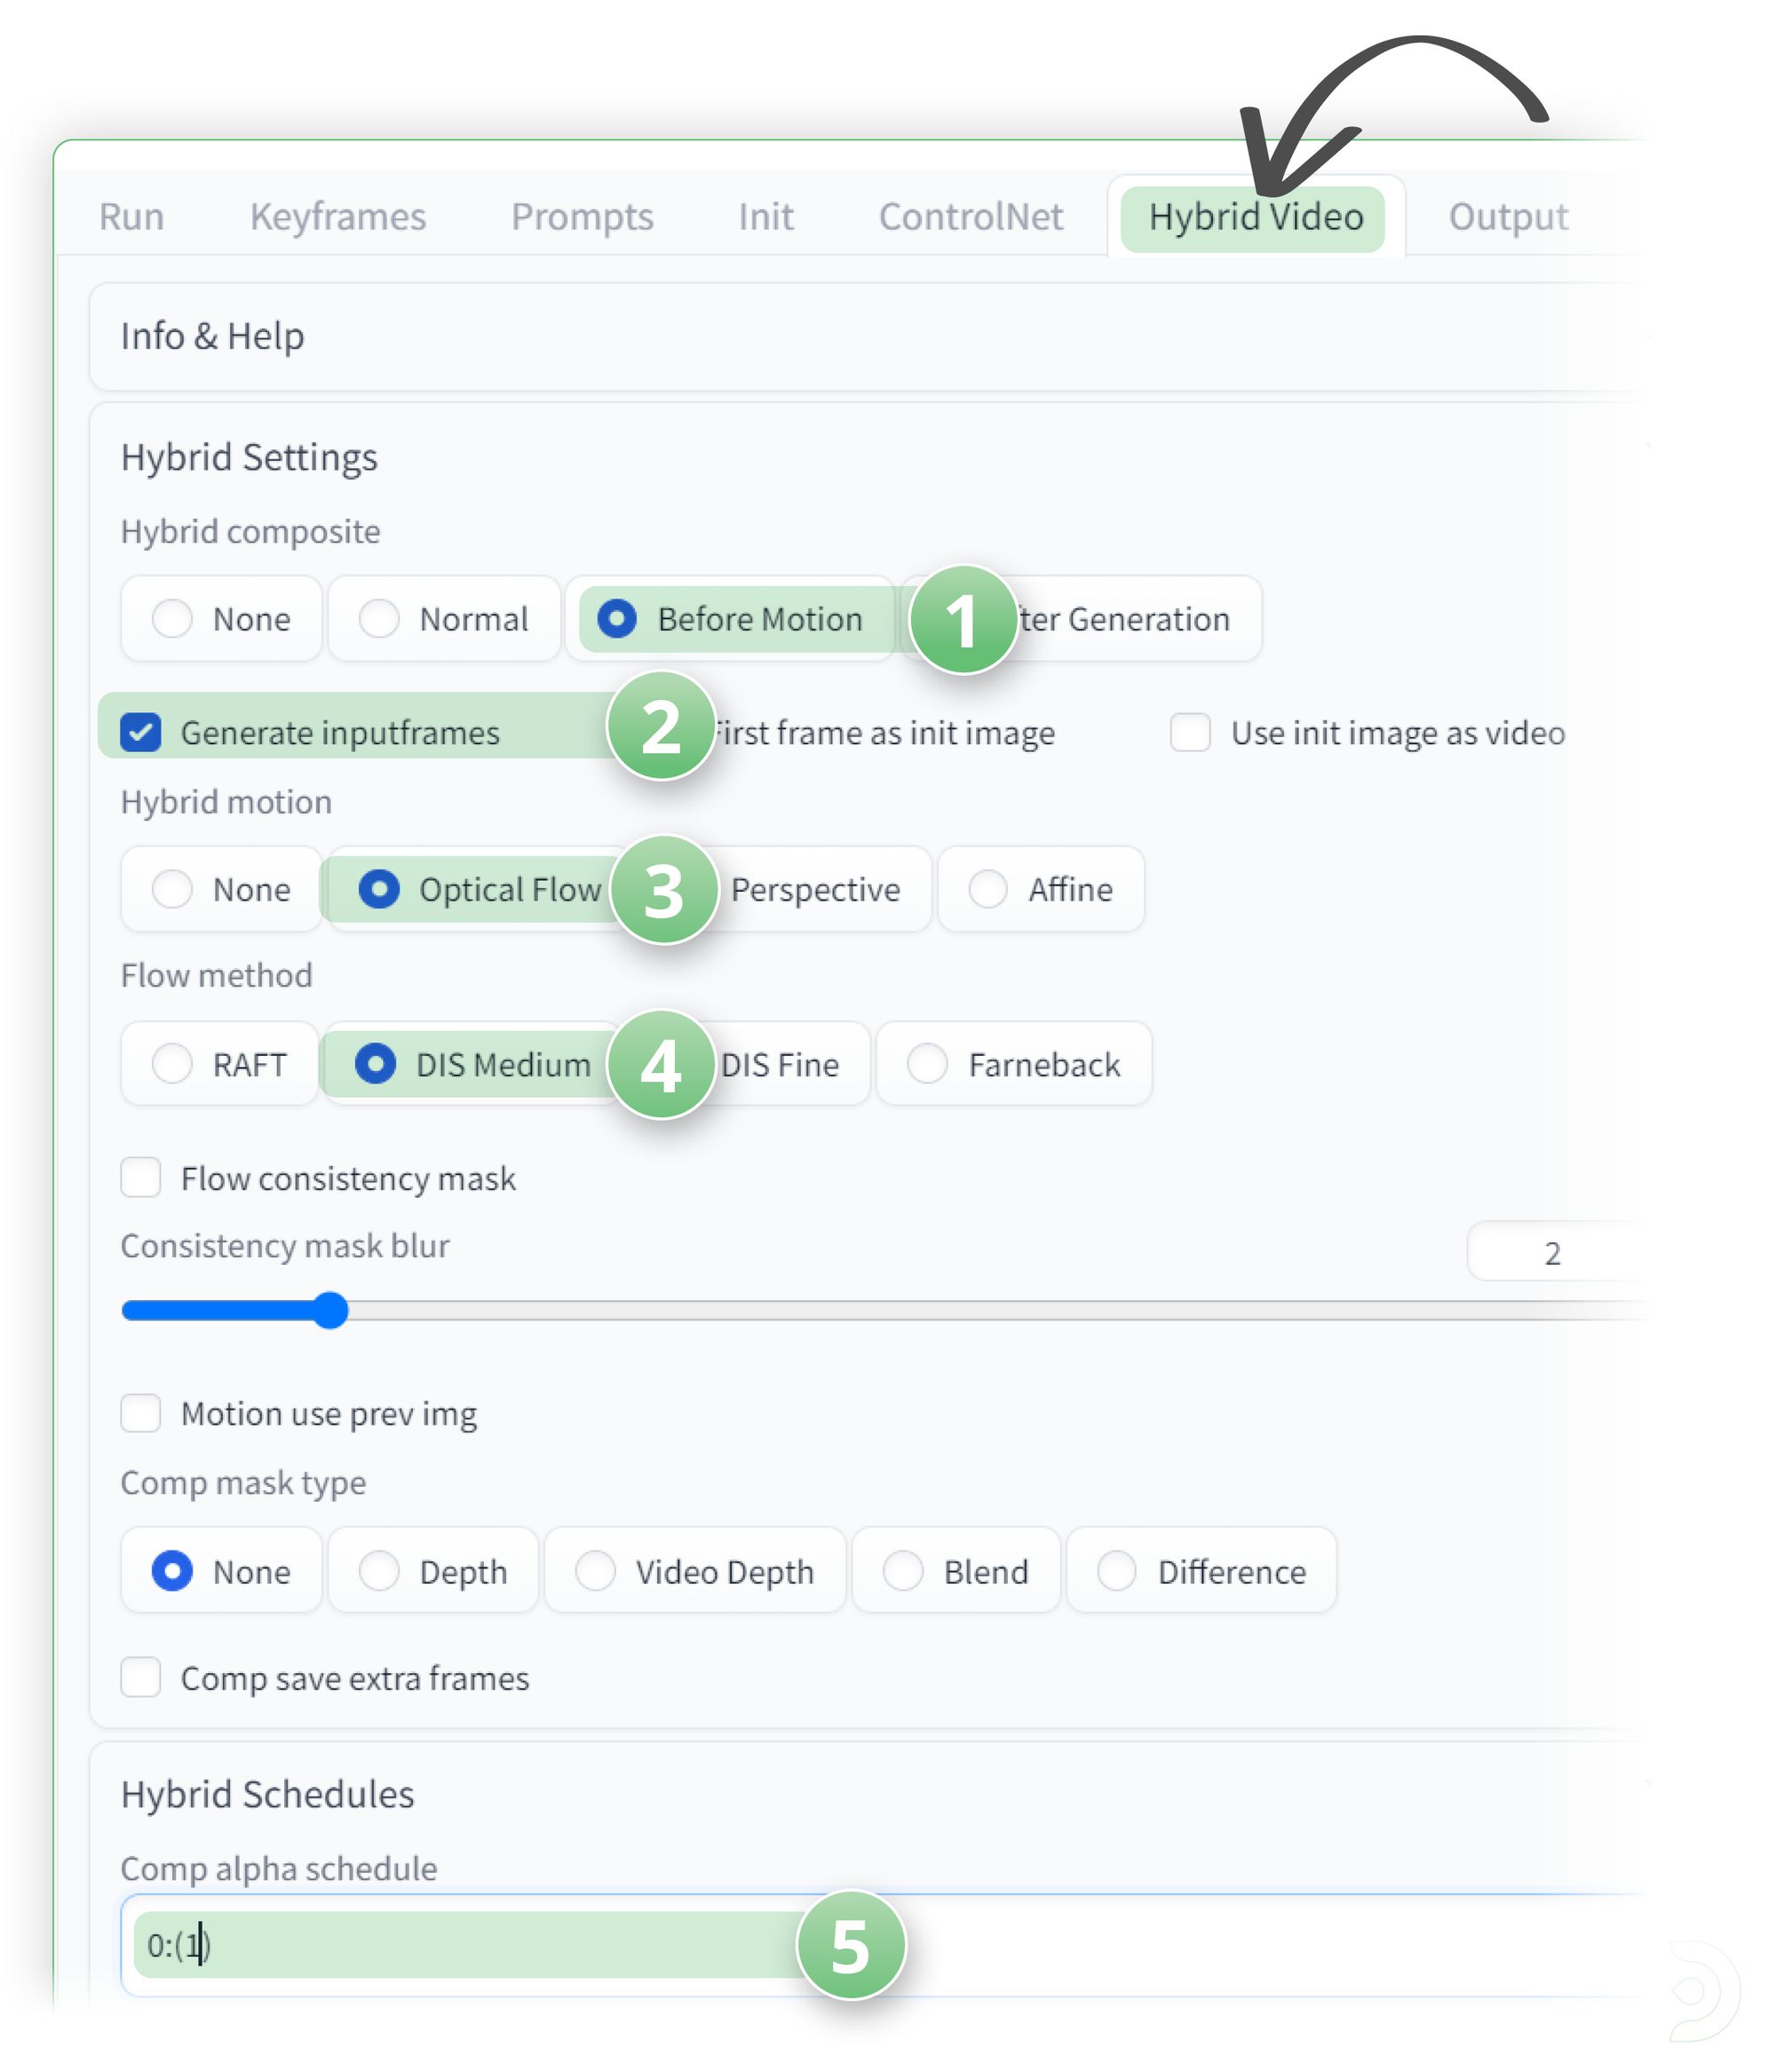
Within the Hybrid Video tab
- (1) Set the Hybrid composite to Before Motion
- (2) Click ✅ Generate inputframes
- (3) Select Optical Flow for the Hybrid Motion
- (4) Set the Flow method to DIS Medium
- (5) Set the comp alpha schedule to 0:(1)
(This can be found under the Hybrid schedules)
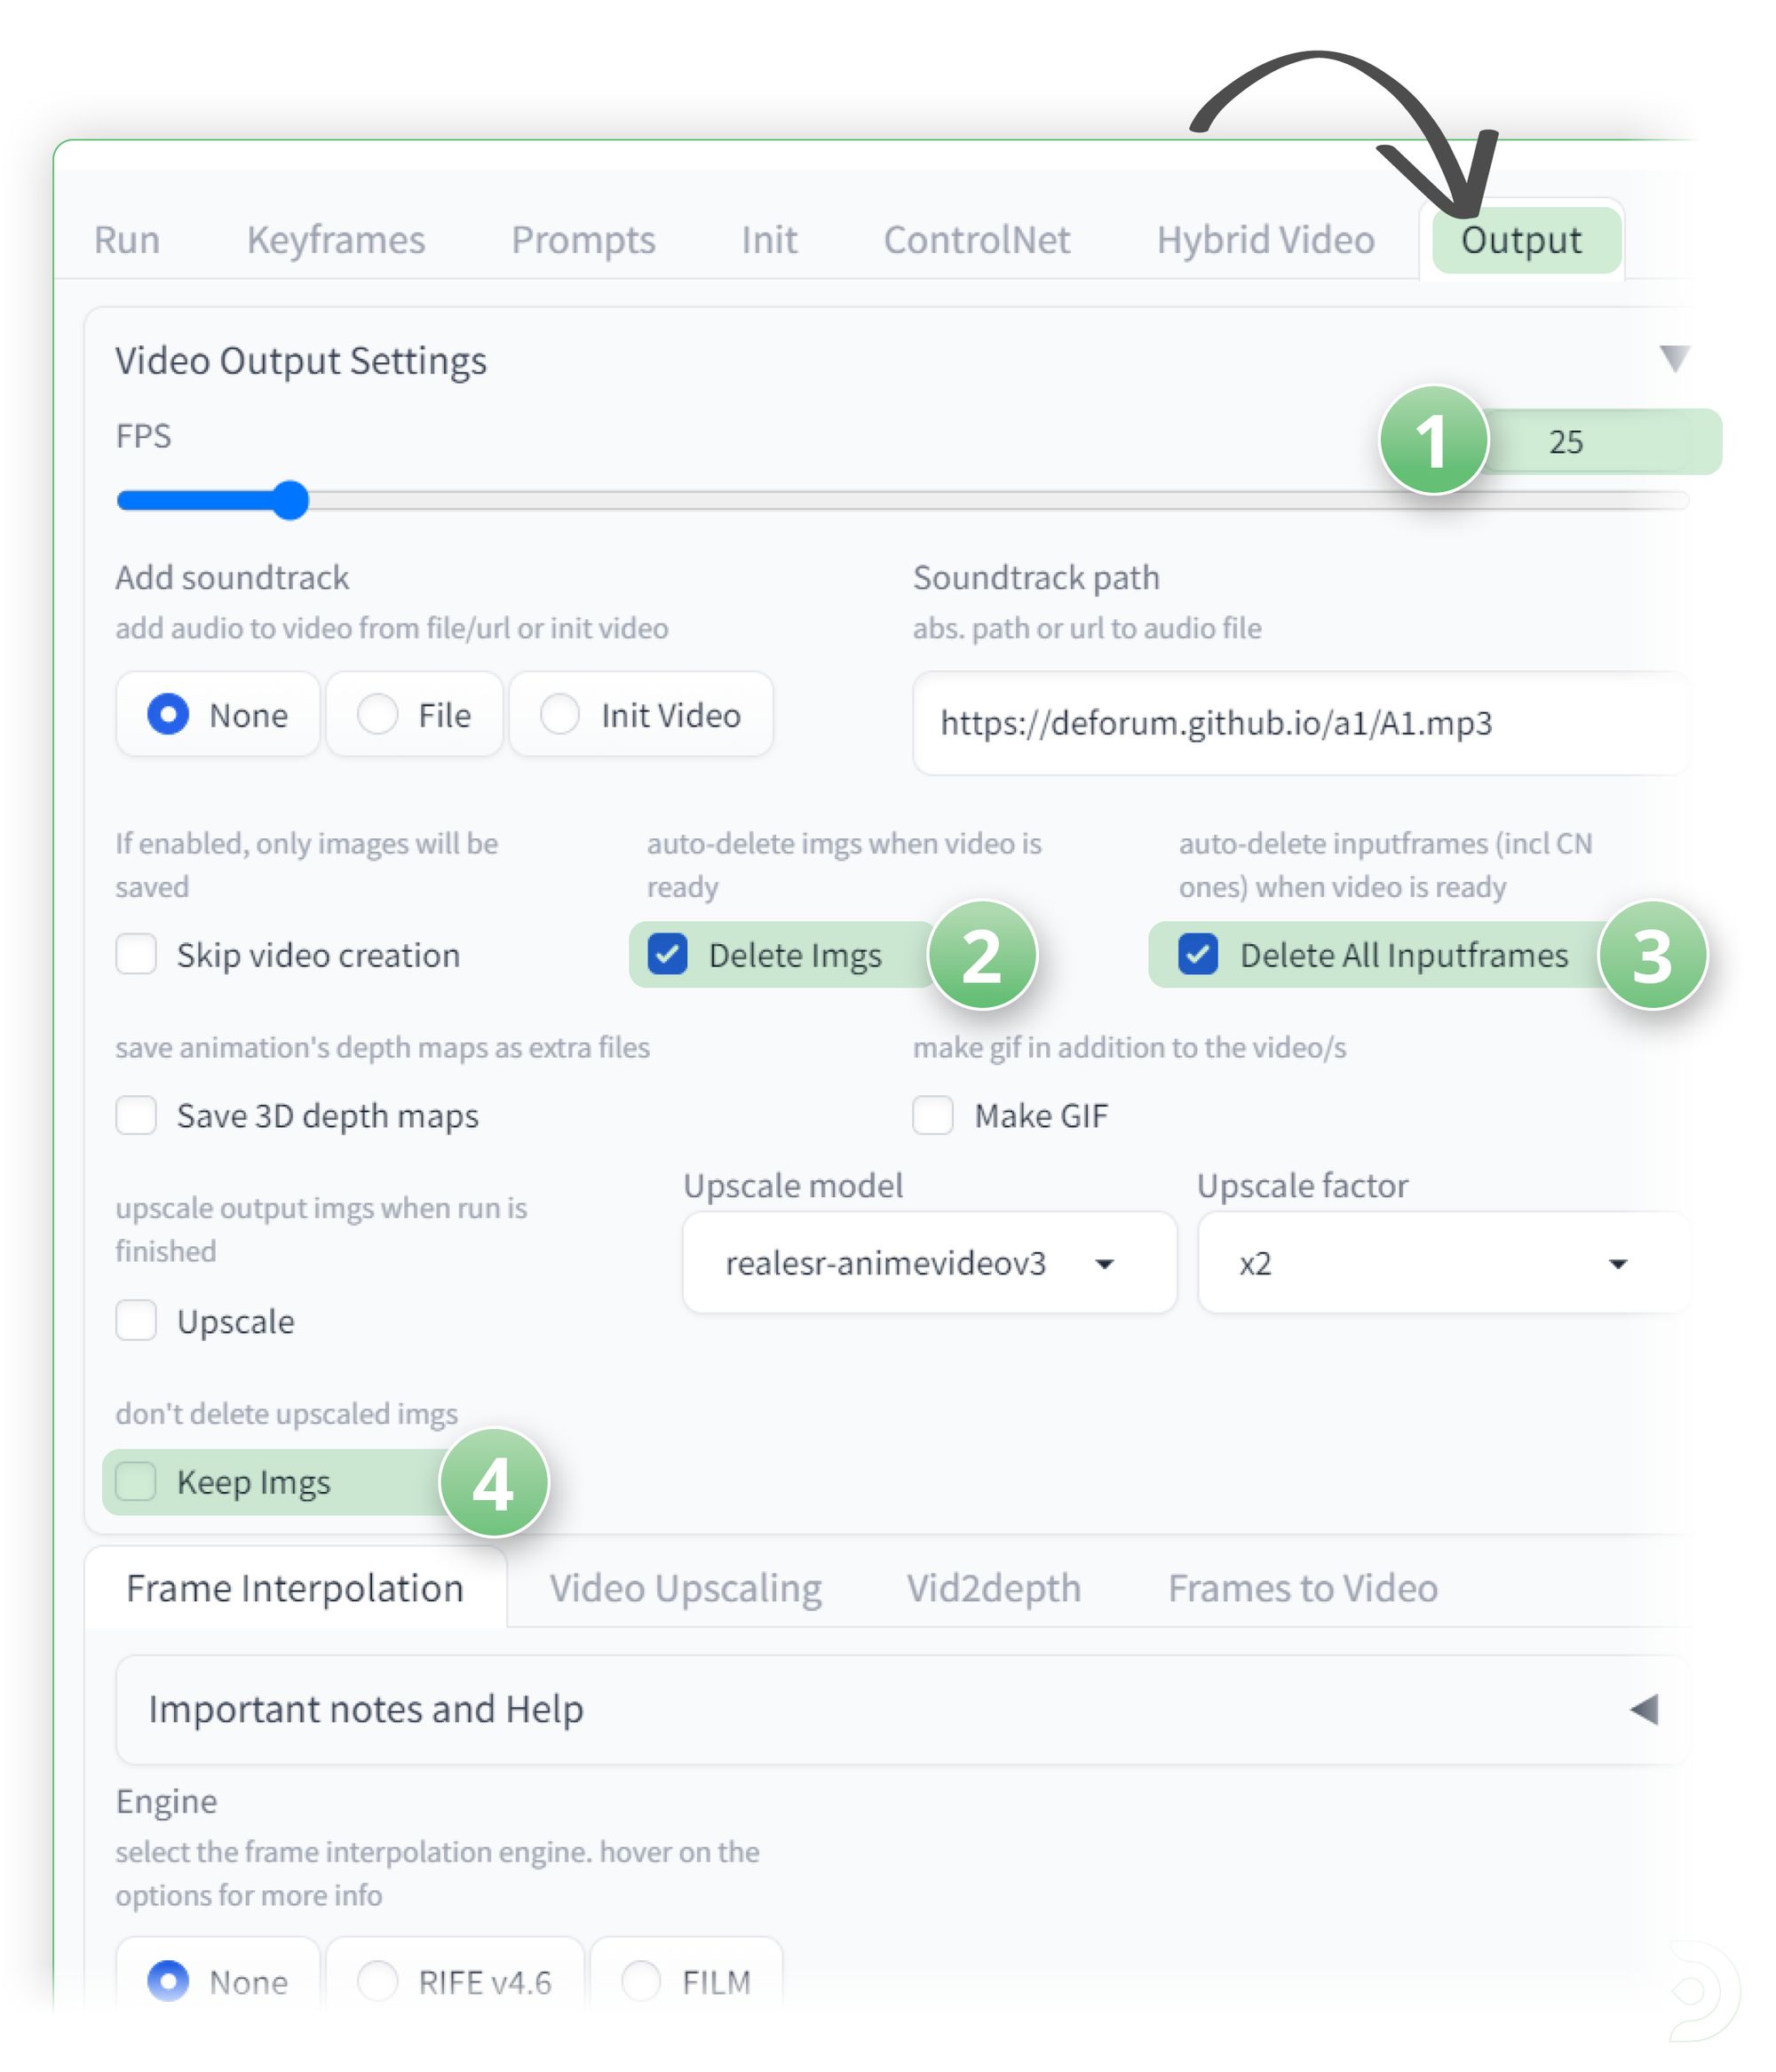
Output Tab
Almost there! In the Output Tab:
- (1) Set the Frames per second (FPS) to match the fps of your video.
In this instance I have set it to 25 - (2) To save disk space I have selected Delete Imgs
- (3) And you should also check ✅ Delete All Inputframes
- (4) And uncheck the ☐ Keep Imgs checkbox.
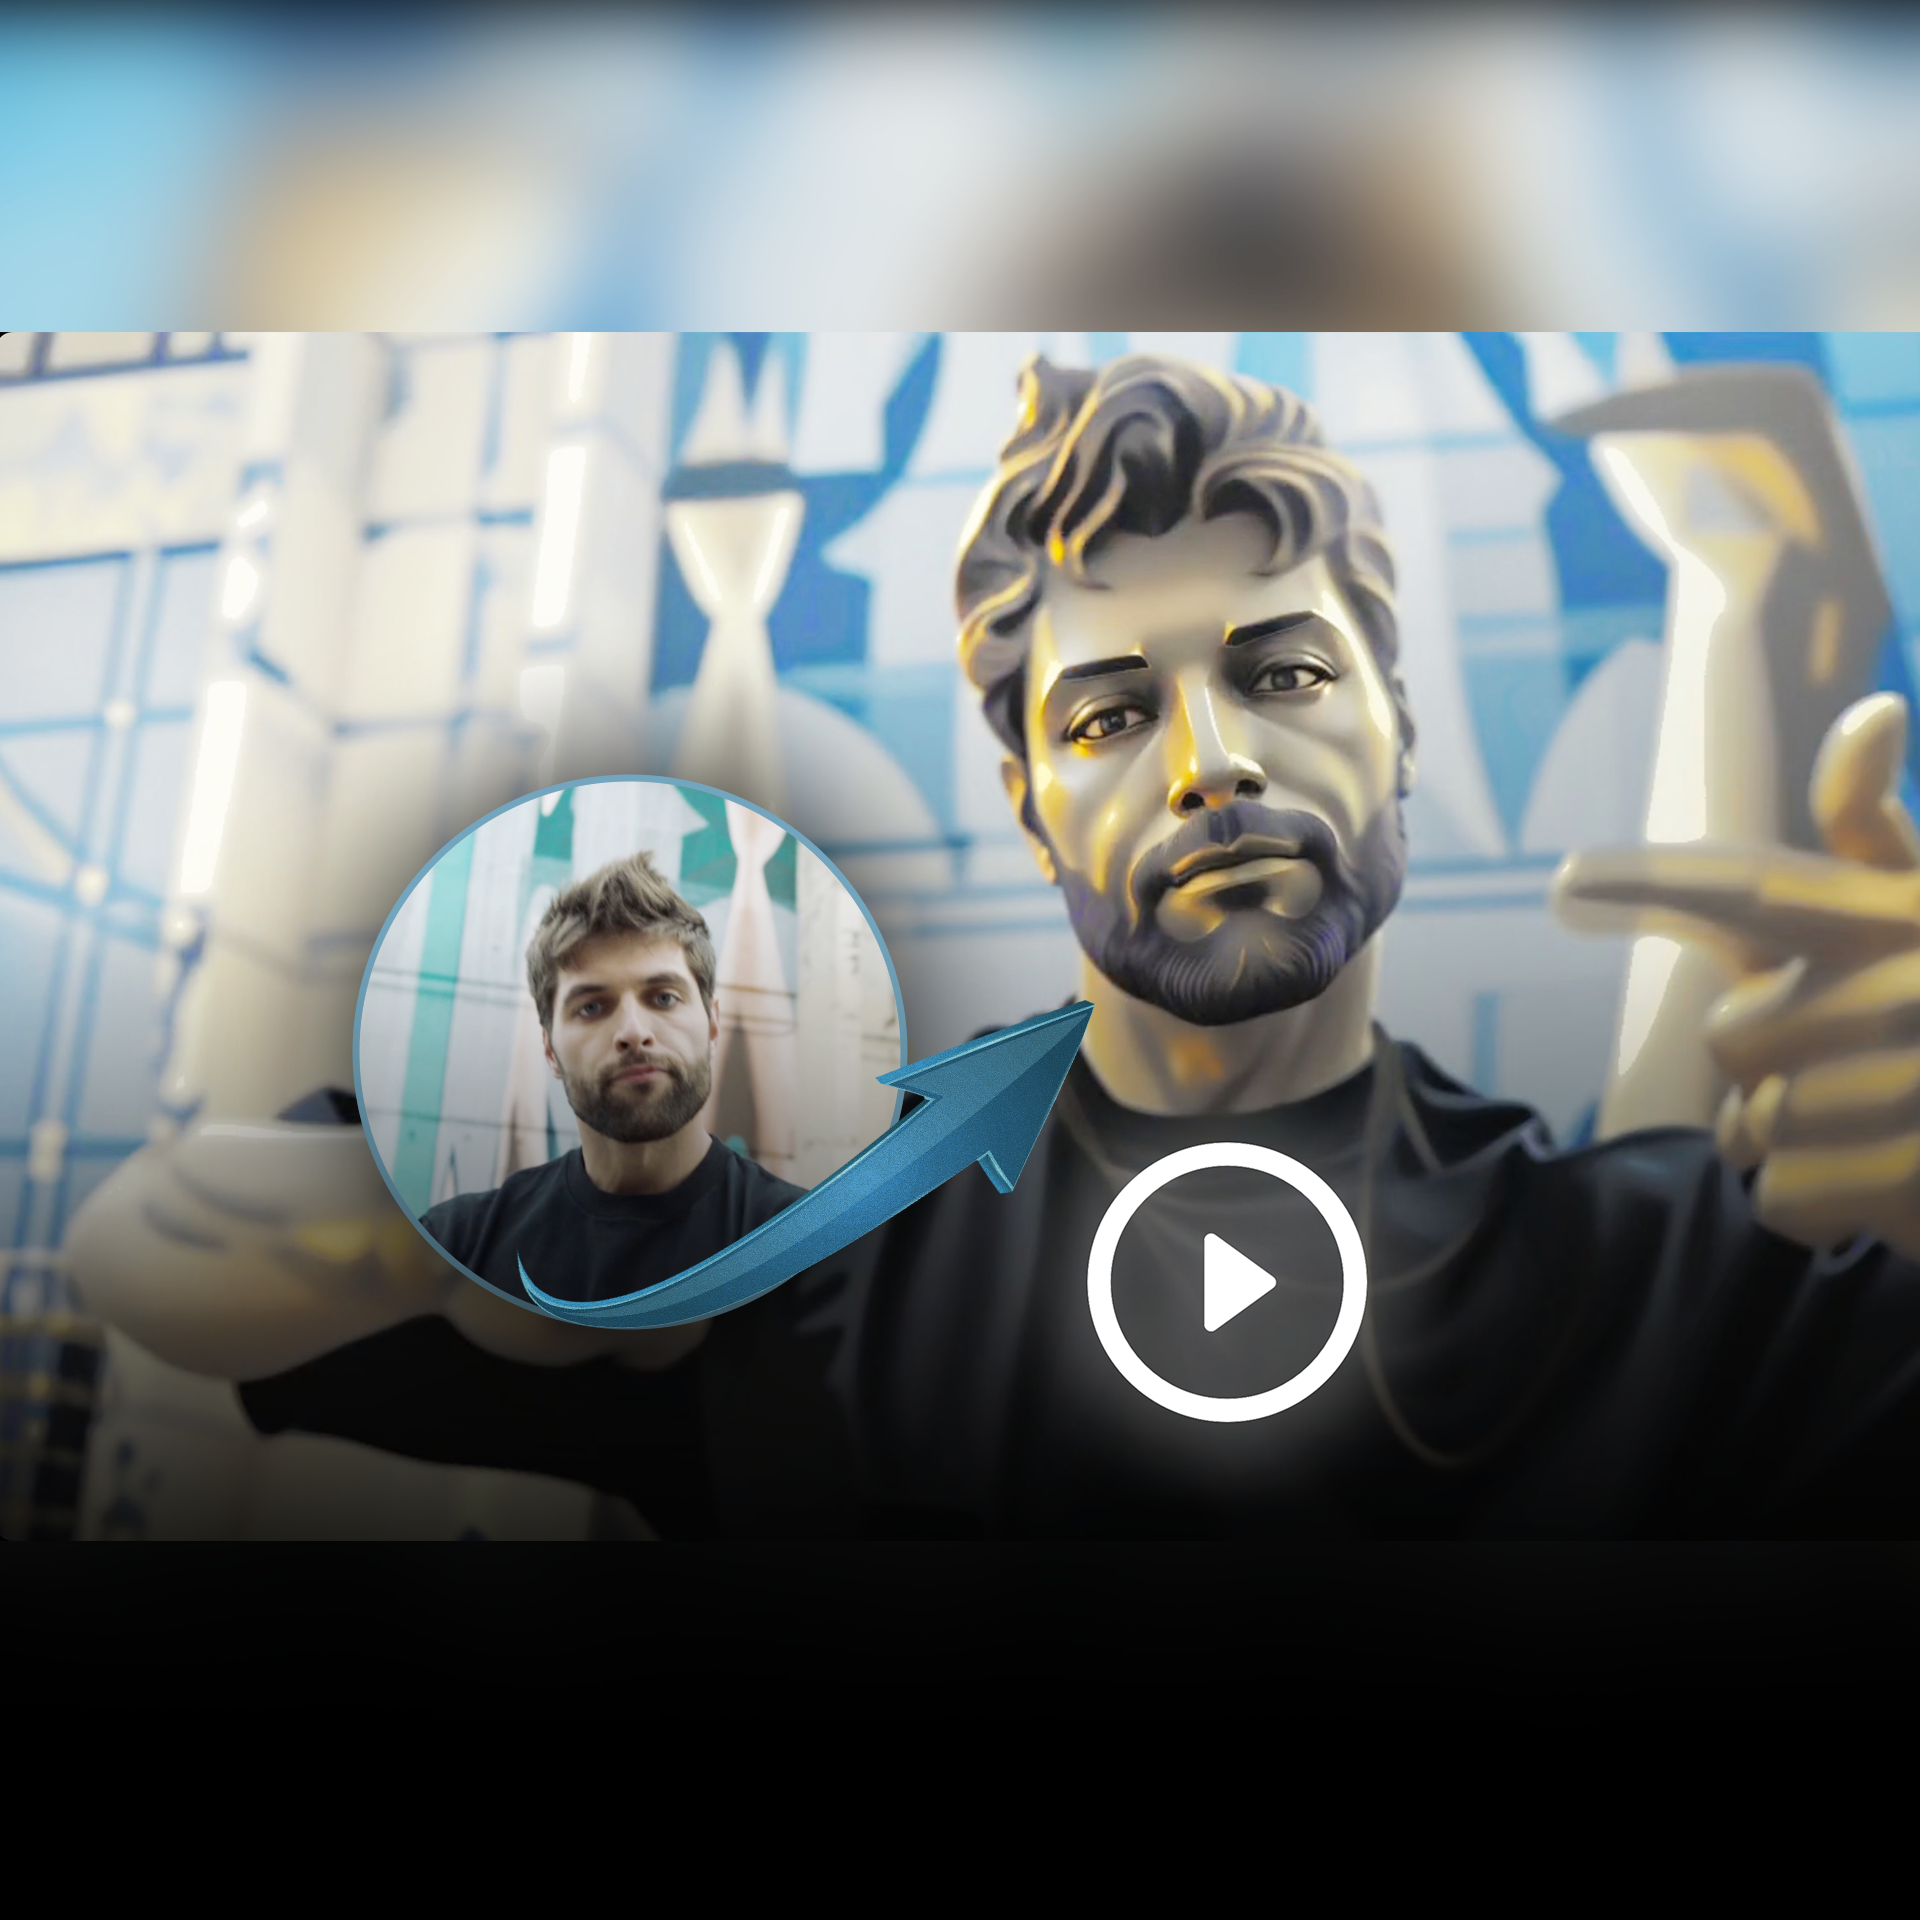
Hit Generate to start the rendering process of the video! Here's the final result:
💡Protip: You can take extra steps to reduce flickering in videos but this is getting quite long, so I'll look at making a part 2 tutorial to run through upscaling and de-flickering with Davinci Resolve
If you'd like to see some other video techniques, check out my post on Video2Video which covers Mov2Mov, SD-CN and Temporal Kit/Ebsynth.
Have fun out there with Deforum and never stop dancing!
Member discussion