

An Introduction to ControlNet and the reference pre-processors
ControlNet Reference is a term used to describe the process of utilizing a reference image to guide and influence the generation of new images. ControlNet Reference enables users to specify desired attributes, compositions, or styles present in the reference image, which are then incorporated into the generated output.
By providing a reference image, users can exert more control over the output of the Stable Diffusion model. The model learns from the visual cues, patterns, and characteristics present in the reference image and uses that information to generate images that align with the desired style or content.
ControlNet Reference helps users achieve a higher degree of control and customization in the generation process, allowing them to guide the output towards their specific preferences or artistic vision. It serves as a valuable tool for generating images that closely resemble or are inspired by the reference image, enhancing the user's ability to create desired compositions.
What specifically is ControlNet Reference?
In this tutorial, we will explore the usage of reference pre-processors, a powerful tool that allows you to generate images similar to a reference image while still leveraging the Stable Diffusion model and the provided prompt. The reference pre-processors offer three different options:-
- Reference adain
- Reference only
- Reference adain plus attn
Let's dive into each of these pre-processors and learn how to use them effectively.
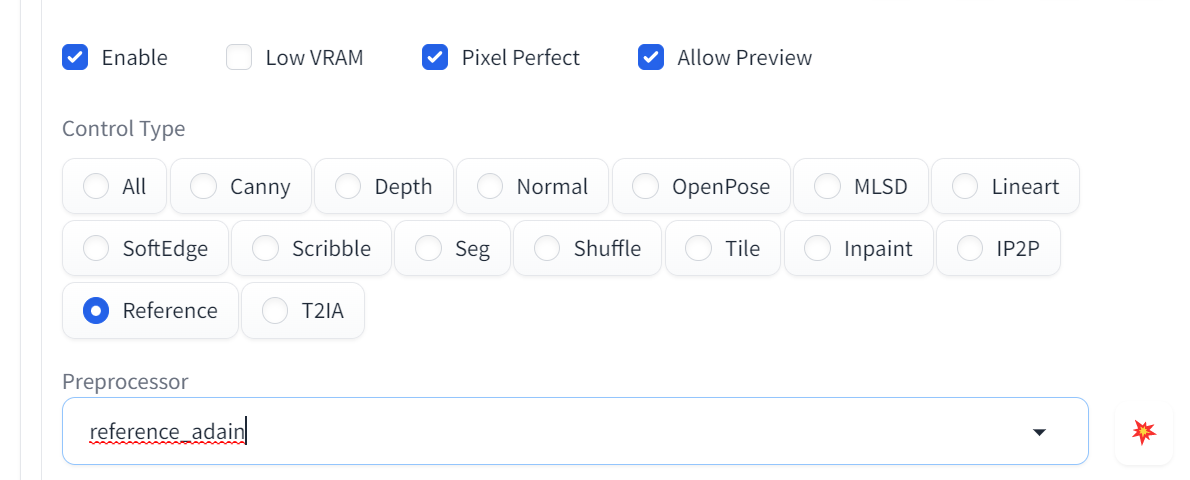
Reference adain (Style transfer via Adaptive Instance Normalization)
The Reference adain pre-processor employs the Adaptive Instance Normalization technique for style transfer. This method allows you to transfer the visual style of the reference image to the generated image.
Reference only (Directly linking the reference image to attention layers)
With the Reference only pre-processor, you can establish a direct link between the reference image and the attention layers. This connection enables the model to focus on specific areas of the reference image during the image generation process. Unlike the other pre-processors, Reference only does not require the selection of a control model. Once you choose this pre-processor, the model dropdown menu will be hidden.
Reference adain+attn (Combining the advantages of Reference adain and Reference only)
The Reference adain+attn pre-processor combines the benefits of both the Reference adain and Reference only pre-processors. It enables you to transfer the style of the reference image while also establishing a direct link to the attention layers. This combination allows for more control and customization during the image generation process.
How to use the reference pre-processors
Start by selecting one of the available pre-processors: Reference adain, Reference only, or Reference adain+attn. Choose the pre-processor that best aligns with your desired outcome.
Once you have selected a pre-processor, proceed to input your reference image. The reference image serves as the basis for the generated image's style or attention focus, depending on the chosen pre-processor.
If you have chosen the "Reference only" pre-processor, the generated images will be influenced by the reference image's attention focus. However, if you prefer other pre-processors, such as "Reference adain" or "Reference adain+attn," you will observe style transfer effects as well.
By following these steps, you can effectively utilize reference pre-processors to generate images that align with your desired style and visual references. Experiment with different pre-processors and reference images to explore various creative possibilities.
An example of using the reference only pre processor
We can upload an image of an anime character and use the control type 'reference' and the 'reference only' pre processor within controlnet. I have checked the Pixel Perfect checkbox to ensure we are using the matching resolution of the input image.
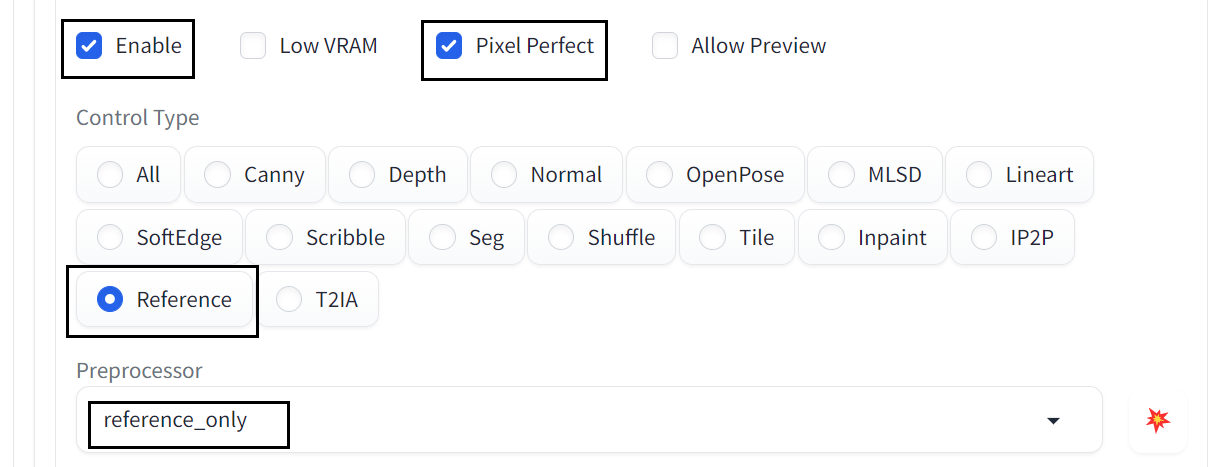
Using this, we can create consistent characters wearing different outfits!
I am using the AyoniMix model with the sampler as Euler a, 20 sampling steps and a CFG scale of 7 with the following prompts:-
Positive Prompts: Solo, 1girl, black hair, Anime Style, full body shot
Negative Prompts: Nudity, nsfw
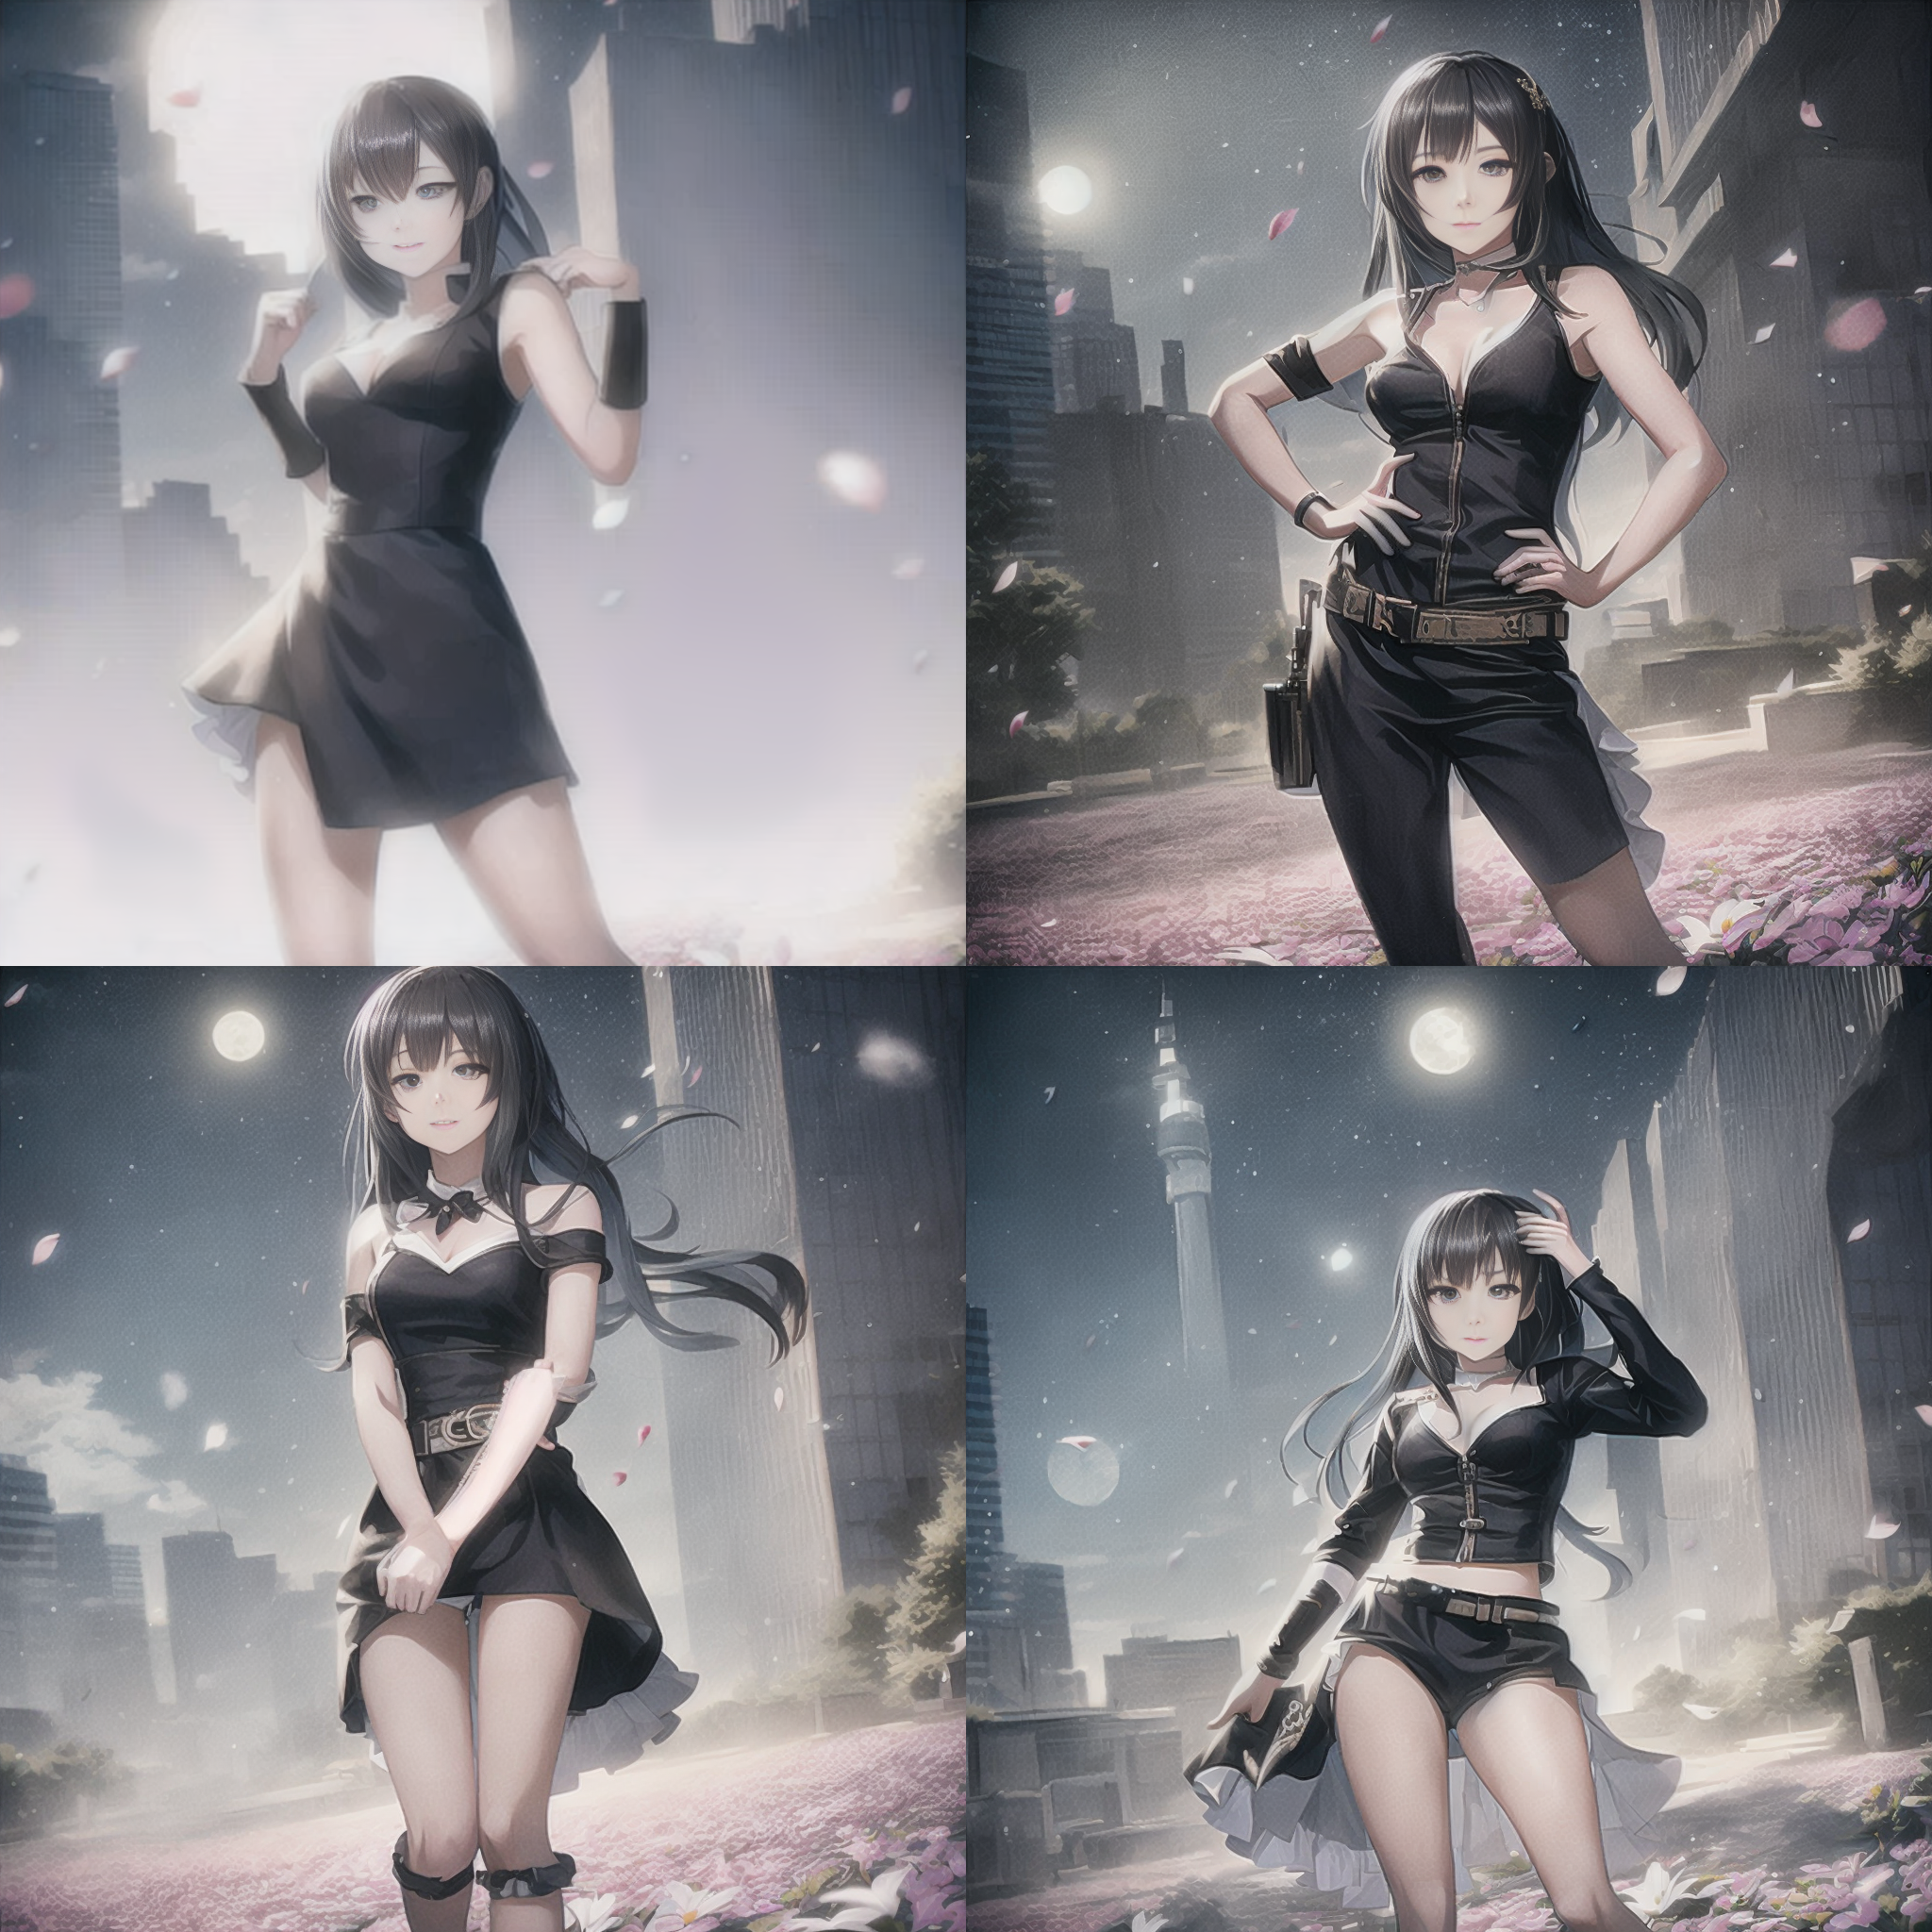
Input image

Output images
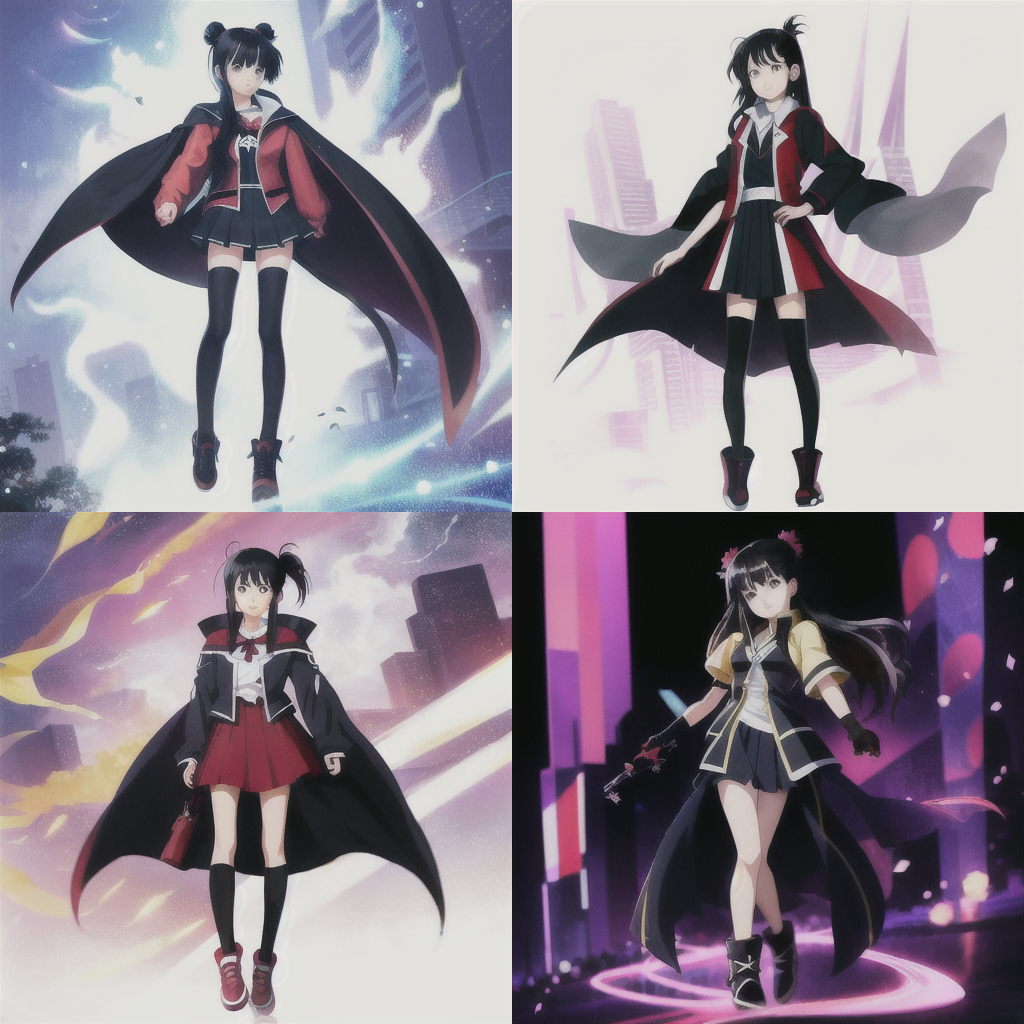
An example using the reference adain+attn pre processor
We can upload an image of an anime character and use the control type of 'reference' and the 'reference adain+attn' pre processor within controlnet. I have checked the Pixel Perfect checkbox to ensure we are using the matching resolution of the input image.
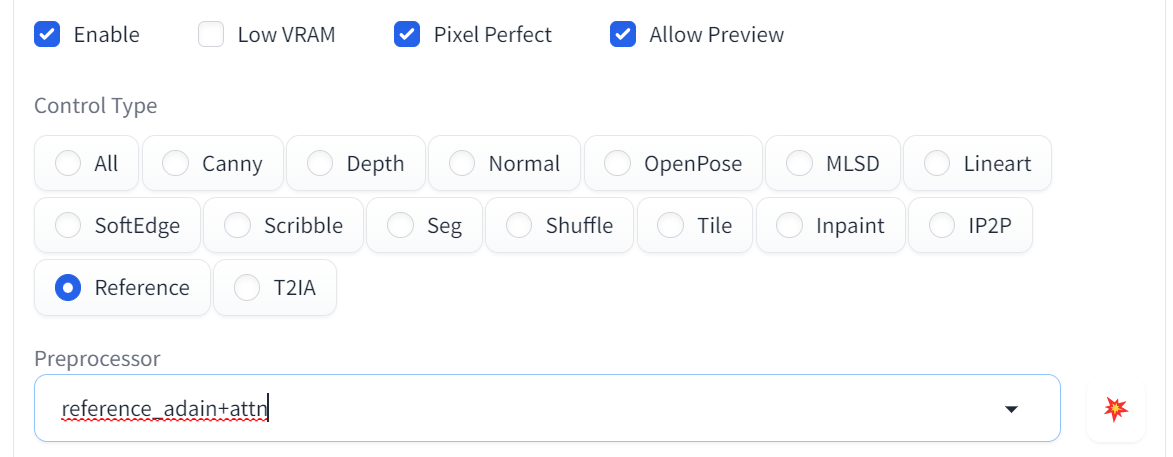
I am using the AyoniMix model with the sampler as Euler a, 20 sampling steps and a CFG scale of 7 with the following prompts:-
Positive Prompts: Solo, 1girl, black hair, Anime Style, full body shot
Negative Prompts: Nudity, nsfw
Input image
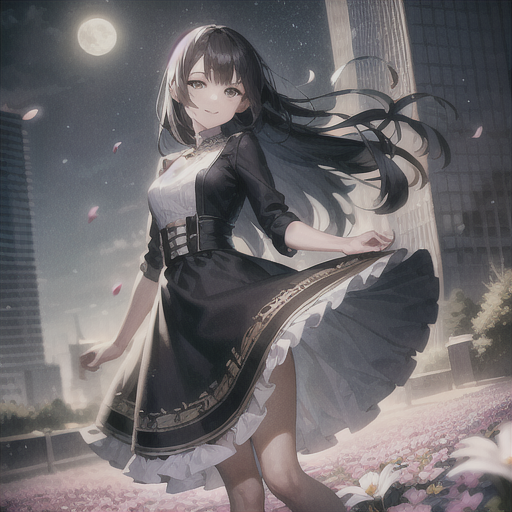
Output images
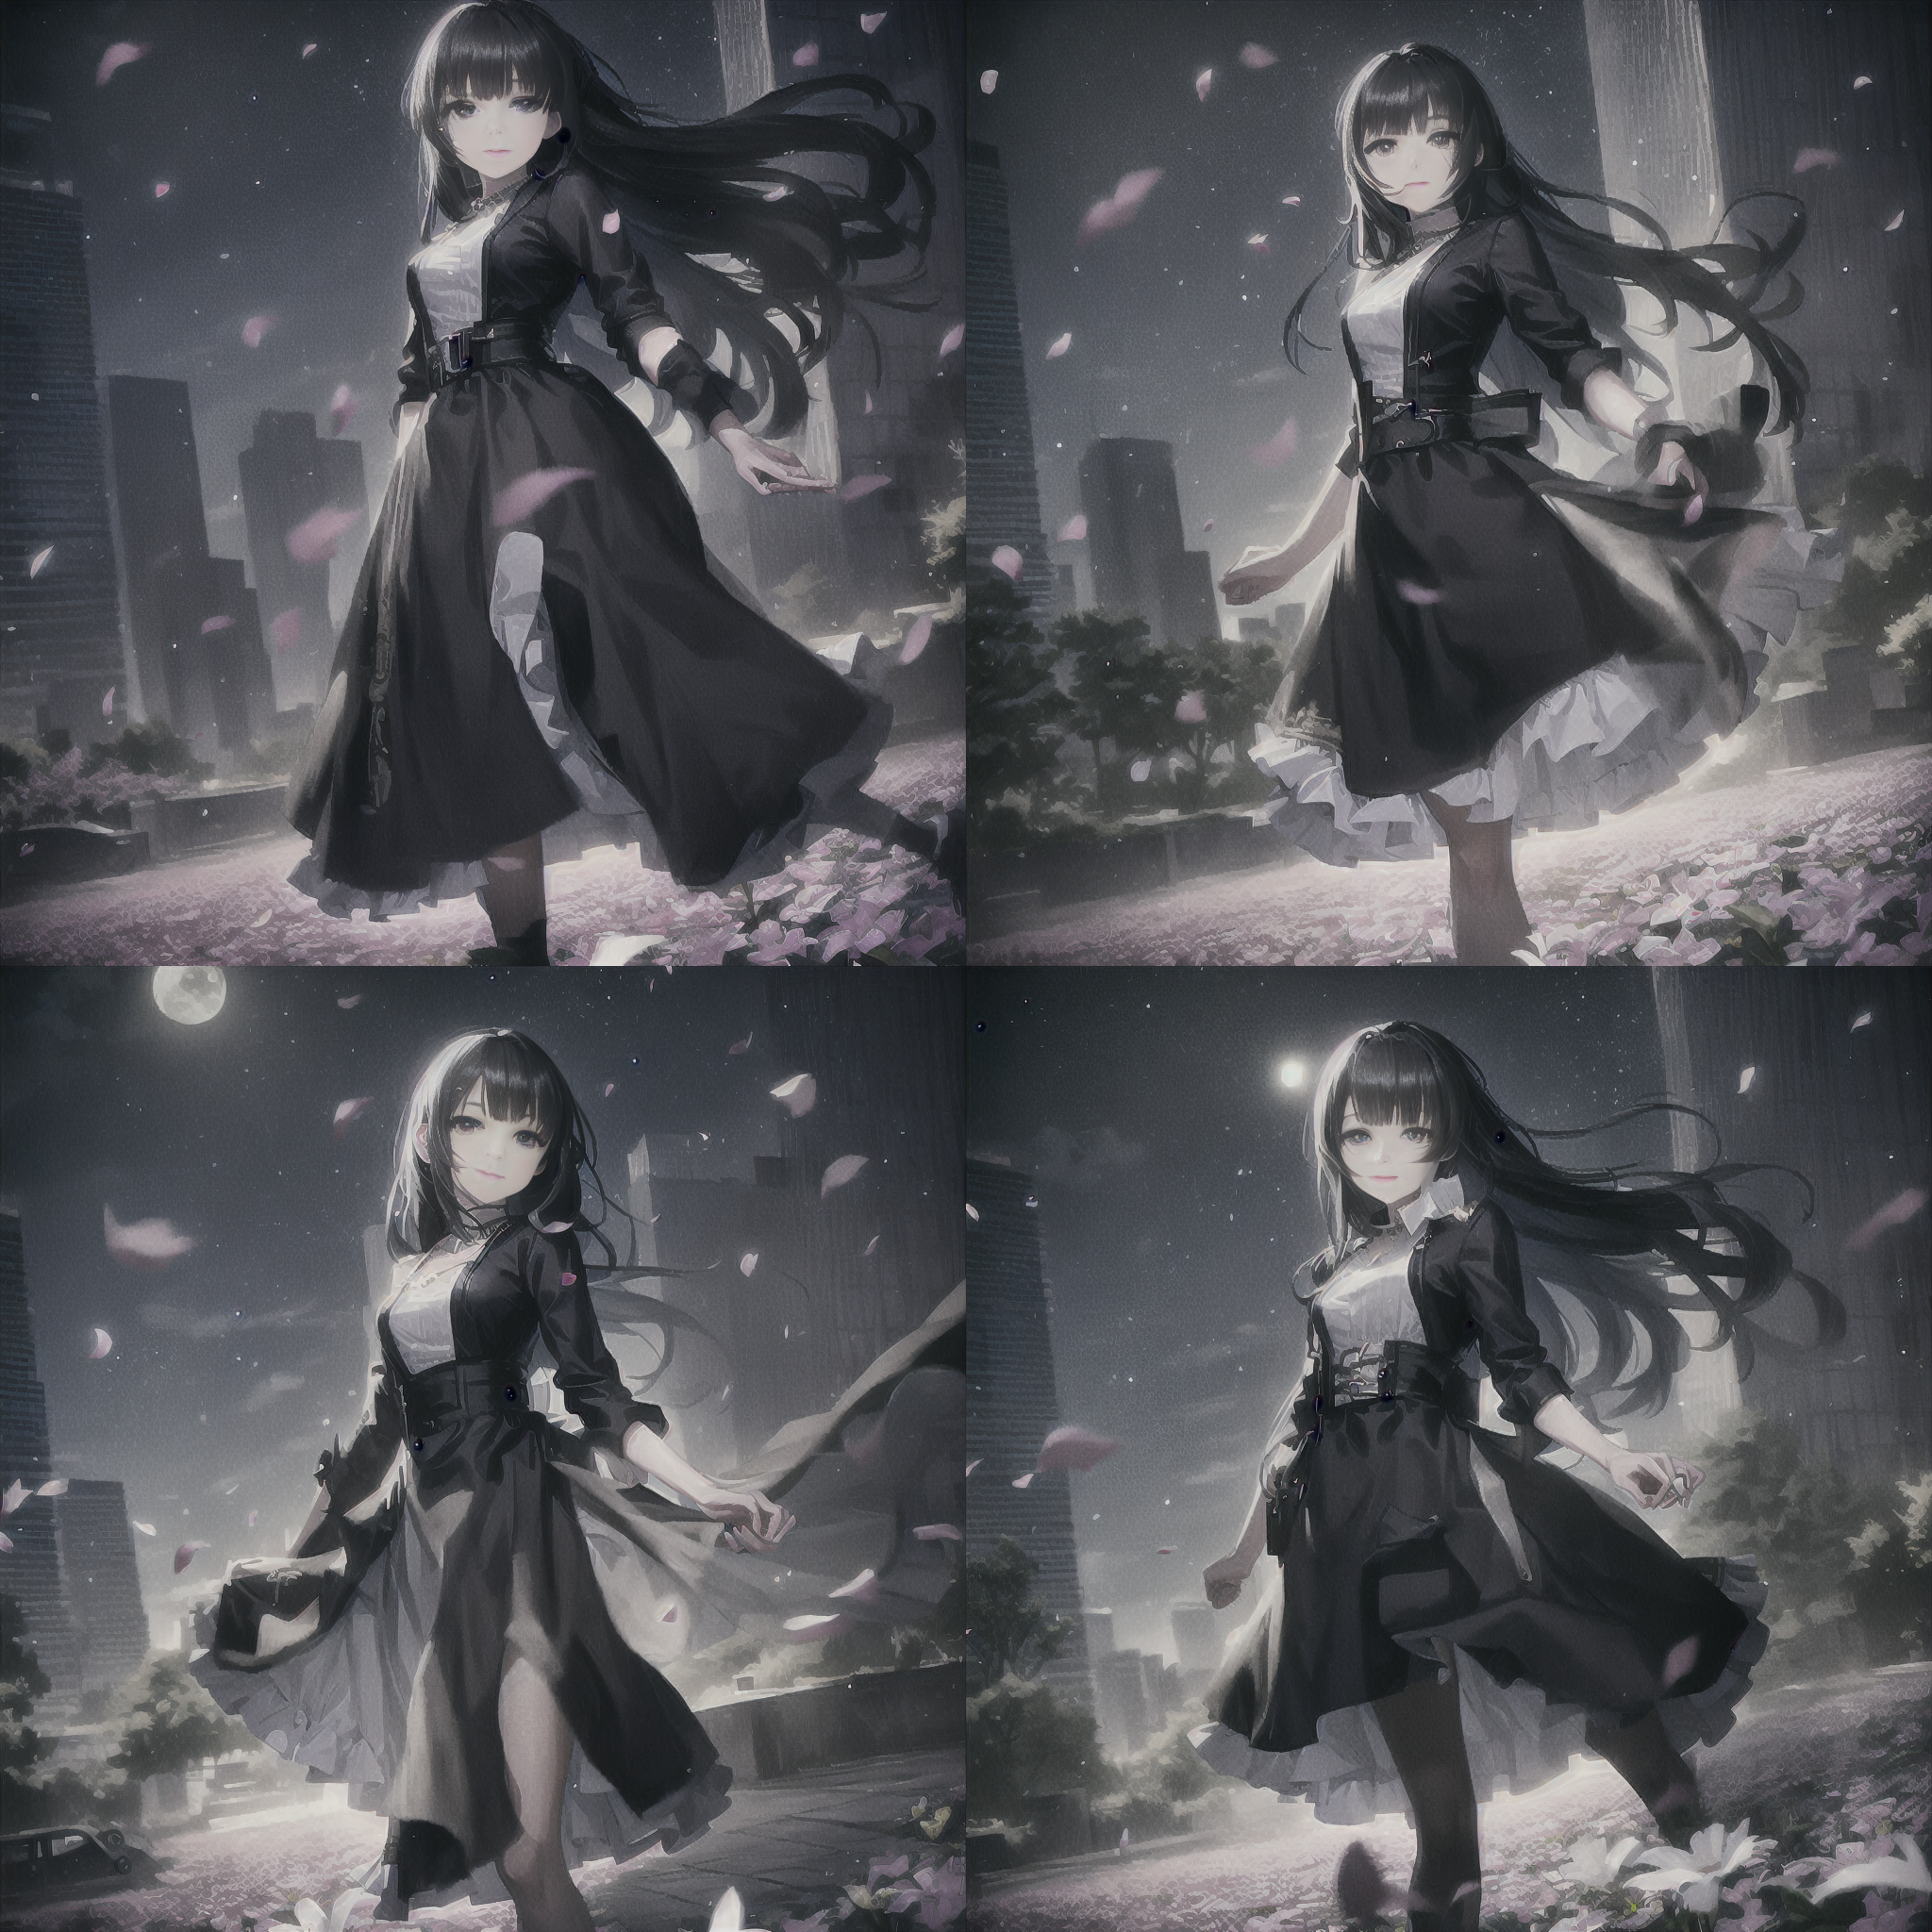
An example using the reference adain pre processor
We can upload an image of an anime character and use the control type of 'reference' and the 'reference adain' pre processor within controlnet. I have checked the Pixel Perfect checkbox to ensure we are using the matching resolution of the input image.
I am using the AyoniMix model with the sampler as Euler a, 20 sampling steps and a CFG scale of 7 with the following prompts:-
Positive Prompts: Solo, 1girl, black hair, Anime Style, full body shot
Negative Prompts: Nudity, nsfw
Input image

Output images
Personally, I believe the reference only pre-processor works best in this scenario.
If you’re having issues with installation or slow hardware, you can try any of these workflows on a more powerful GPU in your browser with ThinkDiffusion.
If you’d like to have more control over the character that you're carefully customizing, check out my post to using OpenPose here. Let me know what you cool crazy techniques you're using, and happy creating!
Member discussion