
An Introduction to ControlNet and OpenPose
Introducing ControlNet, a revolutionary Stable Diffusion model designed to facilitate the replication of compositions or human poses from a reference image.
With ControlNet, the frustrations of Stable Diffusion users are alleviated, as it provides a precise level of control over subject placement and appearance.
In this article, we will delve into the comprehensive details of ControlNet OpenPose, covering:
- An overview of ControlNet OpenPose and its functionalities
- Key settings and practical applications for various use cases.
Prepare to unlock the full potential of ControlNet OpenPose and take your creative endeavours to new heights.
What is ControlNet OpenPose?
ControlNet OpenPose refers to a specific component or feature that combines the capabilities of ControlNet with OpenPose, an advanced computer vision library for human pose estimation. By integrating ControlNet with OpenPose, users gain the ability to control and manipulate human poses within the Stable Diffusion framework.
By leveraging the combined power of ControlNet and OpenPose, Stable Diffusion users can achieve more controlled and targeted results when generating or manipulating compositions involving human subjects.
What OpenPose Pre-processors are available?
The OpenPose pre-processors are:
- OpenPose: eyes, nose, eyes, neck, shoulder, elbow, wrist, knees, and ankles.
- OpenPose_face: OpenPose + facial details
- OpenPose_hand: OpenPose + hands and fingers
- OpenPose_faceonly: facial details only
- OpenPose_full: All of the above

How to use ControlNet and OpenPose
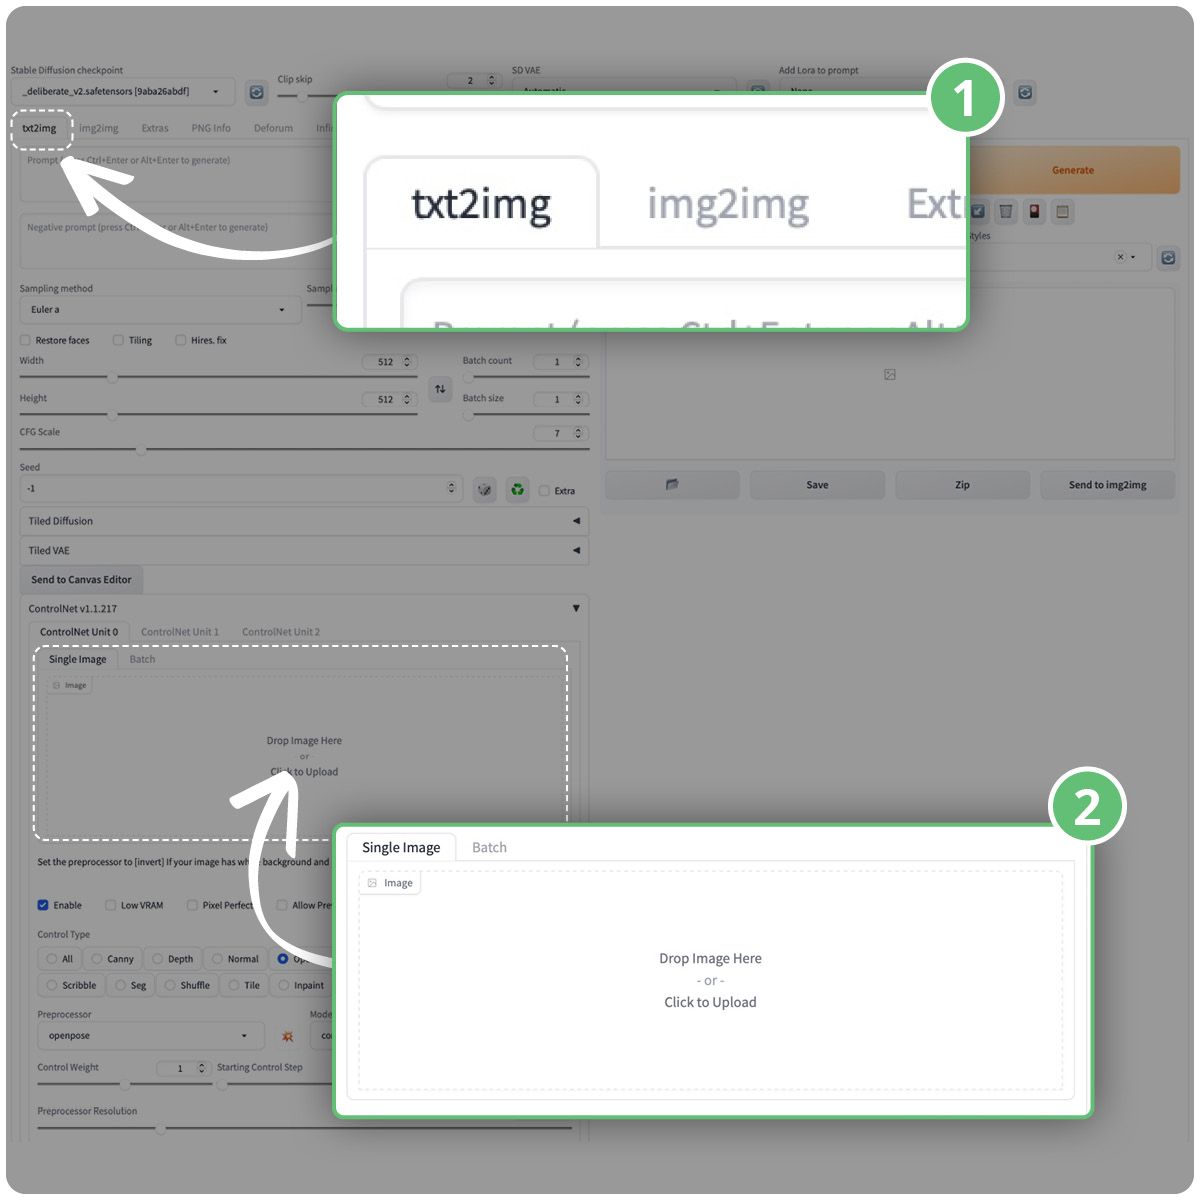
- (1) On the text to image tab...
- (2) upload your image to the ControlNet single image section as shown below
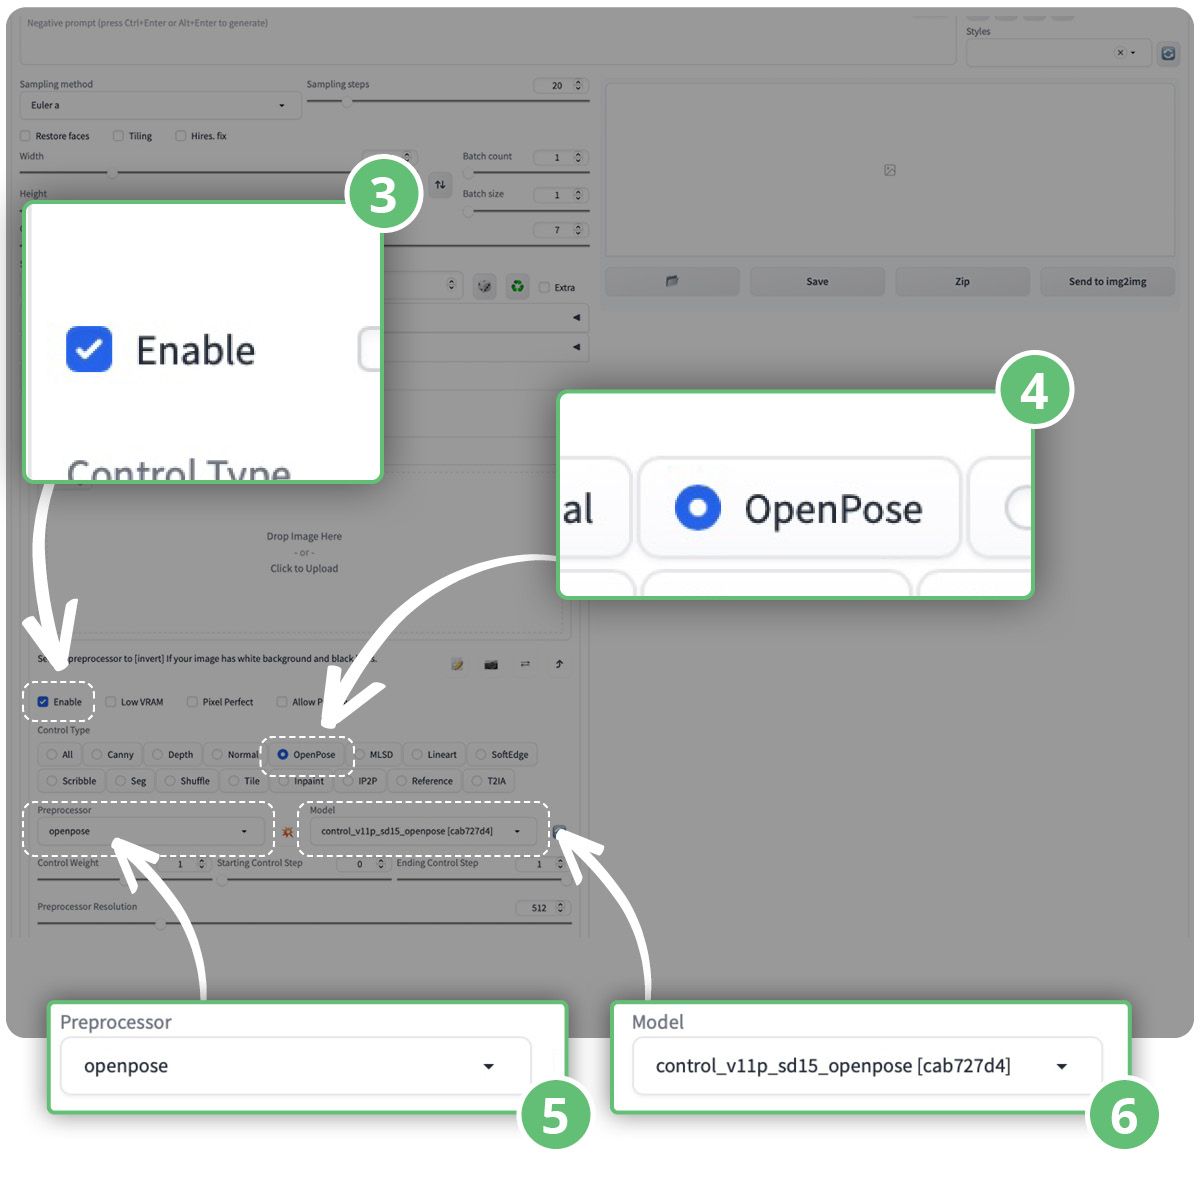
- (3) Enable the ControlNet extension by checking the Enable checkbox.
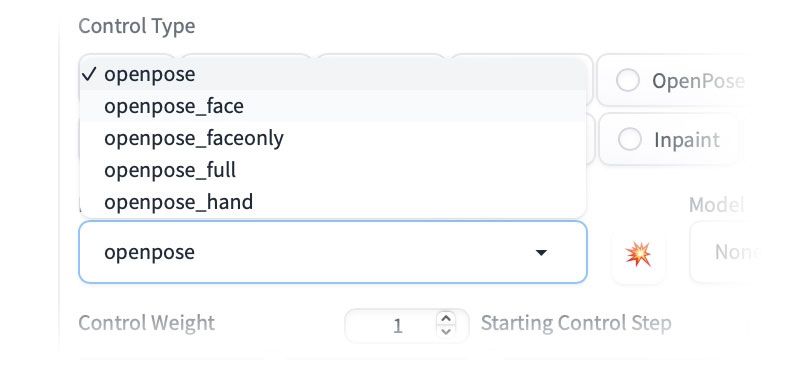
- (4) Select OpenPose as the control type
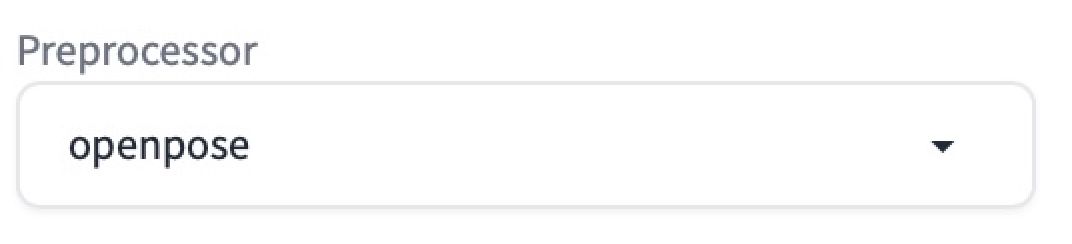
- (5) Select "openpose" as the Pre-processor. OpenPose detects human key points like the positions of the head, arms, etc.
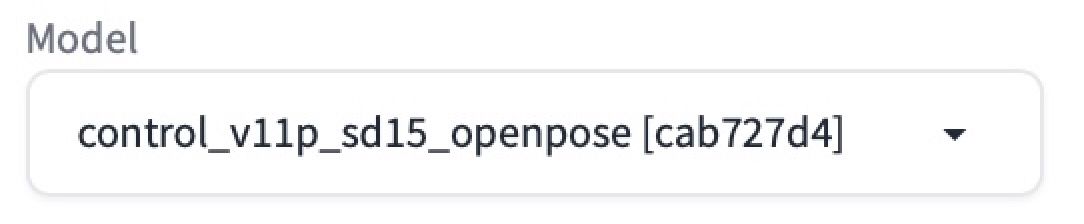
- (6) Choose "control_sd15_openpose" as the ControlNet model, which is compatible with OpenPose.
- You can then type in your positive and negative prompts and click the generate button to start generating images using ControlNet.
- You will see the generated images following the pose of the input image, with the last image showing the detected keypoints.
Disabling ControlNet:
- When you're done with the ControlNet extension, uncheck the Enable checkbox to disable it.
ControlNet Settings
Pre-processors:
- ControlNet provides various pre-processors for different tasks.
- To enable the preview of the pre-processor's output, select Allow Preview.
- Optionally, choose Pixel Perfect to generate the pre-processed image with the specified height and width from text-to-image.
Pre-processors and Models:
- ControlNet requires selecting a pre-processor and a compatible model.
- The pre-processor modifies the original image, and only the pre-processed image is used for ControlNet.

To choose the pre-processor and model:
- Click on the explosion icon next to the Pre-processor dropdown menu.
- Select the desired pre-processor from the available options.
- Ensure the corresponding model is selected in the ControlNet's Model dropdown menu.
Now that we have covered the features and settings for using ControlNet, let's go through each model to see what can be done!
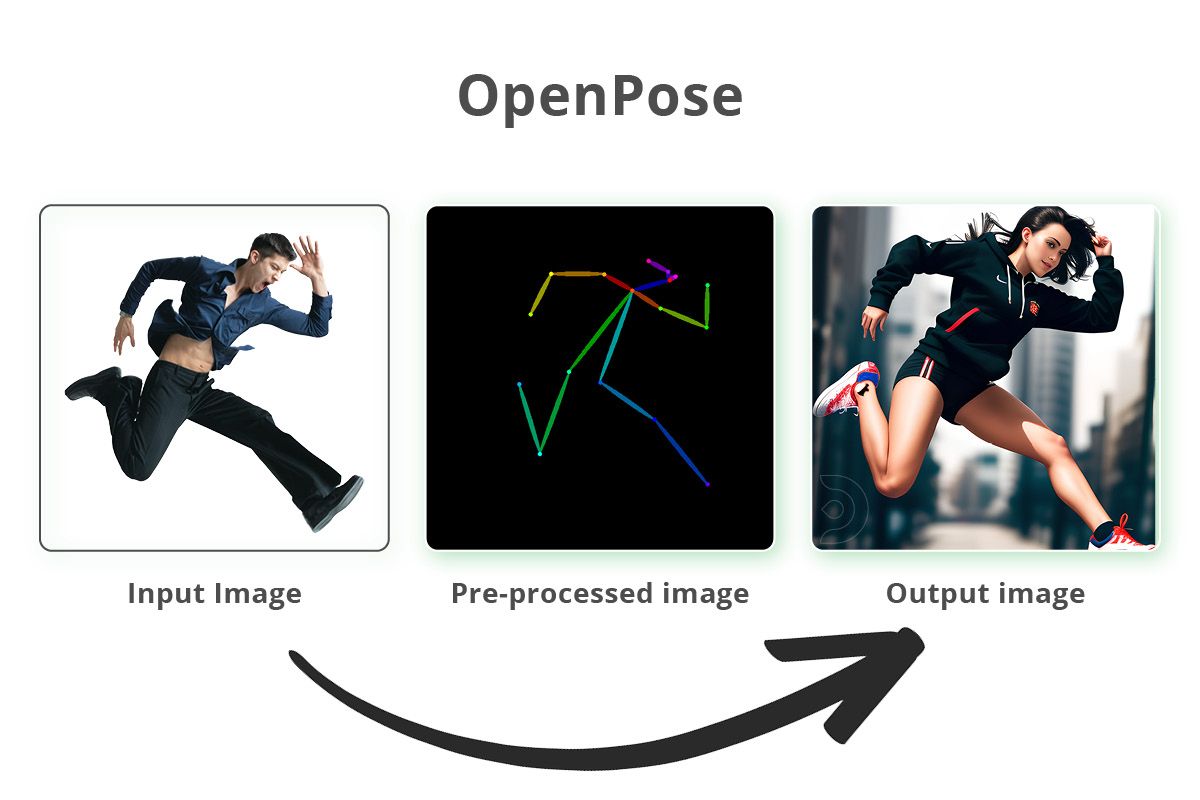
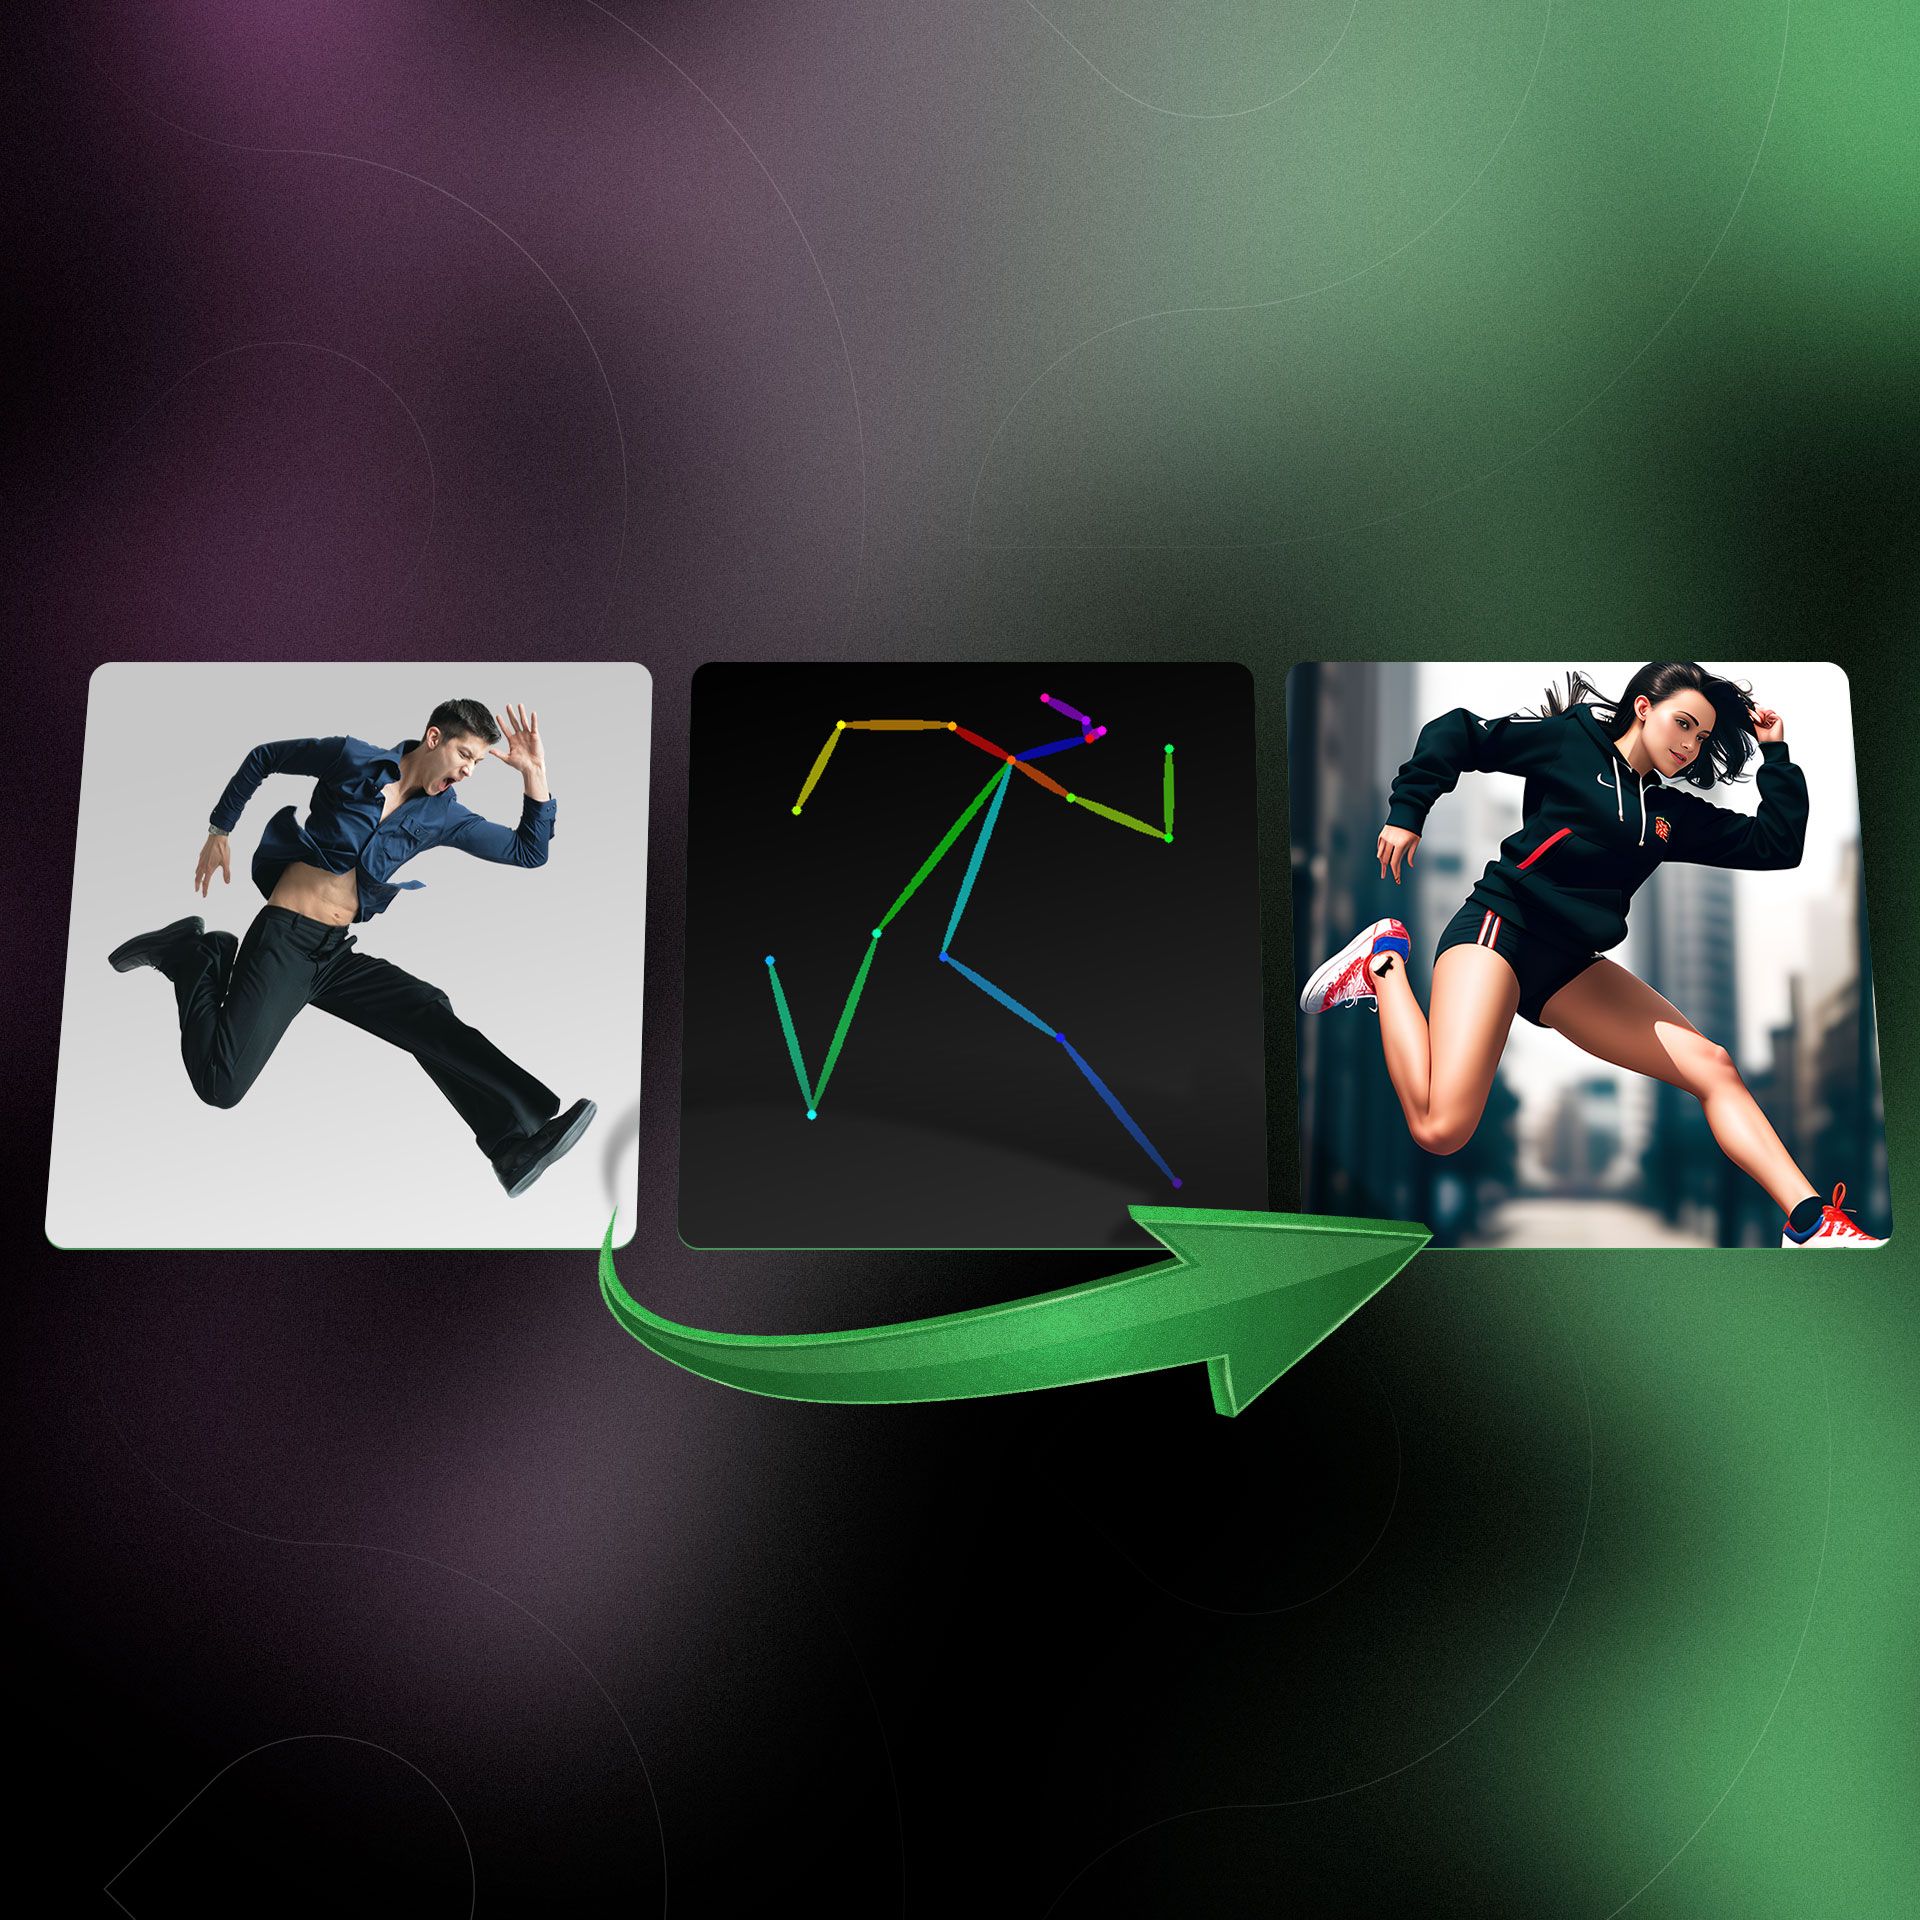
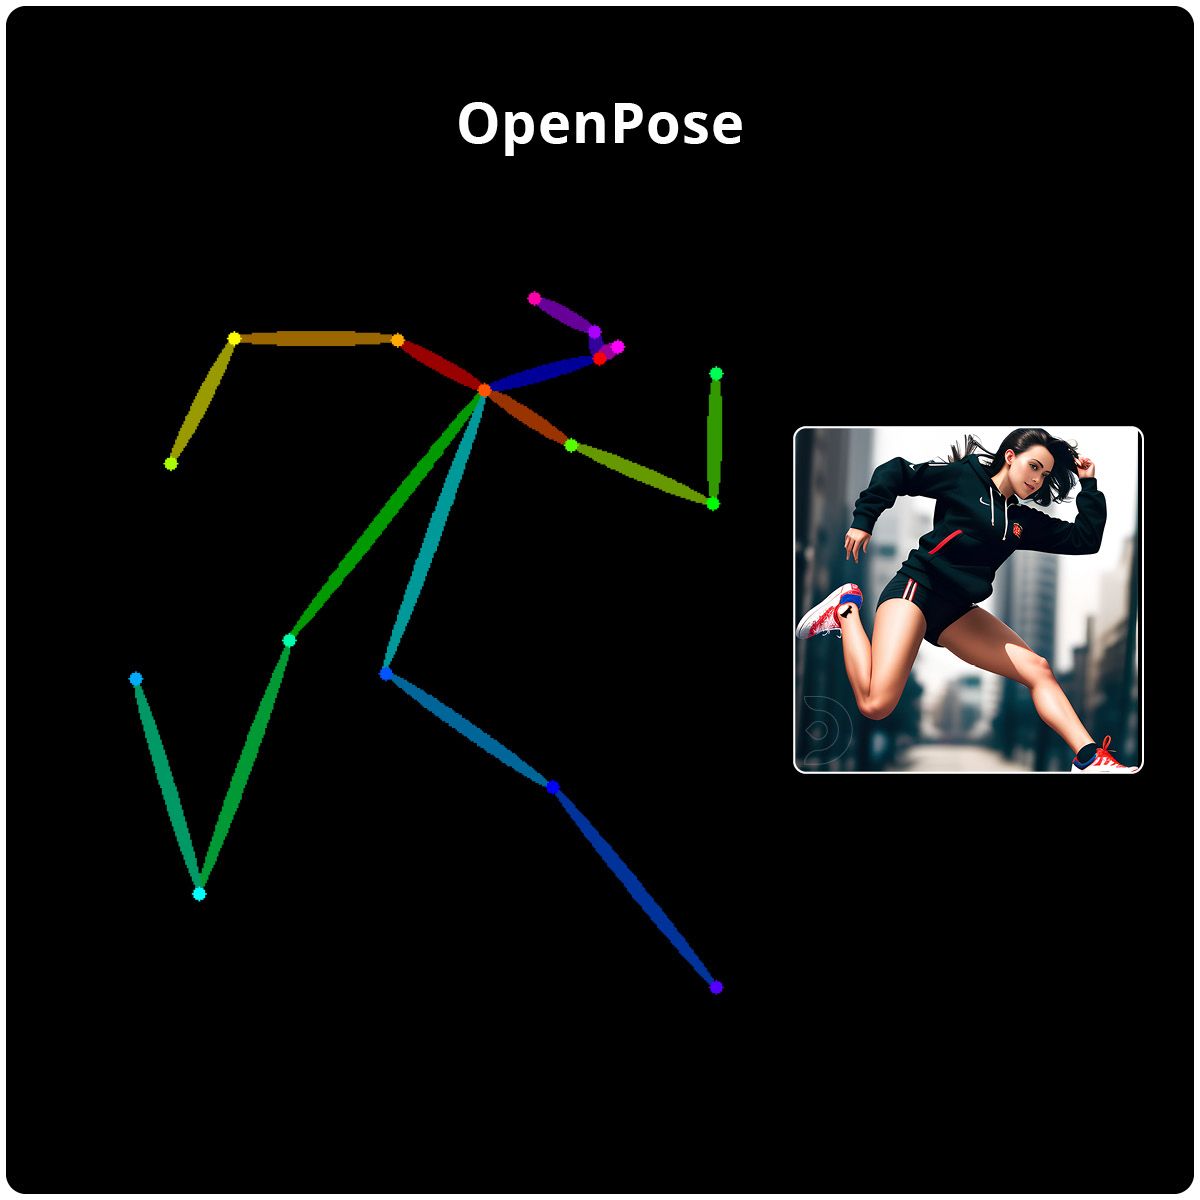
Examples of using OpenPose
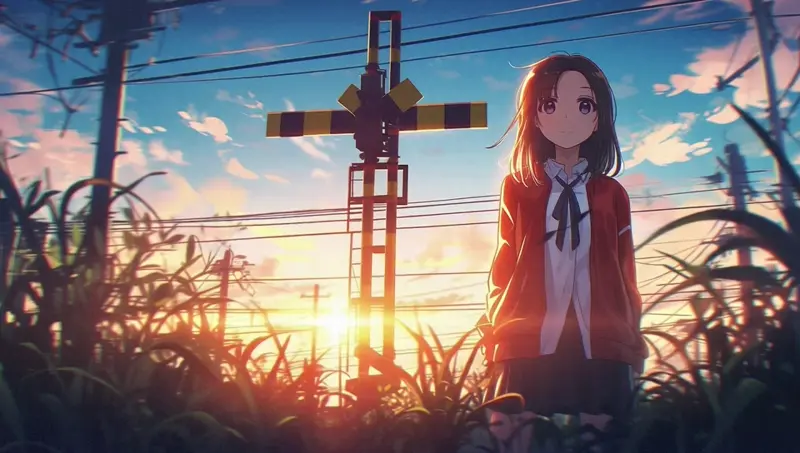
- OpenPose detects human key point positions of the eyes, nose, eyes, neck, shoulder, elbow, wrist, knees and ankles
- It is suitable for copying human poses while excluding other details like outfits, hairstyles, and backgrounds.
For example, if we upload a picture of a man in a certain pose, we can select the control type to be OpenPose, the pre-processor to openpose and control_sd15_openpose as the model.
Positive Prompts: (a photograph of a beautiful girl jumping in the air wearing trainers), (ultra detailed face:1.3), makeup, shot on a Sony mirrorless camera, DSLR, 50mm lens f/2.8, ultra detailed, 8k, morning golden hour
Negative Prompts: deformed, disfigured, nudity, nsfw, blurry, lowres, cartoon, anime, multiple people, warped face
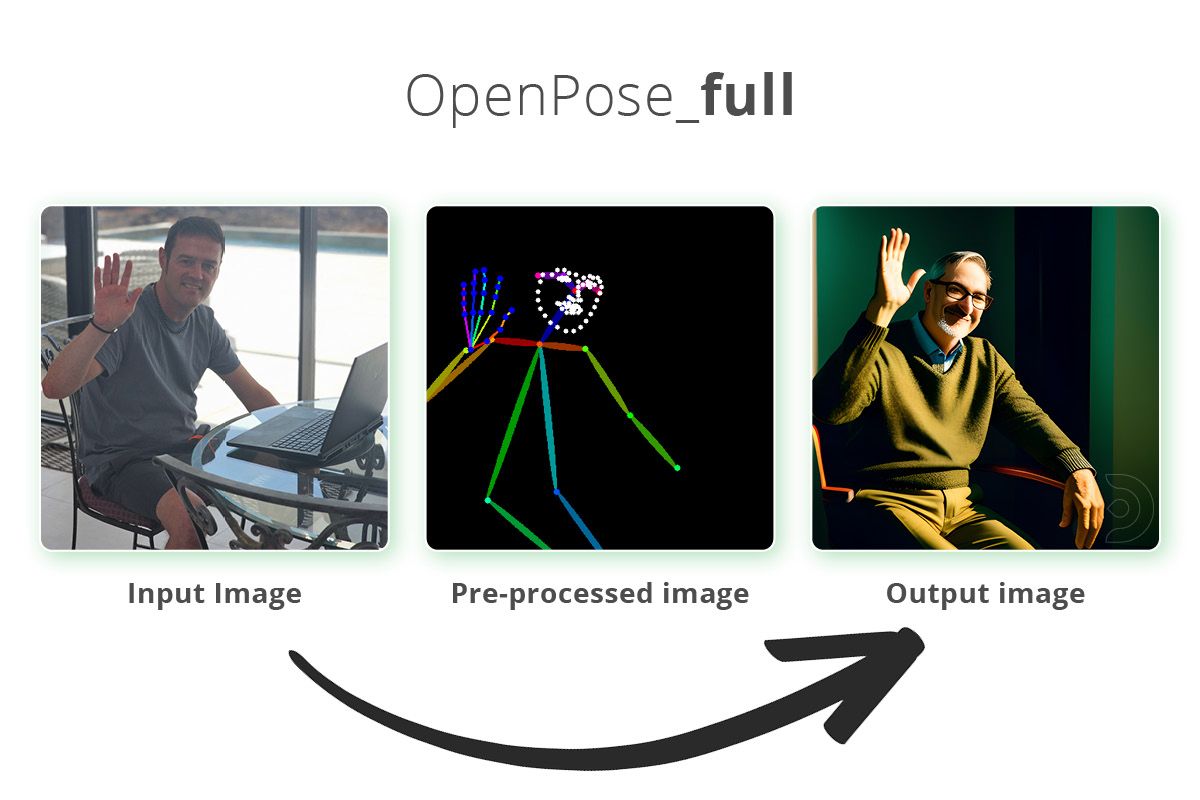
OpenPose Full
- OpenPose_full detects everything openPose face and openPose_hand do.
- OpenPose_full combines all the key points detected by OpenPose, including facial details and hands/fingers.
For example, if we upload a picture of a man waving, we can select the pre-processor to openpose_full and control_sd15_openpose as the model.
Positive Prompts: Photograph of a man sat in a chair, waving, shot on a Sony mirrorless camera, DSLR, 50mm lens f/2.8, ultra detailed, 8k, [ at night / morning golden hour ]
Negative Prompts: Nudity, nsfw, blurry, lowres, cartoon, anime
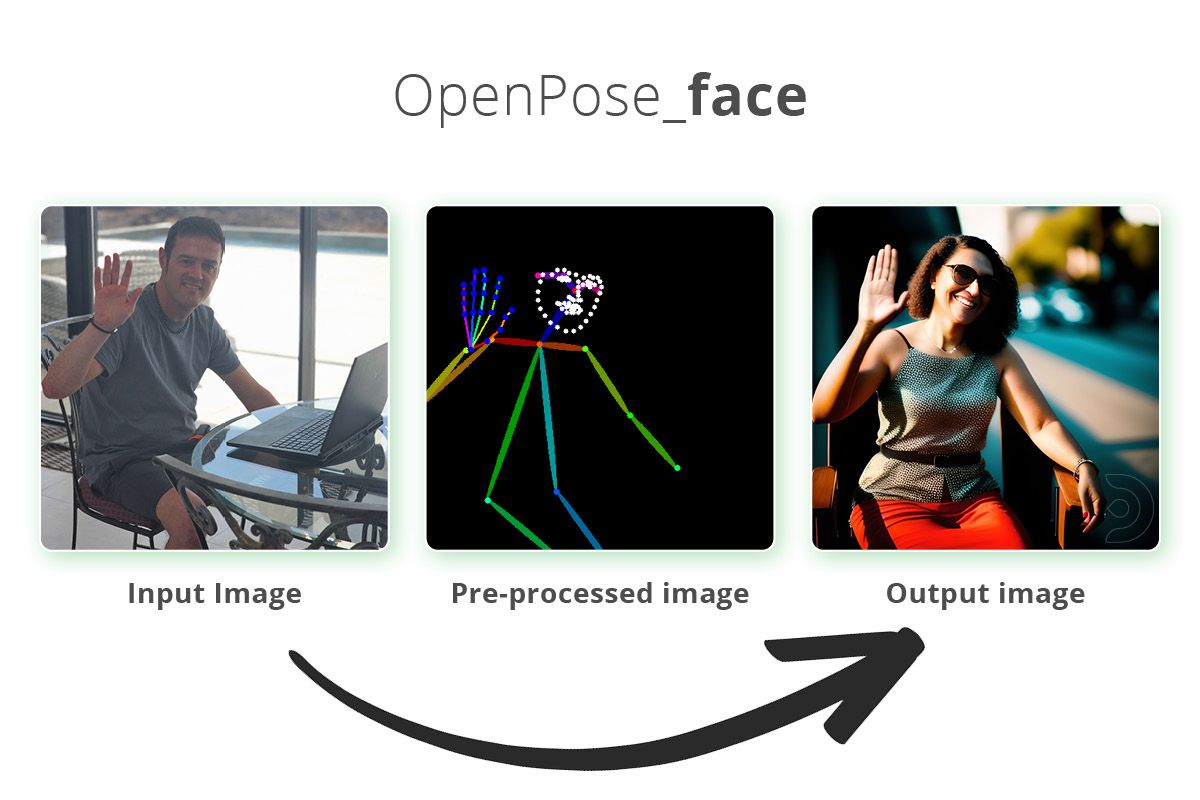
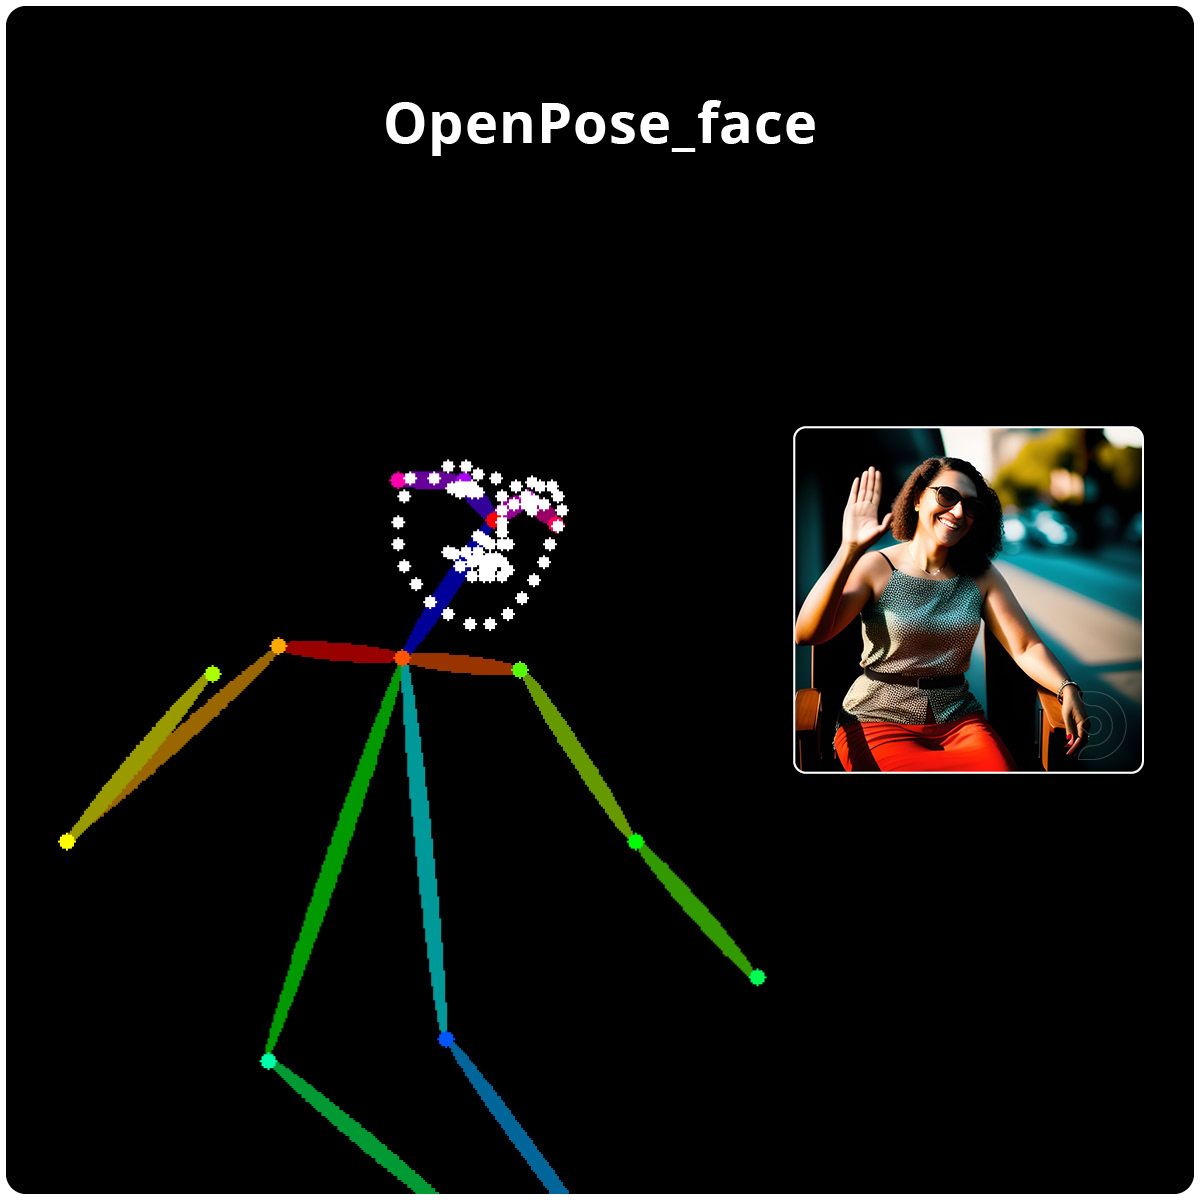
OpenPose_face
- OpenPose_face includes all the key points detected by OpenPose, along with additional facial details.
- It is useful for copying facial expressions along with the body pose.
For example, if we upload a picture of a man waving, we can select the pre-processor to openpose_face and control_sd15_openpose as the model.
Positive Prompts: Photograph of a lady sat in a chair, waving, shot on a Sony mirrorless camera, DSLR, 50mm lens f/2.8, ultra detailed, 8k, [ at night / morning golden hour ]
Negative Prompts: Nudity, nsfw, blurry, lowres, cartoon, anime
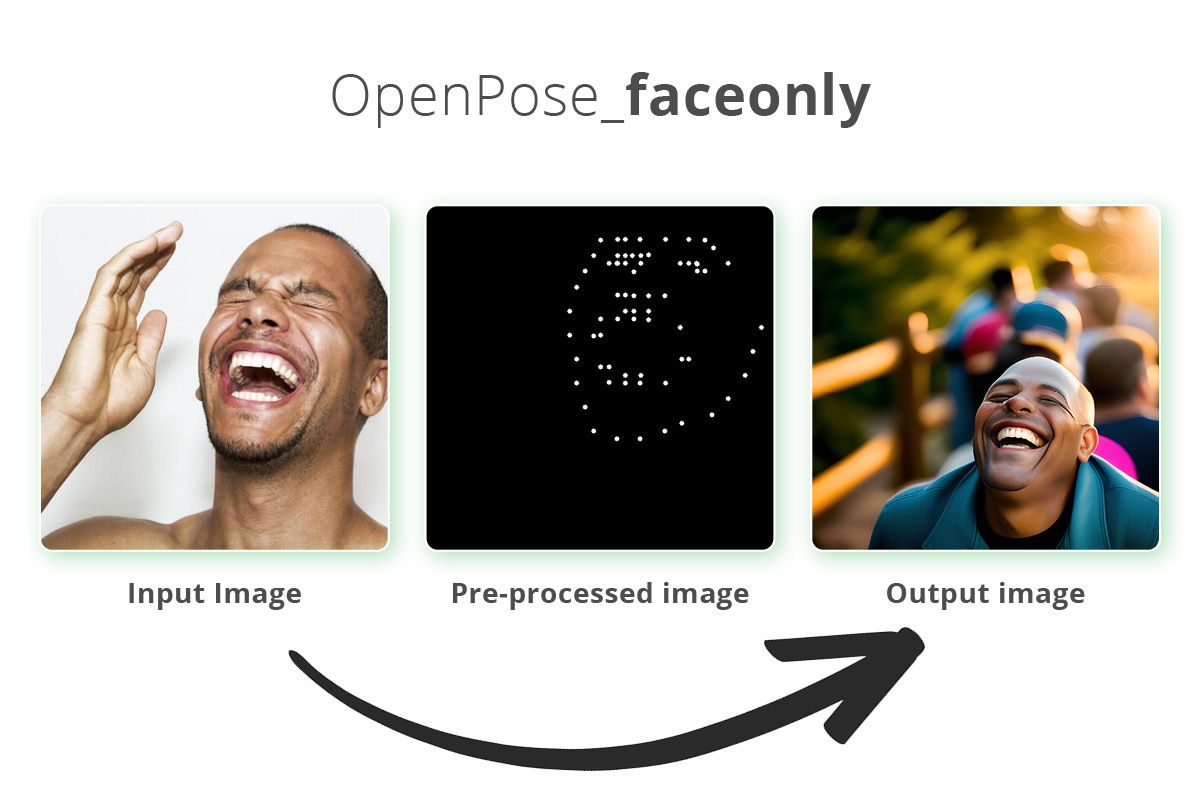
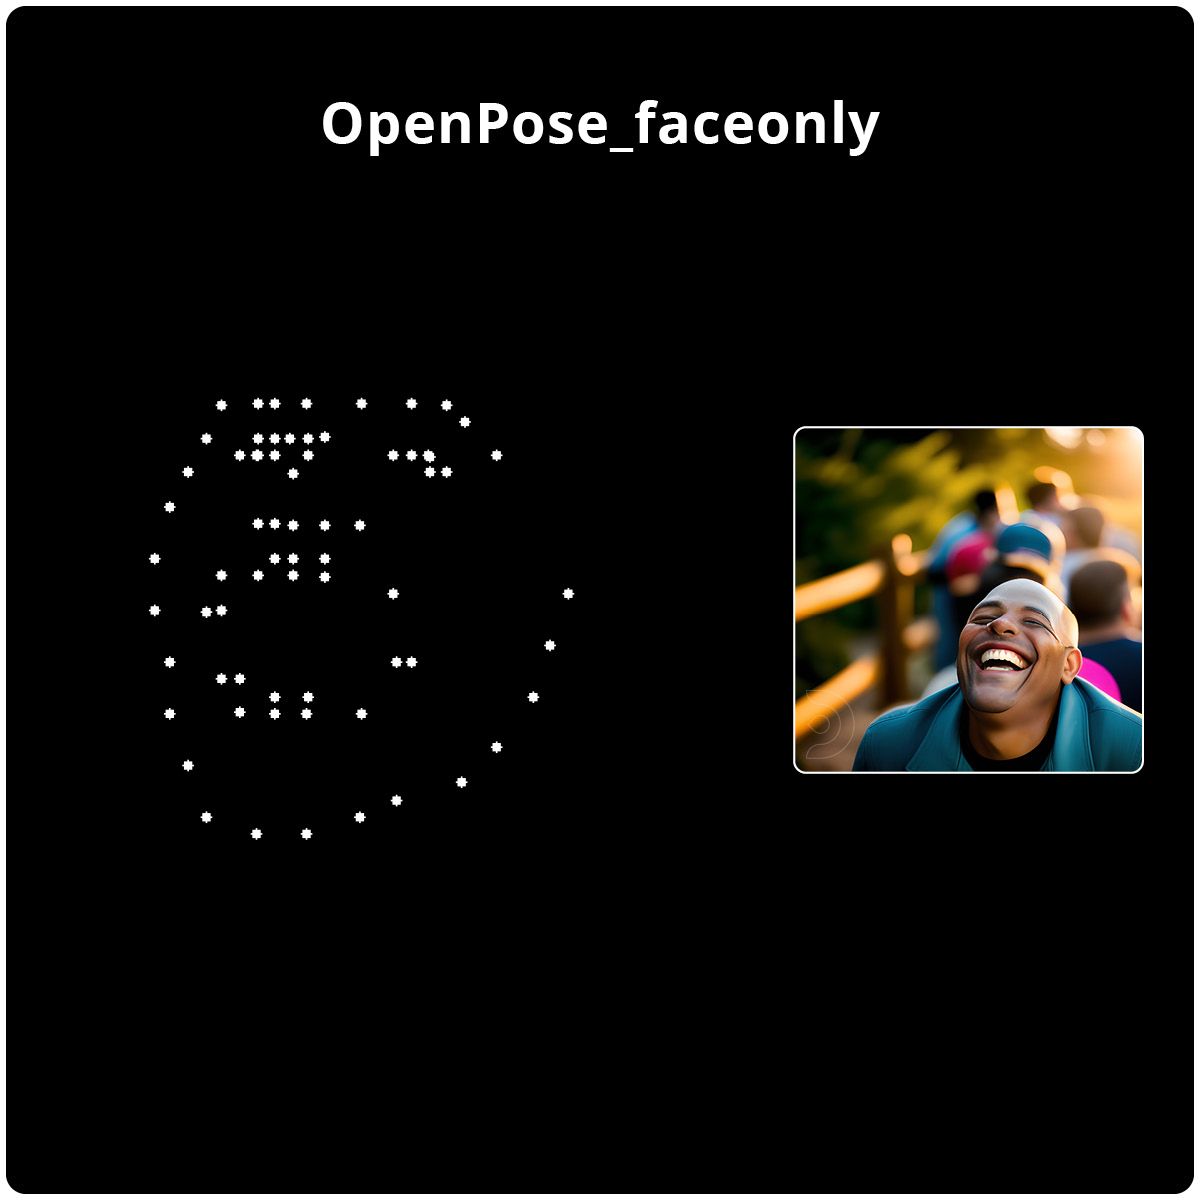
OpenPose_faceonly
- OpenPose_faceonly focuses solely on detecting facial details and excludes other key points.
- This is helpful for copying only the face without including other body key points.
For example, if we upload a picture of a man laughing, we can select the pre-processor to openpose_faceonly and control_sd15_openpose as the model.
Positive Prompts: (a photograph of a man laughing:1.2), shot on a Sony mirrorless camera, DSLR, 50mm lens f/2.8, ultra detailed, 8k, morning golden hour
Negative Prompts: Nudity, nsfw, blurry, lowres, cartoon, anime

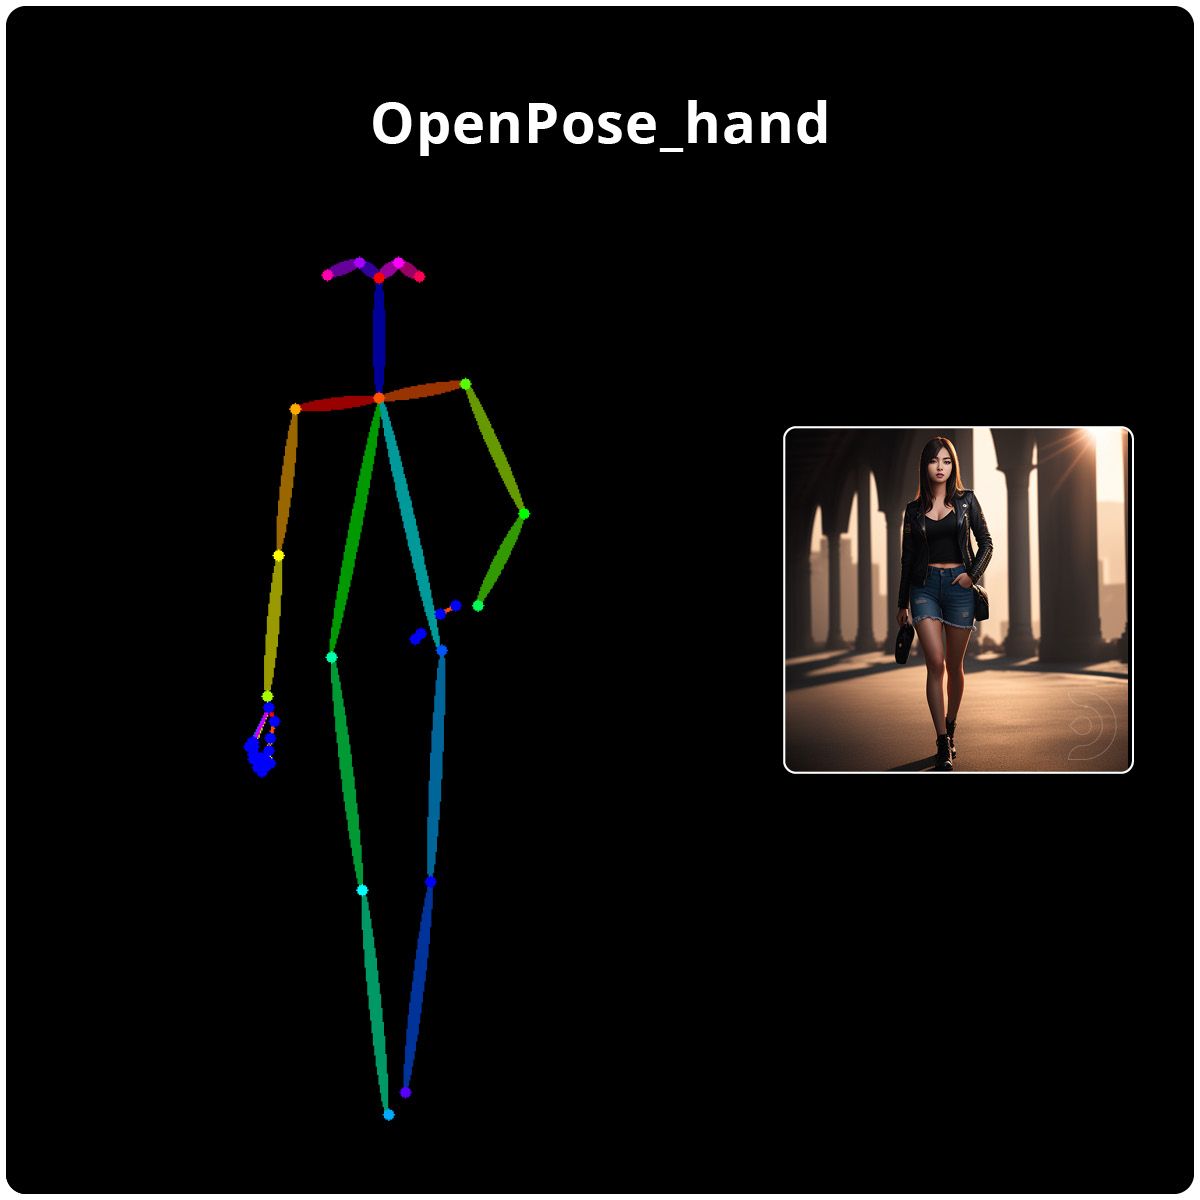
OpenPose_hand
- OpenPose_hand detects key points using OpenPose, including the hands and fingers. This can be useful as stable diffusion can sometimes really struggle to generate realistic hand poses.
- It is beneficial for copying hand poses along with the body posture.
For example, if we upload a picture of a man doing the thumbs up, we can select the pre-processor to openpose_hand and control_sd15_openpose as the model.
Positive Prompts: (a photograph of a beautiful girl doing the thumbs up), shot on a Sony mirrorless camera, DSLR, 50mm lens f/2.8, ultra detailed, 8k, morning golden hour
Negative Prompts: deformed, disfigured, Nudity, nsfw, blurry, lowres, cartoon, anime, multiple people
FAQs
What is controlnet?
ControlNet is a tool that helps you guide AI image or video generation by using extra information, like depth maps, edge maps, or poses. It makes sure the AI creates content that matches your input, such as keeping objects in the right places or making characters move in specific ways. This is useful for tasks like animations, video editing, and creating consistent designs. ControlNet works with different input types, like sketches or videos, and ensures smooth transitions in videos while keeping everything realistic. It’s flexible, easy to use with models like Stable Diffusion, and great for artists and creators who want more control over their AI projects.
What is ControlNet OpenPose?
ControlNet OpenPose is a model that uses human pose detection to guide image or video generation by identifying key body points, like the head, arms, legs, hands, and facial features. It creates a skeleton-like "control map" from a reference image and uses it to influence AI models (e.g., Stable Diffusion) to generate new content that matches the pose. This makes it ideal for creating realistic human characters, animations, or scenes with accurate poses and movements.
What is ControlNet used for?
ControlNet is a powerful AI framework designed to give users precise control over image and video generation processes. It works by adding extra conditions, such as depth maps, edge detection, or human pose data, to guide diffusion models like Stable Diffusion. This allows creators to generate content that aligns closely with their input, whether it's replicating a pose, copying the composition of an image, or turning a simple sketch into a professional-quality result. Its versatility and ability to handle multiple input types make it an essential tool for artists and designers seeking consistent and high-quality outputs.
What is OpenPose used for?
OpenPose is a real-time pose estimation system designed to detect and track human body, face, hand, and foot keypoints in images or videos. OpenPose is widely used in applications like sports analytics, healthcare, gaming, animation, and robotics. OpenPose supports 2D and 3D pose detection and works with various input sources like webcams and depth cameras, making it a versatile tool for understanding human movements in diverse fields.
How to Use OpenPose ControlNet SD1.5 Model in ComfyUI
To use the OpenPose ControlNet SD1.5 model in ComfyUI, you first need to install ComfyUI and download the required models, including the SD1.5 base model and the OpenPose ControlNet model. OpenPose detects body poses from an input image and turns them into a skeleton-like map, which guides the AI to generate new images that match the pose. After setting up your workflow in ComfyUI, you load your reference image, apply the OpenPose ControlNet model, and run the workflow to create images based on your chosen pose and text prompts.
Where to find controlnet models for comfyui
You can find ControlNet models for ComfyUI on websites like Hugging Face, where models for tasks like depth, edge detection, and OpenPose are available. The ComfyUI Wiki also provides links and guides on how to download and use these models. GitHub is another great source, with repositories. To use these models, download the files and place them in the ComfyUI/models/controlnet/ folder. After restarting ComfyUI, the models will be ready to use for creating high-quality, pose-guided images or videos.
How to edit controlnet canny
To edit ControlNet Canny in ComfyUI, you first need to set up the workflow and adjust its parameters for edge detection and image generation. Start by installing the required models, such as the SD1.5 base model, Canny ControlNet model. Load your input image into the workflow using the LoadImage node, and adjust the Canny parameters like low_threshold (e.g., 0.2–0.5) and high_threshold (e.g., 0.5–0.8) to control edge sensitivity and continuity. Preview the edge detection results using a PreviewImage node to ensure accuracy.
That's everything covered for using ControlNet with OpenPose! Experiment with different pre-processors and models to generate images based on human poses and key points.
And if you’re having issues with installation or slow hardware, you can try any of these workflows on a more powerful GPU in your browser with ThinkDiffusion.
If you'd like to try our tutorial guides, head on the to the links below
Member discussion