
This guide covers ATI (Any Trajectory Instruction) - ByteDance's tool for controlling motion in AI-generated videos. You'll learn what it does, how to set it up in ComfyUI, and how to use it to create videos with precise movement control.
ATI takes an image and user-drawn motion paths, then generates video following those exact trajectories. Instead of describing movement in text prompts, you draw where things should go.
How it works at a quick high-level:
- Load an image
- Draw motion paths on it using the Spline Editor
- ATI generates video following your paths
- Control objects, people, or camera movement
This replaces older methods that needed separate tools for different motion types. Let's deep dive into details now.
What is ATI?
Source: Bytedance ATI
ATI, or Any Trajectory Instruction, is a new framework for controllable video generation that lets users guide how objects, people, or even the camera move in a video by simply drawing or specifying motion paths (trajectories) on an image.
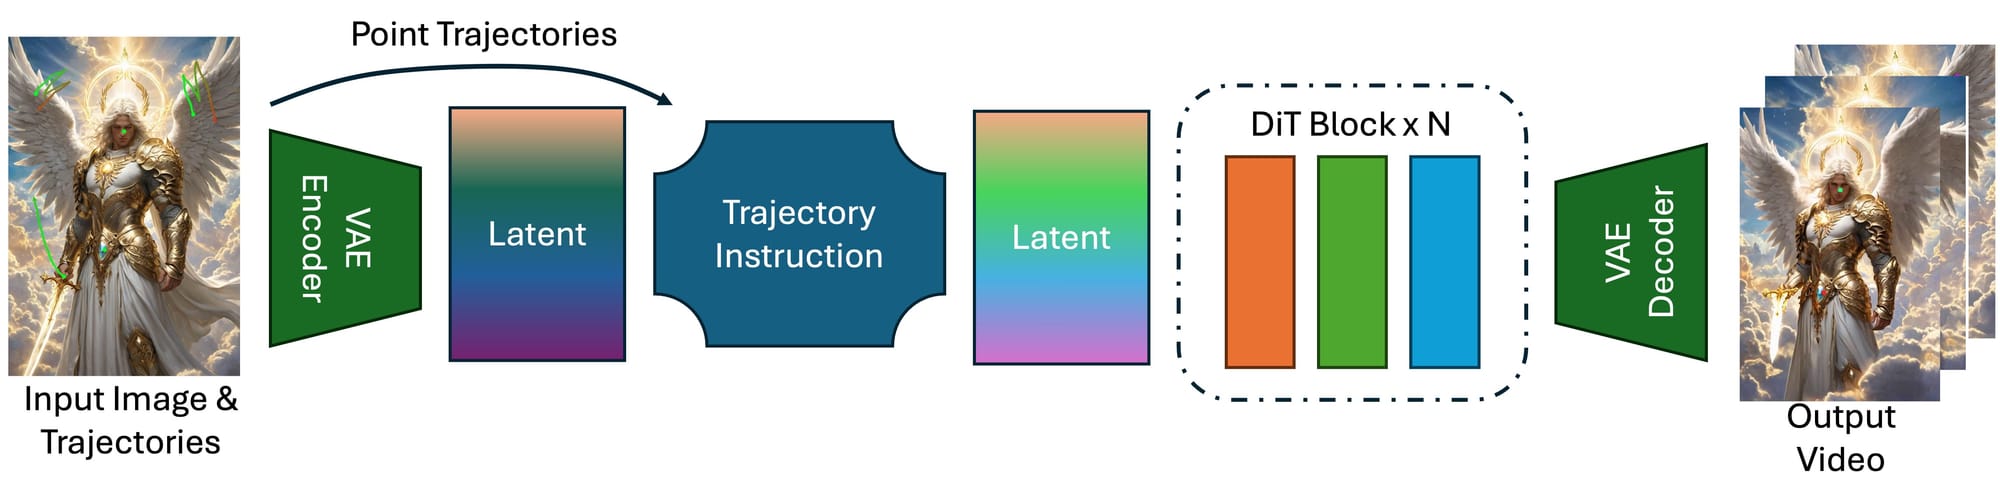
Unlike older methods that needed separate tools for different kinds of motion, ATI combines everything into one system: you can control local deformations, full object movements, or camera angles—all at once—by setting keypoints and their paths. These user-defined trajectories are injected into powerful AI video models, ensuring the generated video follows your instructions smoothly and realistically.
ATI makes it easy for anyone to create videos with precise, custom motion, opening up new creative possibilities and giving users much more control over how their videos look and move.
Buckle up and get ready to explore a new era where your creative journey is as exciting as the destination!
How to Use ATI for Controlled AI Video Generation
Installation guide
- Download the workflow file
- Open ComfyUI (local or ThinkDiffusion)
- Drag the workflow file into the ComfyUI window
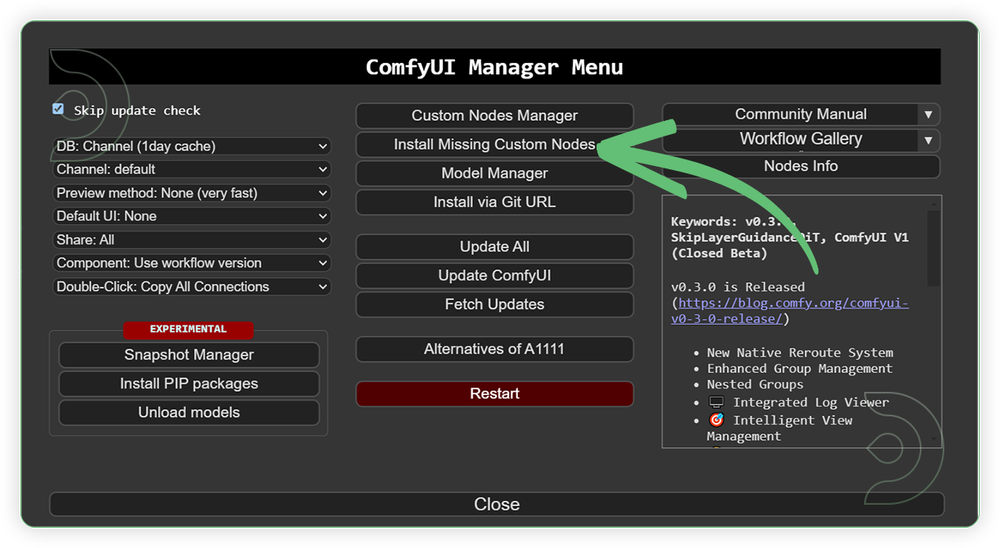
- If you see red nodes, install missing components:
- ComfyUI Manager > Install Missing Custom Nodes
Verified to work on ThinkDiffusion Build: June 27, 2025
ComfyUI v0.3.47 with the use Wan2_1-I2V-ATI-14B_fp8_e4m3fn.safetensors model
Note: We specify the build date because ComfyUI and custom node versions updated after this date may change the behavior or outputs of the workflow.
Minimum Machine Size: Ultra
Use the specified machine size or higher to ensure it meets the VRAM and performance requirements of the workflow
Custom Nodes
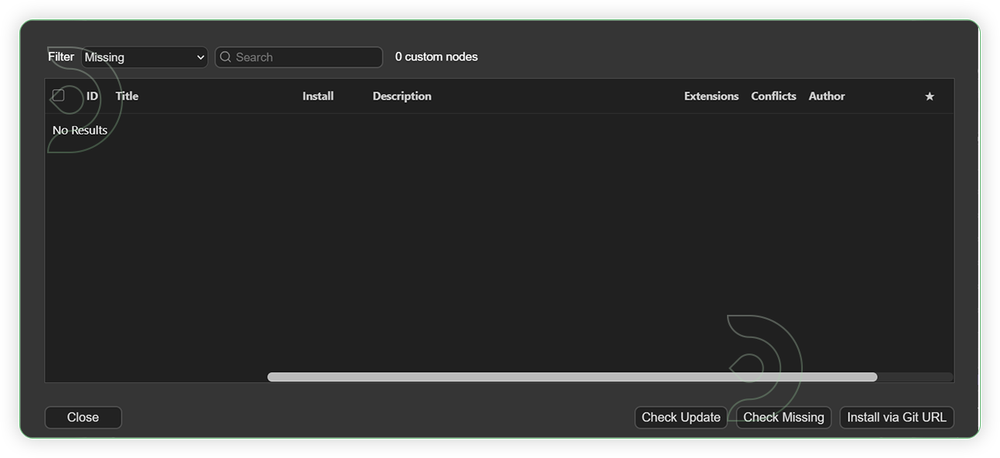
If there are red nodes in the workflow, it means that the workflow lacks the certain required nodes. Install the custom nodes in order for the workflow to work.
- Go to the ComfyUI Manager > Click Install Missing Custom Nodes
- Check the list below if there's a list of custom nodes that needs to be installed and click the install.
Required Models
For this guide you'll need to download these 5 recommended models.
2. umt5-xxl-enc-bf16.safetensors
3. Wan2_1_VAE_fp32.safetensors
4. clip_vision_h.safetensors
5. detailz-wan.safetensors
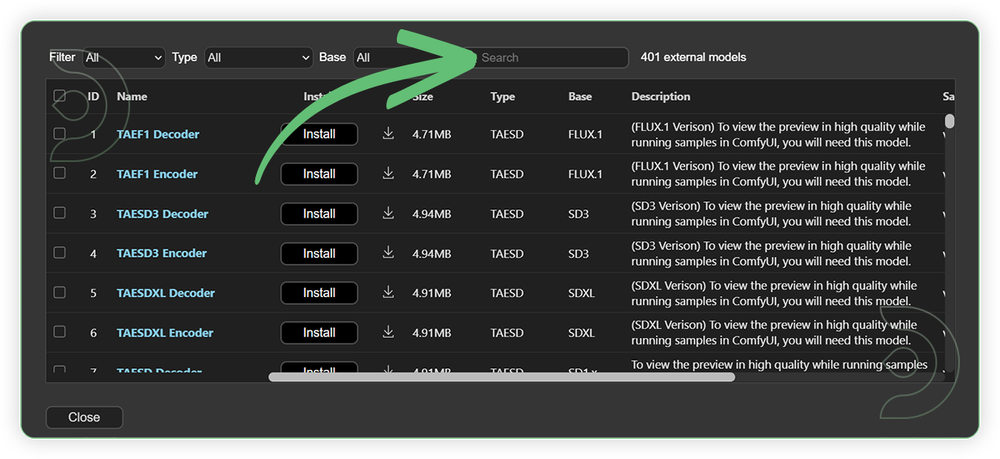
- Go to ComfyUI Manager > Click Model Manager
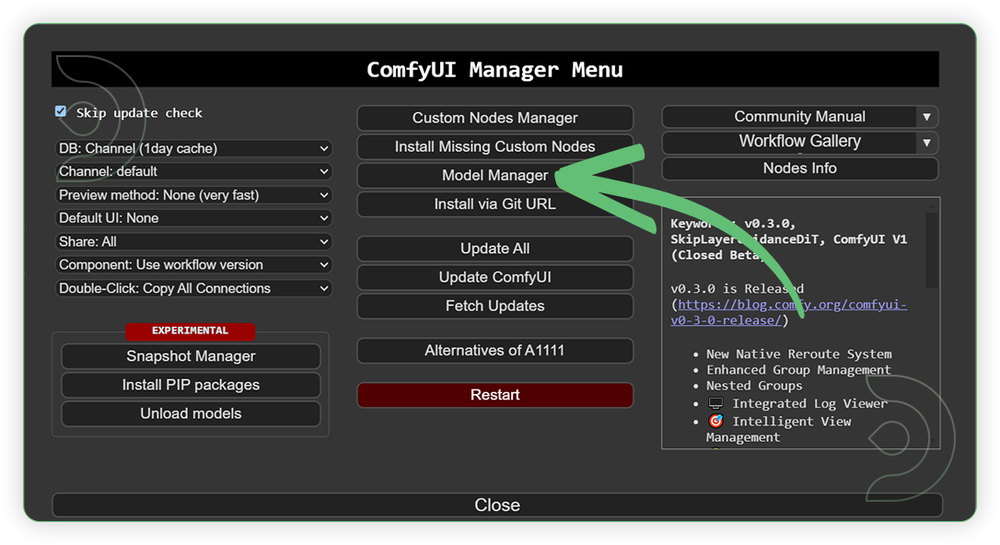
- Search for the models above and when you find the exact model that you're looking for, click install, and make sure to press refresh when you are finished.
If Model Manager doesn't have them: Use direct download links (included with workflow) and upload through ThinkDiffusion MyFiles > Upload URL. Refer our docs for more guidance on this.
You could also use the model path source instead: by pasting the model's link address into ThinkDiffusion MyFiles using upload URL.
| Model Name | Model Link Address | ThinkDiffusion Upload Directory |
|---|---|---|
Wan2_1-I2V-ATI-14B_fp8_e4m3fn.safetensors |
.../comfyui/models/diffusion_models/ |
|
| umt5-xxl-enc-bf16.safetensors | .../comfyui/models/text_encoders/ |
|
| Wan2_1_VAE_fp32.safetensors | .../comfyui/models/vae/ |
|
| clip_vision_h.safetensors | .../comfyui/models/clip_vision/ |
|
| detailz-wan.safetensors | .../comfyui/models/lora/ |
Step-by-step Workflow Guide
This workflow was pretty easy to set up and runs well from the default settings. Here are a few steps where you might want to take extra note.
There are 2 Stages that you need to remember.
Stage 1 - Pre-setup first running the prompt 1st before you enable the group nodes of Stage 2.
Stage 2 - Once the pre-setup has been laid, enable the Stage 2 group nodes, set the necessary settings and run the prompt
Important: Run both stages every time you use a new image.
| Steps | Recommended Nodes |
|---|---|
| 1. Pre-Setup Load Image (Stage 1) Load a high quality image. Run the prompt 1st in order for the resized image to be applied to Spline Editor. Set your desired trajectory path. Take note that Stage 2 nodes must be disabled. |
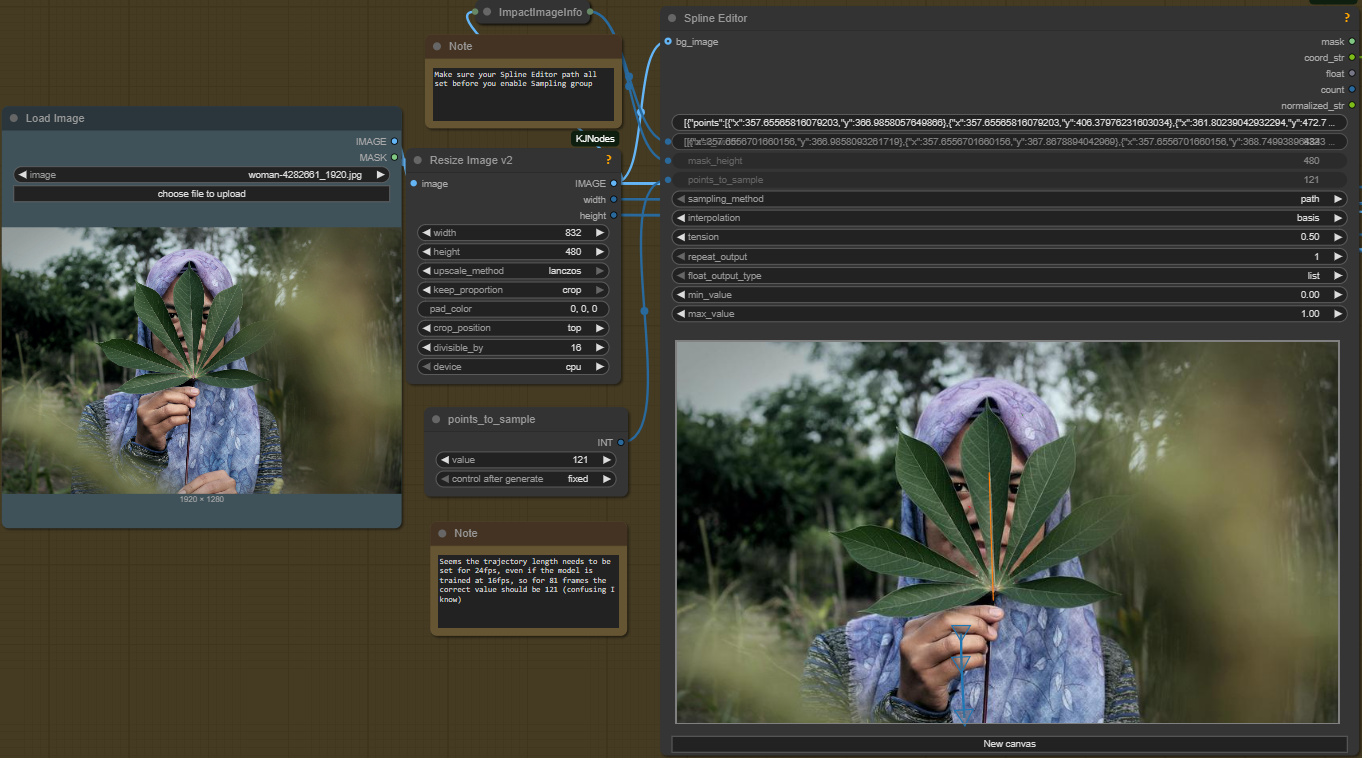 |
| 2. Set the Models (Stage 2) Enable the Stage 2 group nodes. Set the required models as seen on the image. |
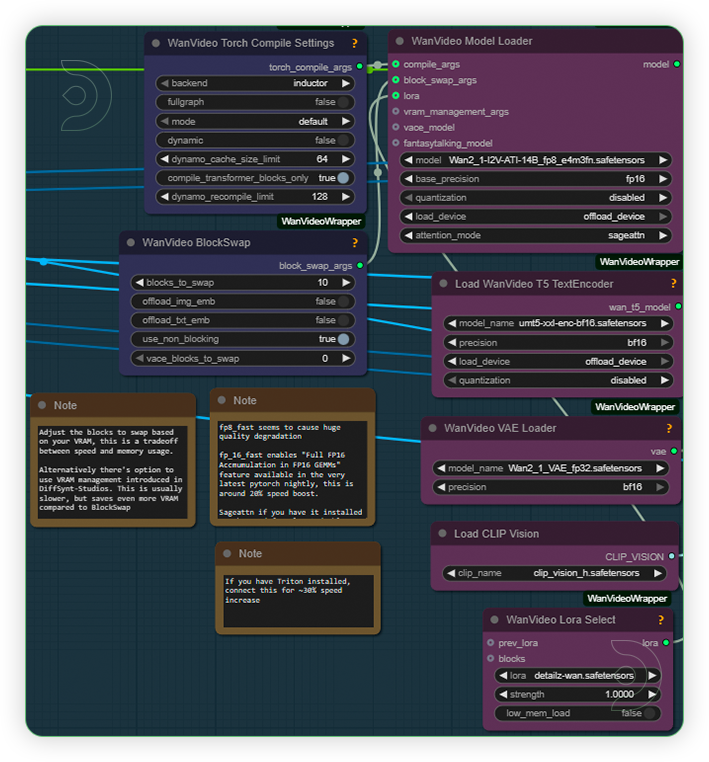 |
| 3. Write the Prompt (Stage 2) Write a prompt. The prompt should contains words that describe what subject is, the movement and its settings or background. |
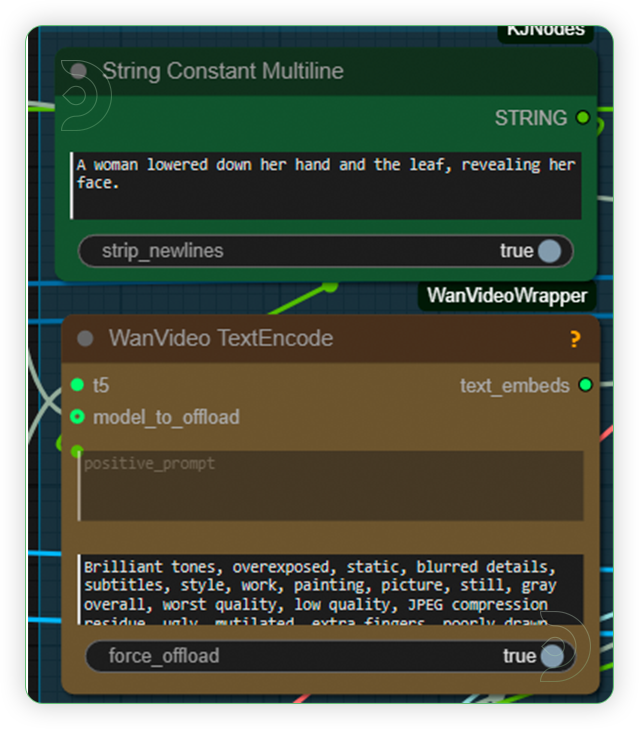 |
| 4. Check the Sampling (Stage 2) Check the sampling settings. Settings must be the same as seen on the image. You can play with steps. ATI model is only compatible with 81 frames on 16fps. |
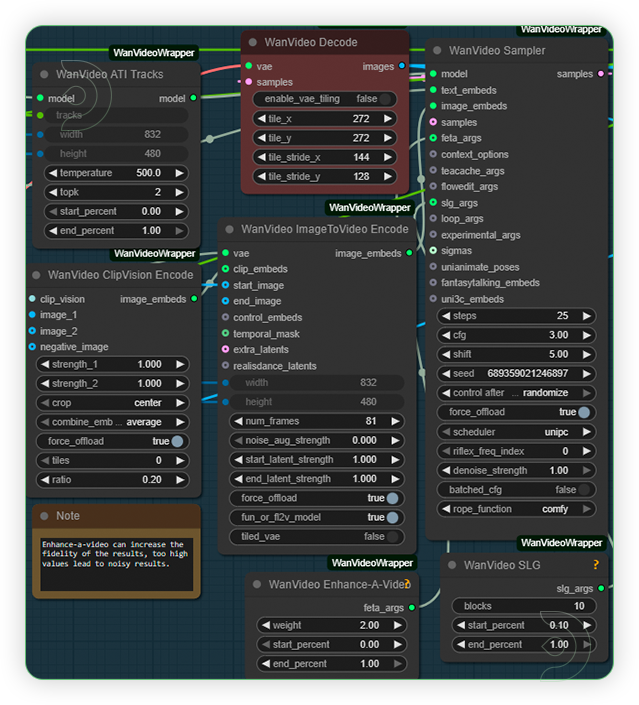 |
| 5. Check the Output (Stage 2) Check the generated output. If you are not satisfied with the results. You can set the trajectory path again by adjust its length, curve or as a fixed and rerun the prompt. |
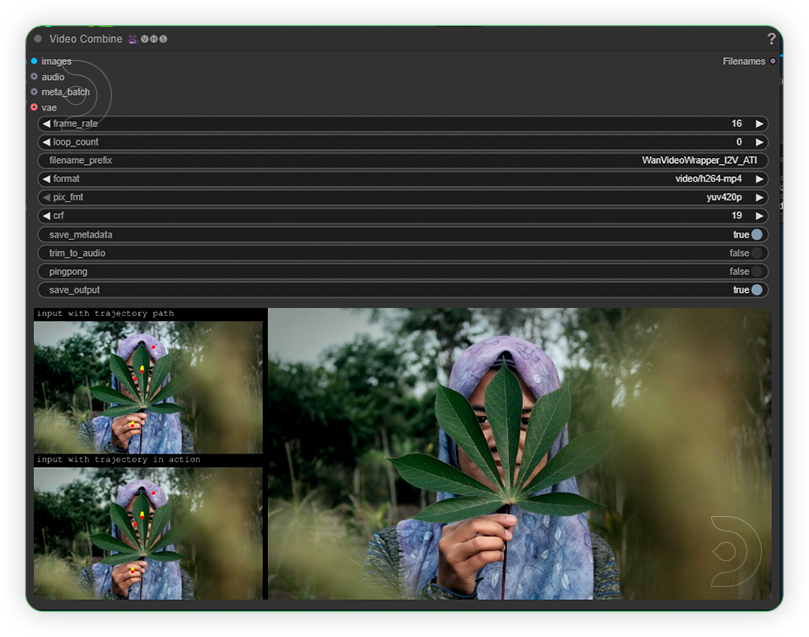 |
Controlling Motion
Making things move: Draw curved lines in the Spline Editor to show motion paths.
Keeping things still: Add a single dot (fixed trajectory) where you want no movement.
If results don't match your paths: Adjust the trajectory length, curve, or add more fixed points. Then regenerate.
Image quality tip: Start with high-resolution images. The Spline Editor resizes them, so higher input = better output.
Examples
If you’re having issues with installation or slow hardware, you can try any of these workflows on a more powerful GPU in your browser with ThinkDiffusion.
Member discussion