
Introduction
After Detailer (aDetailer) is a game-changing web-UI extension designed to simplify the process of image enhancement, particularly inpainting.
This tool not only saves you valuable time but also proves invaluable in fixing common issues, such as distorted faces in your generated images.
In this guide, we'll explore how After Detailer works, how to utilize its features effectively, and discover its various applications.
Historical Solutions: Inpainting for Face Restoration
Before delving into the intricacies of After Detailer, let's first understand the traditional approach to addressing problems like distorted faces in images generated using lower-resolution models.
Imagine you've generated a full-body image of a person using a lower-resolution model to avoid duplication. In such cases, due to the small face size and low resolution, there may not be sufficient pixels to accurately generate a clear face. Consequently, the result may appear garbled.
Inpainting (before aDetailer existed)
Historically we would send the image to an inpainting tool and manually draw a mask around the problematic face area. For optimal results, you would follow these steps:
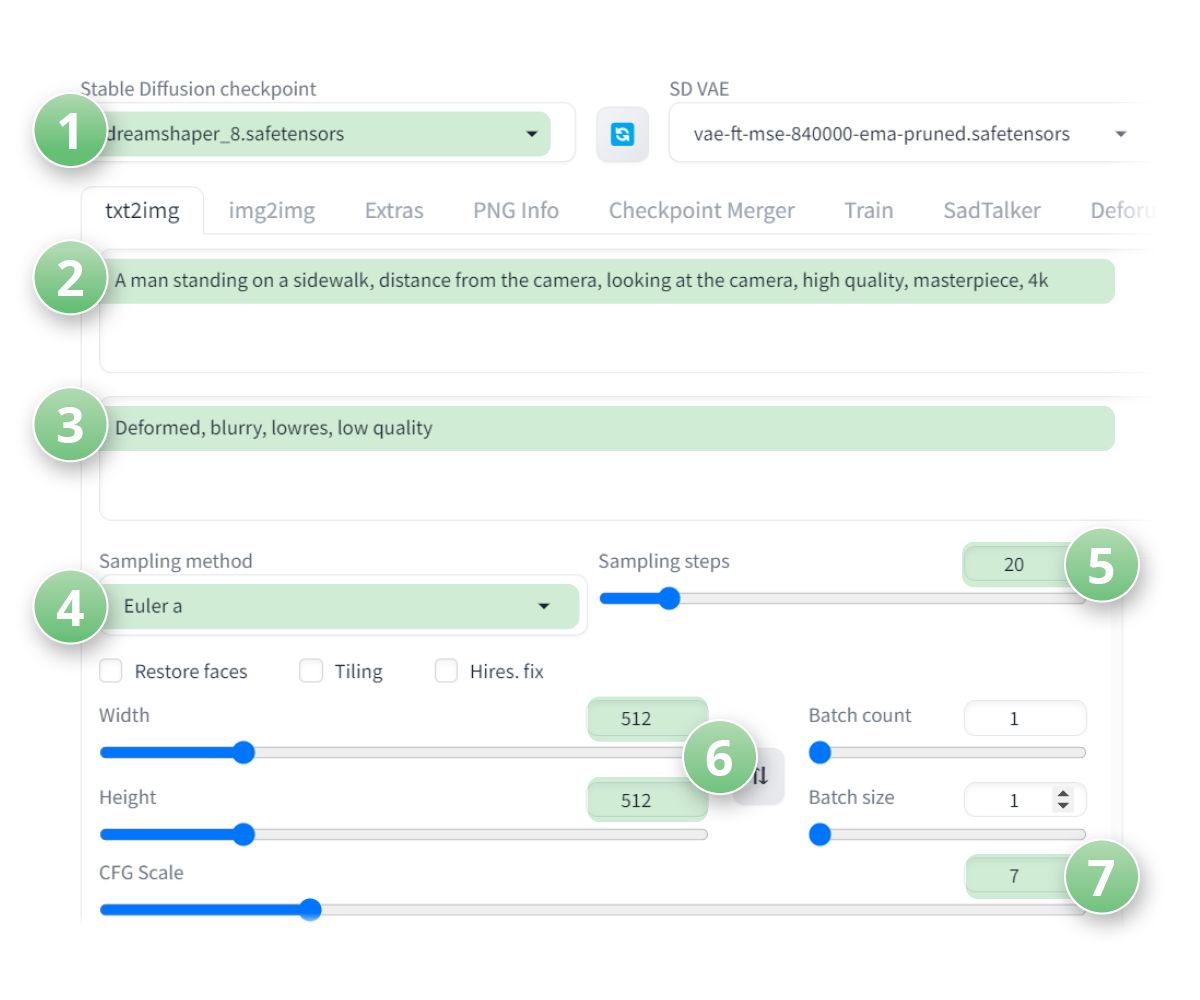
Here is an example of how we would normally do this, without aDetailer. Let's generate an image in txt2img
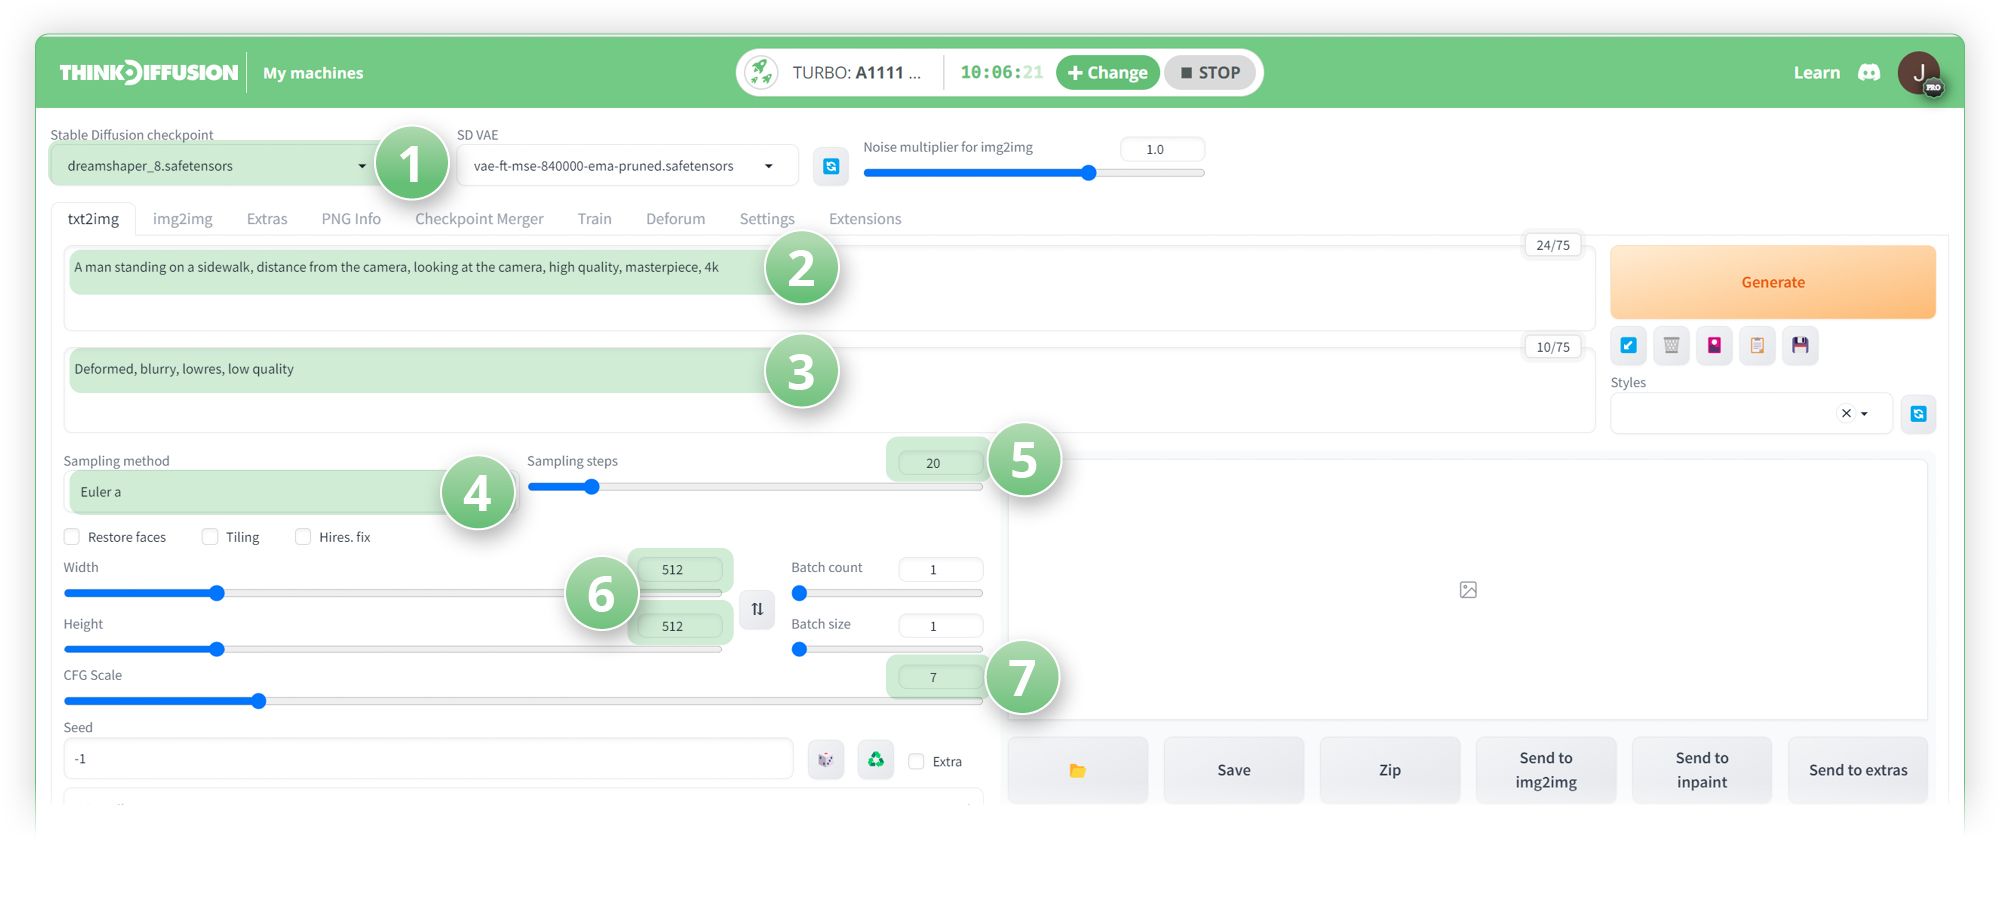
- (1) Set the checkpoint model to dreamshaper_8
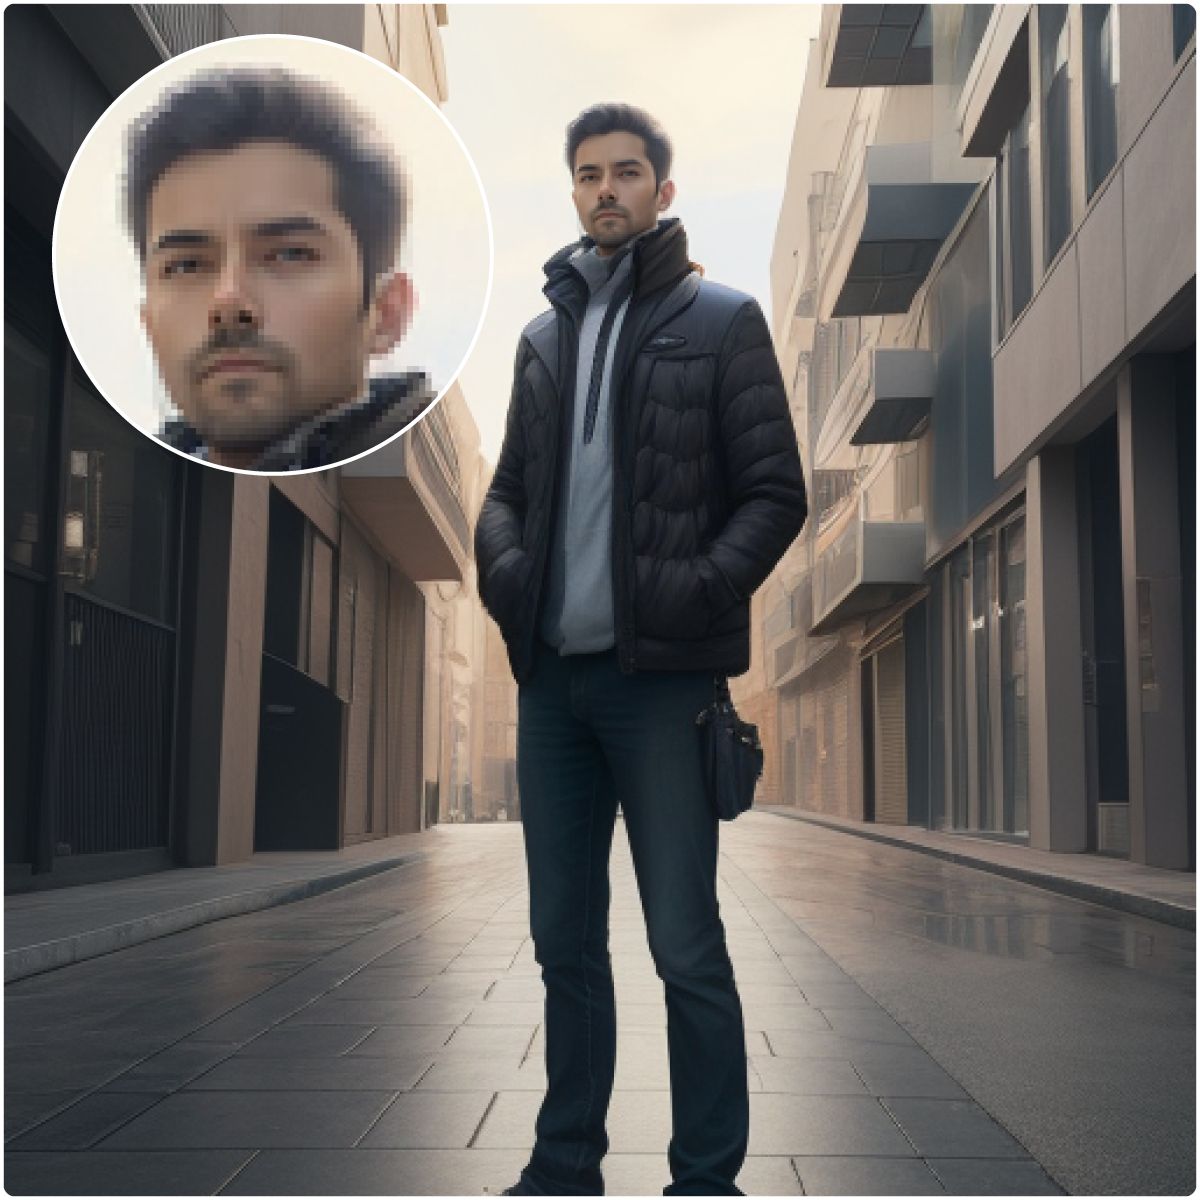
- (2) Positive Prompts: A man standing on a sidewalk, distance from the camera, looking at the camera, high quality, masterpiece, 4k
- (3) Negative Prompts: Deformed, blurry, lowres, low quality
- (4) Sampling method: Euler a
- (5) Sampling steps: 20
- (6) Resolution: 512 x 512
- (7) CFG scale: 7
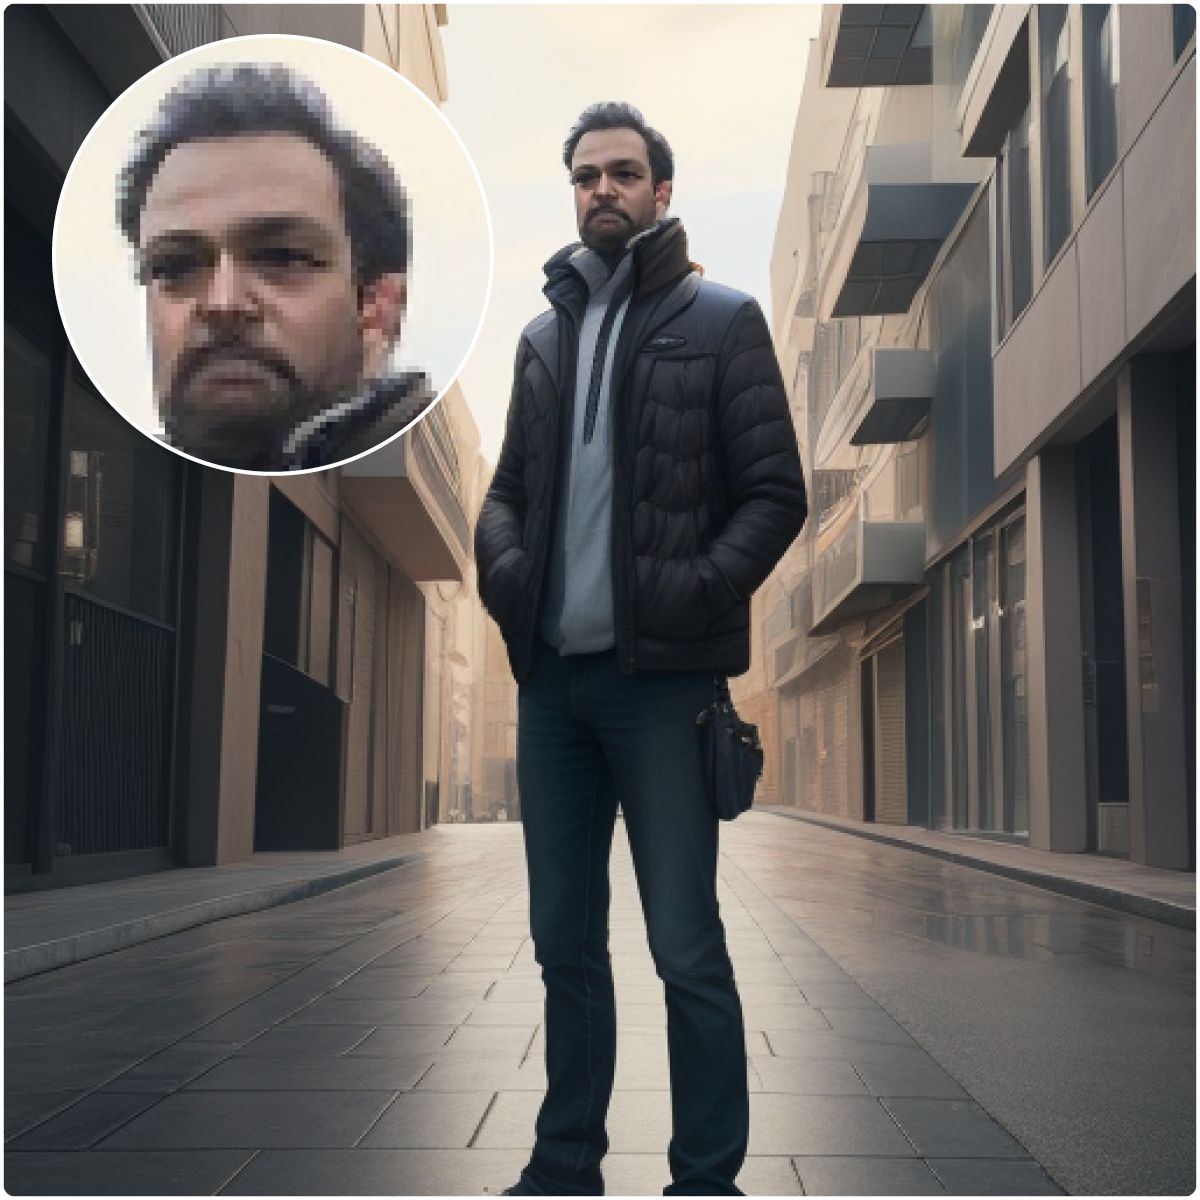
We can see that the face is a little distorted so we would normally send this to Inpaint to fix it as follows:
- Click the send to inpaint button
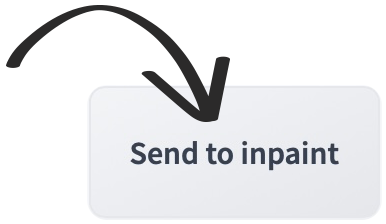
- Draw a mask around the face
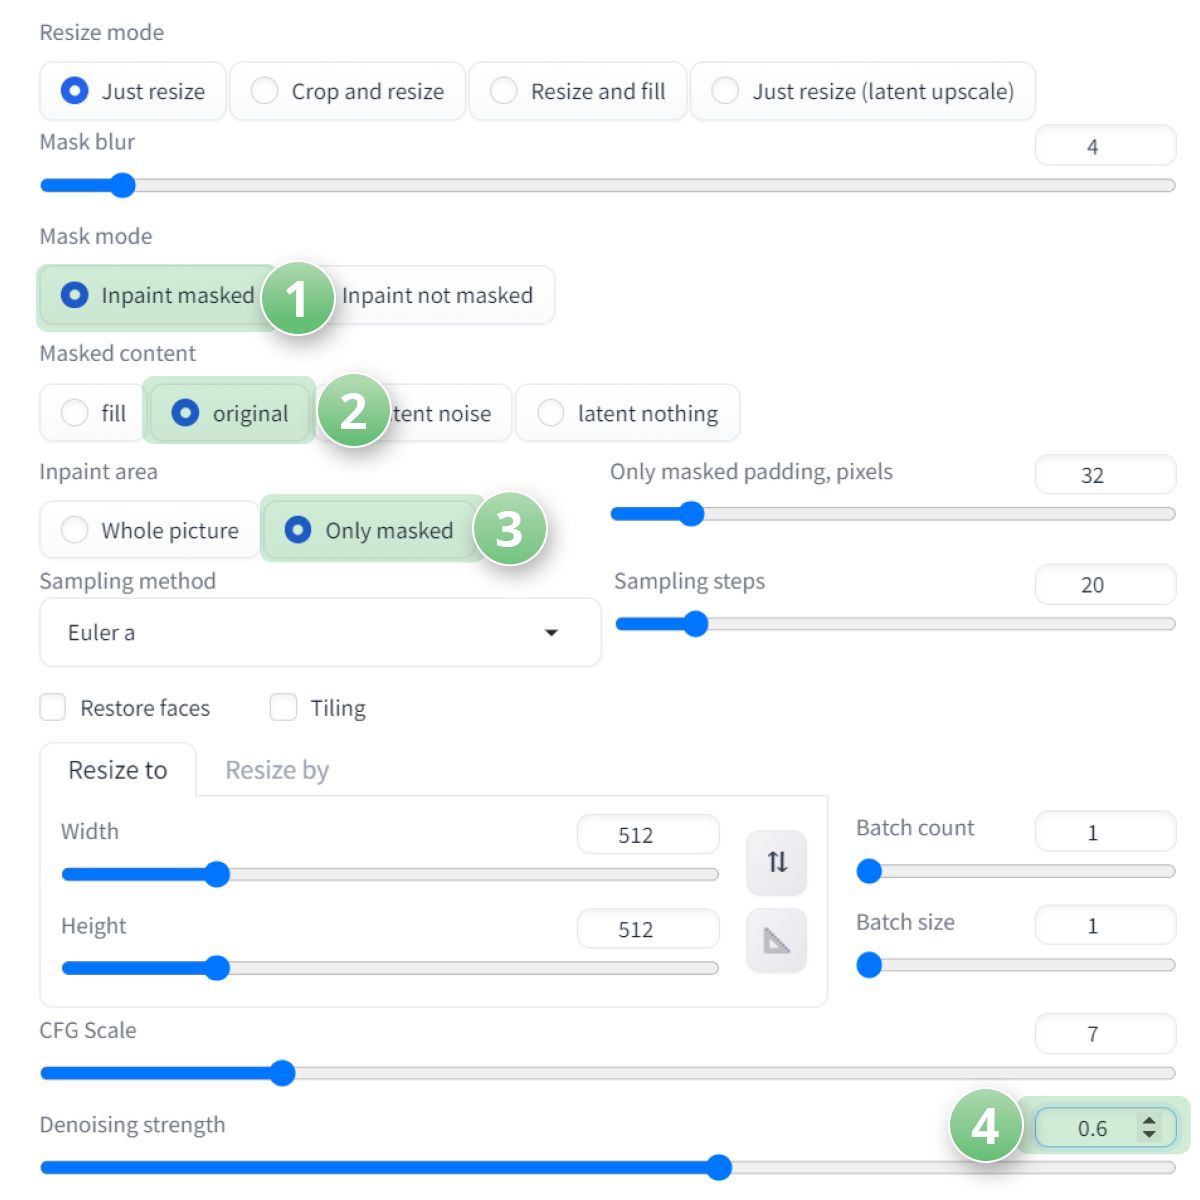
- (1) Select the Mask mode to be Inpaint masked
- (2) Set the Masked content to original
- (3) Set the Inpaint area to Only masked
- (4) Set the denoising strength to around 0.6
- Hit Generate
Witness the magic as the tool expertly restores the face, leveraging the entire resolution (512×512) to enhance the masked area. The result is a vastly improved face.
Automatic Inpainting with After Detailer
After Detailer streamlines this process by automating it with the help of a face recognition model. It detects faces and automatically generates the inpaint mask, then proceeds with inpainting just like the manual method described earlier.
Using After Detailer in Txt2img:
Go to the txt2img tab:
- (1) Set the checkpoint model to dreamshaper_8
- (2) Positive Prompts: A man standing on a sidewalk, distance from the camera, looking at the camera, high quality, masterpiece, 4k
- (3) Negative Prompts: Deformed, blurry, lowres, low quality
- (4) Sampling method: Euler a
- (5) Sampling steps: 20
- (6) Resolution: 512 x 512
- (7) CFG scale: 7
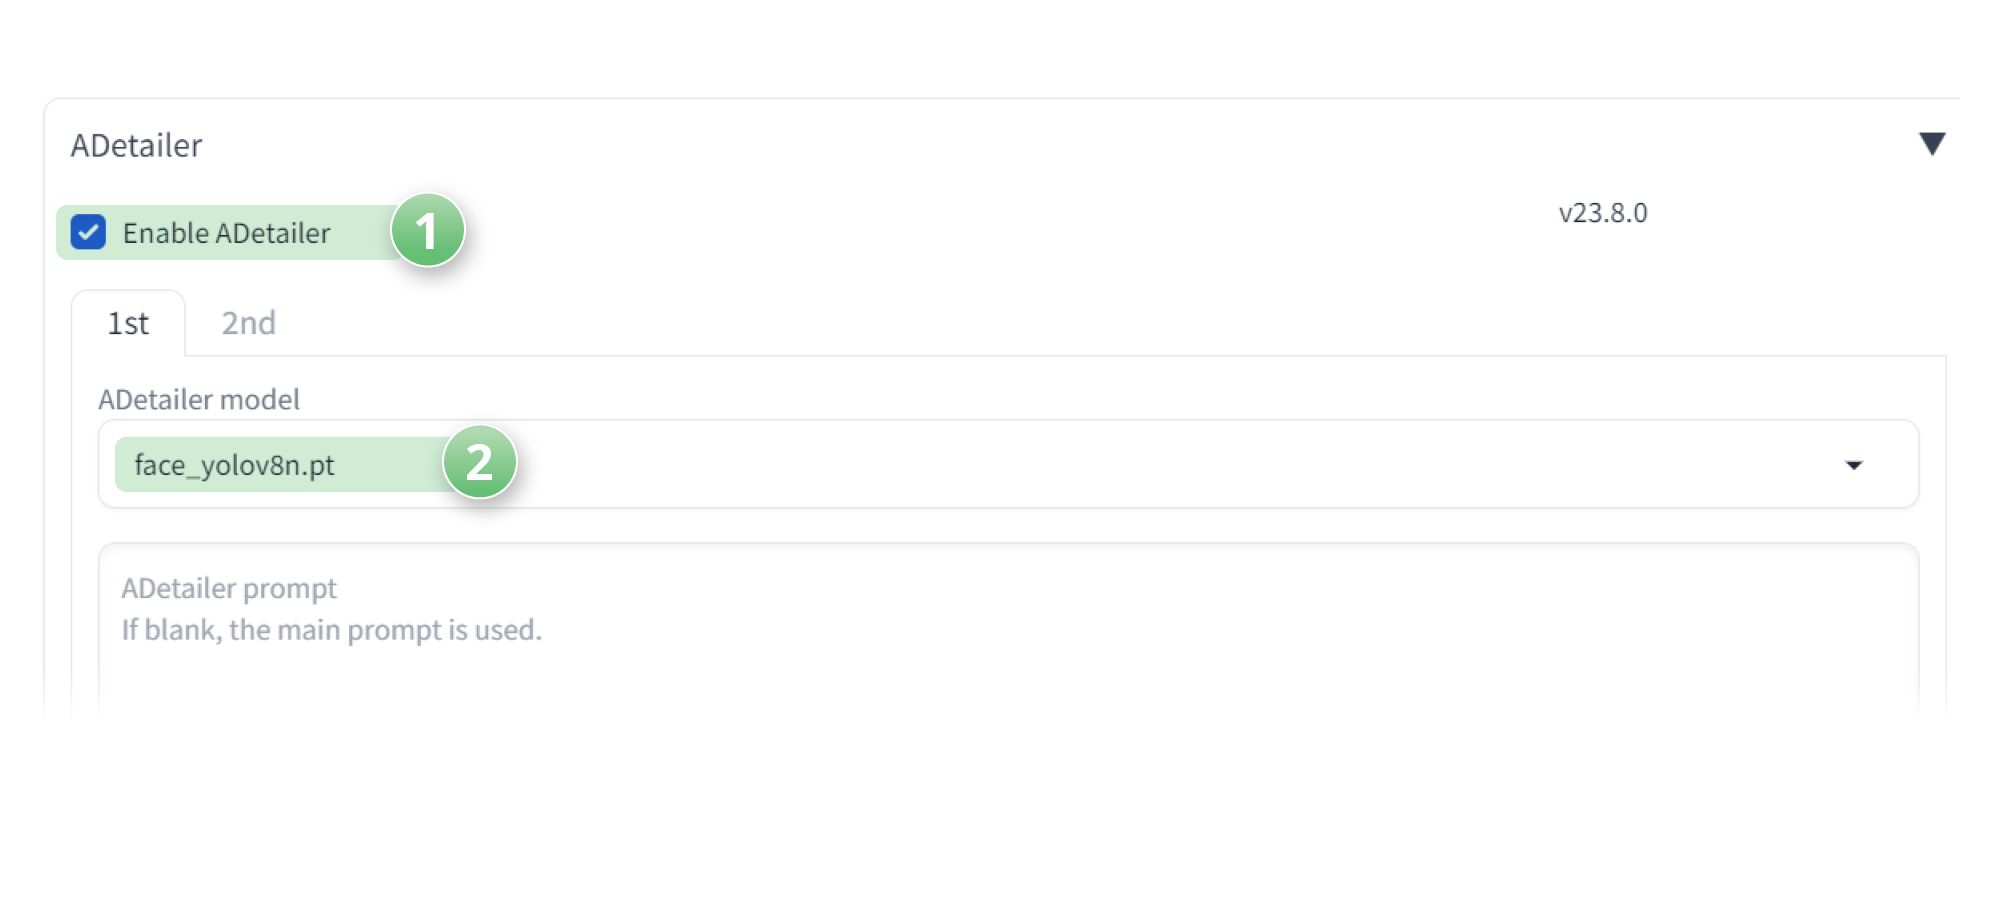
Navigate to the ADetailer section
- (1) Enable it
- (2) Select the "face_yolo8n.pt" model from the ADetailer model dropdown menu.
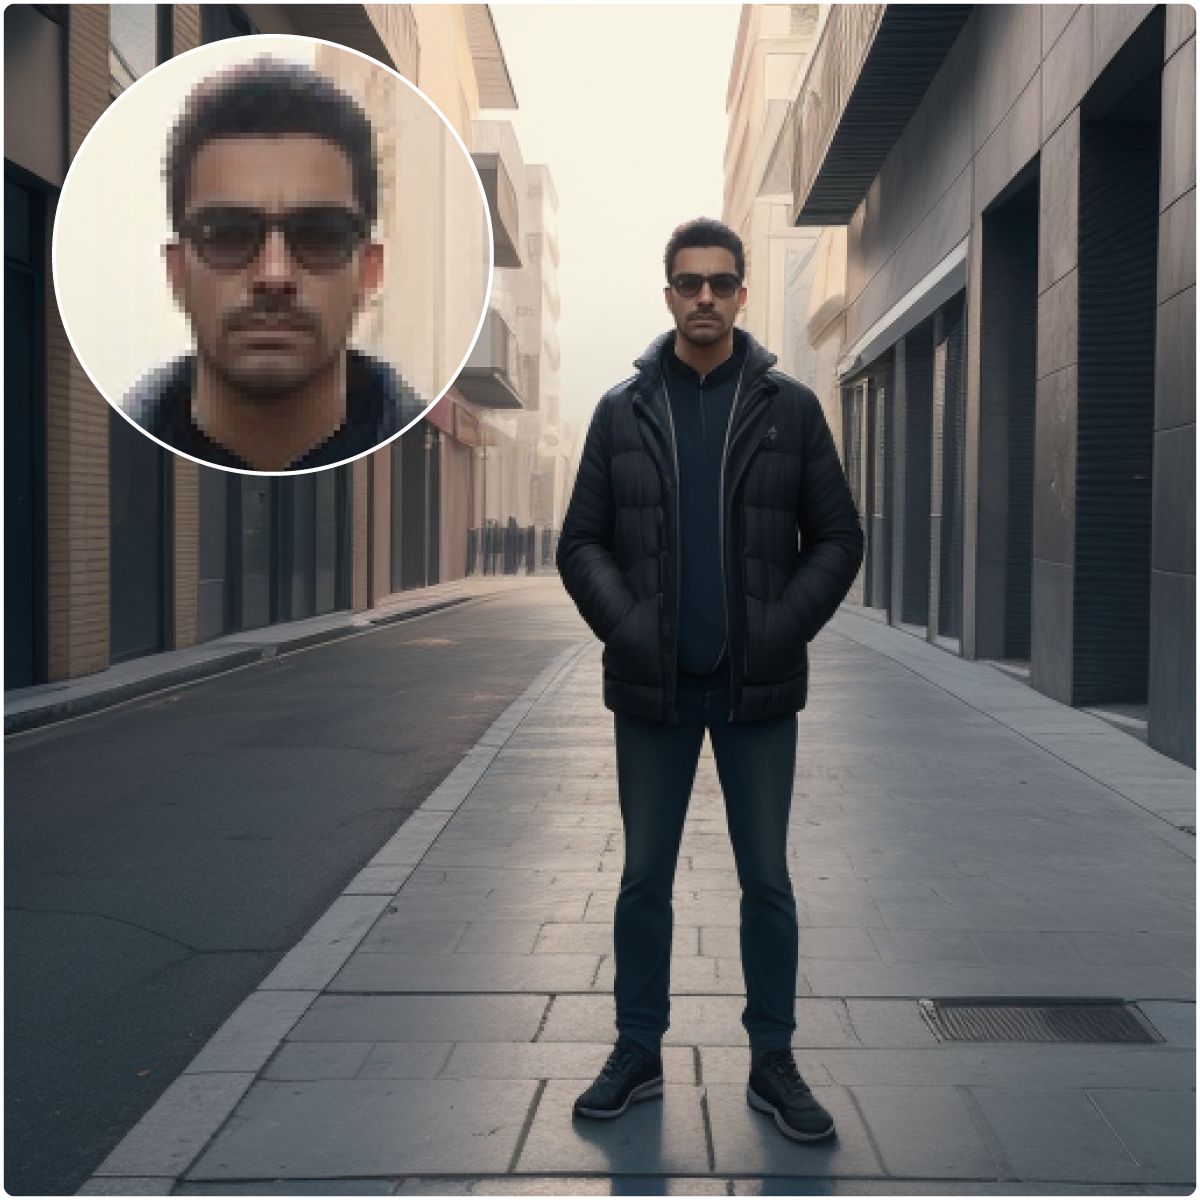
- Click 'Generate' to instantly witness the face restoration.
Note that the inpainting masks may differ from manual inpainting, resulting in slightly varied outcomes.
Here we can see that the face is much better using aDetailer without the need for manually doing any inpainting.
Exploring ADetailer Parameters
Now that you've grasped the basics, let's delve into additional parameters that allow fine-tuning of ADetailer's functionality.
Detection Model:
- ADetailer offers various detection models, such as face_xxxx, hand_xxxx, and person_xxxx, catering to specific needs.
- Notably, face_yolo and person_yolo models, based on YOLO (You Only Look Once), excel at detecting faces and objects, yielding excellent inpainting results.
Model Selection:
- The "8n" and "8s" models vary in speed and power, with "8n" being faster and smaller.
- Choose the model that suits your detection needs, switching to "8s" if detection proves challenging.
Multi-Model Usage:
You can employ up to two detection models simultaneously by switching to the 2nd tab and selecting an additional model. This allows for sequential inpainting, enhancing different aspects of your image. Let's first generate an image without using aDetailer
Go to the txt2img tab:
- (1) Set the checkpoint model to dreamshaper_8
- (2) Positive Prompts: A man standing on a sidewalk, distance from the camera, (hands pointing:1.3), t-shirt, full body shot, jeans, looking at the camera, high quality, masterpiece, 4k
- (3) Negative Prompts: Deformed, blurry, lowres, low quality
- (4) Sampling method: Euler a
- (5) Sampling steps: 20
- (6) CFG scale: 7
- (7) Resolution: 512 x 512
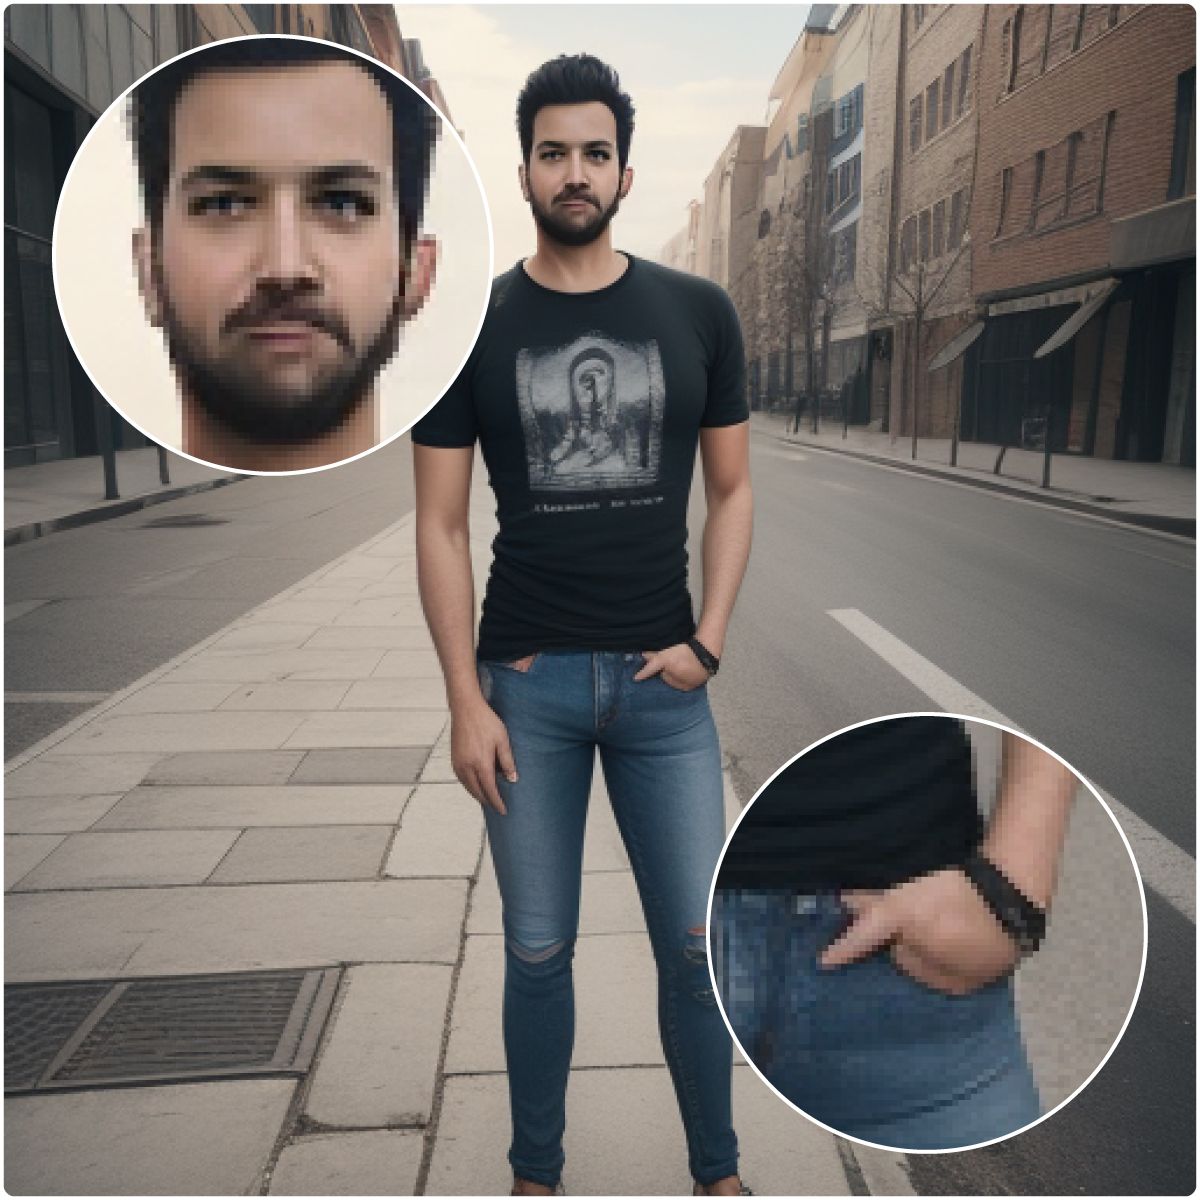
We can see that the face is distorted and the hands don't look right, so let's try and fix that using 2 aDetailer tabs.
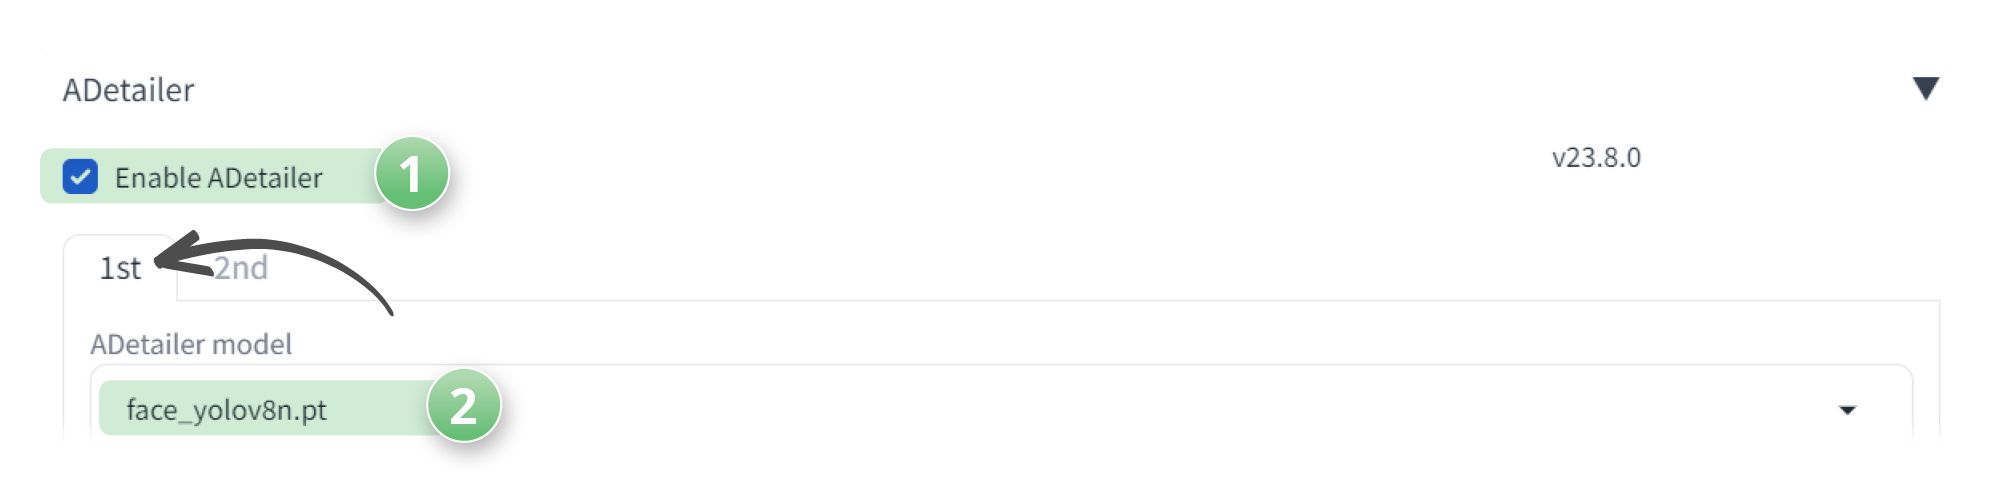
- Enable the first aDetailer tab
- And set the model to face_yolov8n
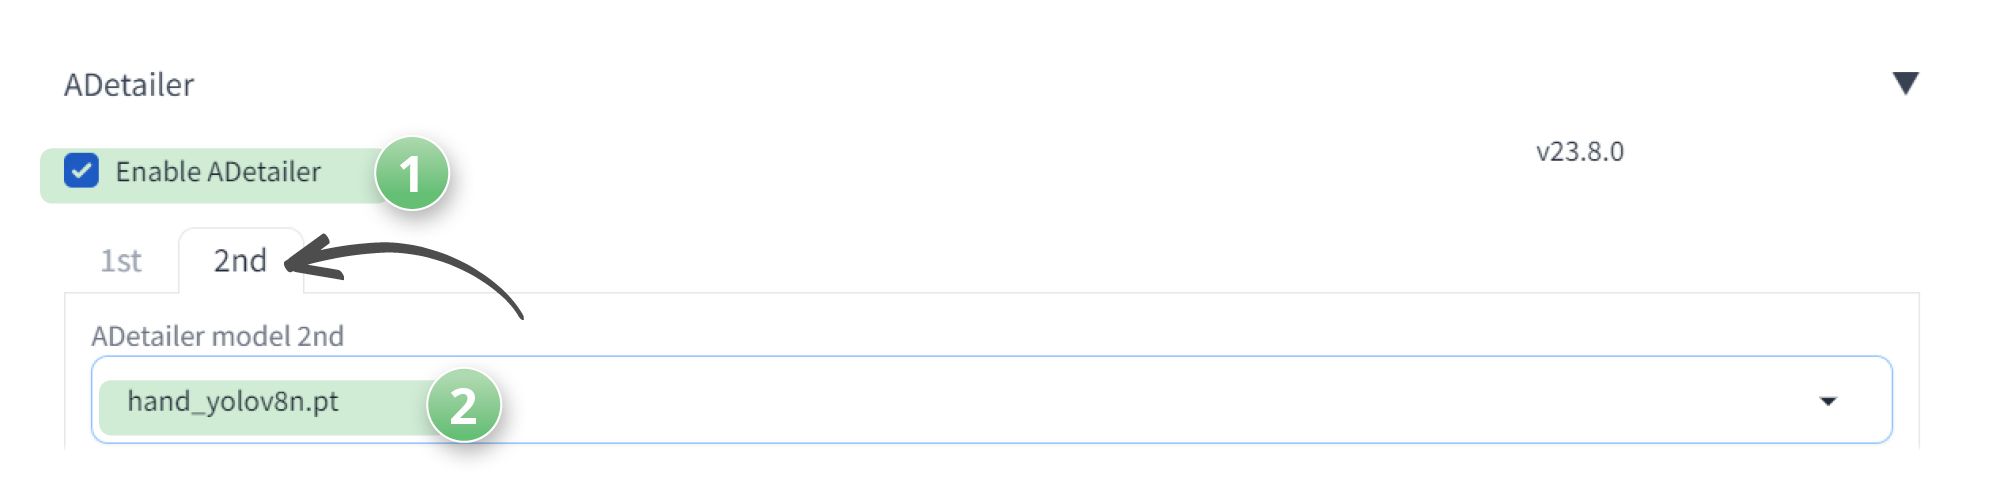
- Enable the second aDetailer tab
- And set the model to hand_yolov8n
- Hit Generate
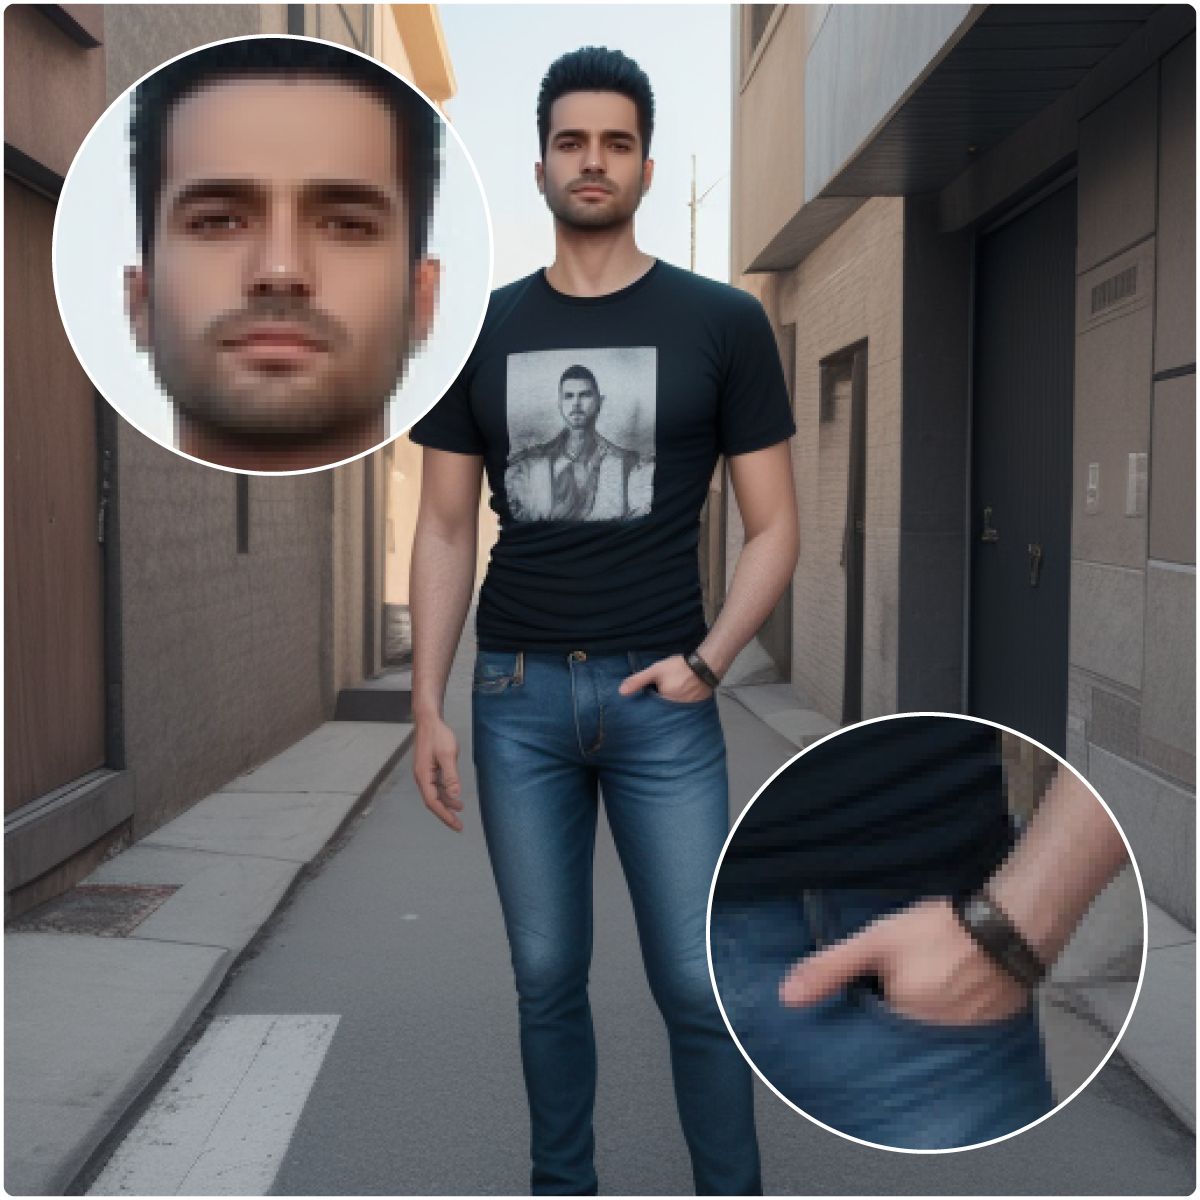
We can see that both the hands and face are much better when we use 2 aDetailer tabs (Note: Stable diffusion as we all know struggles with hands, so even when using aDetailer, the hands may not be perfect)
Customizing Inpainting with Different Prompts
Custom prompts empower you to modify the face or image even further after inpainting. Input your prompts and negatives in the aDetailer section to achieve desired results.
Understanding Detection and Mask Parameters
While aDetailer offers default values that work well, it's essential to comprehend their meaning:
Detection Model Confidence Threshold:
- This threshold determines the minimum confidence score needed for model detections. Lower values (e.g., 0.3) are advisable for detecting faces. Adjust as necessary to improve or reduce detections.
Mask Min/Max Area Ratio:
- These parameters control the allowed size range for detected masks. Modifying the minimum area ratio can help filter out undesired small objects.
Inpainting Settings
The most crucial setting in the Inpainting section is the "Inpaint denoising strength," which determines the level of denoising applied during automatic inpainting. Adjust it to achieve your desired degree of change.
In most cases, selecting "Inpaint only masked" is recommended when inpainting faces.
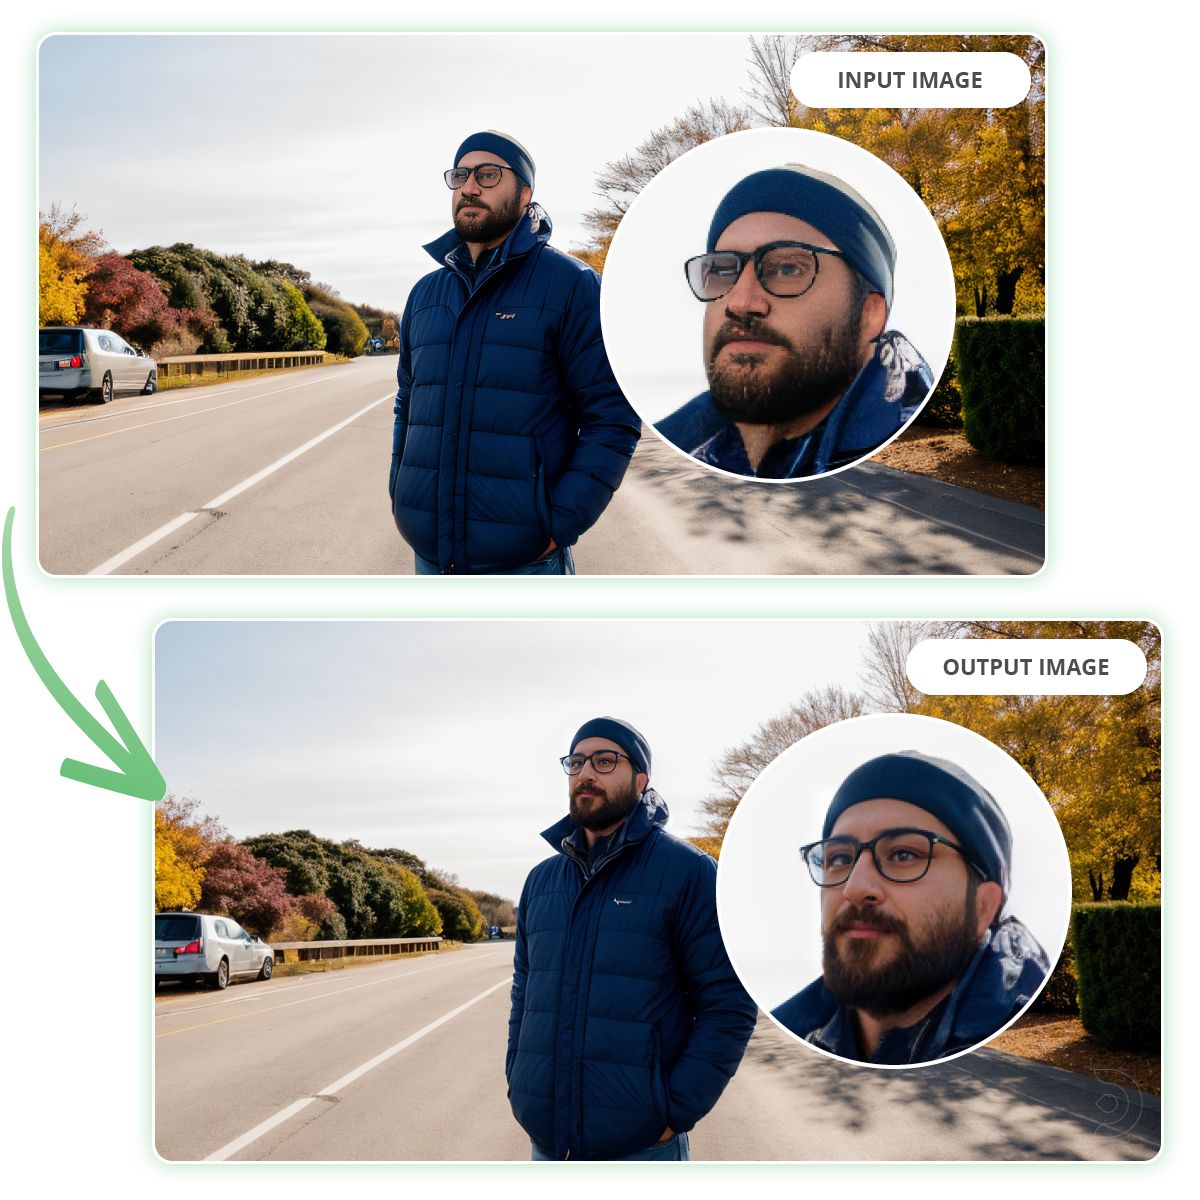
Enhancing an existing image with Img2img and aDetailer
Let's say you've generated or found an existing image that you'd like to add detail to, but not change in any way. Bring it into your Img2img tab. I'm using pretty standard settings below:
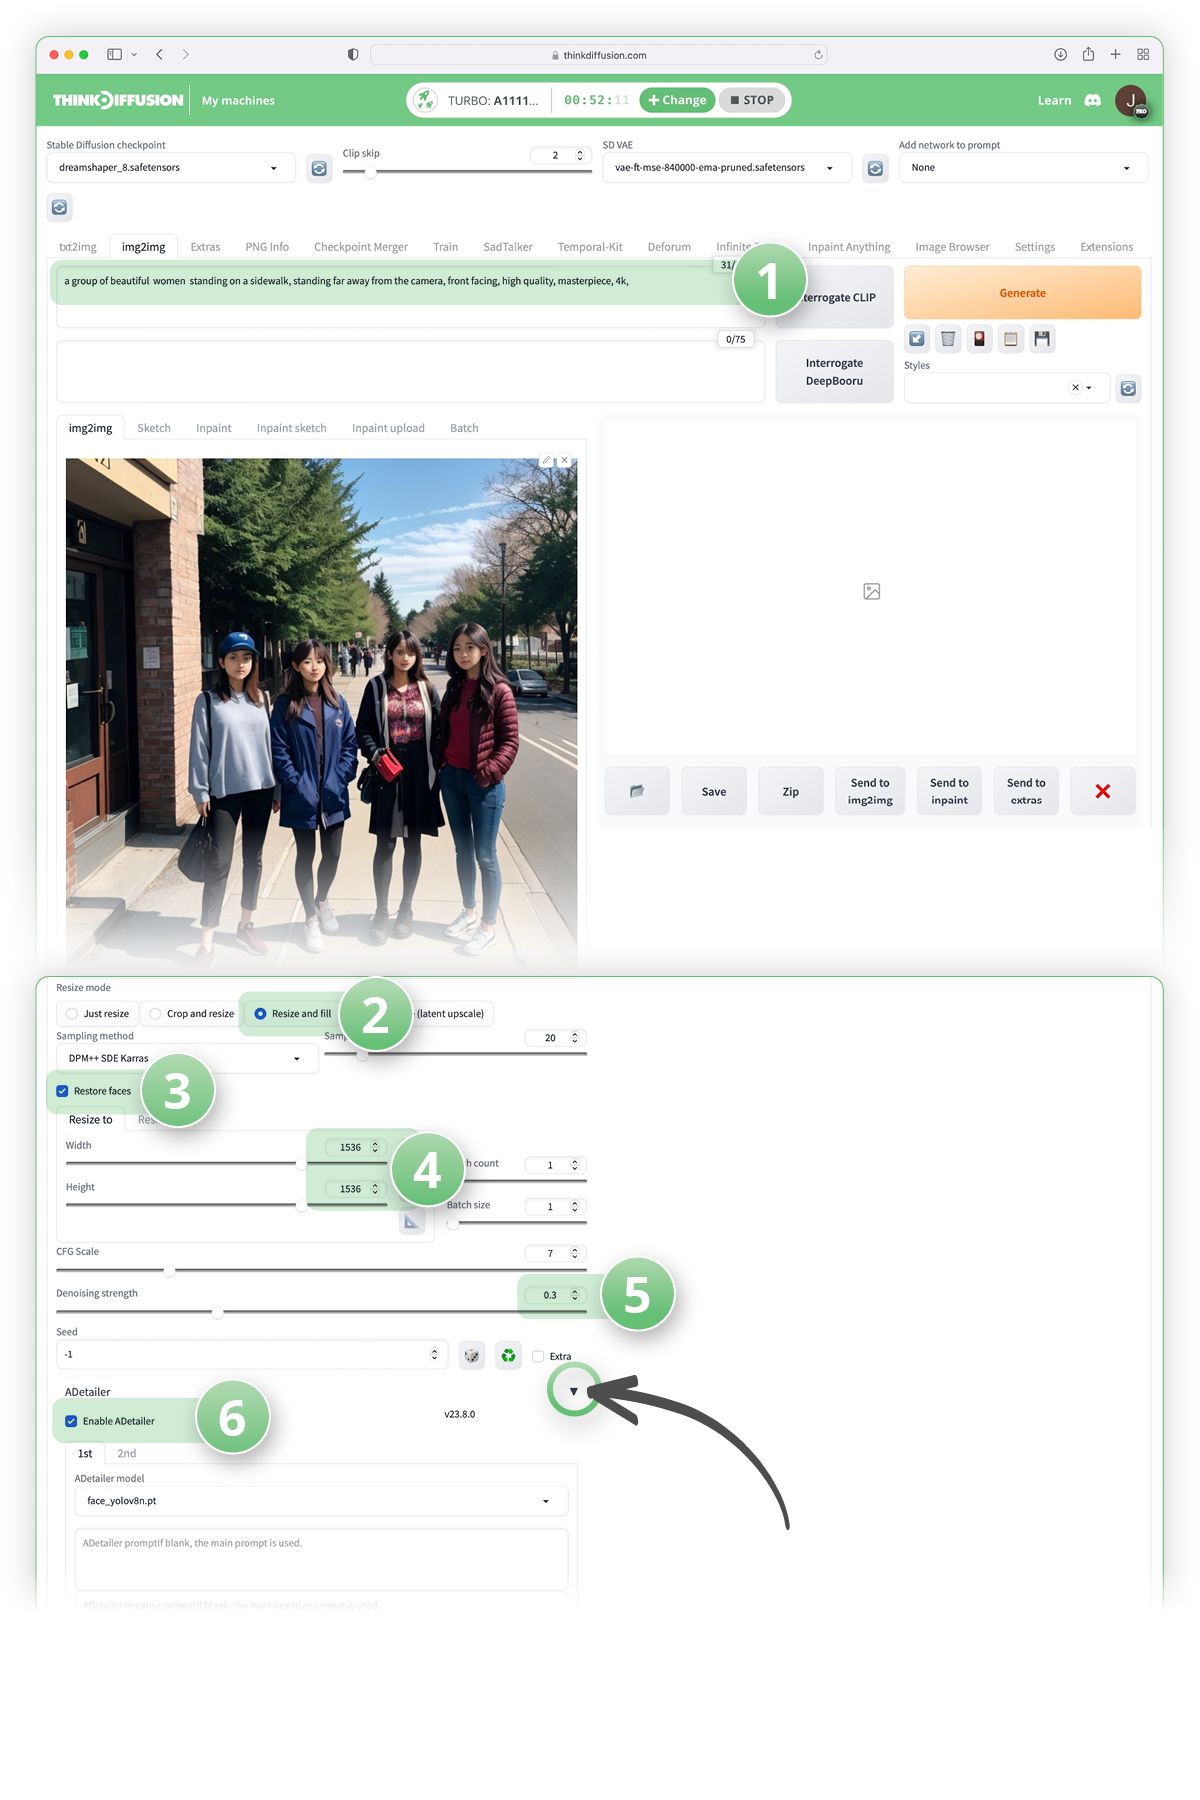
- (1) Add a prompt that matches the image you've uploaded.
(You can click "Interrogate CLIP" to have A.I. suggest the prompt) - (2) Click resize and fill because I don't want anything cropped
- (3) click ✅ Restore faces
- (4) doubled the width of my source image to 1536px * 1536px so we have more pixels and details to work with
- (5) Denoising strength to .3 to encourage the output to stay more true to the original.
Then in the aDetailer module, click the dropdown arrow
- (6) Check ✅ Enable ADetailer
- Everything else is left to default!
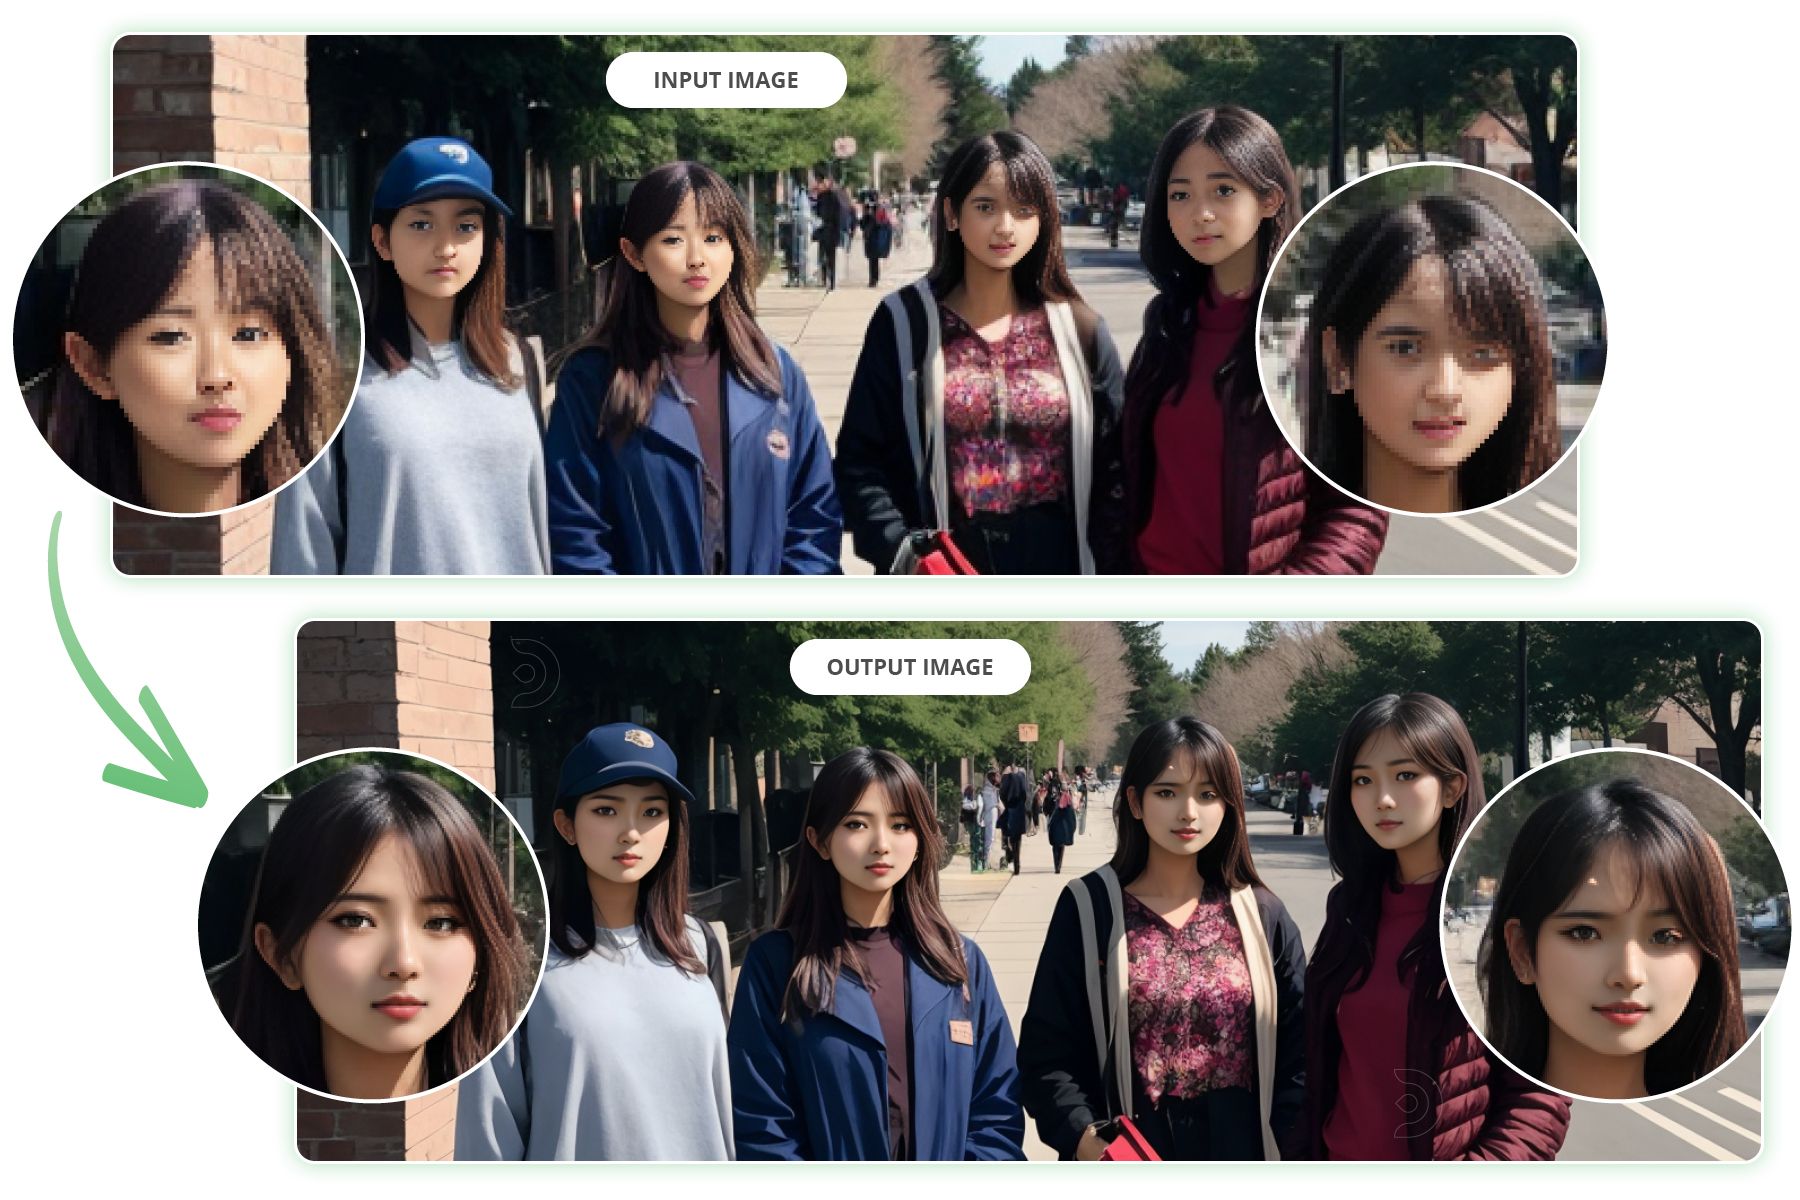
And as you can see below, with standard settings, we have an amazing result.
If you’re having issues with installation or slow hardware, you can use aDetailer preinstalled on a more powerful GPU in your browser with ThinkDiffusion.
If you’d like to animate your faces and make them talk after you're done making them look better, check out my post on using SadTalker here and have fun with your magical ENHANCE button!
Member discussion